New article
Recently updated
Creating a workflow in the modern workflow definition

Who is this article for?
Users looking to create a new workflow within the modern interface.
Modern Workflow Definition access is required.
Workflows are a great way to ensure that your team follows a standardised approach to completing actions within the system. This minimises errors, enhances the overall quality of deliverables, and ensures seamless communication among teams.
This article walks you through the process of creating a workflow in the modern workflow definition interface.
1. Creating a workflow
To create a workflow in the modern interface:
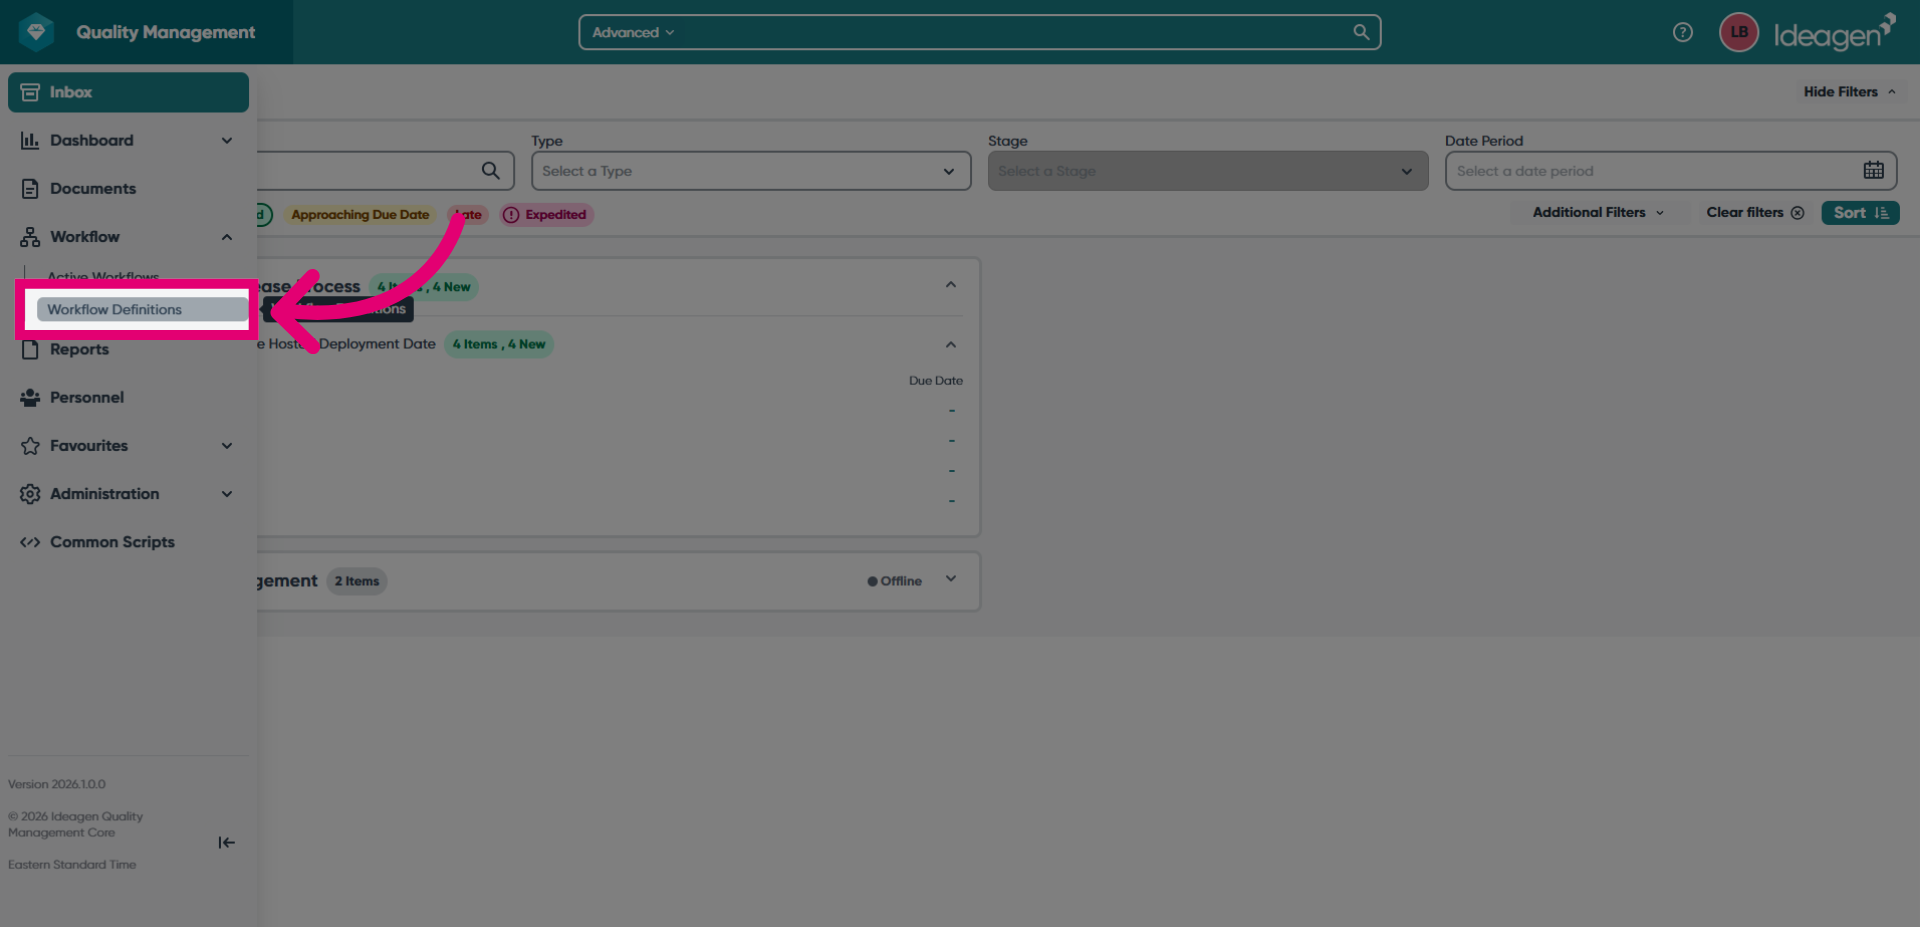
- Click the Workflow icon to expand the sidebar.
- Select Workflow Definitions.
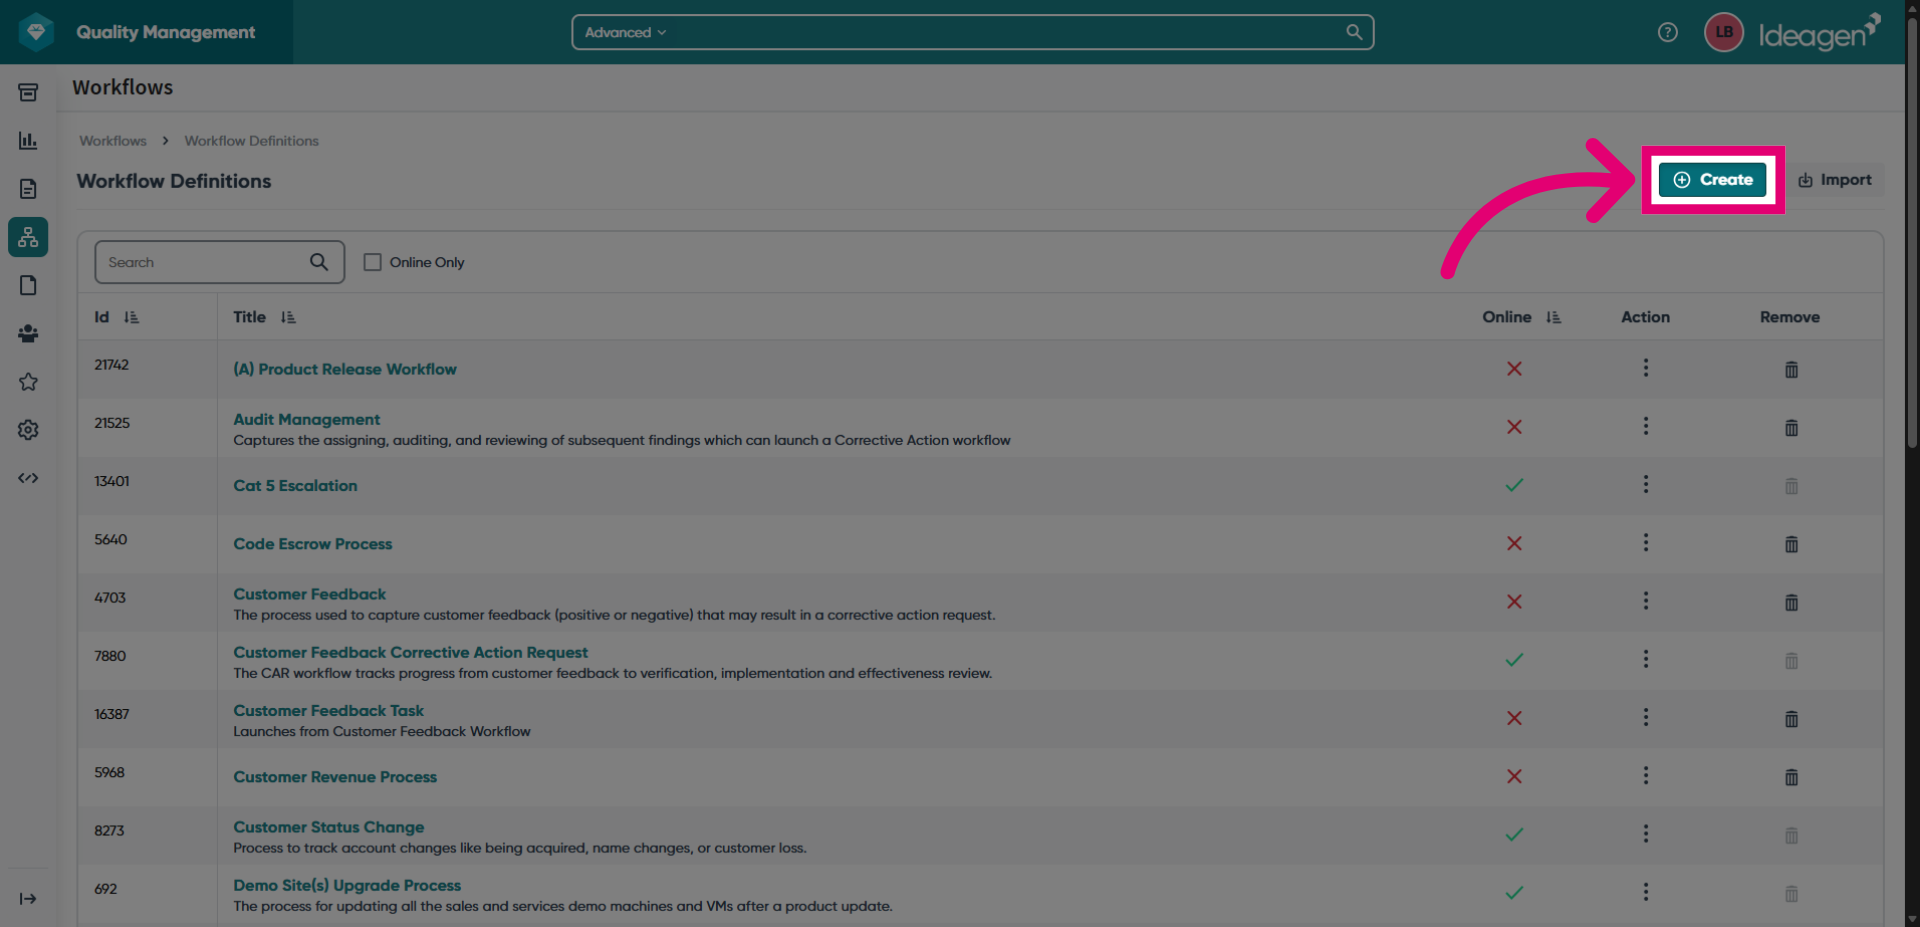
- Click Create.
- Give your workflow a Title.
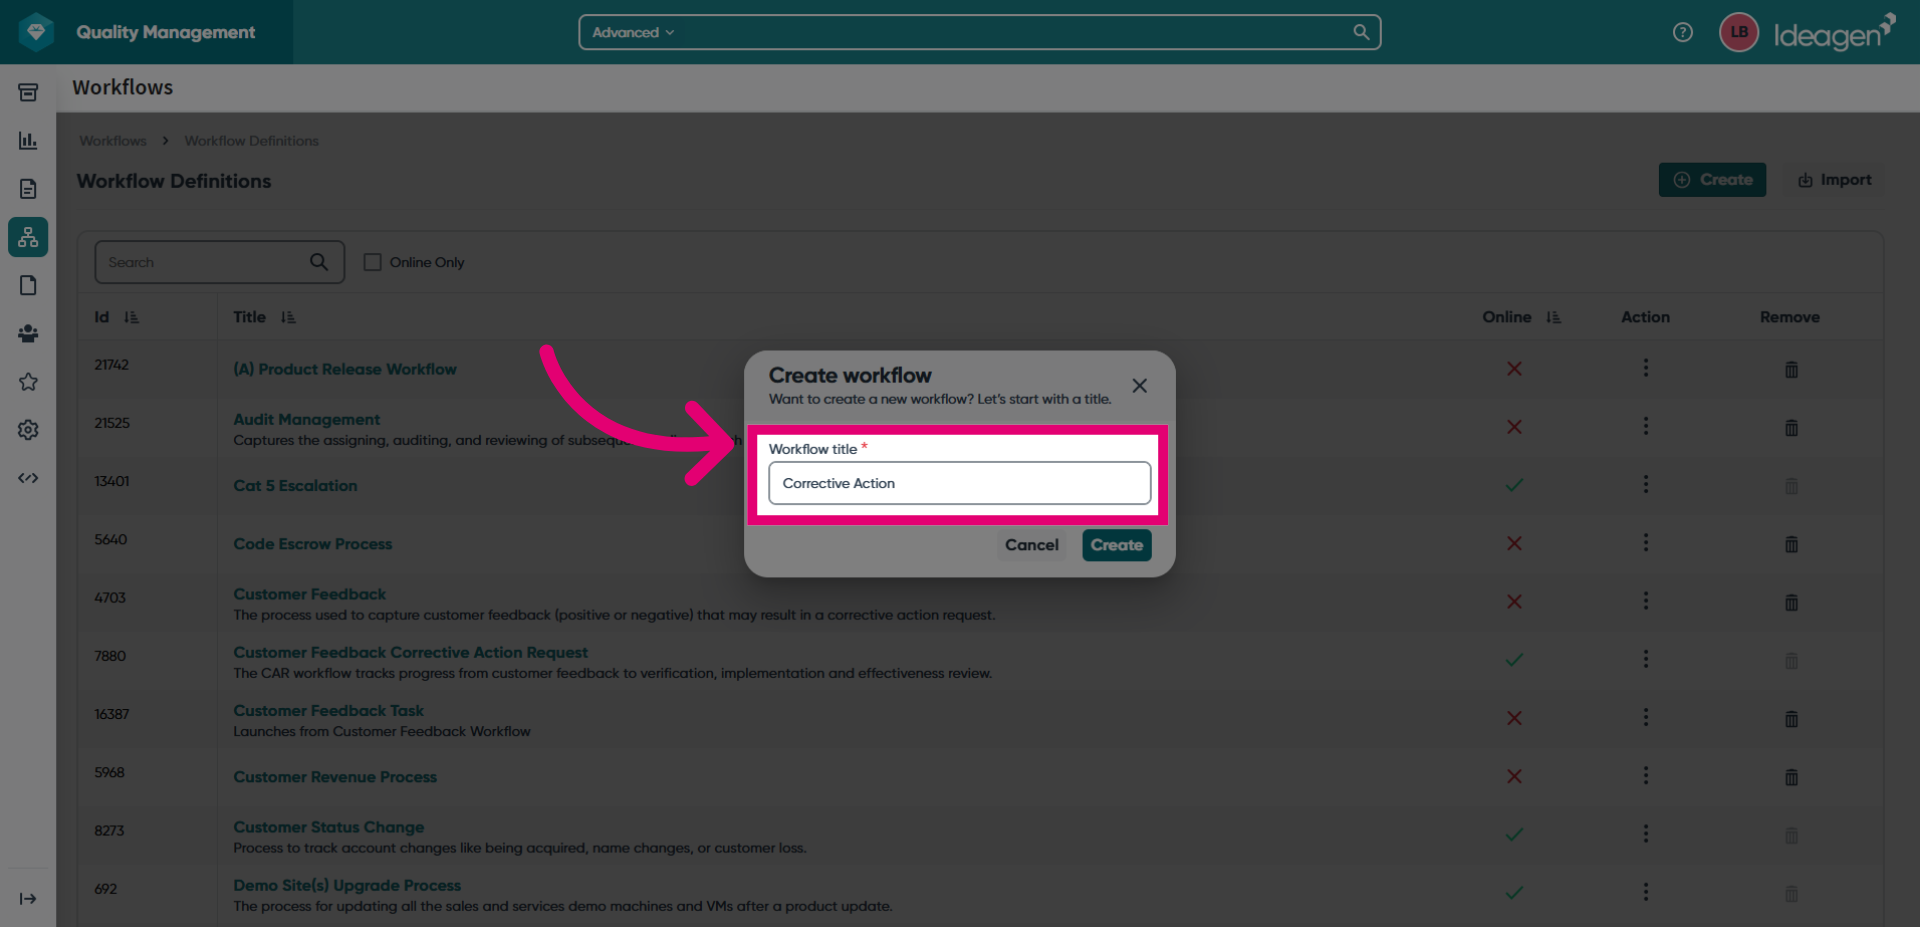
- Click Create.
You will be taken to a draft version of the workflow where you will need to complete details the Workflow Definition Settings and Steps tabs.
2. Completing workflow definition settings
To complete the workflow definition settings:
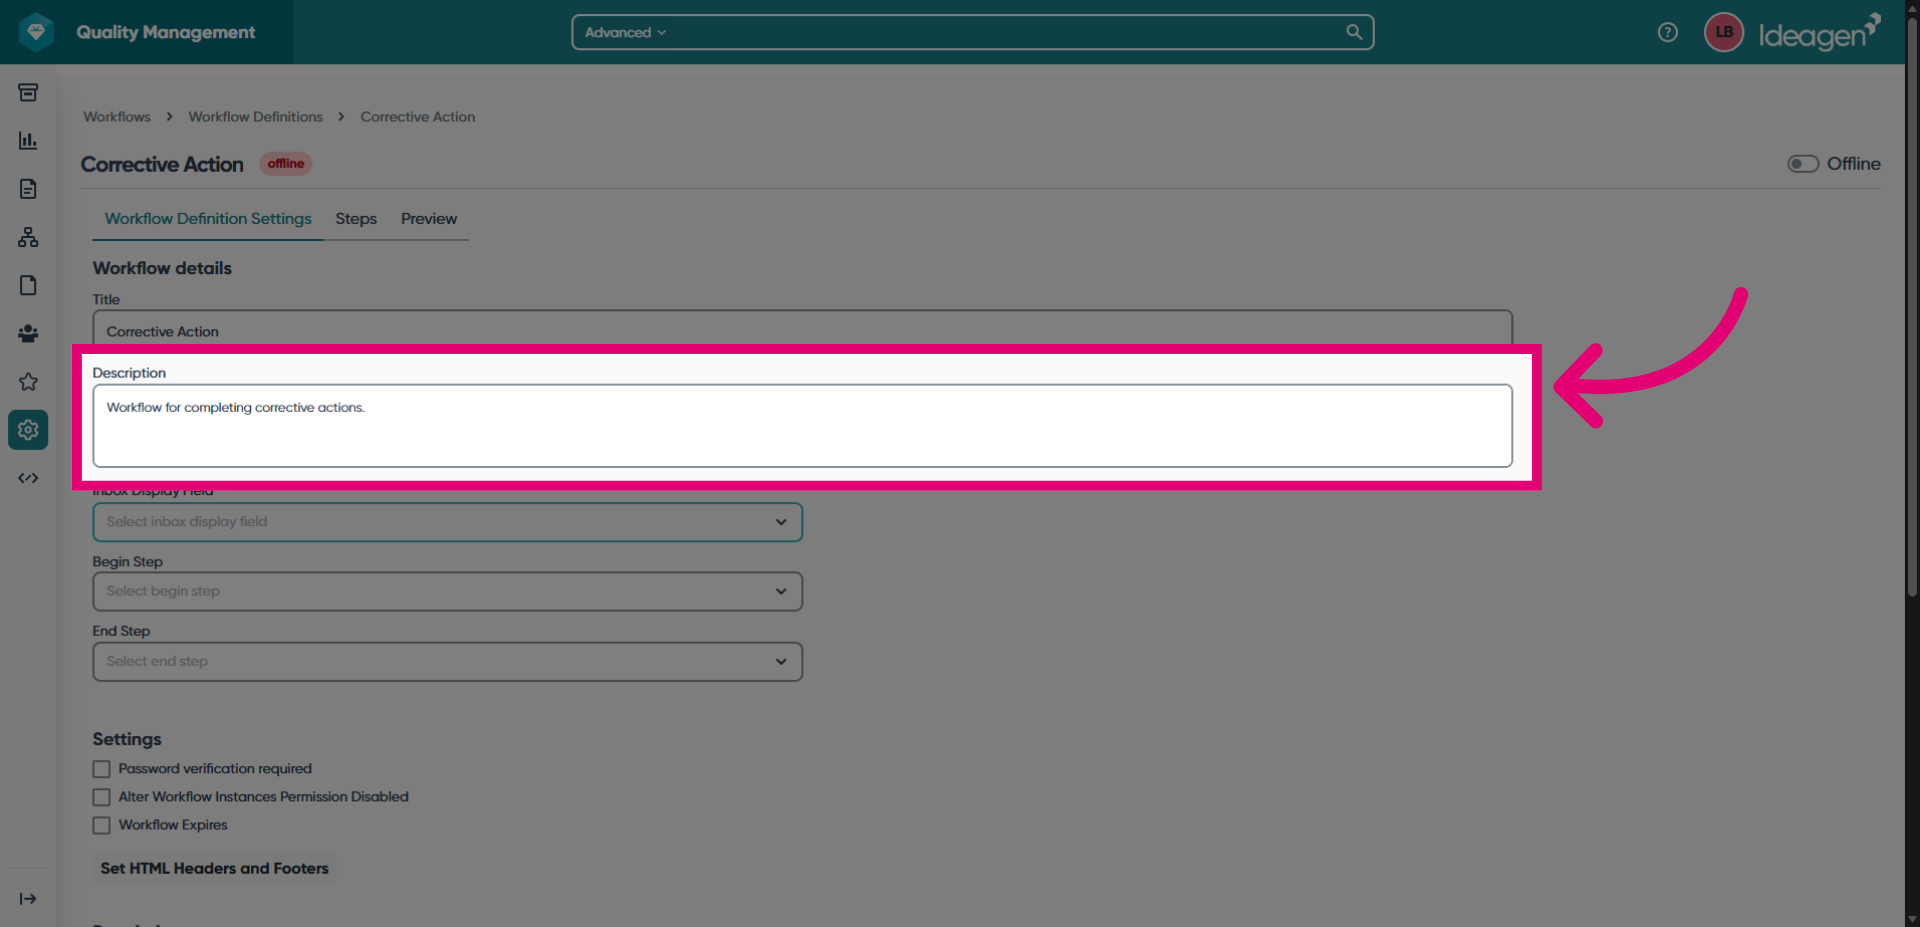
- Add an optional Description.
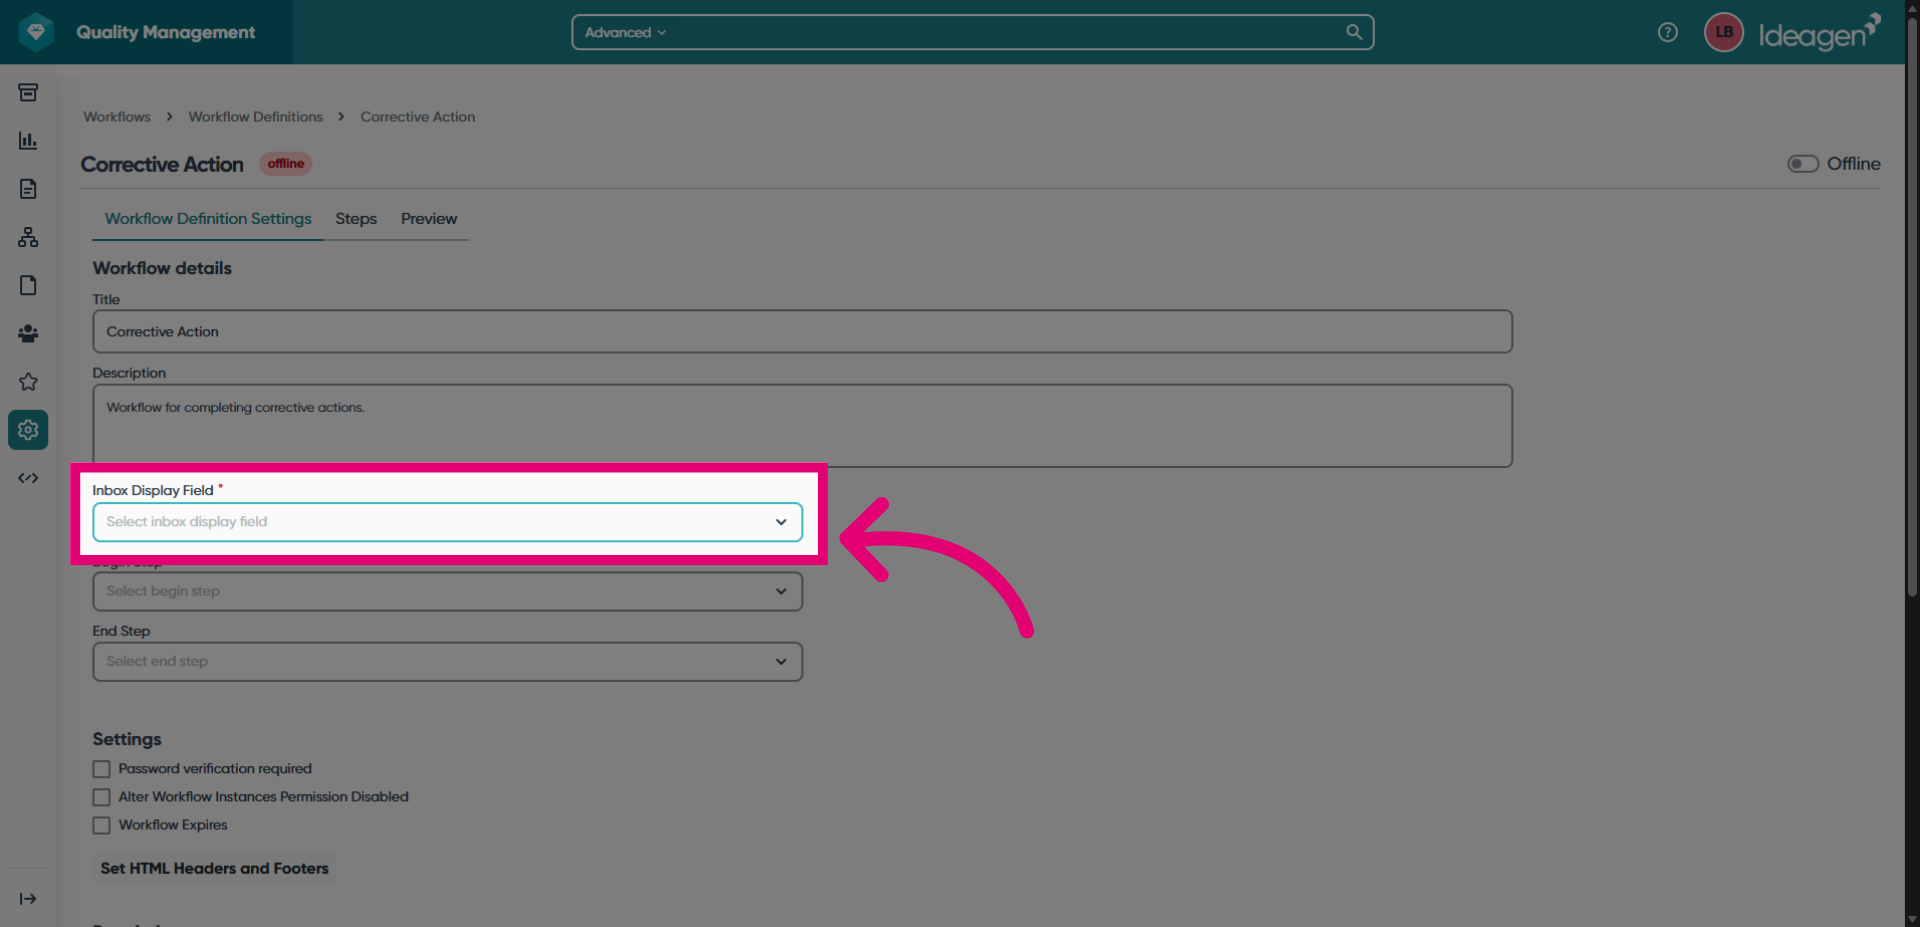
- Set the Inbox Display Field for items using this workflow.
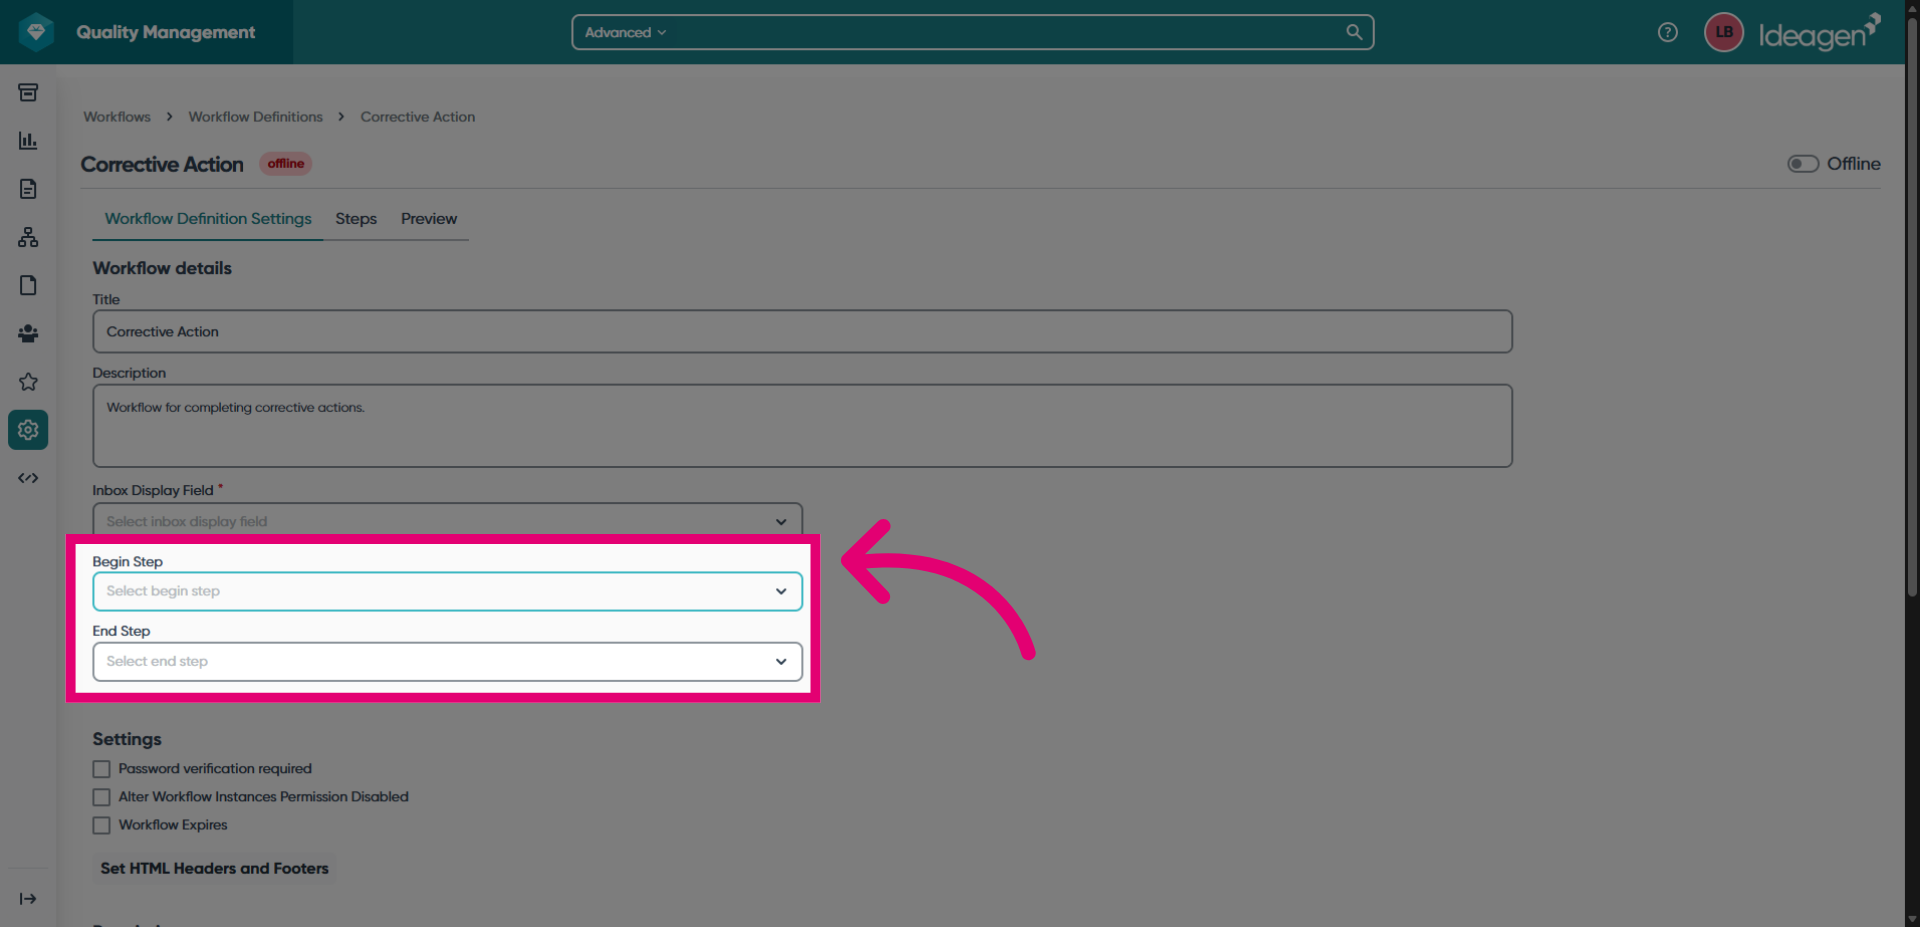
- Set Begin Step and End Step.
You may need to complete the Steps tab first before filling this out.
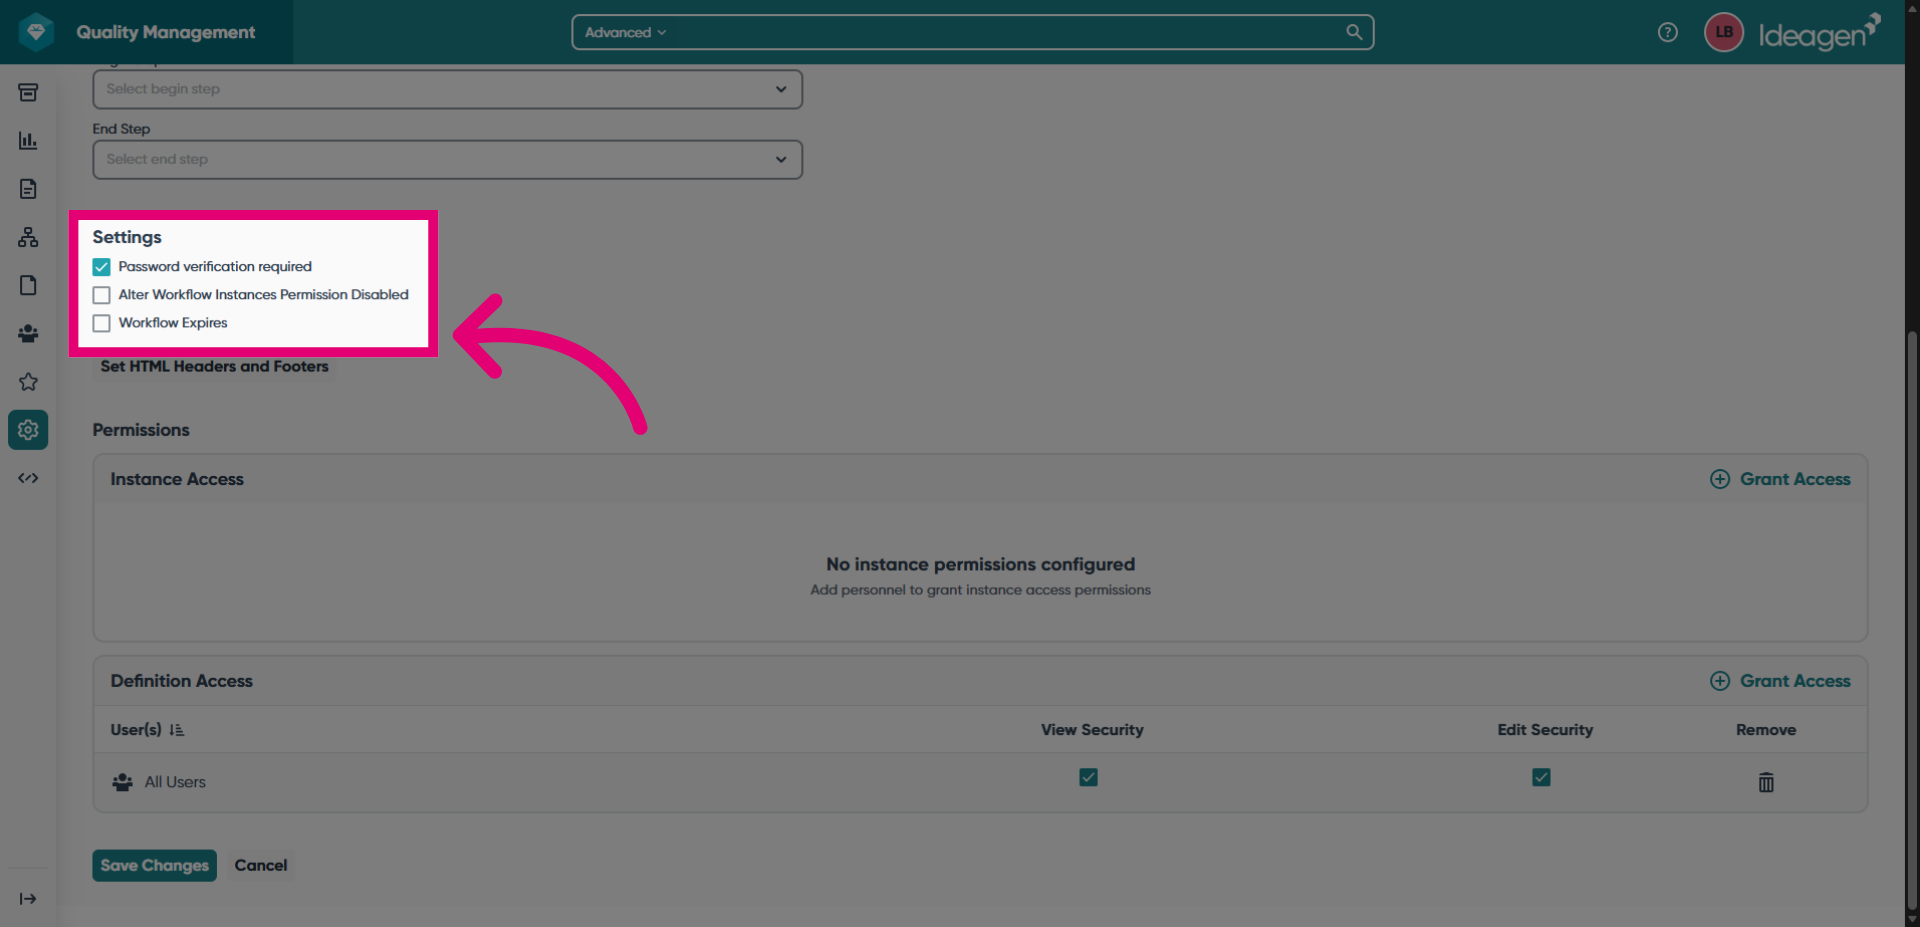
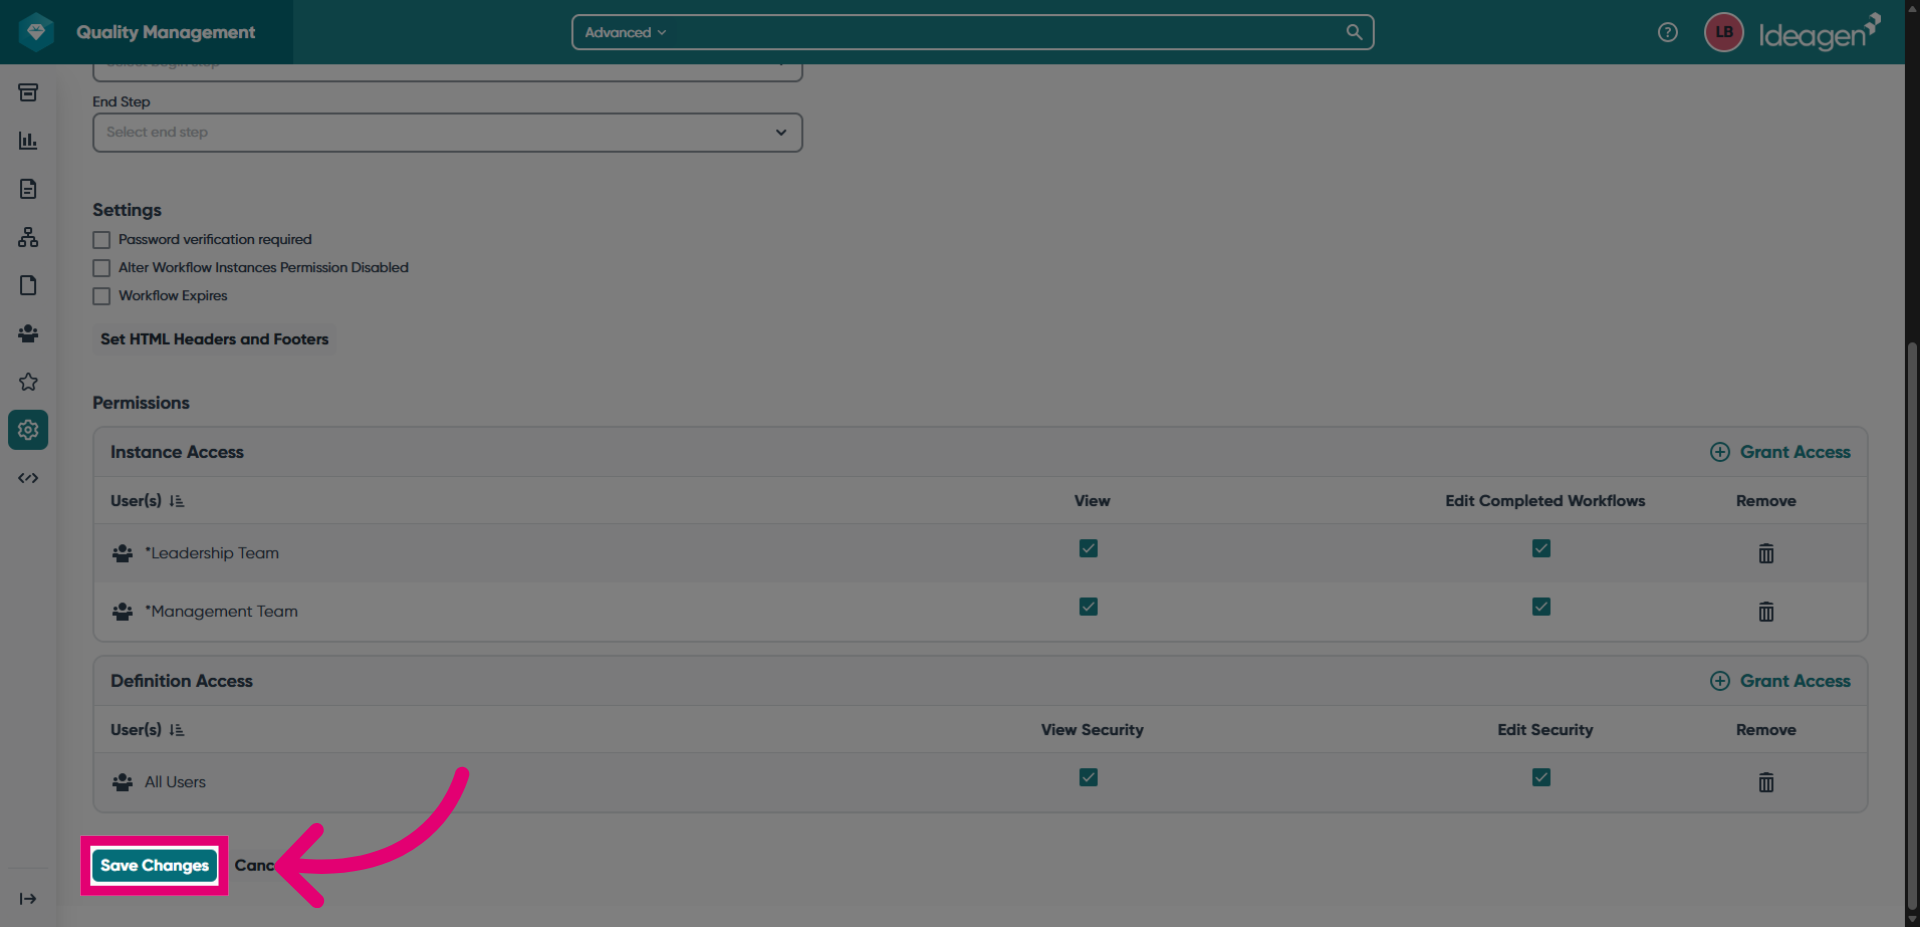
- Configure Settings for the workflow.
- To use the workflow, personnel needs to be given access to it.
Click Grant Access to manage permissions.
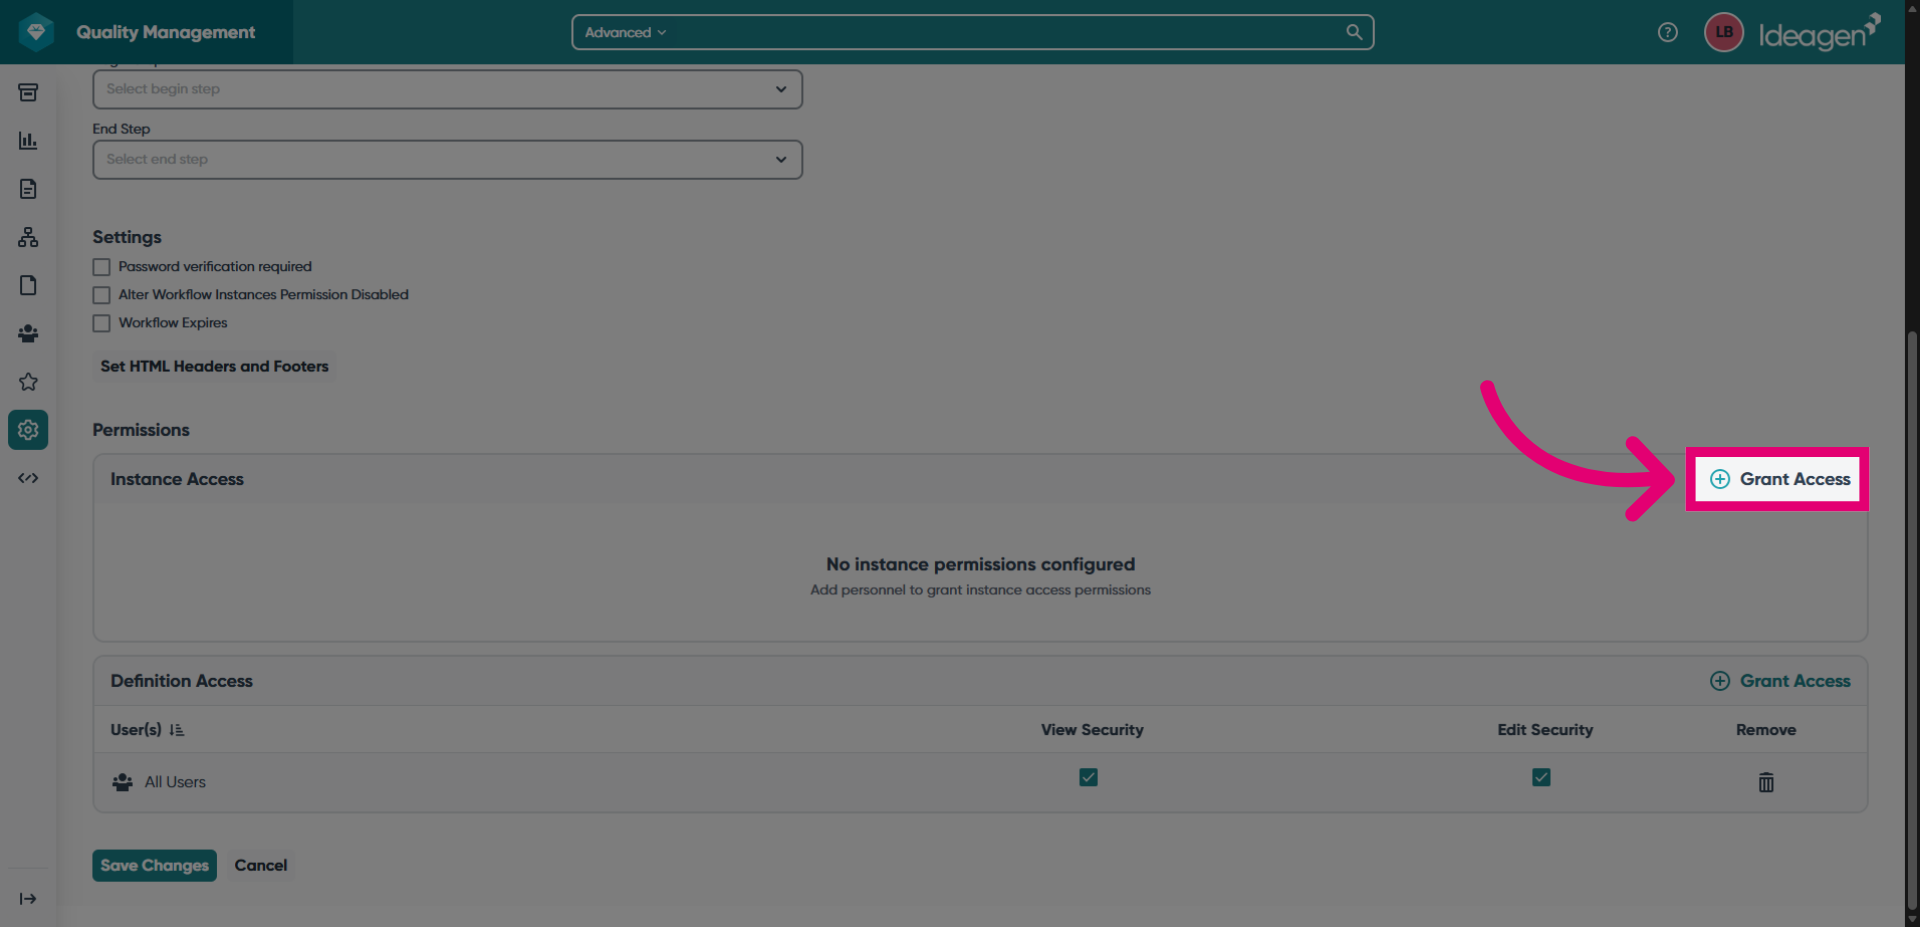
- Tick each group needing access to the workflow.
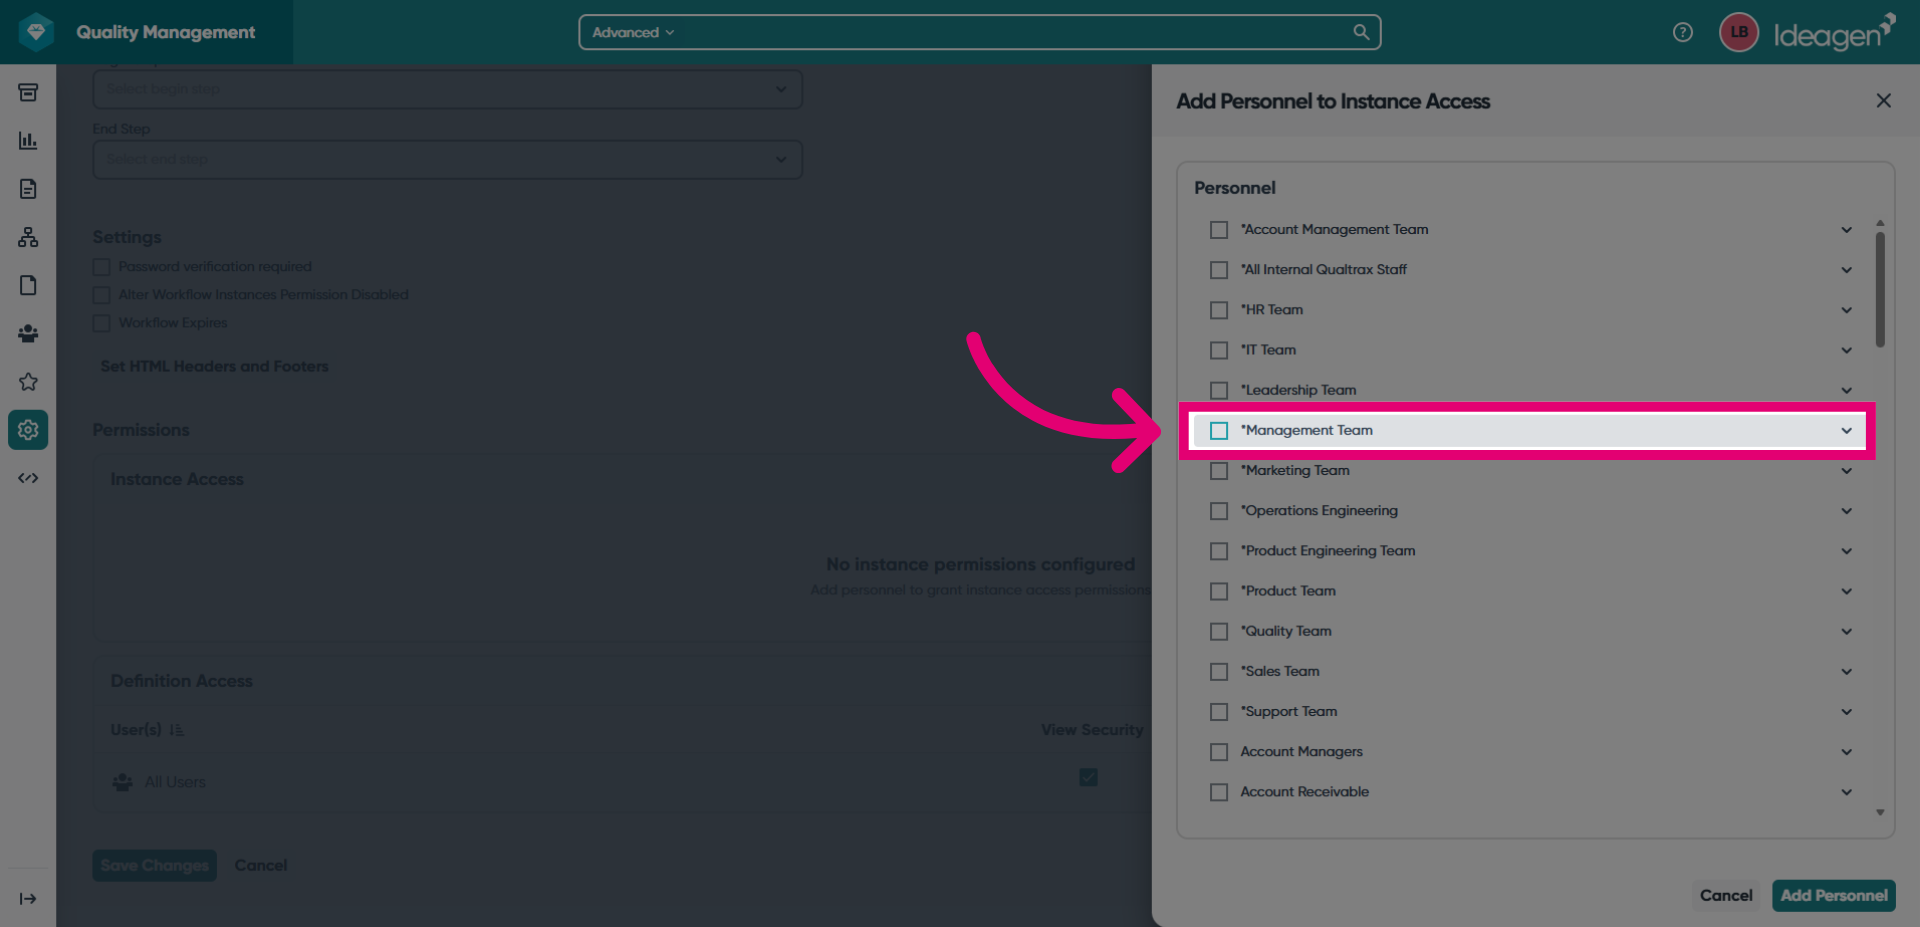
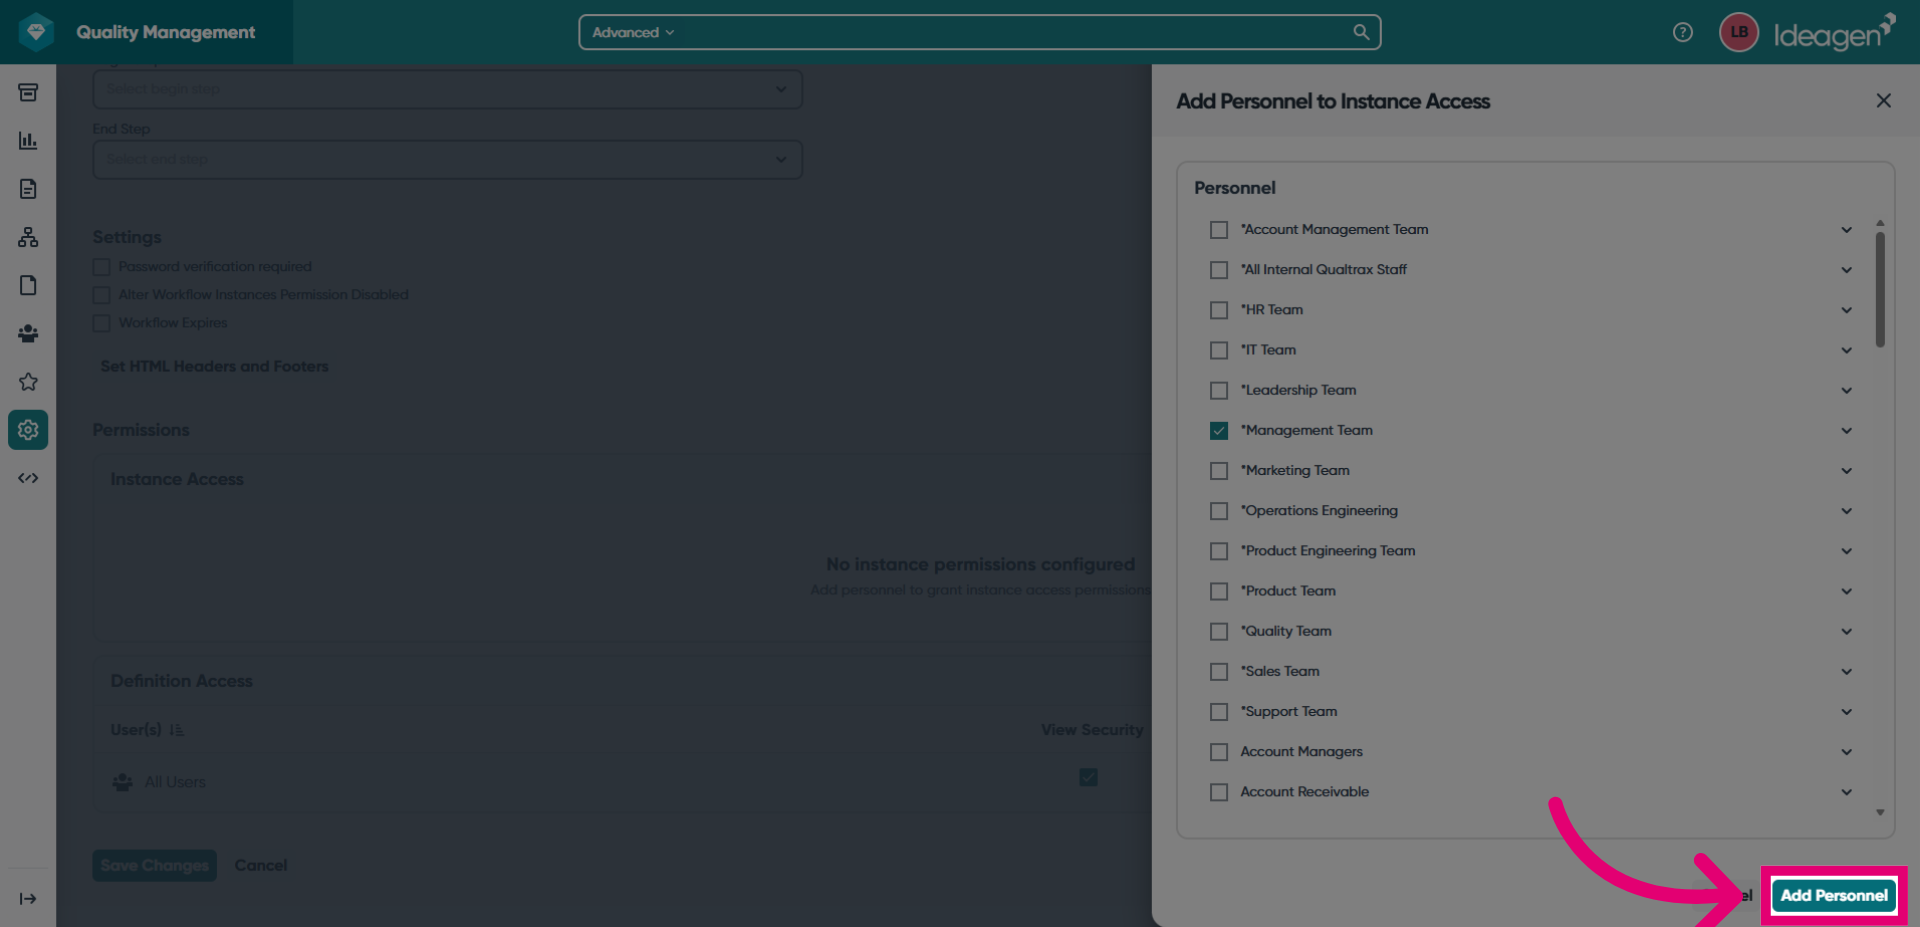
- Click Add Personnel.
- Amend additional permissions as needed for each group.
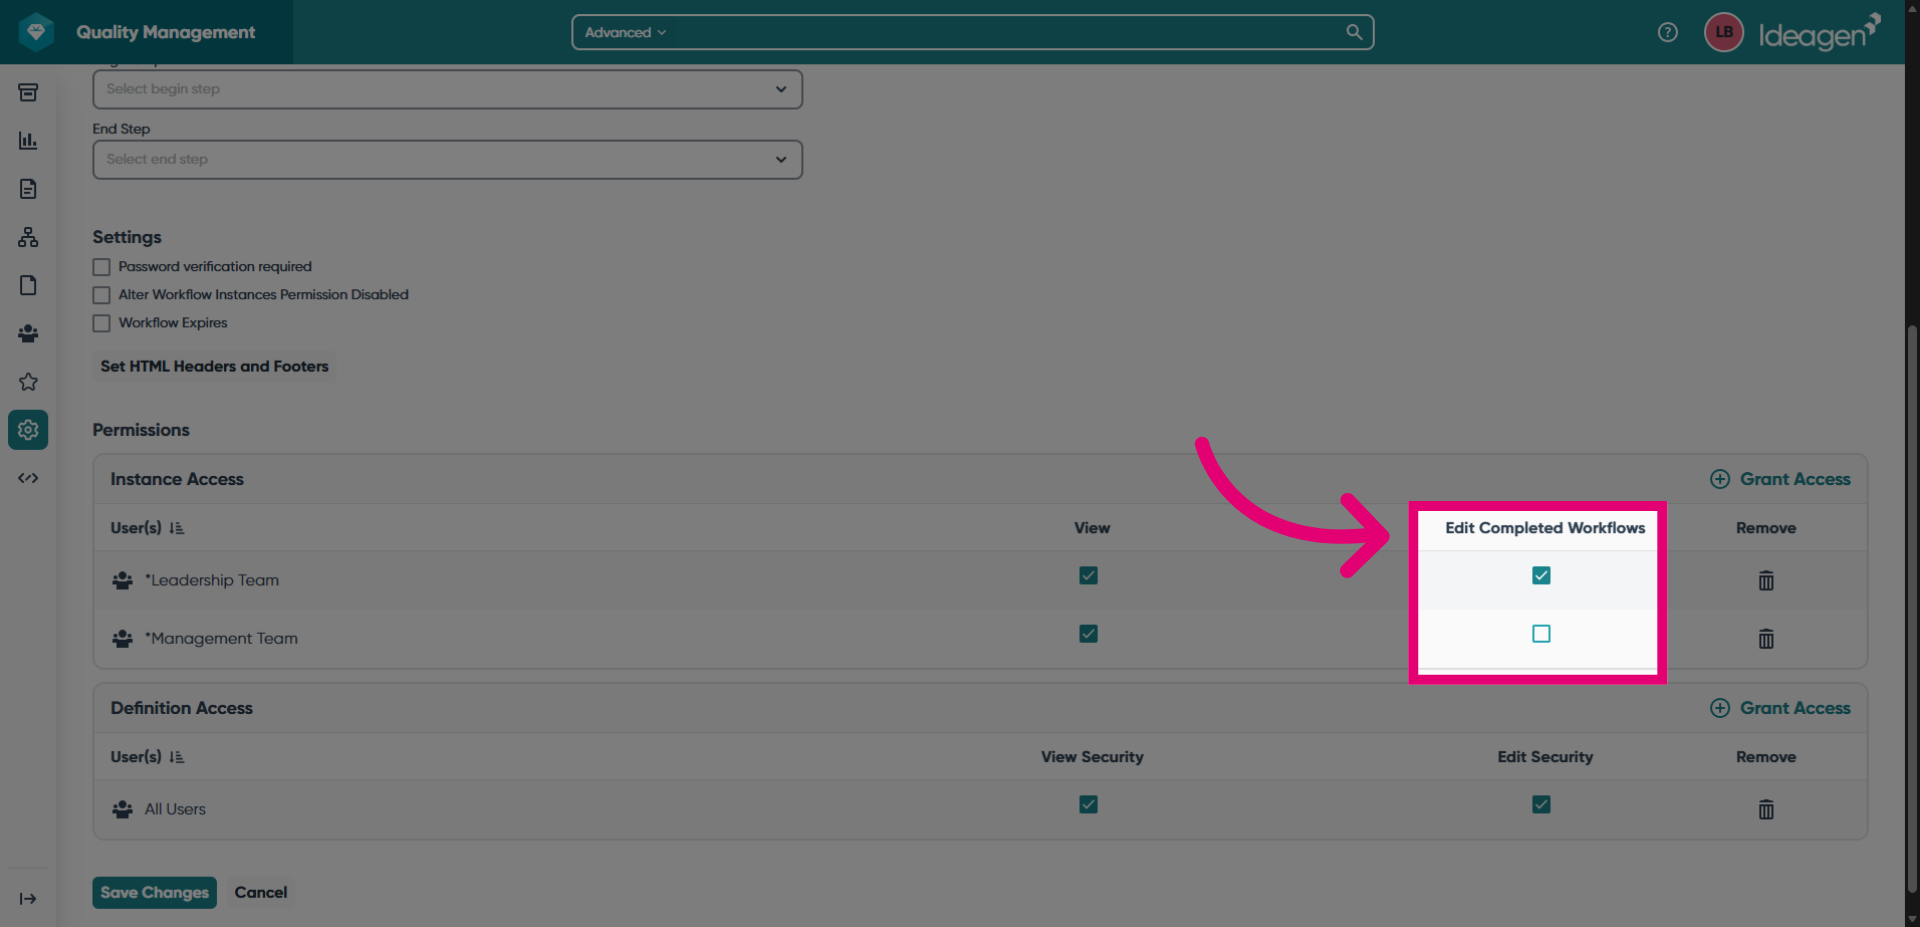
- Click Save Changes.
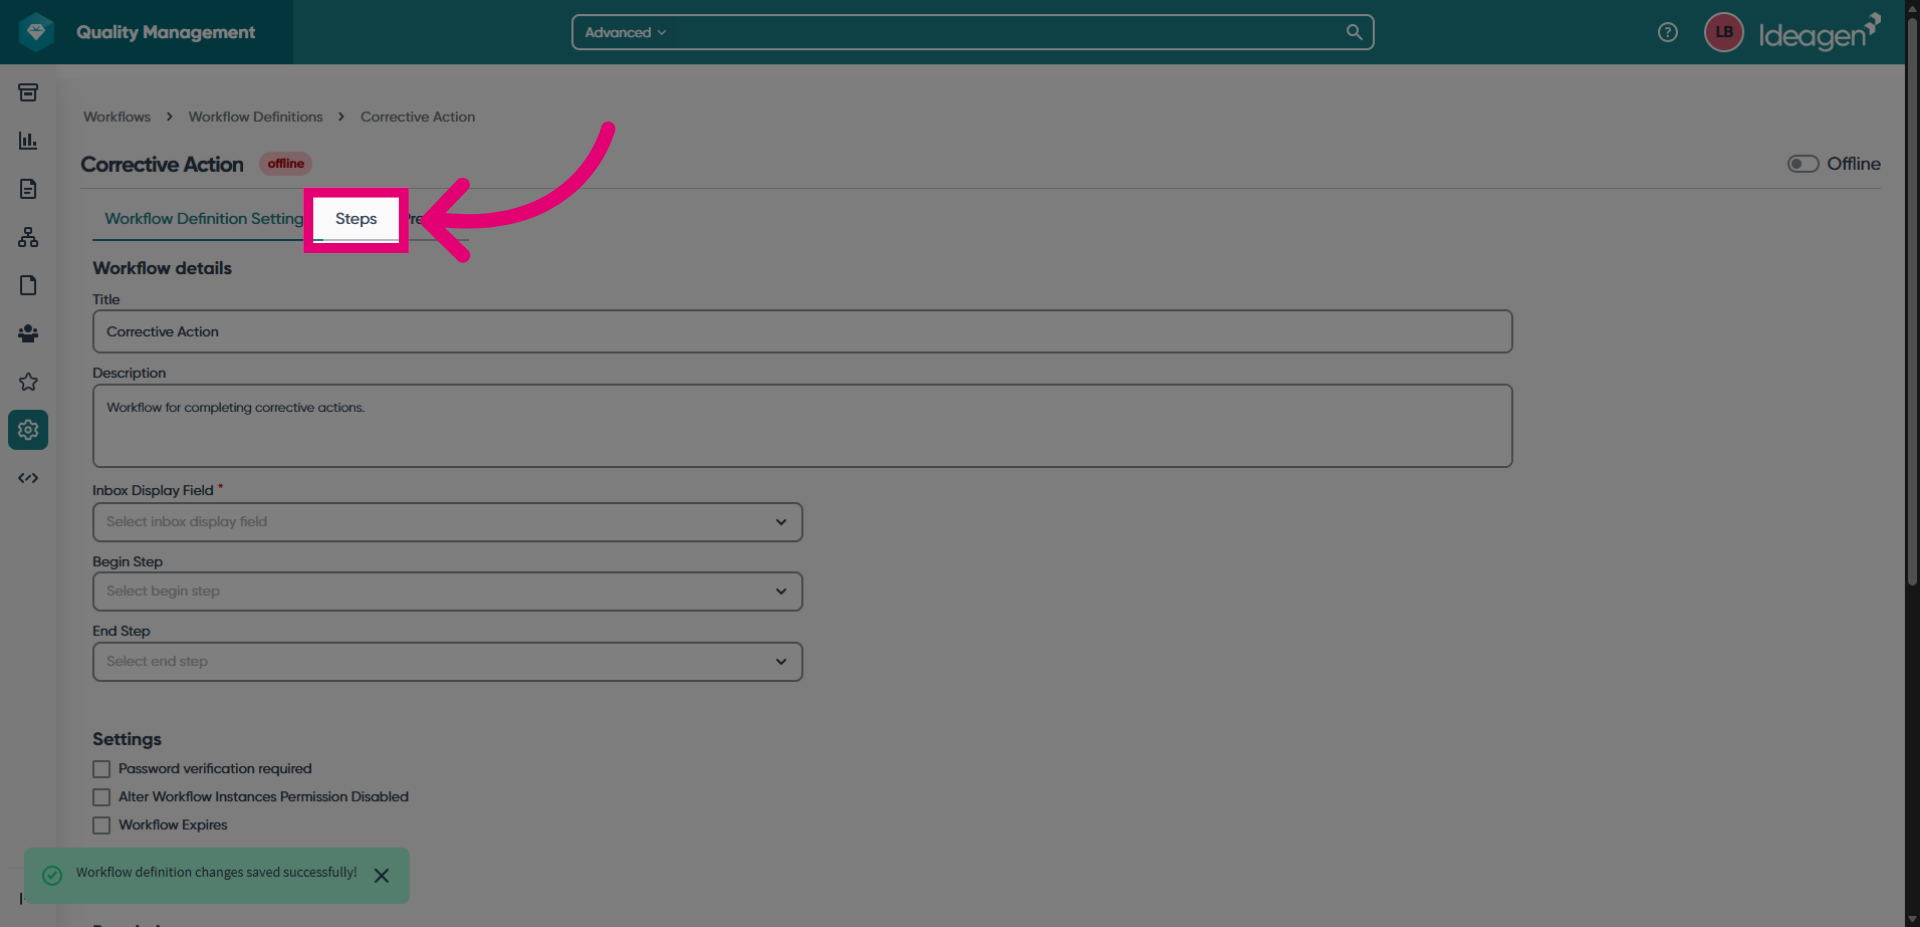
3. Completing the steps
To complete the steps, you need to first create the steps and then define the routes between them.
3.1. Steps
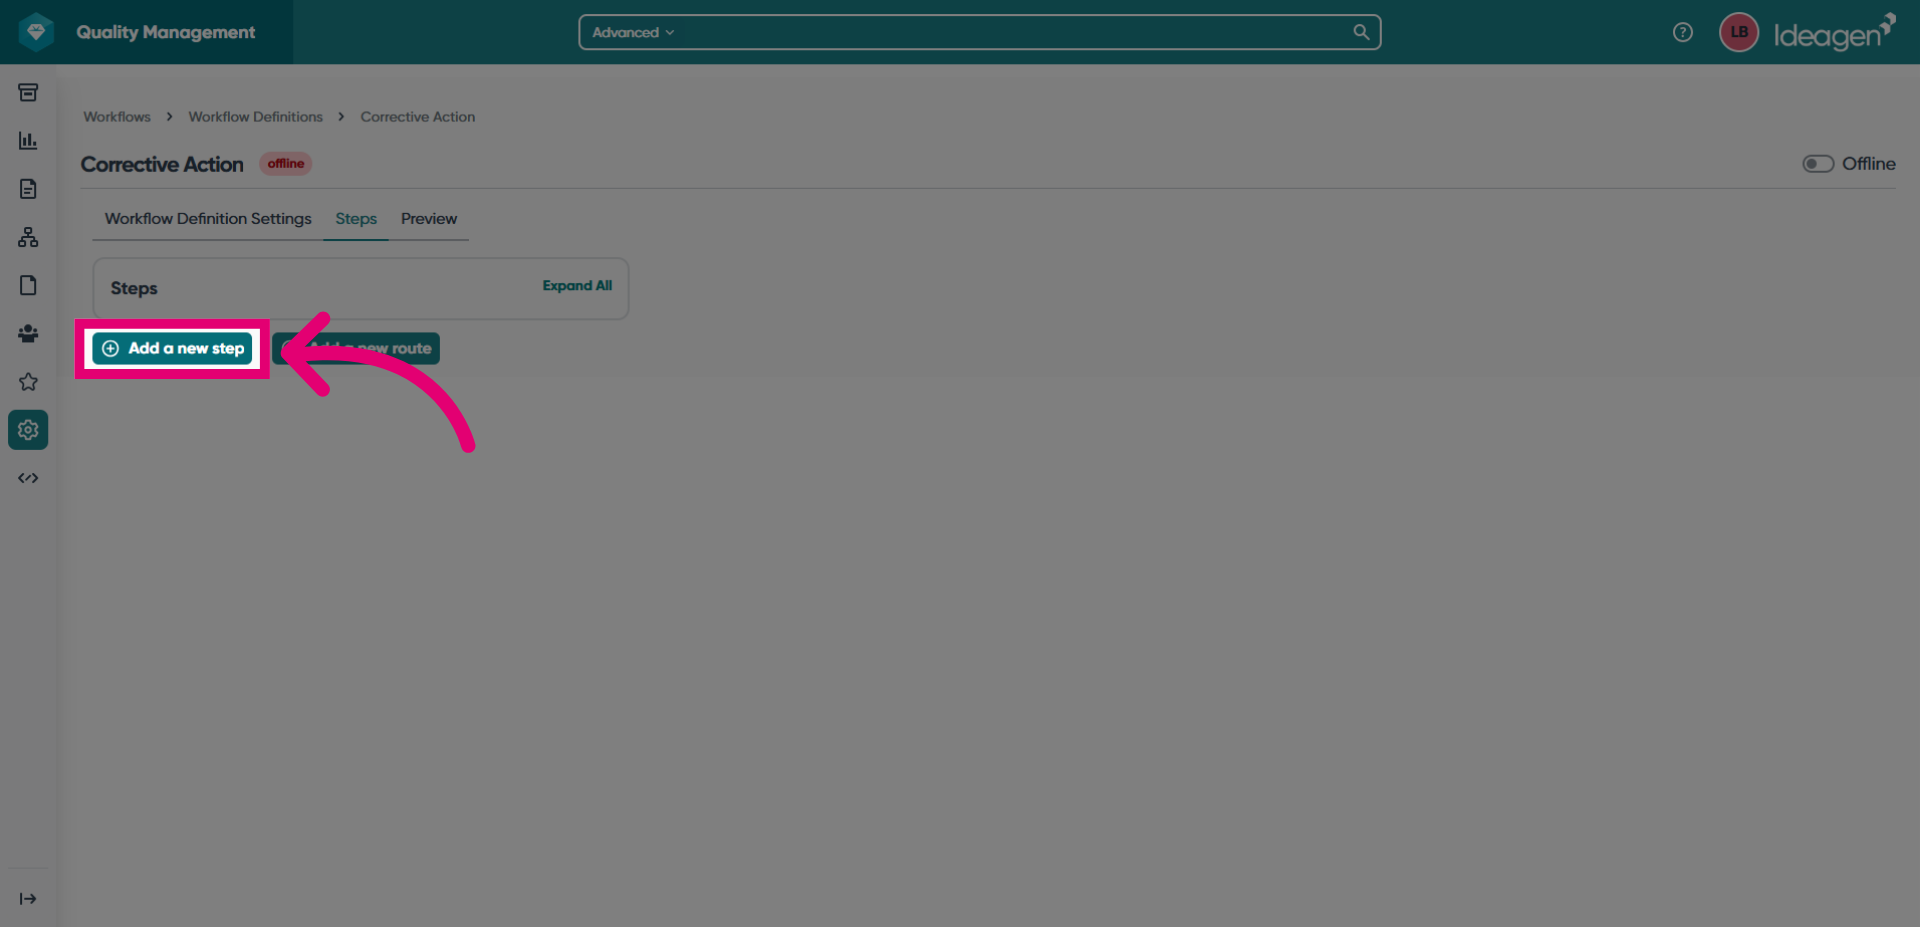
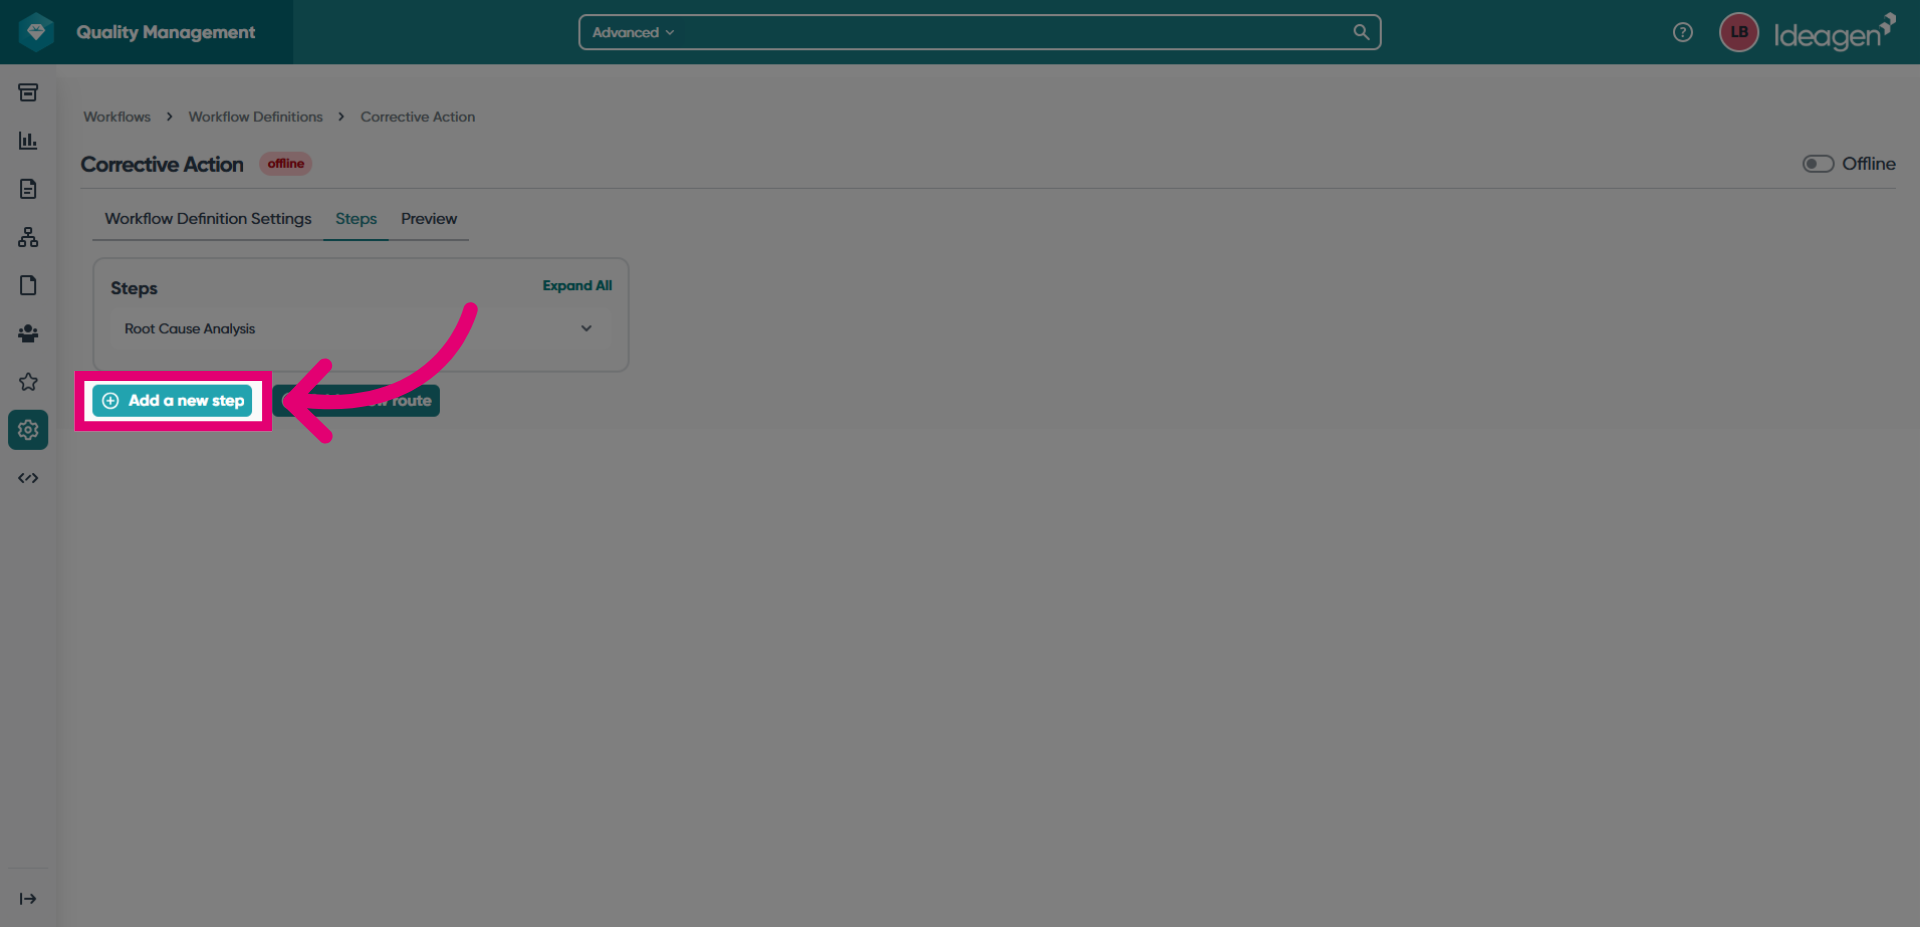
To create steps:
- Switch to the Steps tab.
- Click Add a new step.
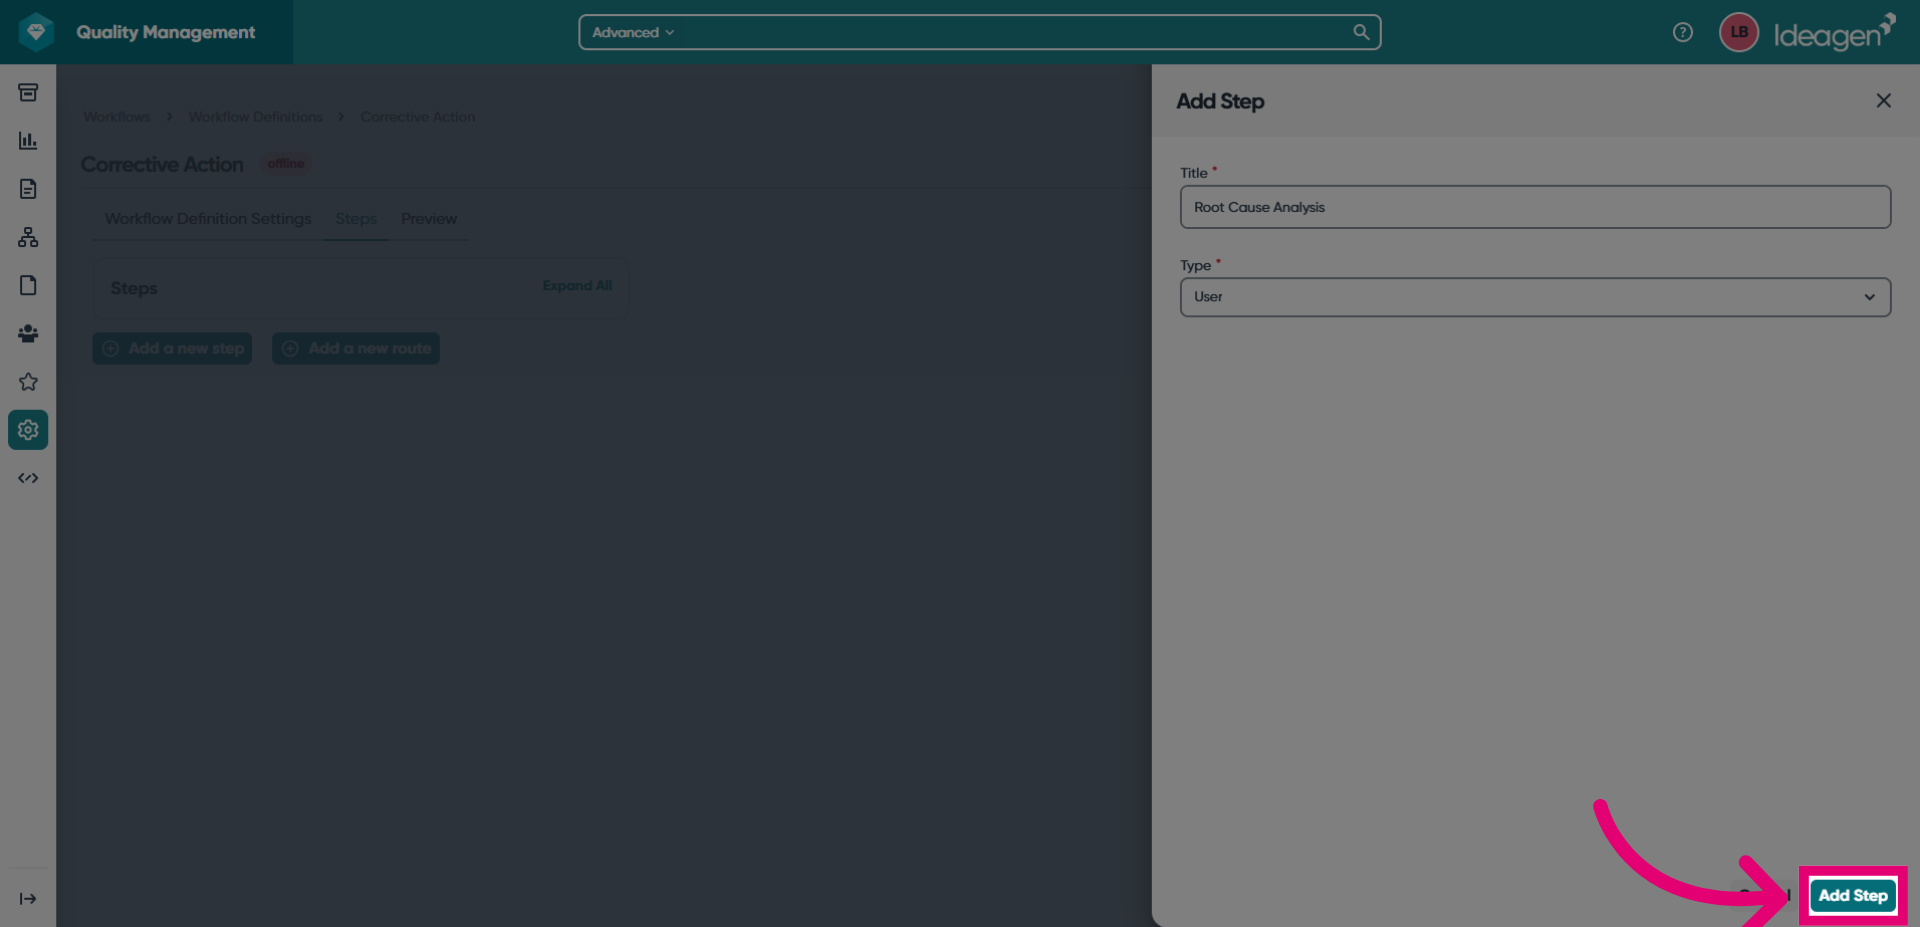
- Give your step a Title.
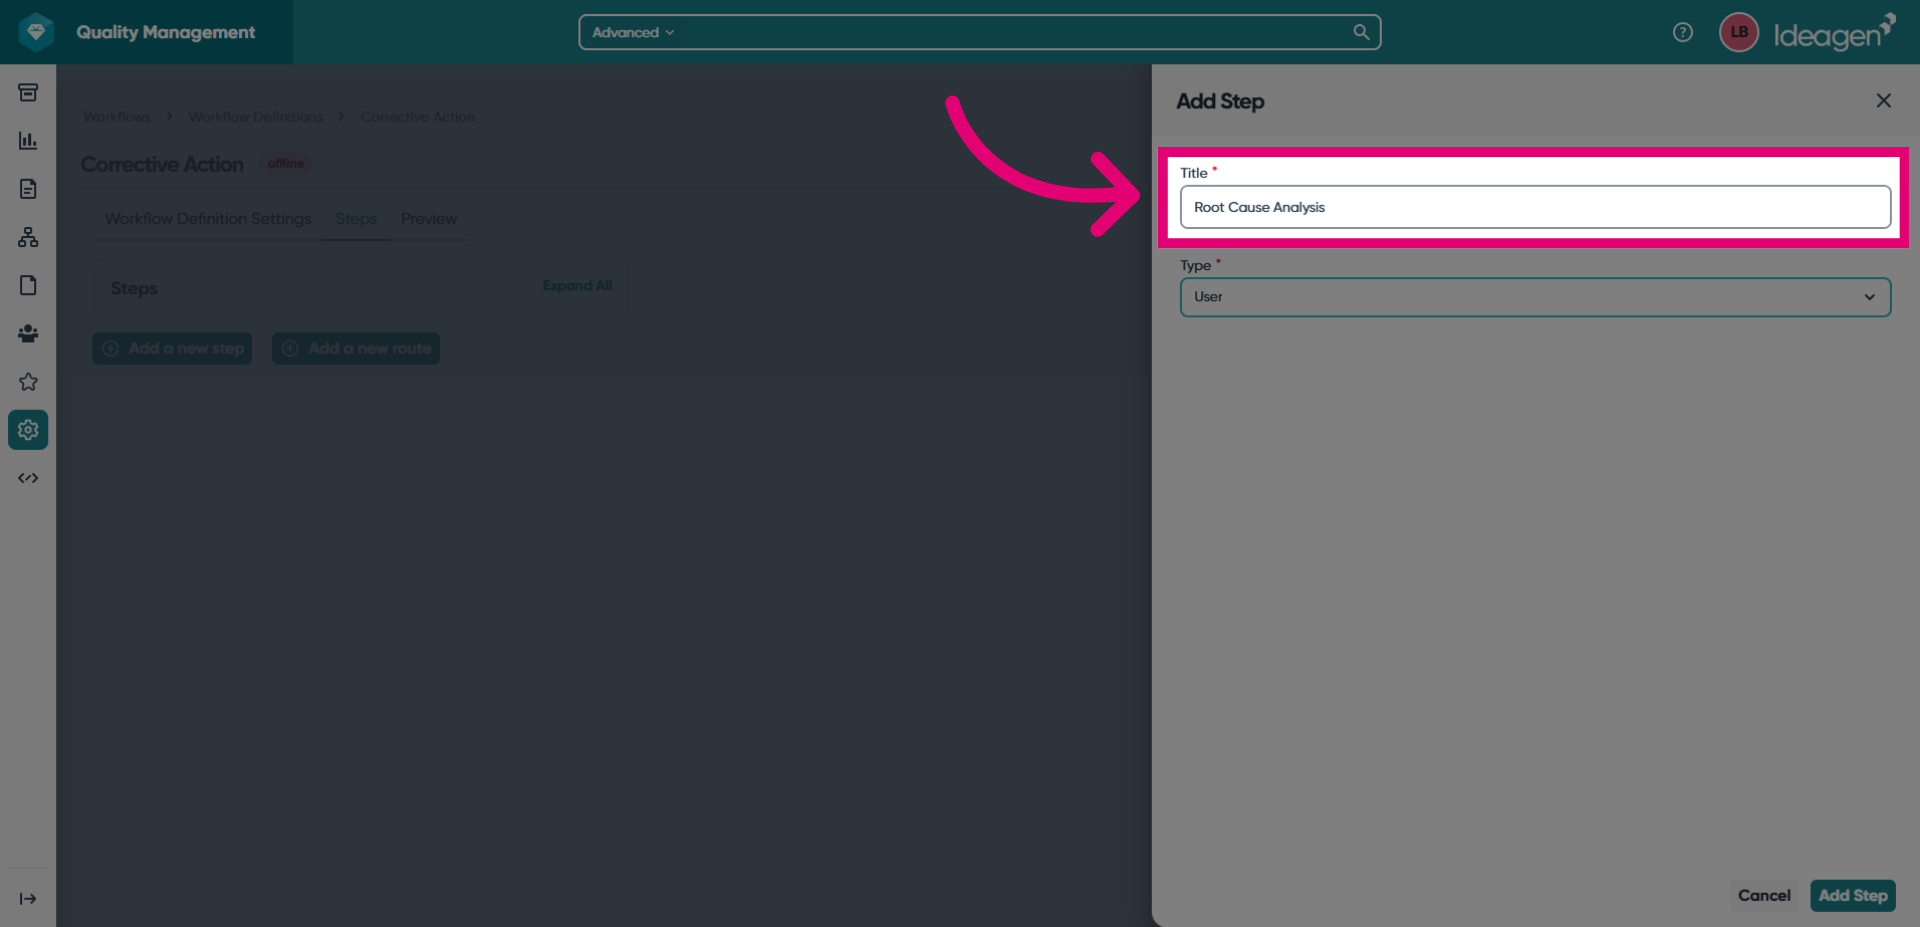
- Choose a Type for your step.
User will require user input to be completed. Automation will automate the step in the workflow based on the parameters you set.
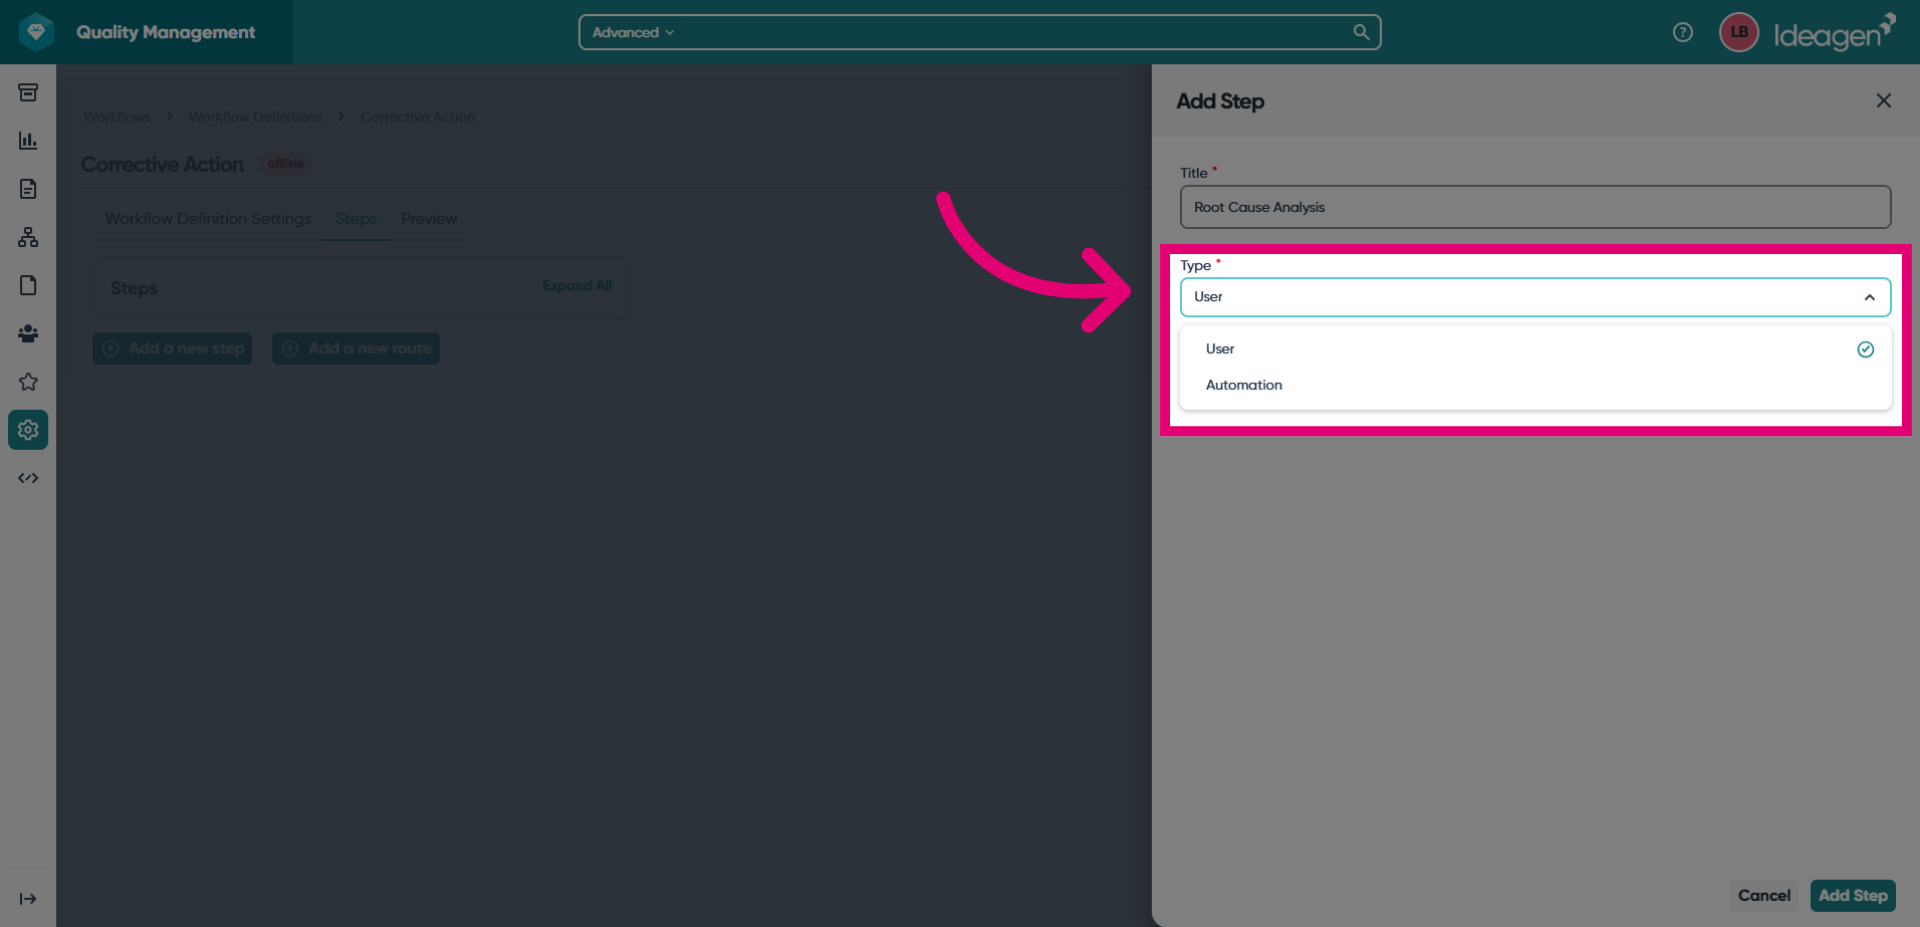
- Click Add Step.
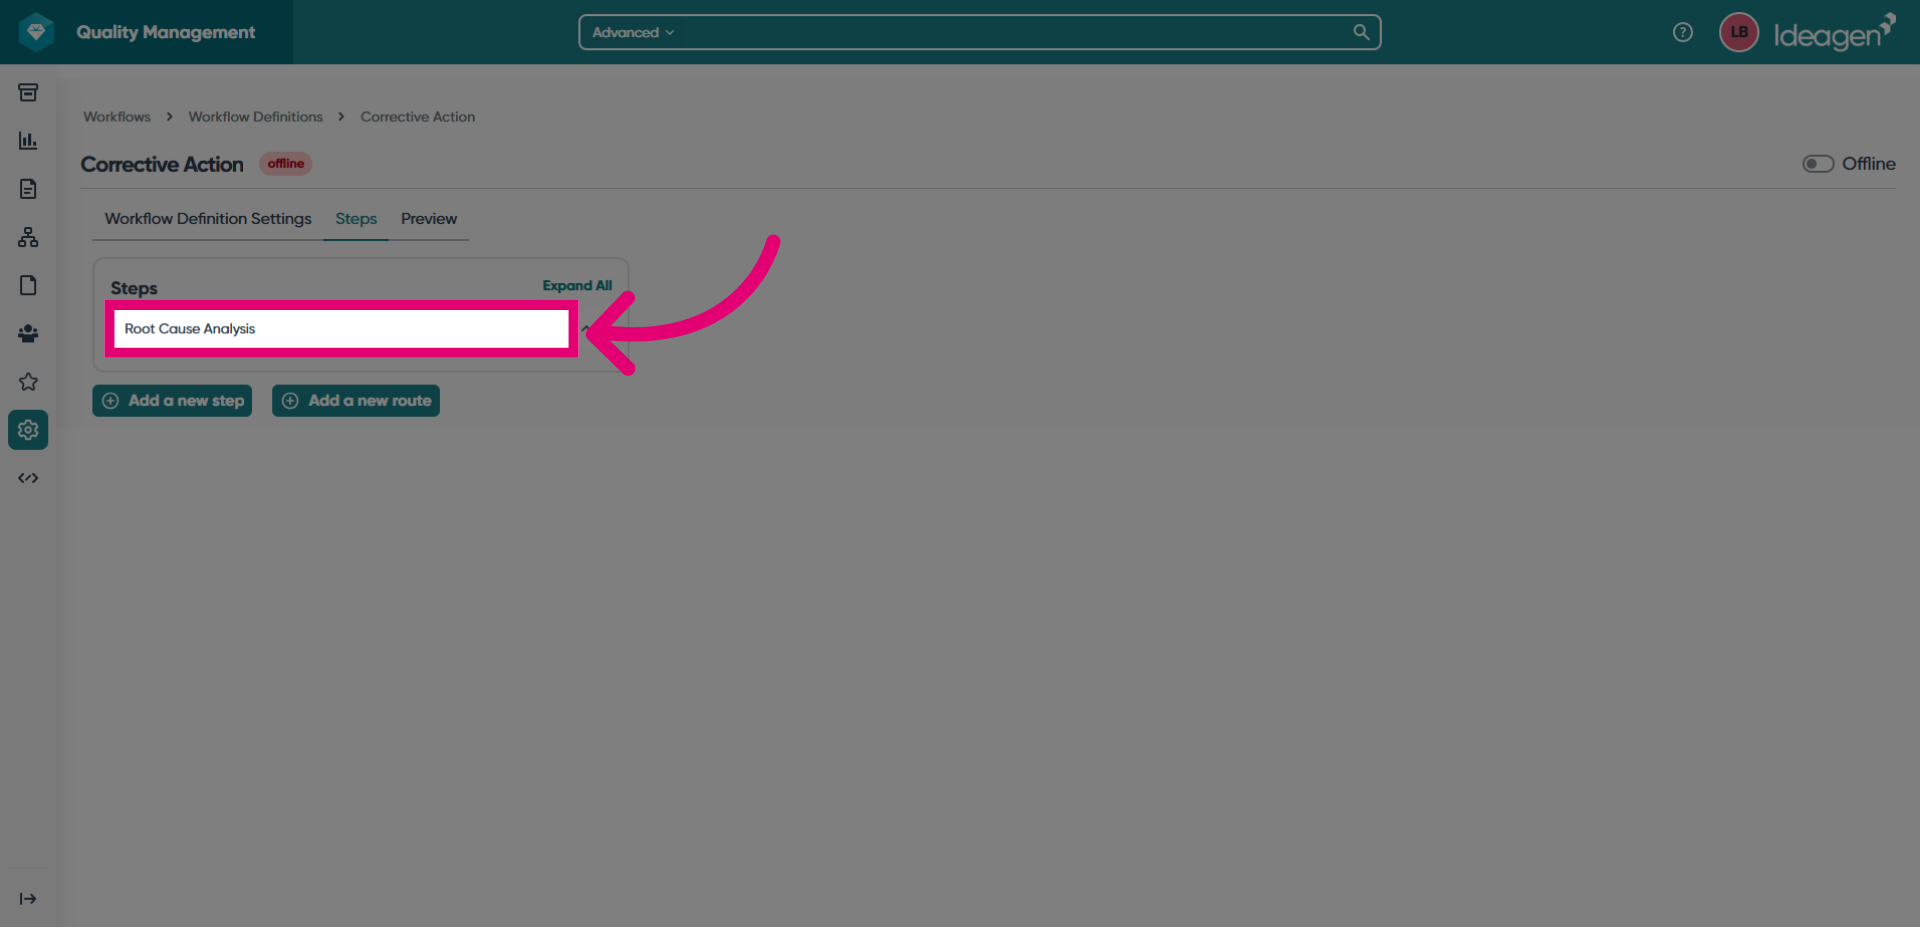
- Click the title of the step you just added to open it.
- Click Add in the Responsible parties box.
This will allow you to add personnel responsible for completing this step of the workflow.
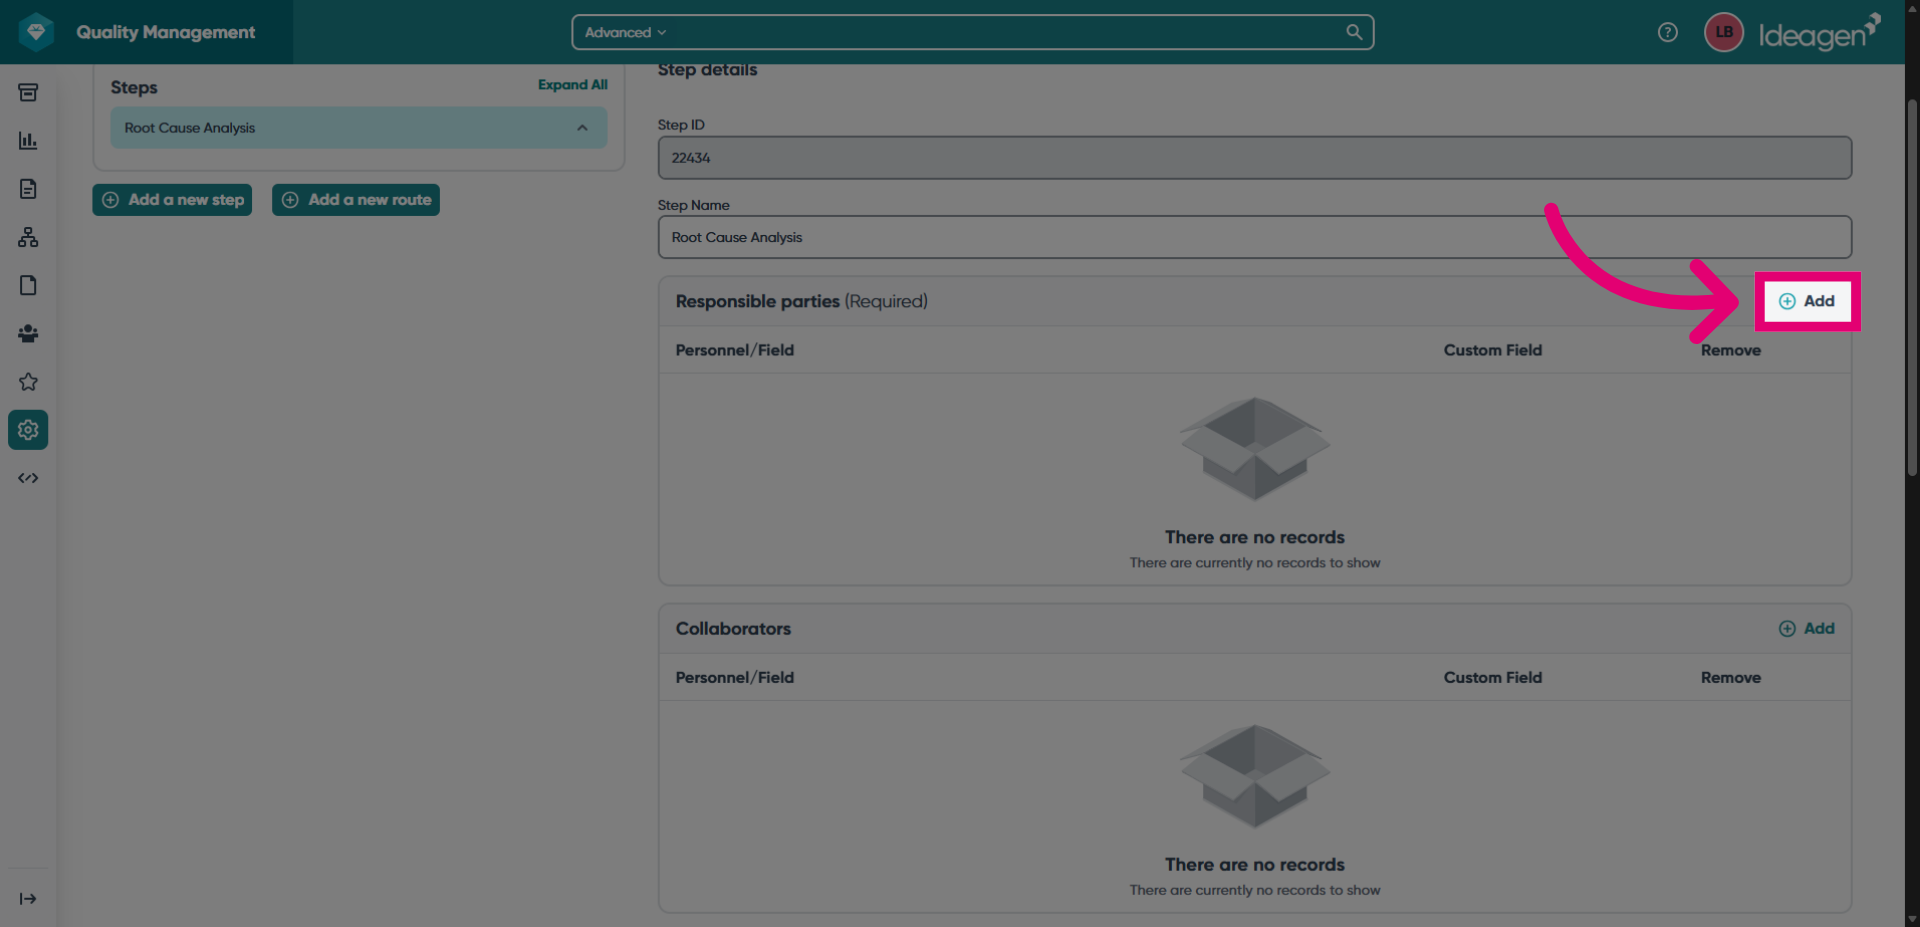
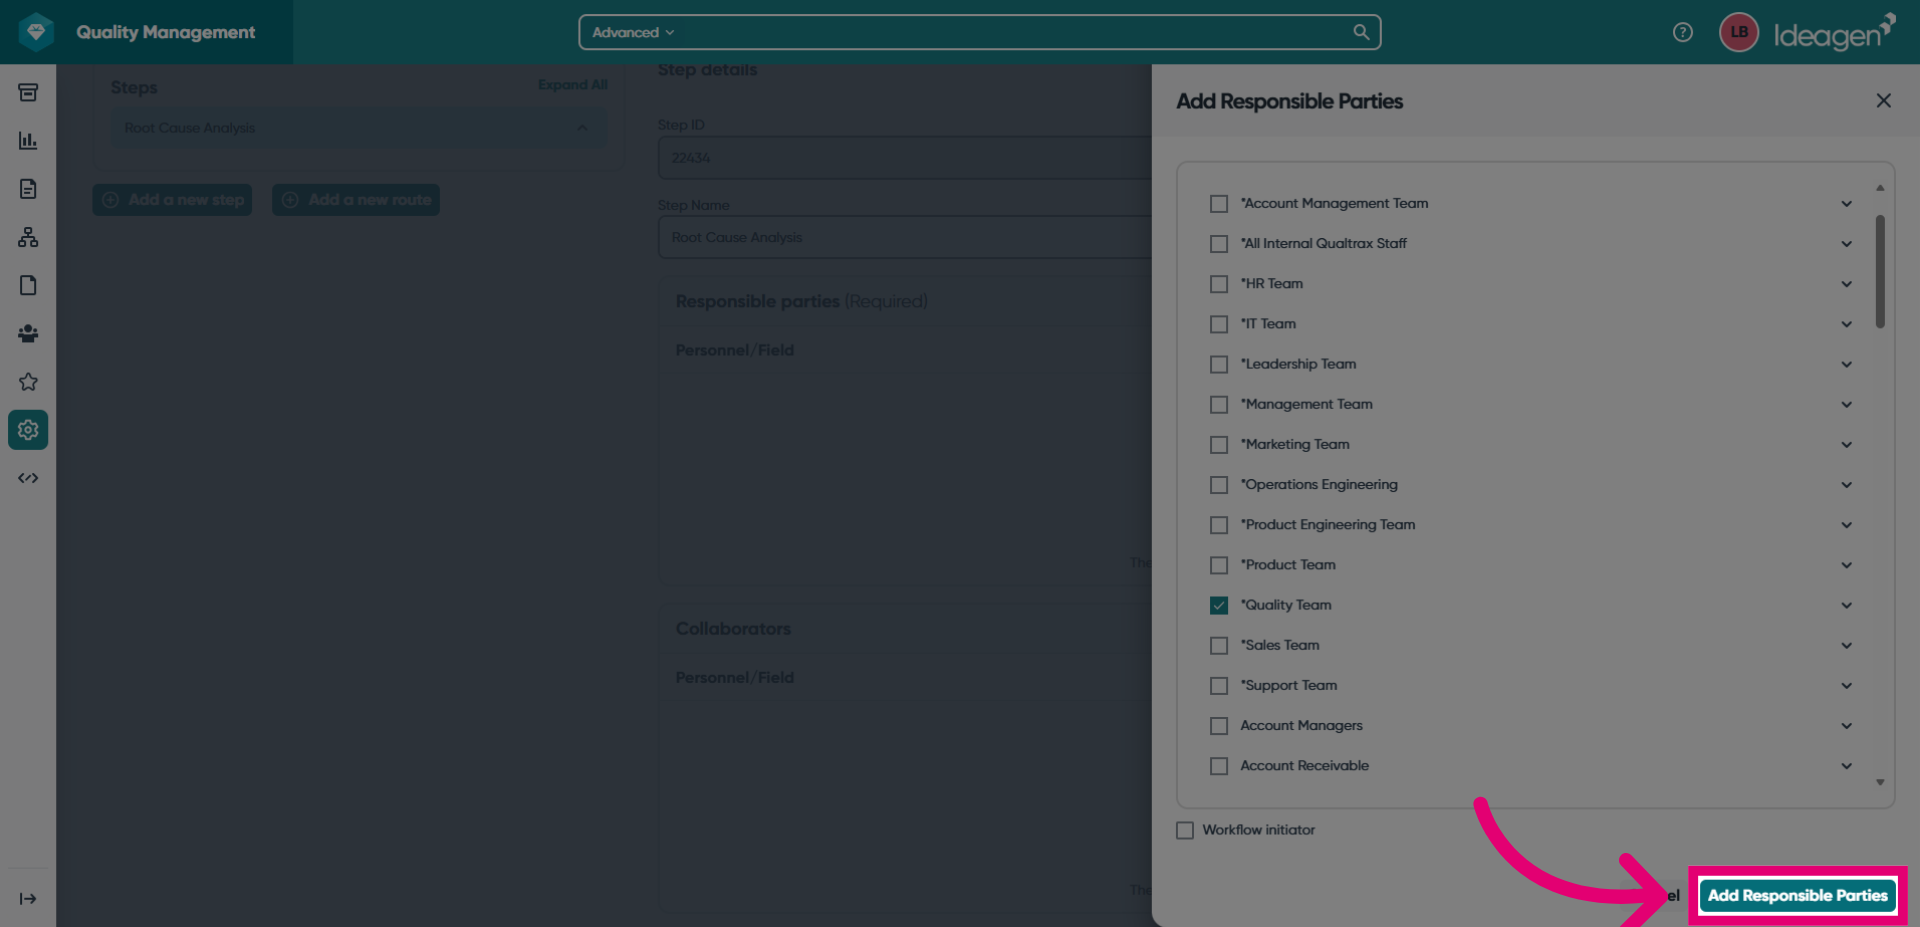
- Tick each group responsible.
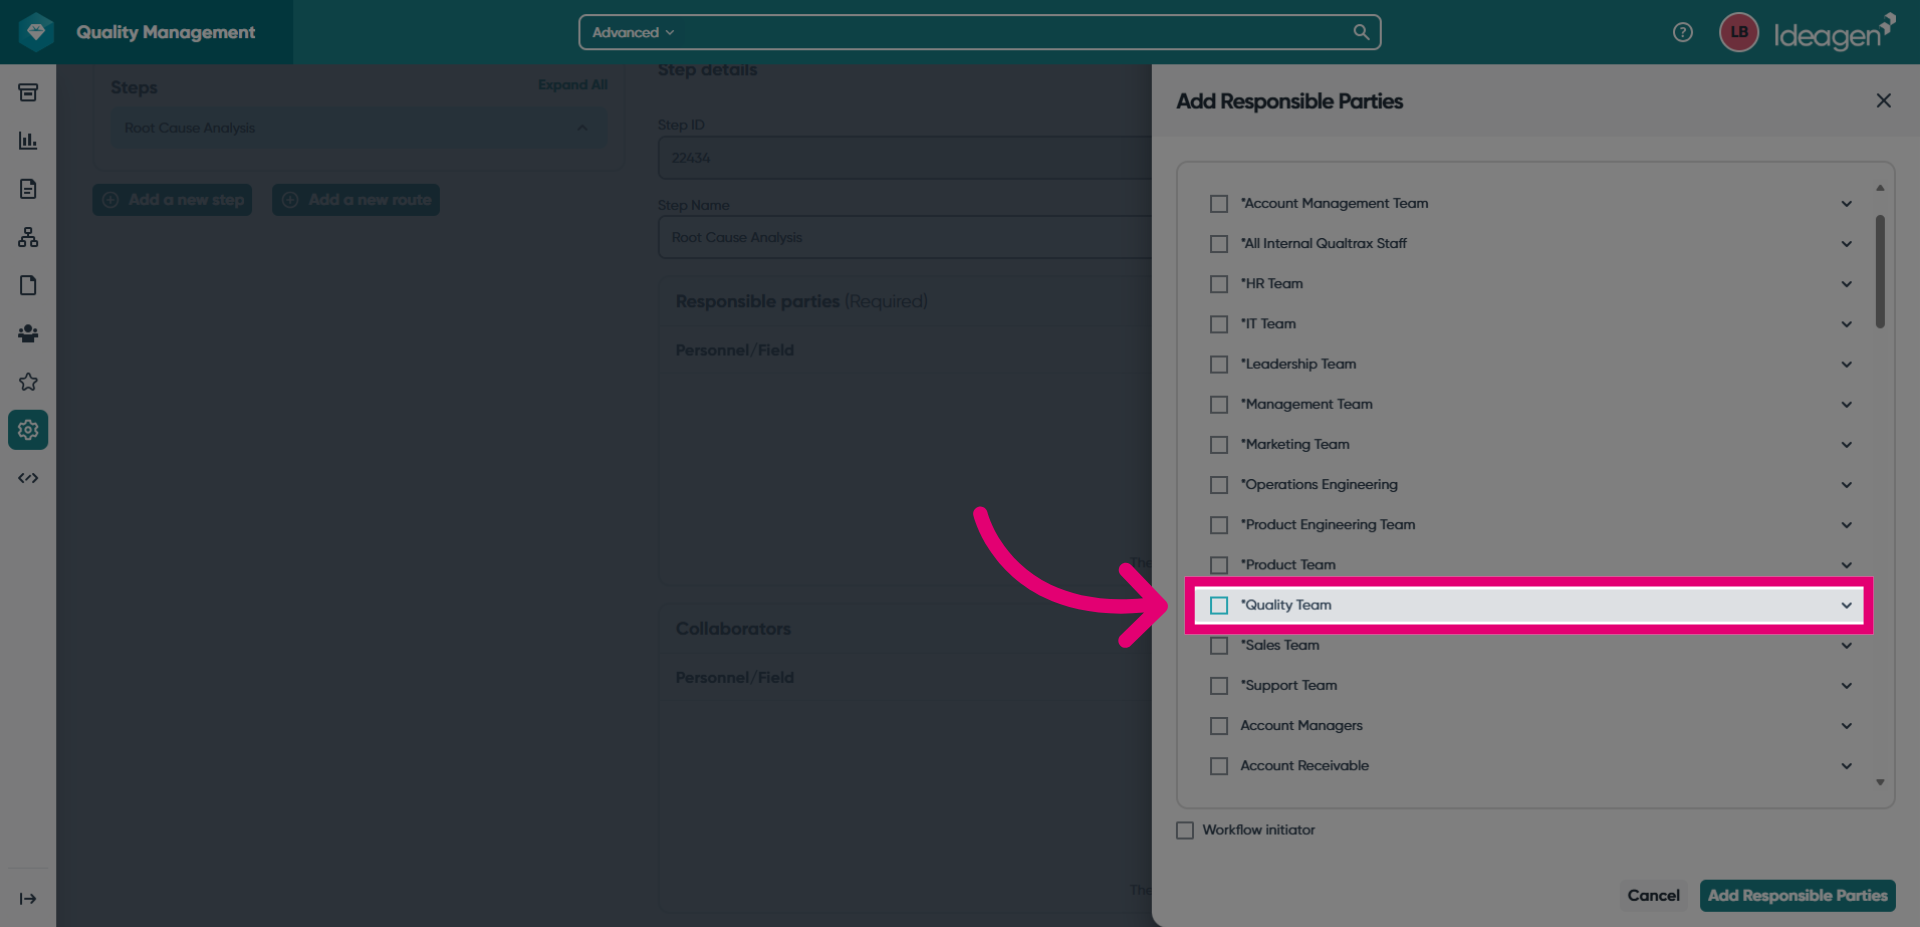
- Click Add Responsible Parties.
- Repeat the steps for the optional fields.
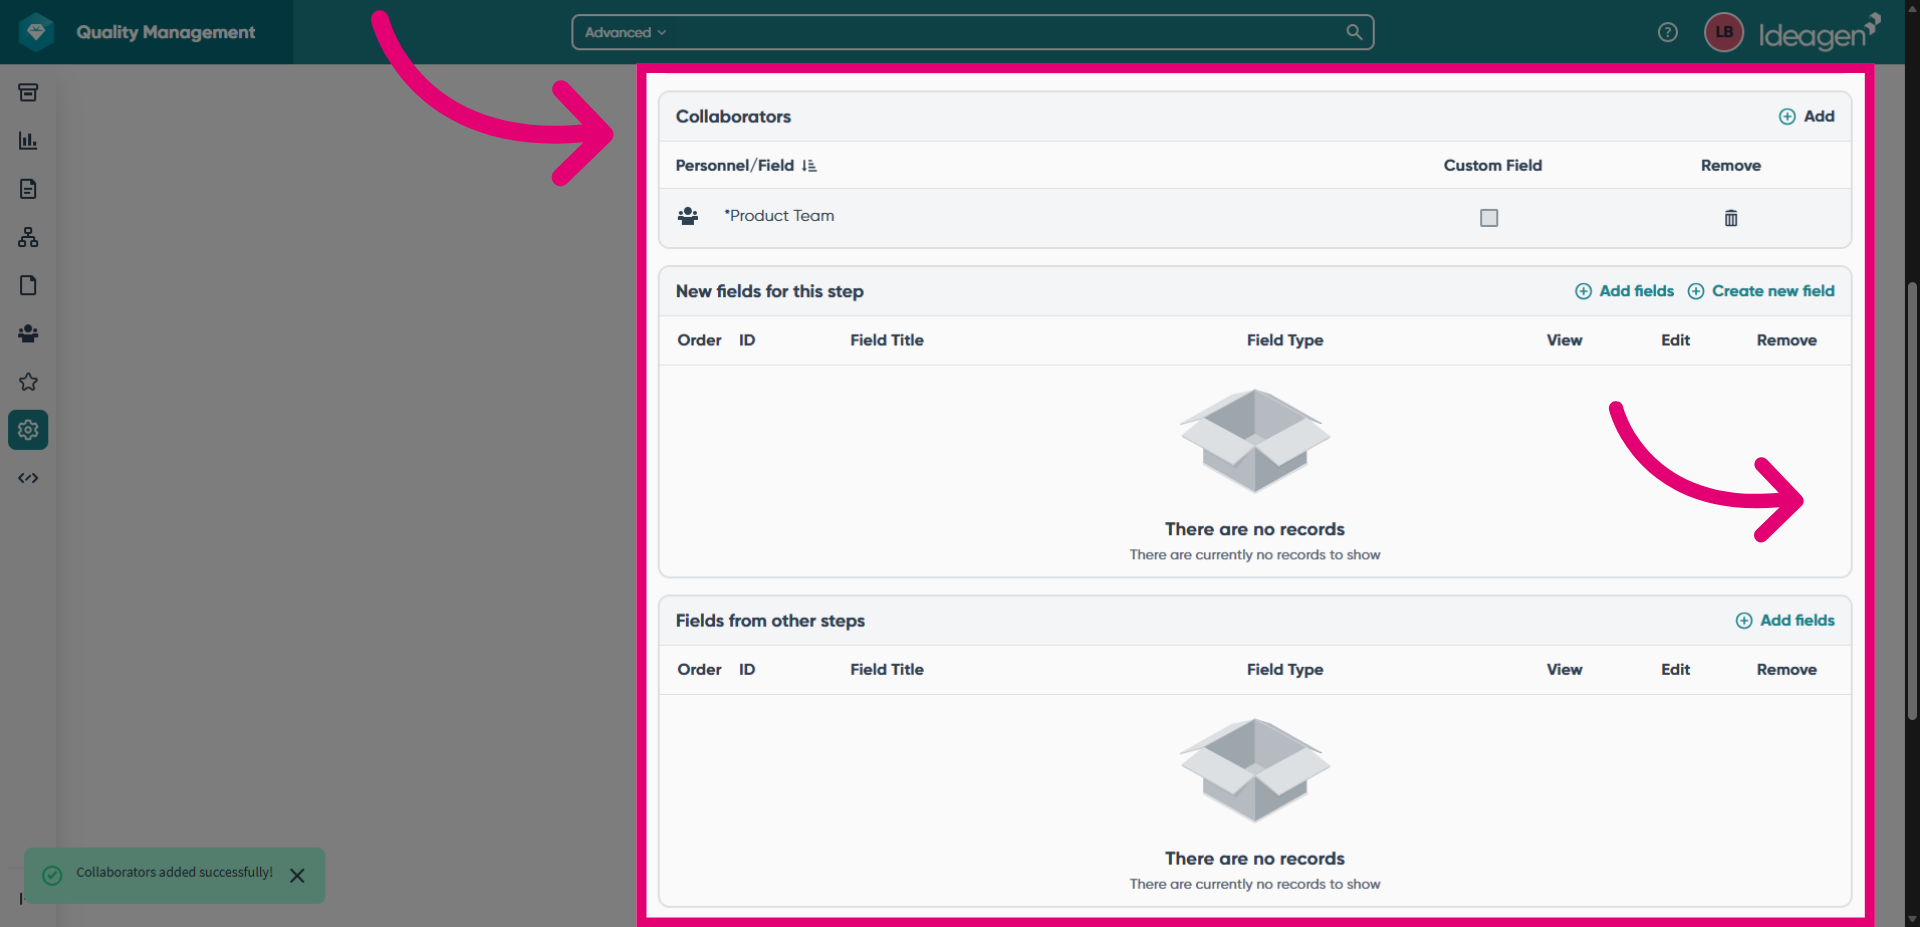
- Click Save Changes once done.

- Repeat these instructions for each required step in the workflow.
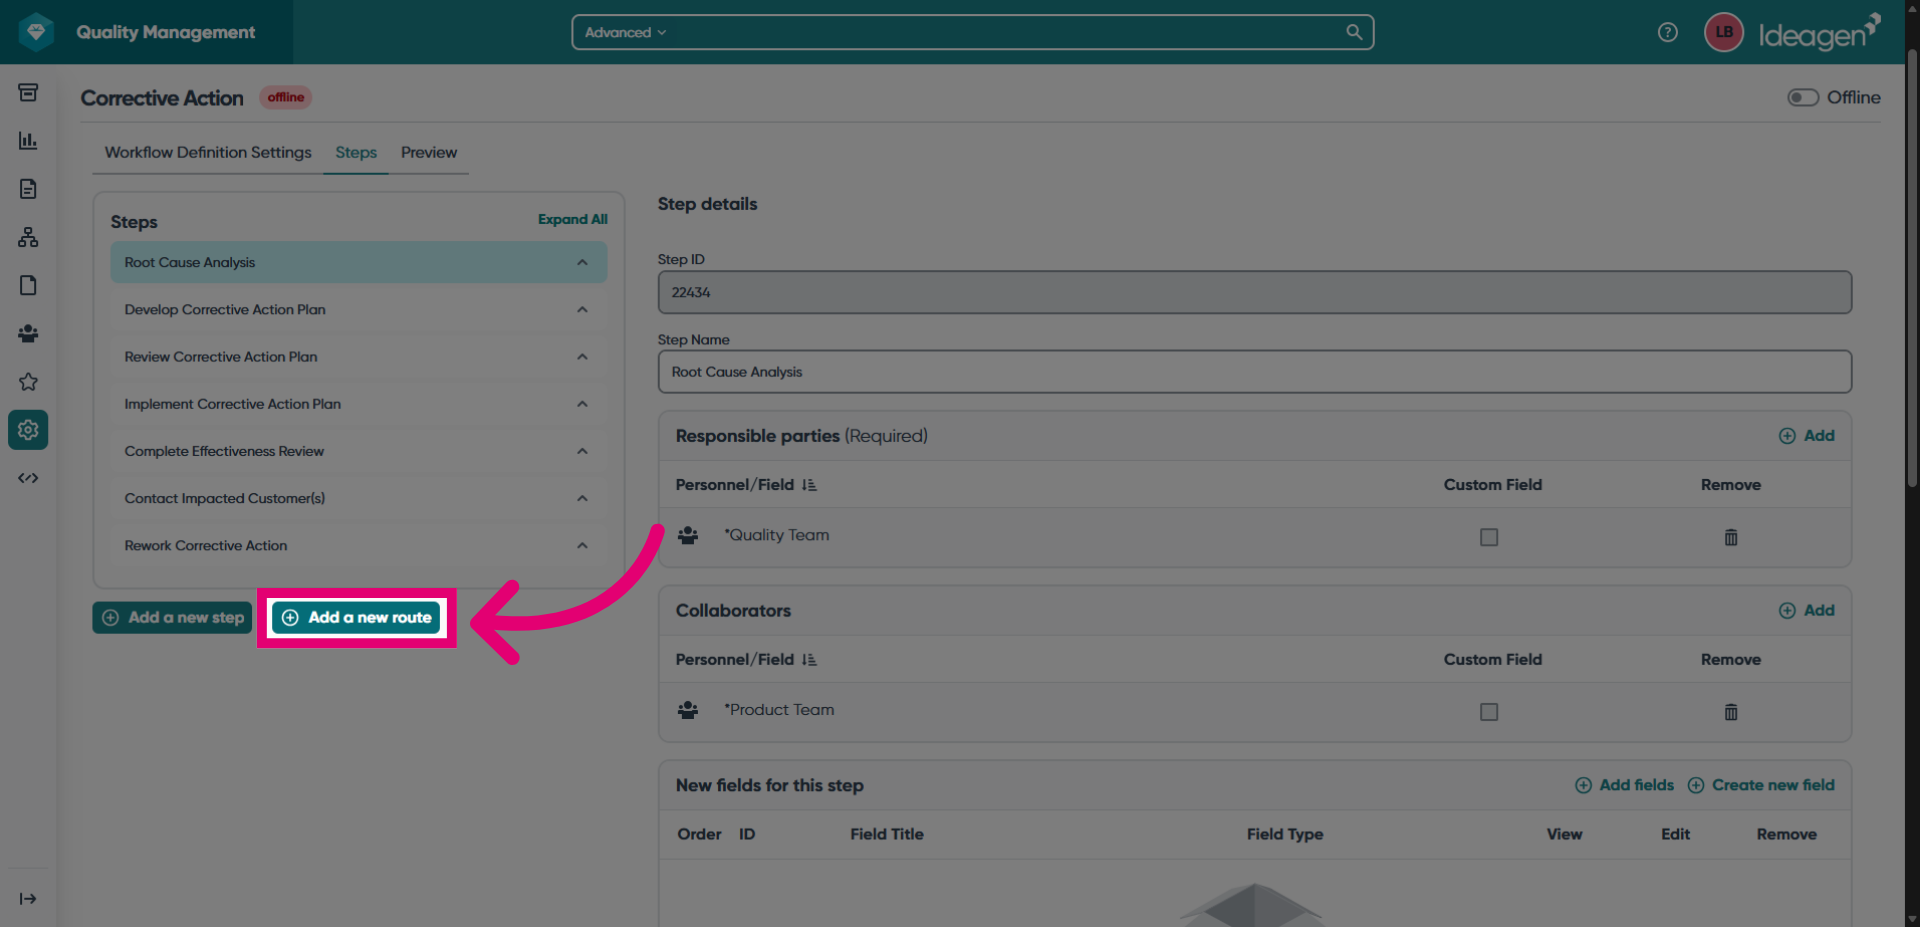
3.2. Routes
Once all steps have been added, they need to be connected by route logic.
To create routes:
- Click Add a new route.
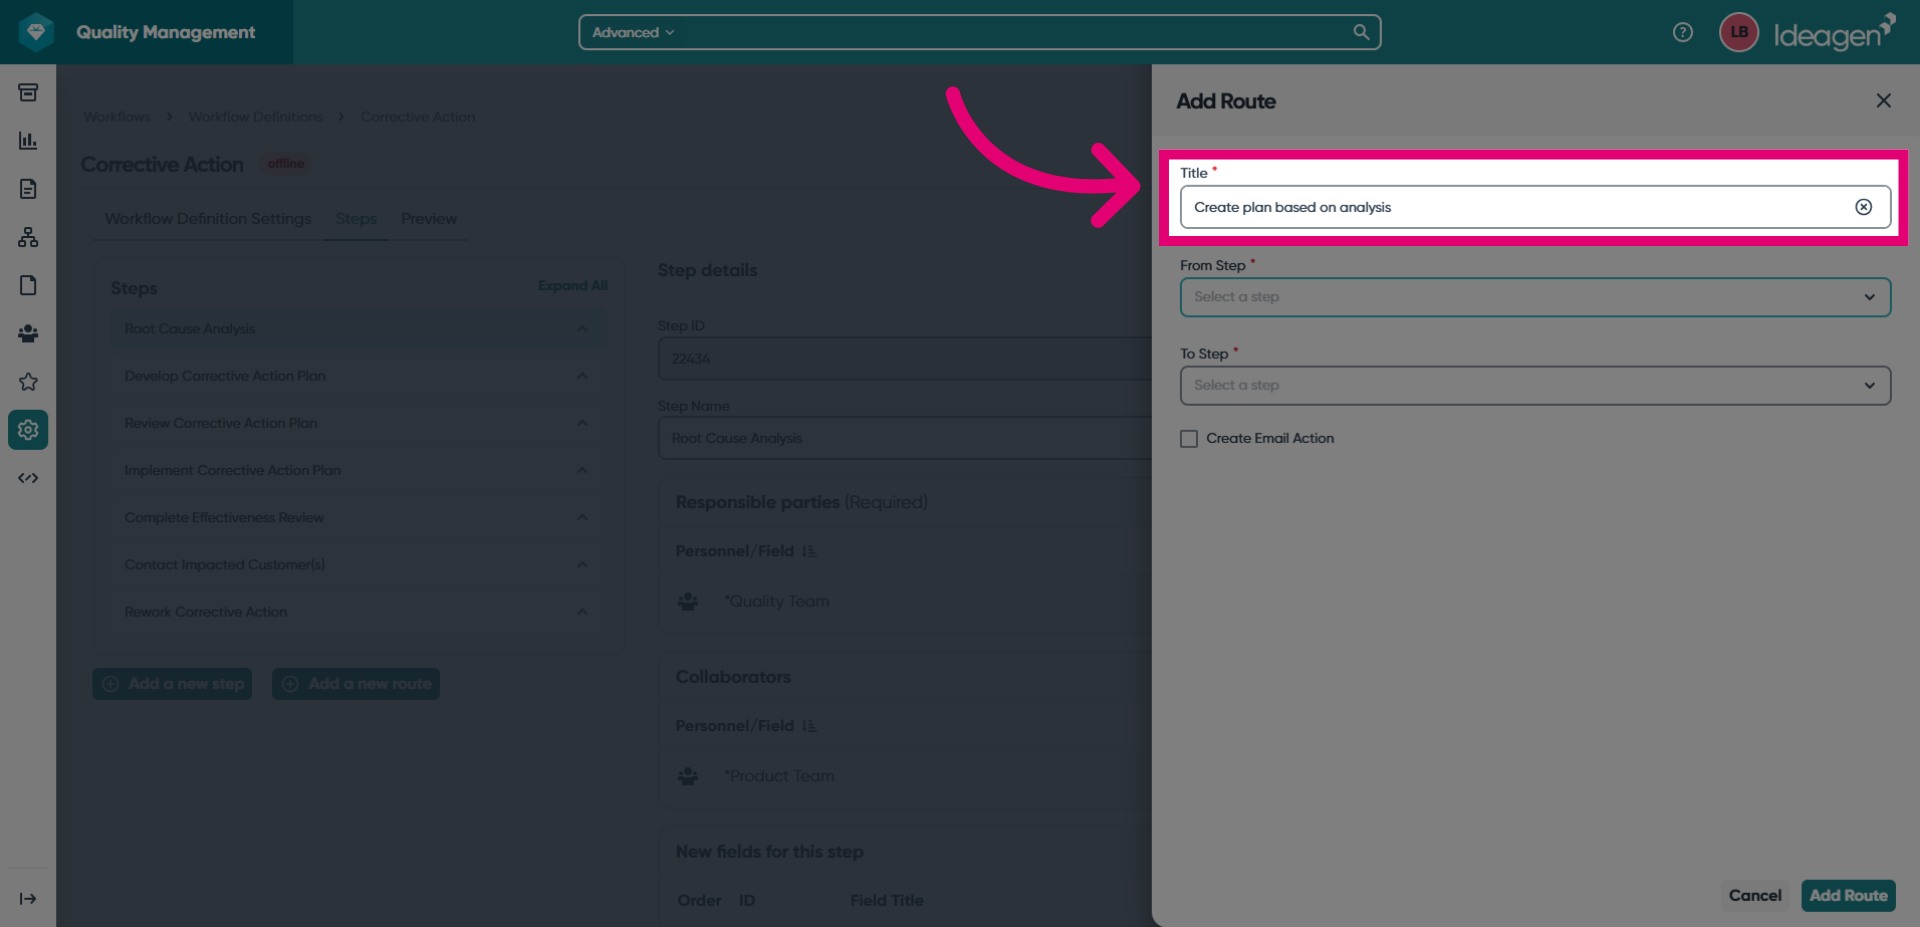
- Give the route a Title.
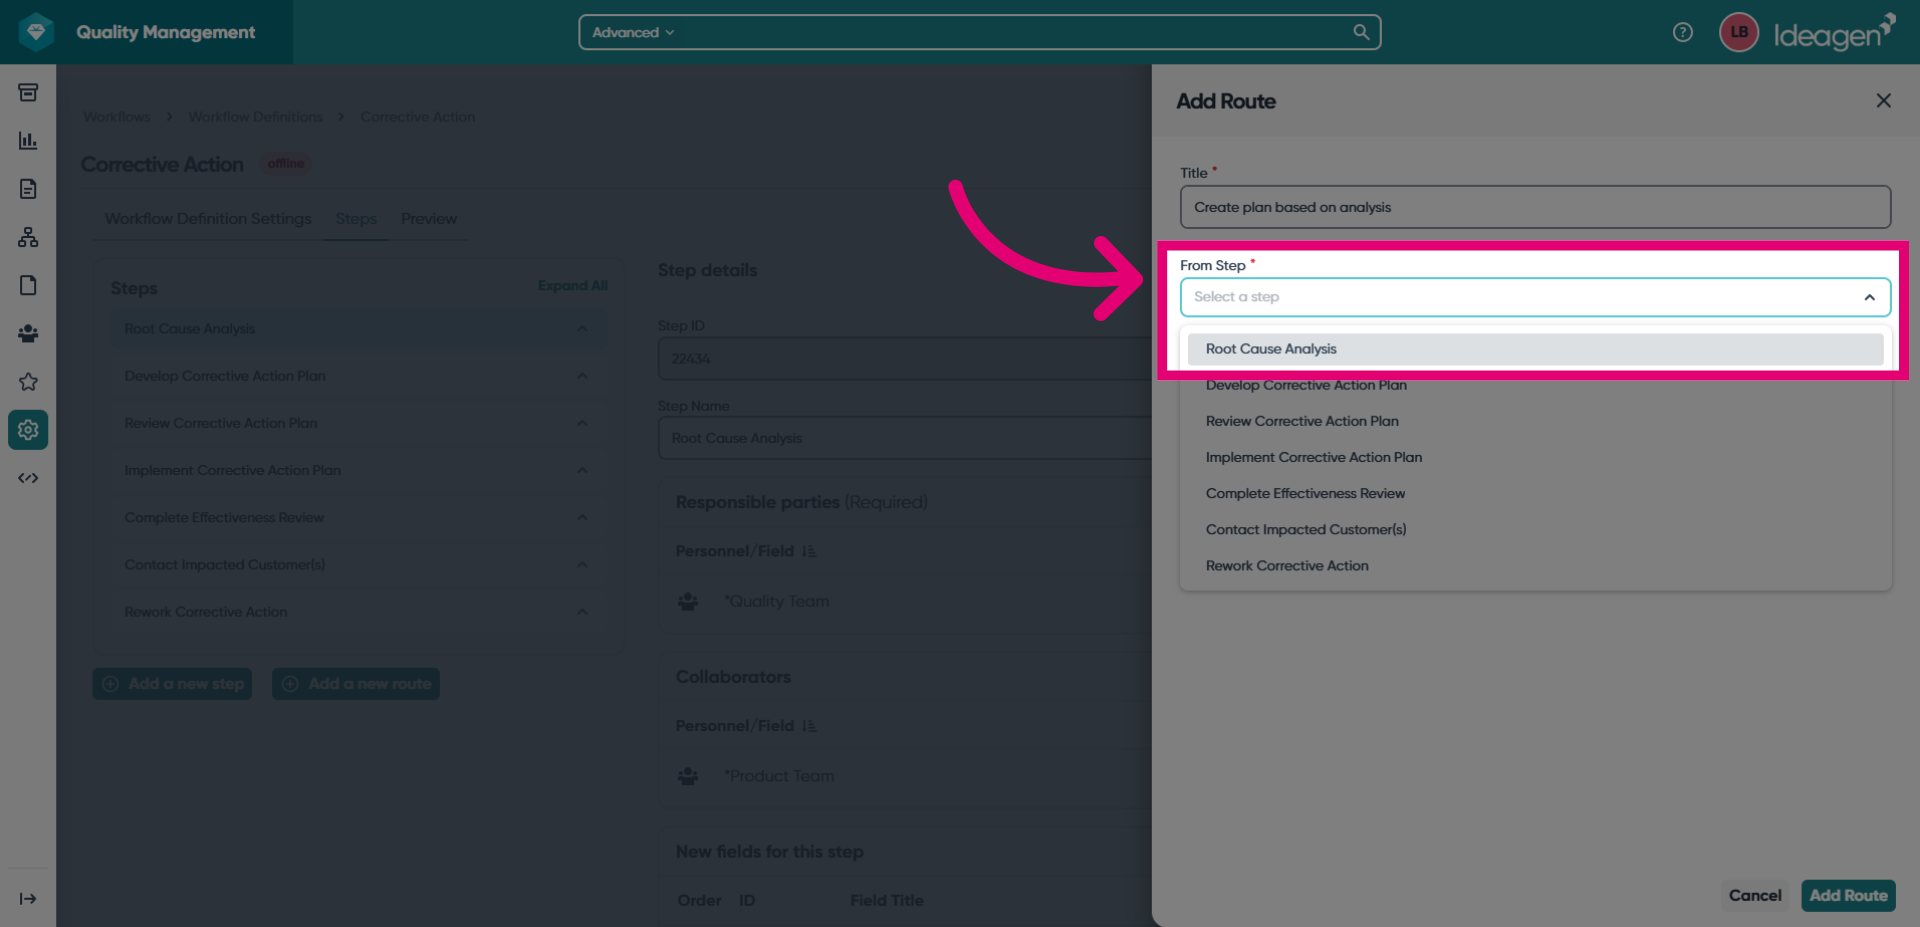
- Set the From Step.
This is the route origin.
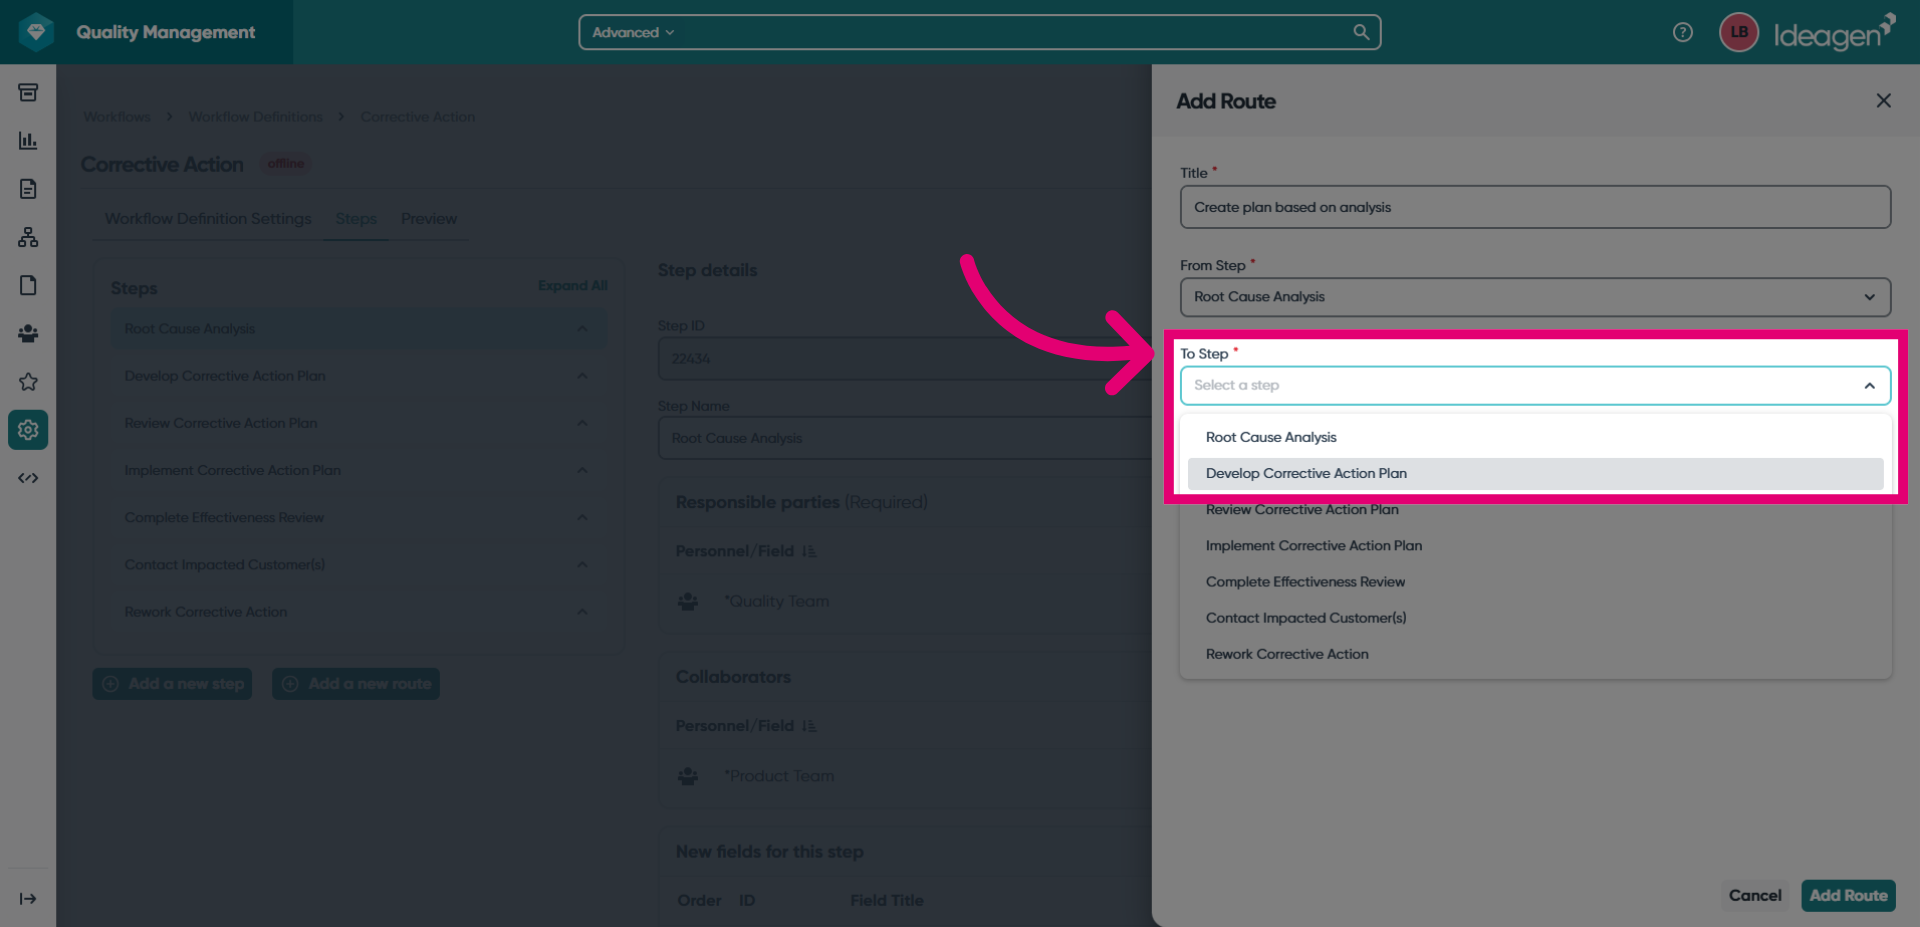
- Set the To Step.
This is the route destination.
- Tick Create Email Action if you'd like the assigned personnel to receive an email action when this route is triggered.
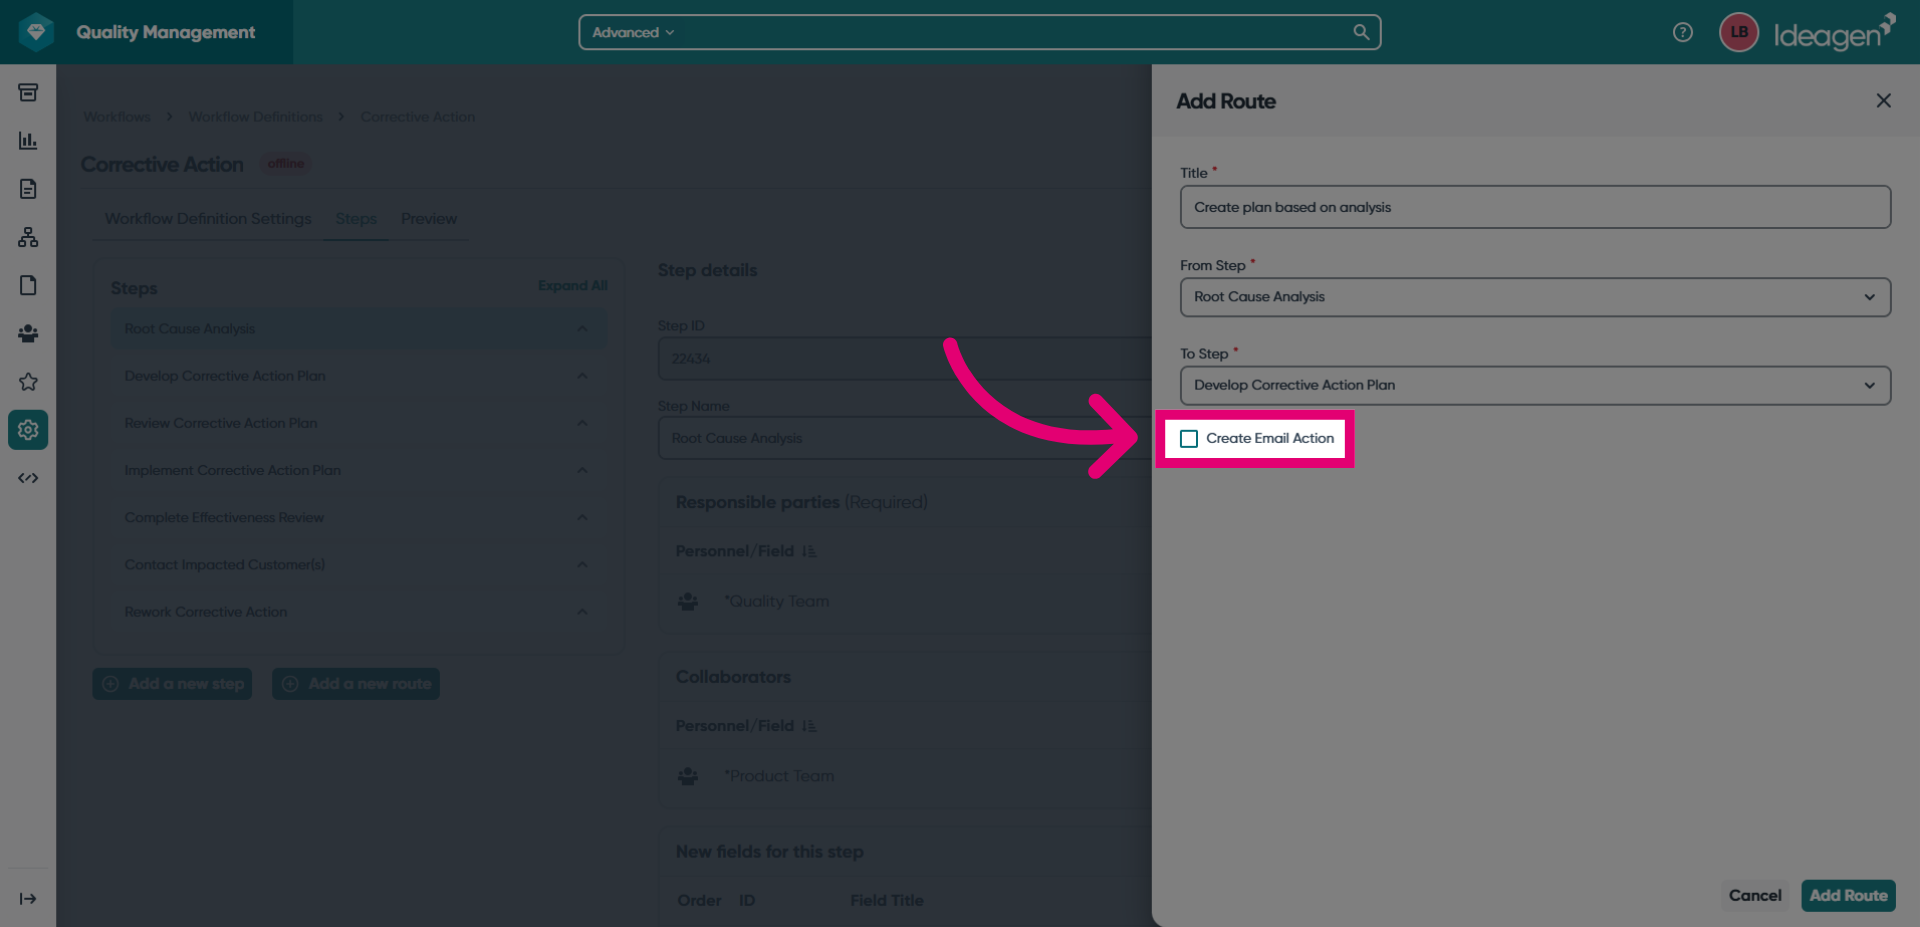
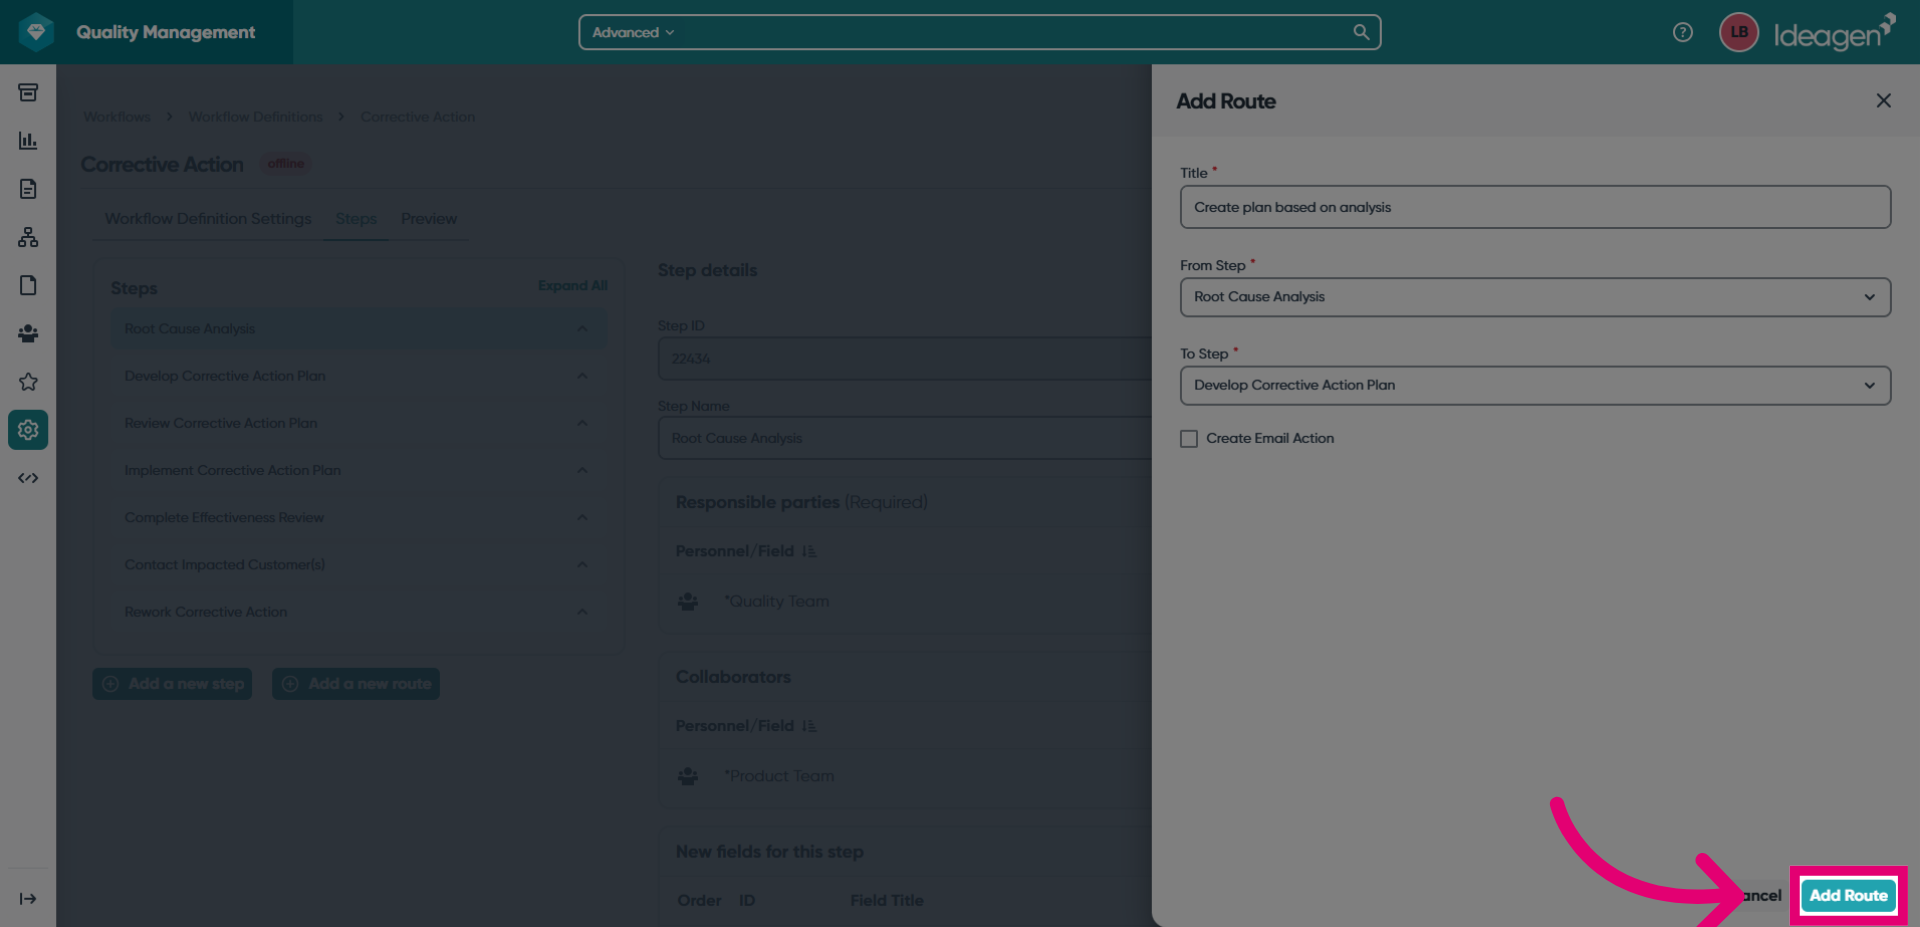
- Click Add Route.
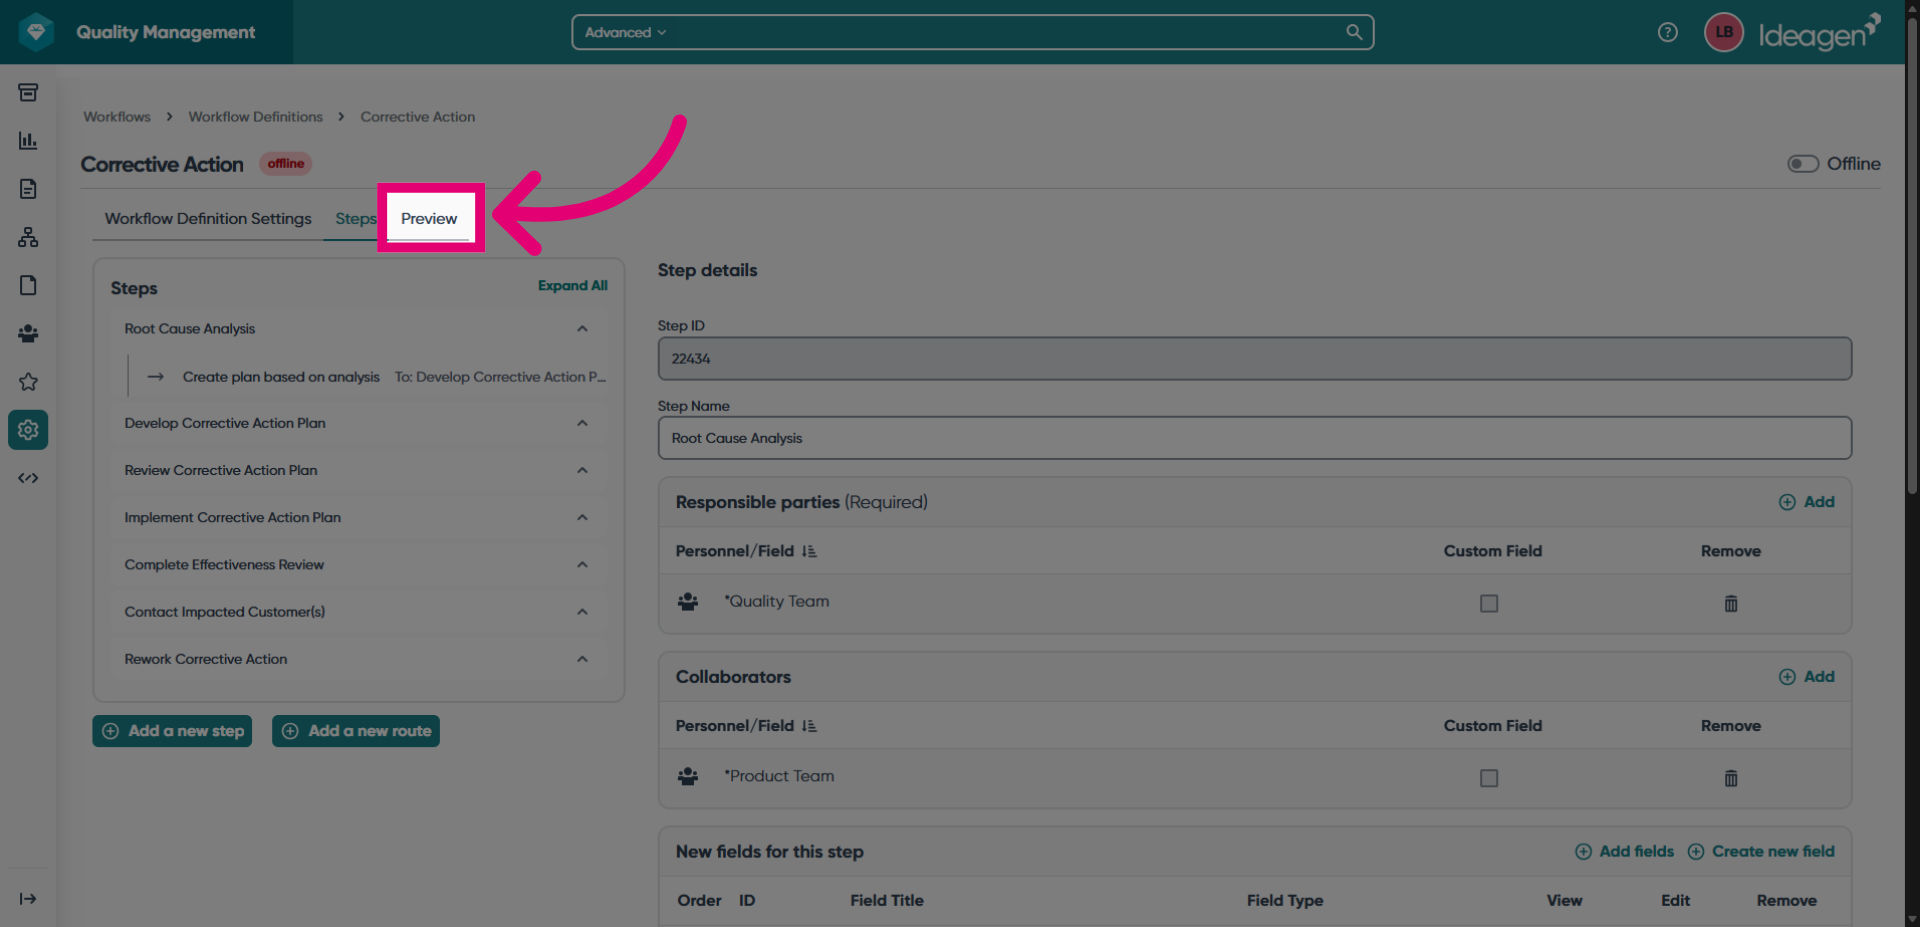
You can preview the routes you've added in the Steps list.
- Repeat these instructions for the remaining routes.
4. Accessing the preview
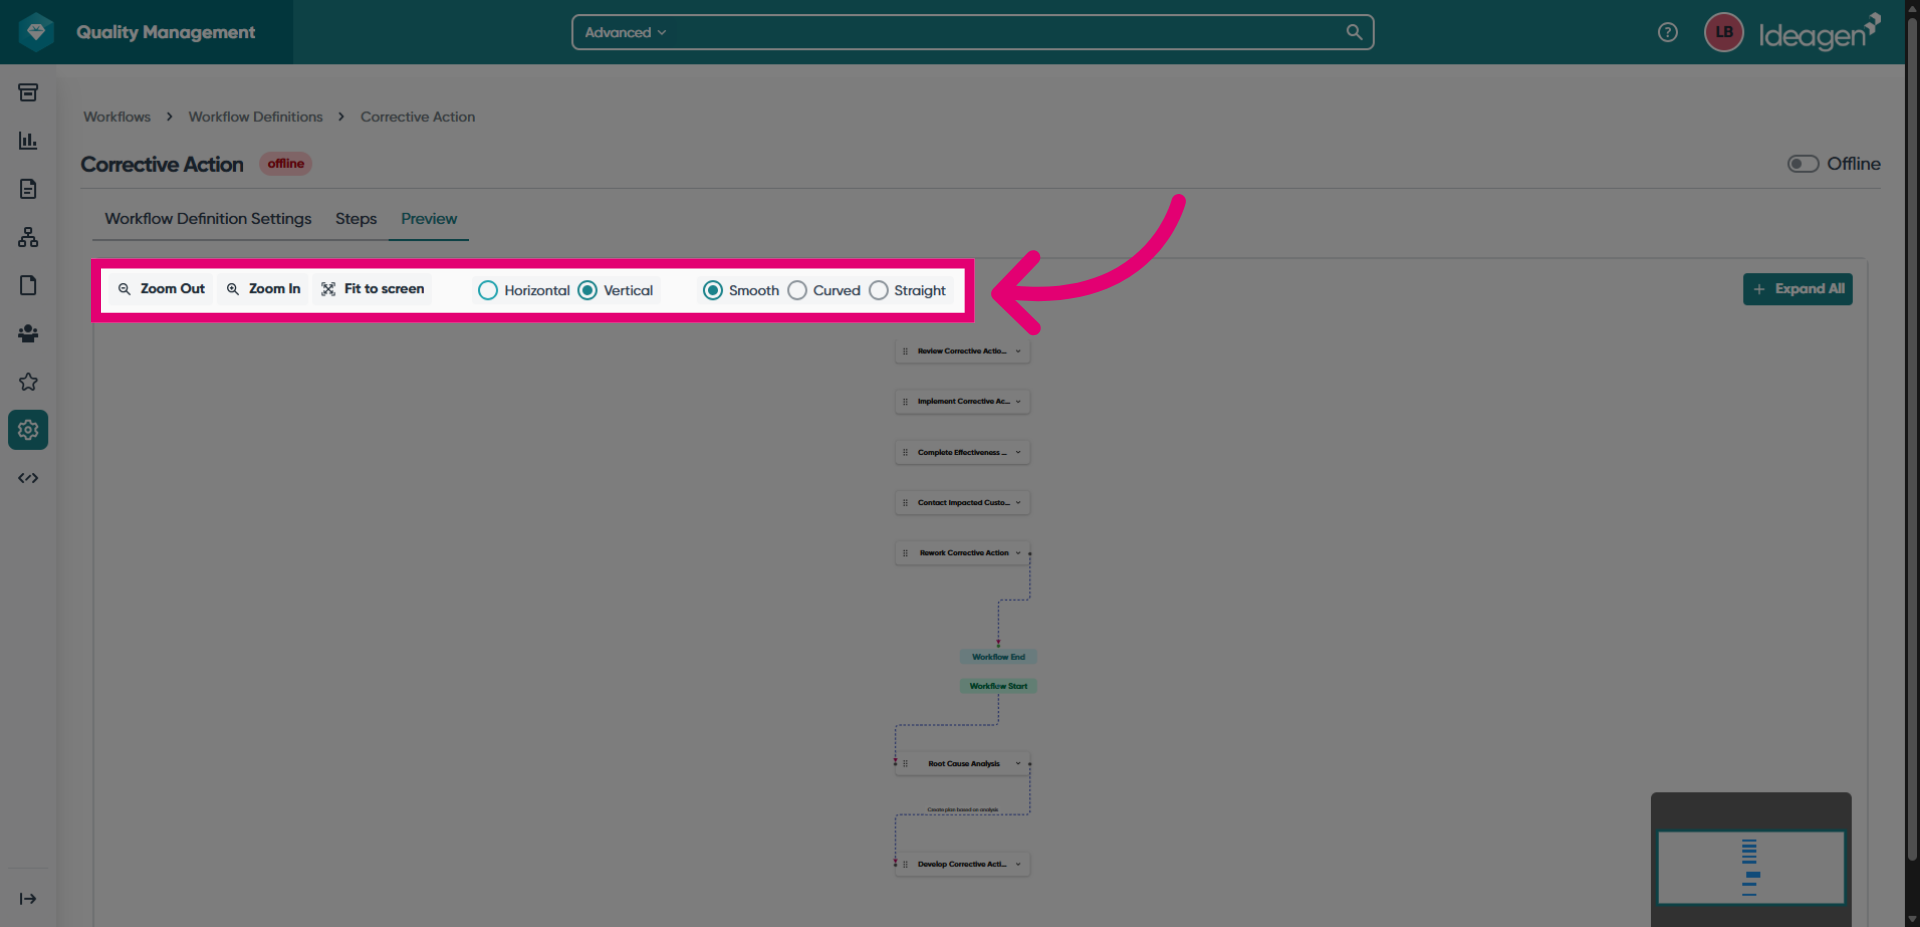
Once you've finished adding steps and connecting routes, switch to the Preview tab.
Here you can view a visualisation of the full workflow, making it easy to identify gaps in routing.
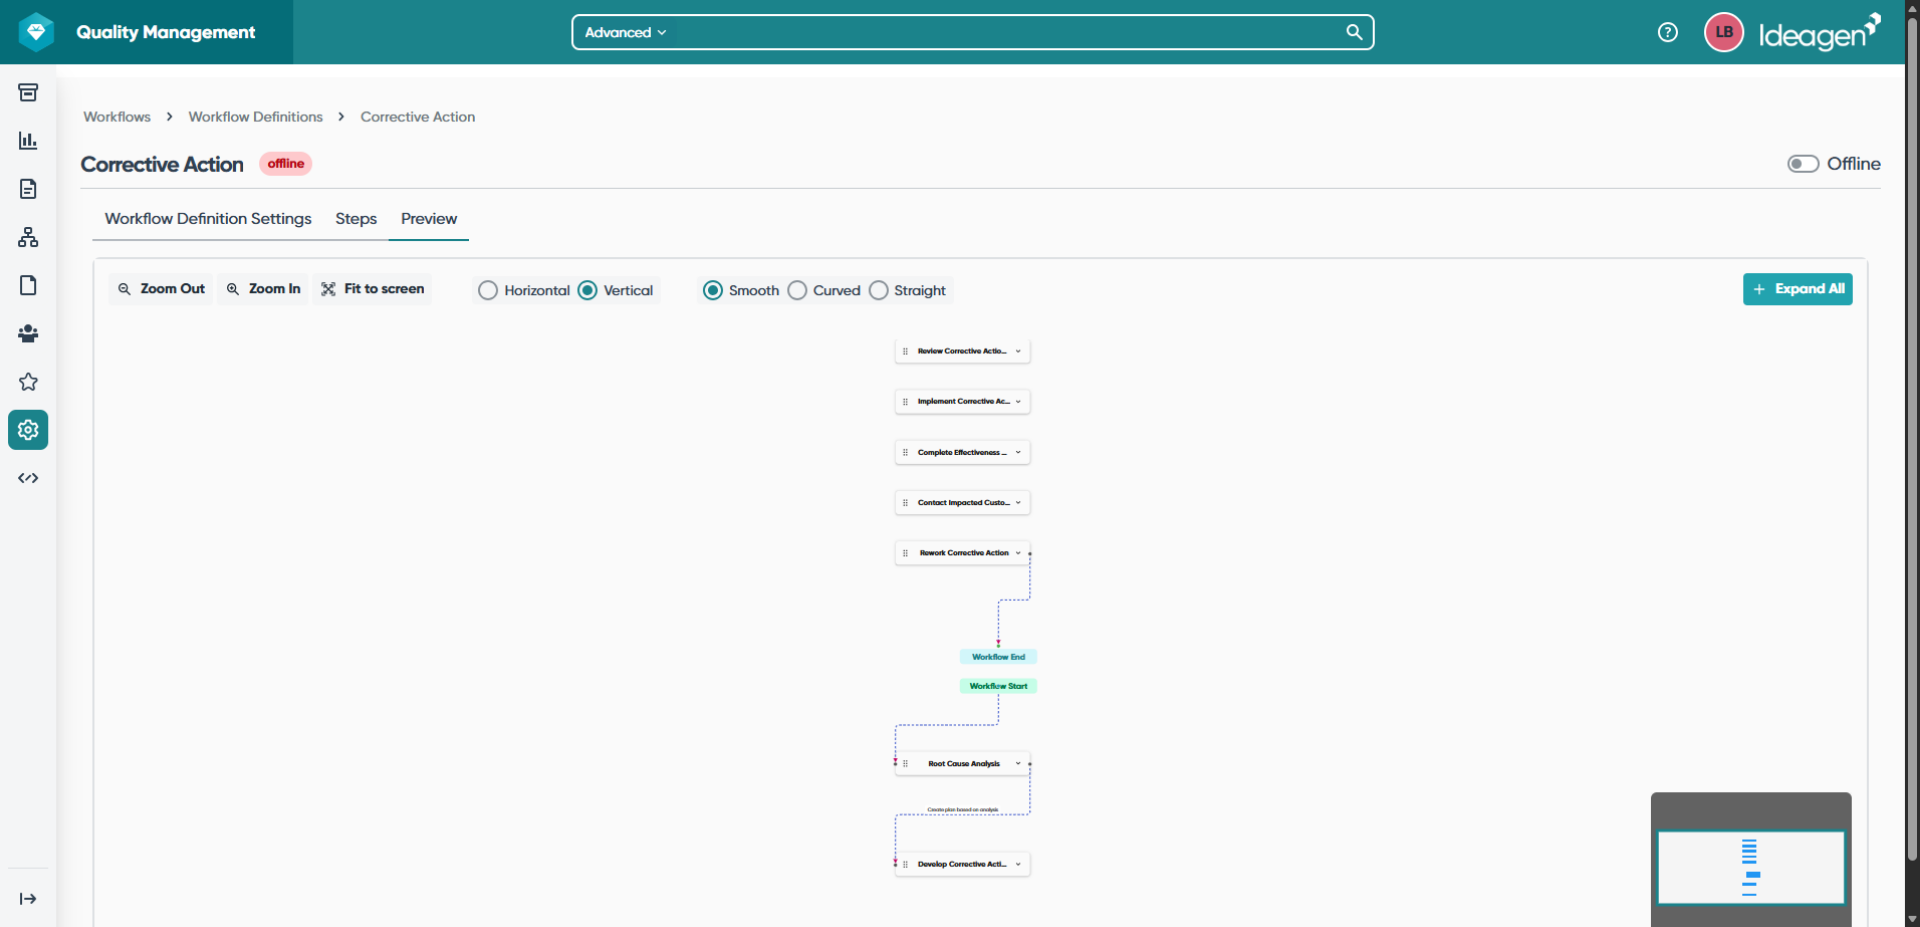
You can use the available layout options to create a visualisation that works best for you.