New article
Recently updated
Configuring Single Sign-On (SSO) providers

Who is this article for?
Administrators responsible for managing the system.
Administration module access is required.
To be able to enable Single Sign-On (SSO) as an authentication method on your system, you must first register with the identity provider. When doing so, make sure that all accounts you add use the same email address as the one associated with their Quality Management accounts.
This article takes you through the process of registering with the supported identity providers. Before you start, access the service provider information within Quality Management as you will need to refer to it throughout.
This article is specifically for customers who are not integrated with Mazlan Home, including on-premise customers who do not integrate with Mazlan Home
For customers whose users access Ideagen Quality Management Core through Mazlan Home and need to configure their Identity Provider (IdP) for the Mazlan Home and Ideagen Quality Management Core SSO integration, refer to the Help article to configure SSO with Mazlan Home.
1. Configuring Entra ID
Entra ID (formerly Azure) is an access management solution offered by Microsoft.
To configure Entra ID:
- Access the Microsoft Azure portal.
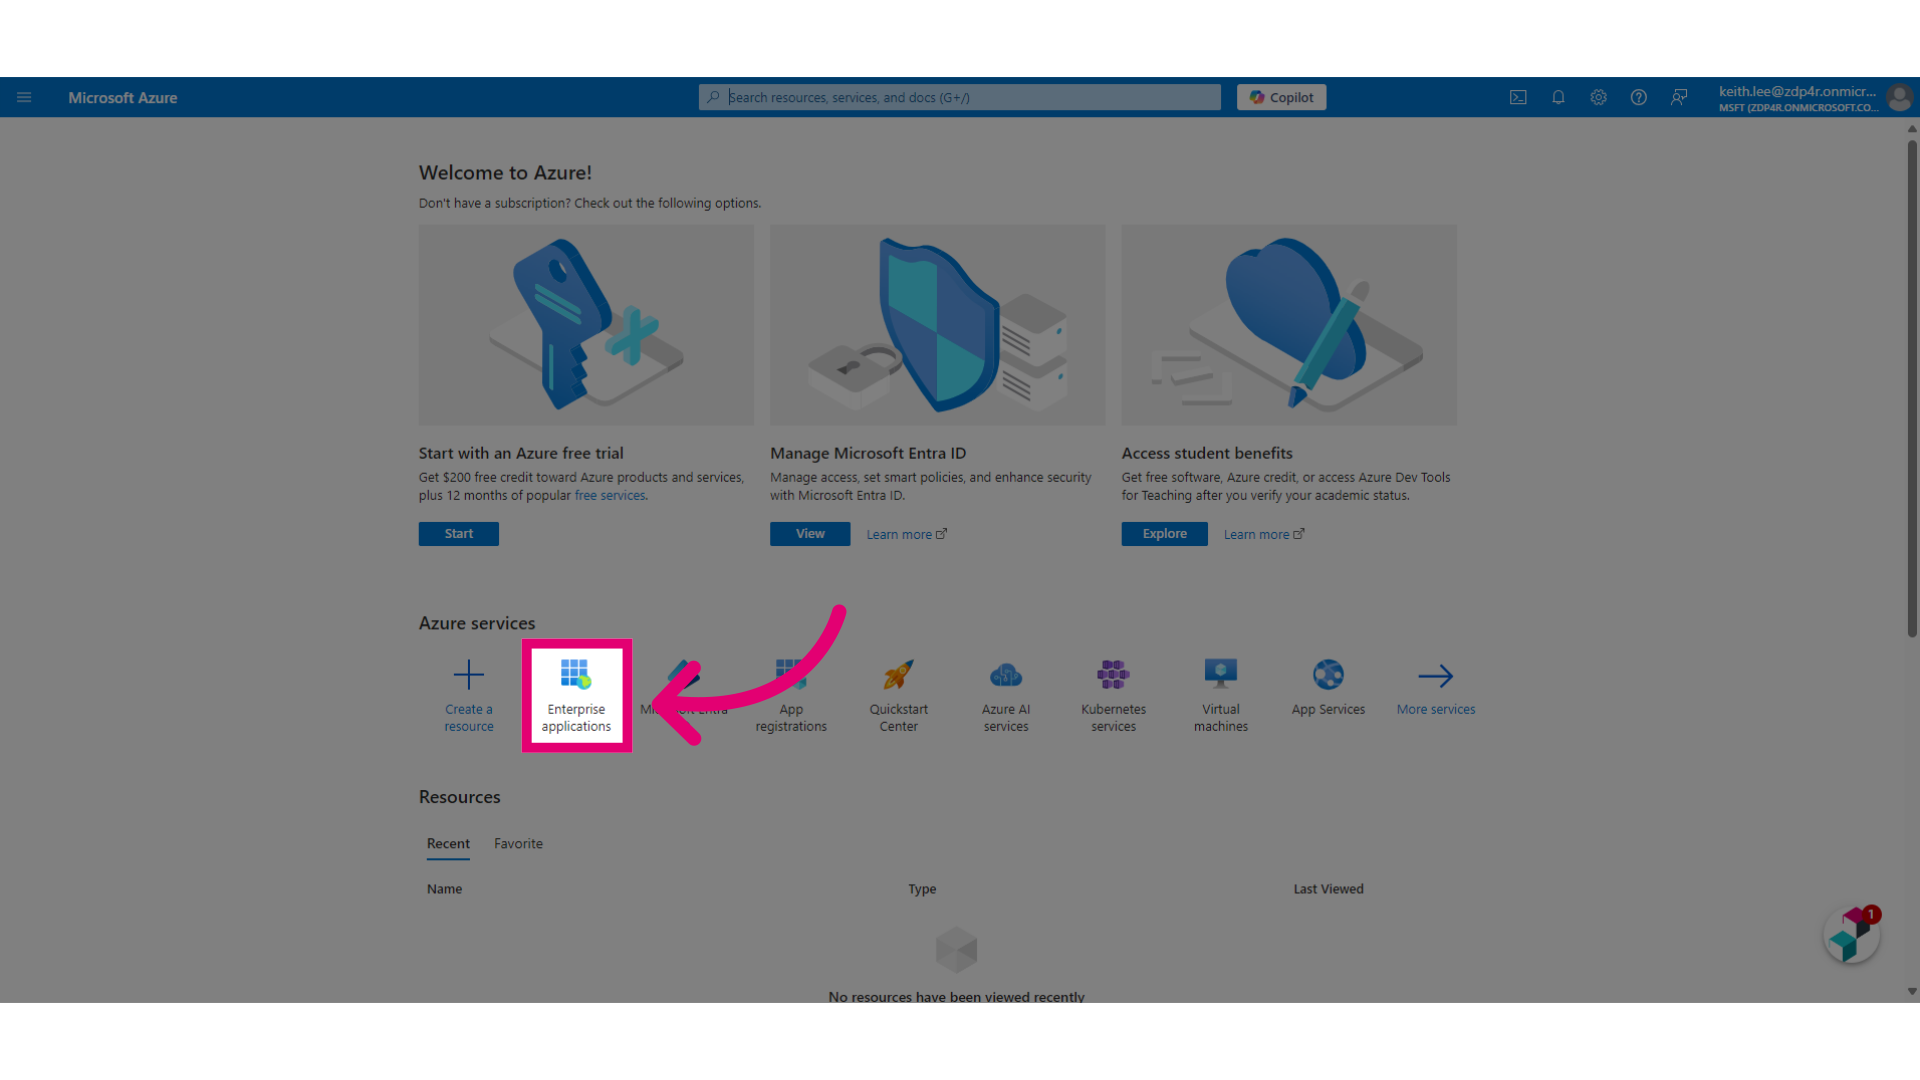
- Select Enterprise applications.
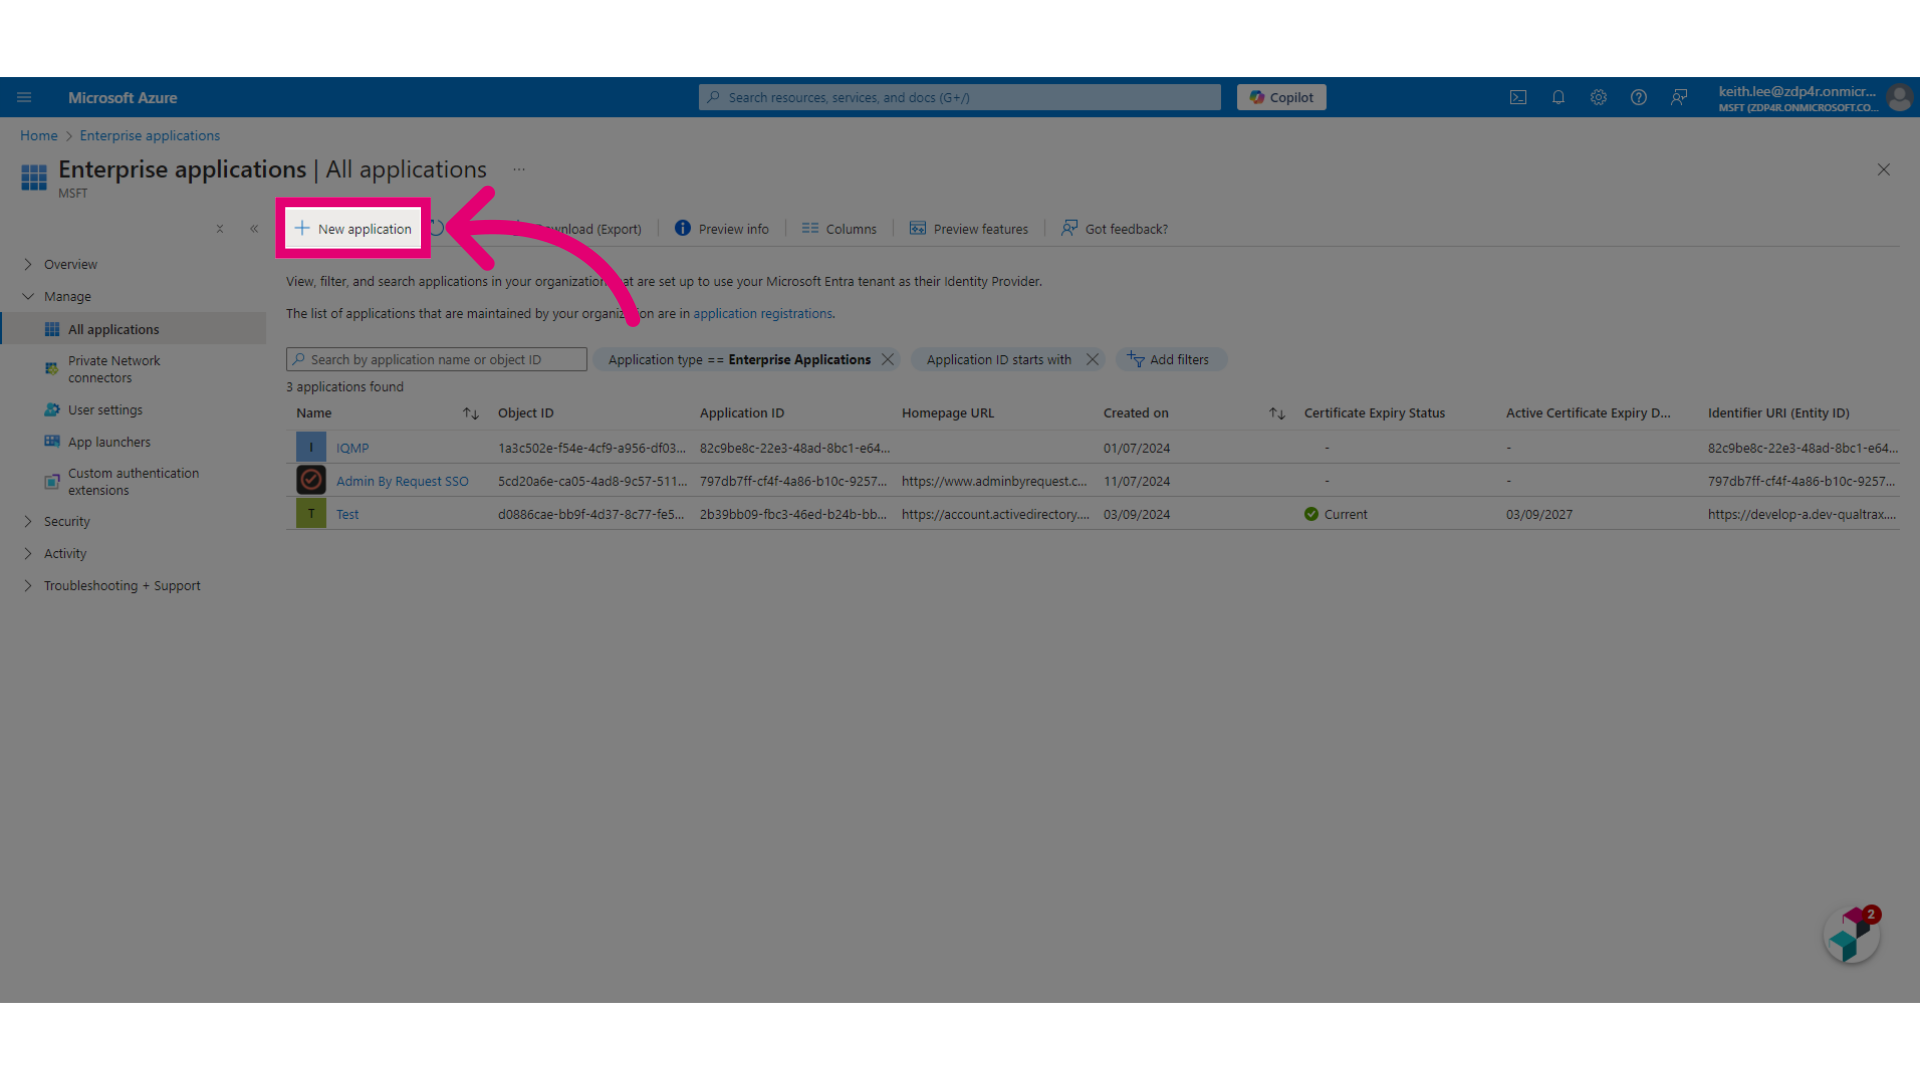
- Click New application.
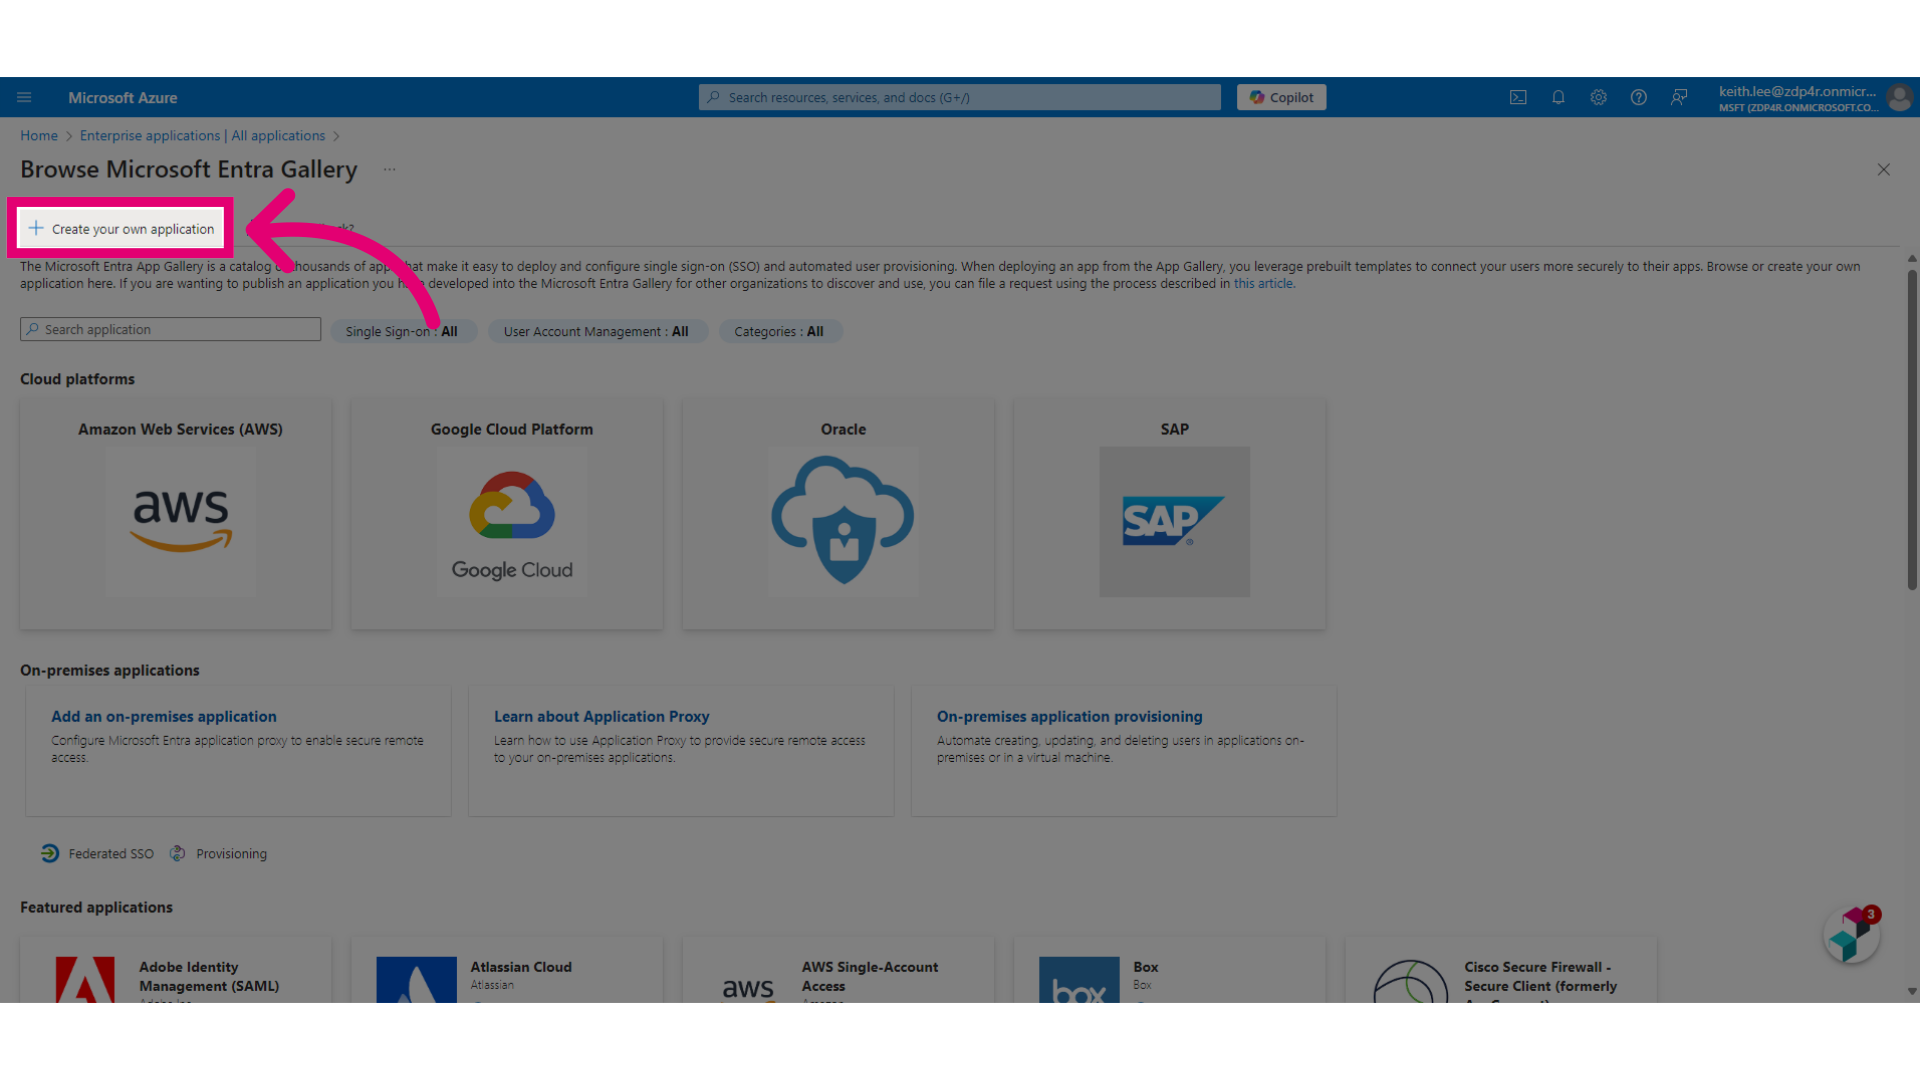
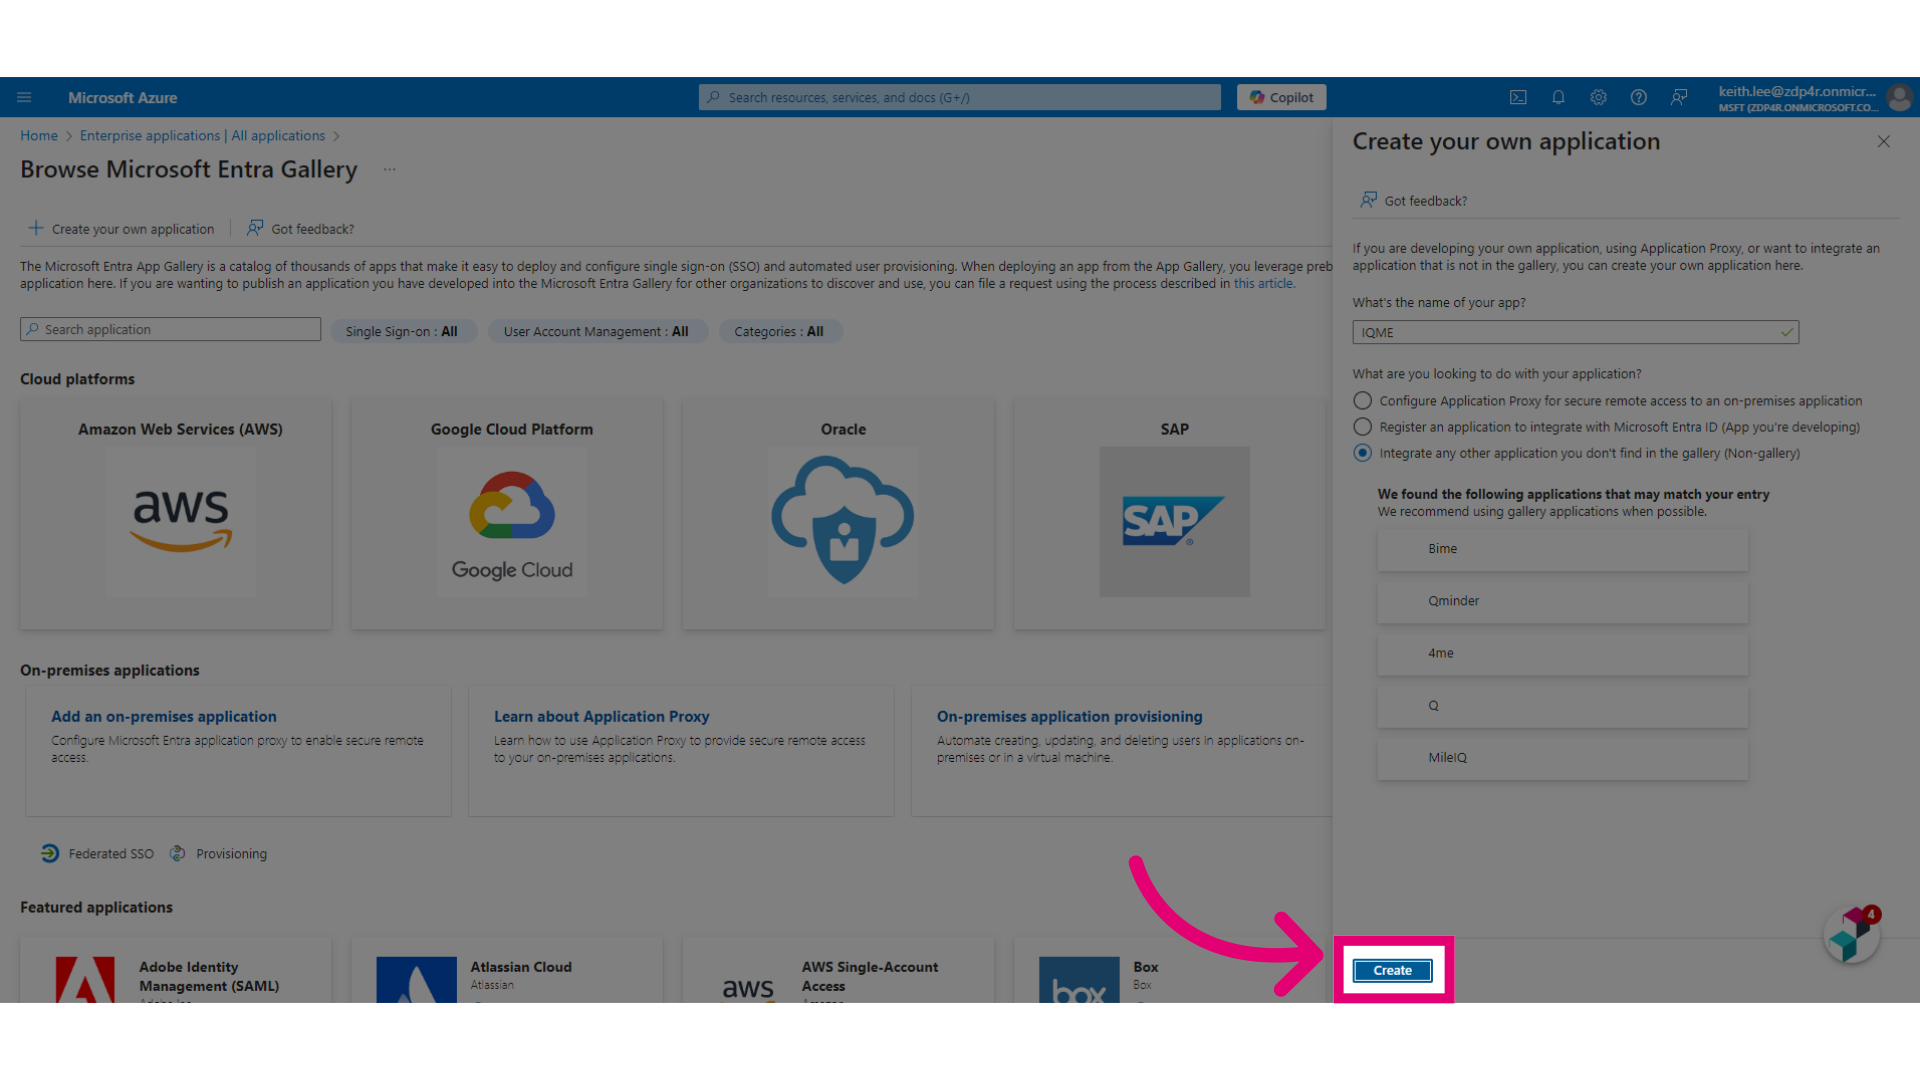
- Click Create your own application.
- Enter Ideagen Quality Management (Core) as the name.
Leave the other options as they are. - Click Create.
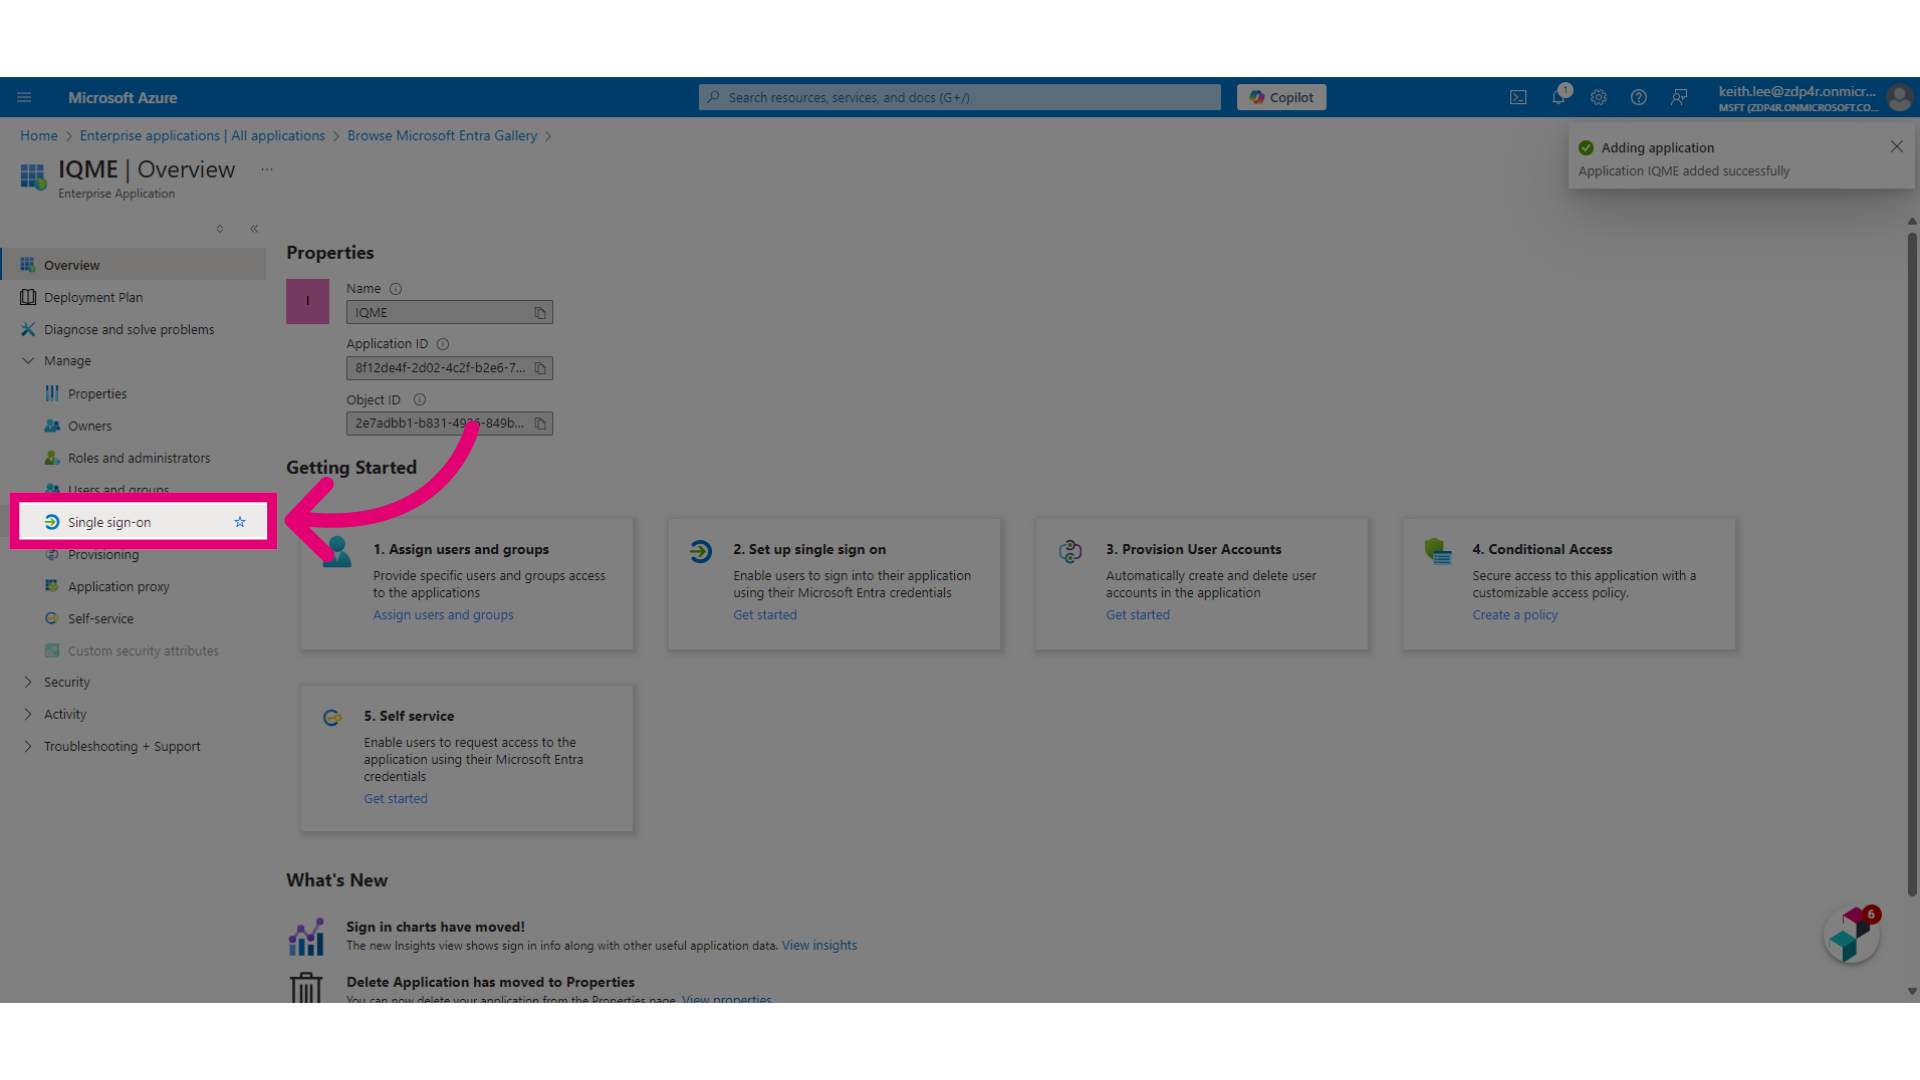
You will be taken to an overview page for the app.
- Access Single sign-on settings.
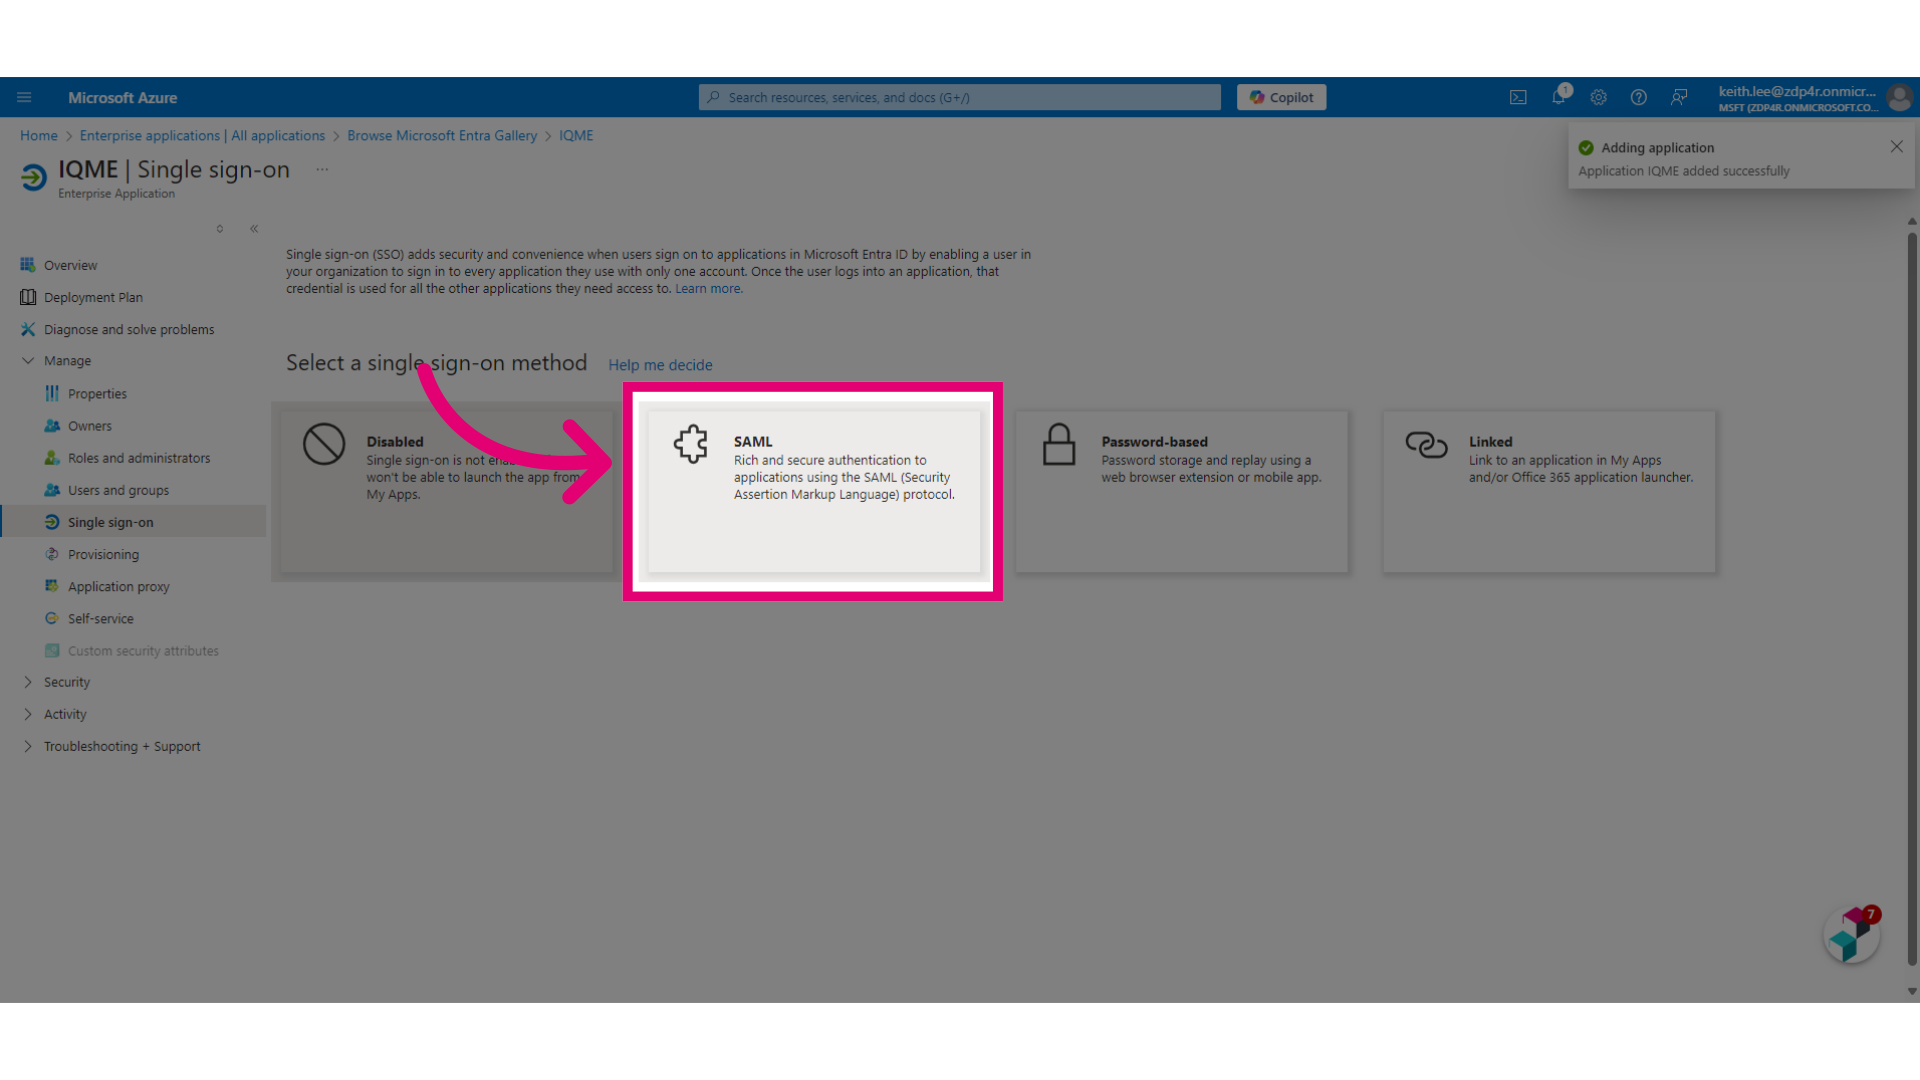
- Click the SAML card.
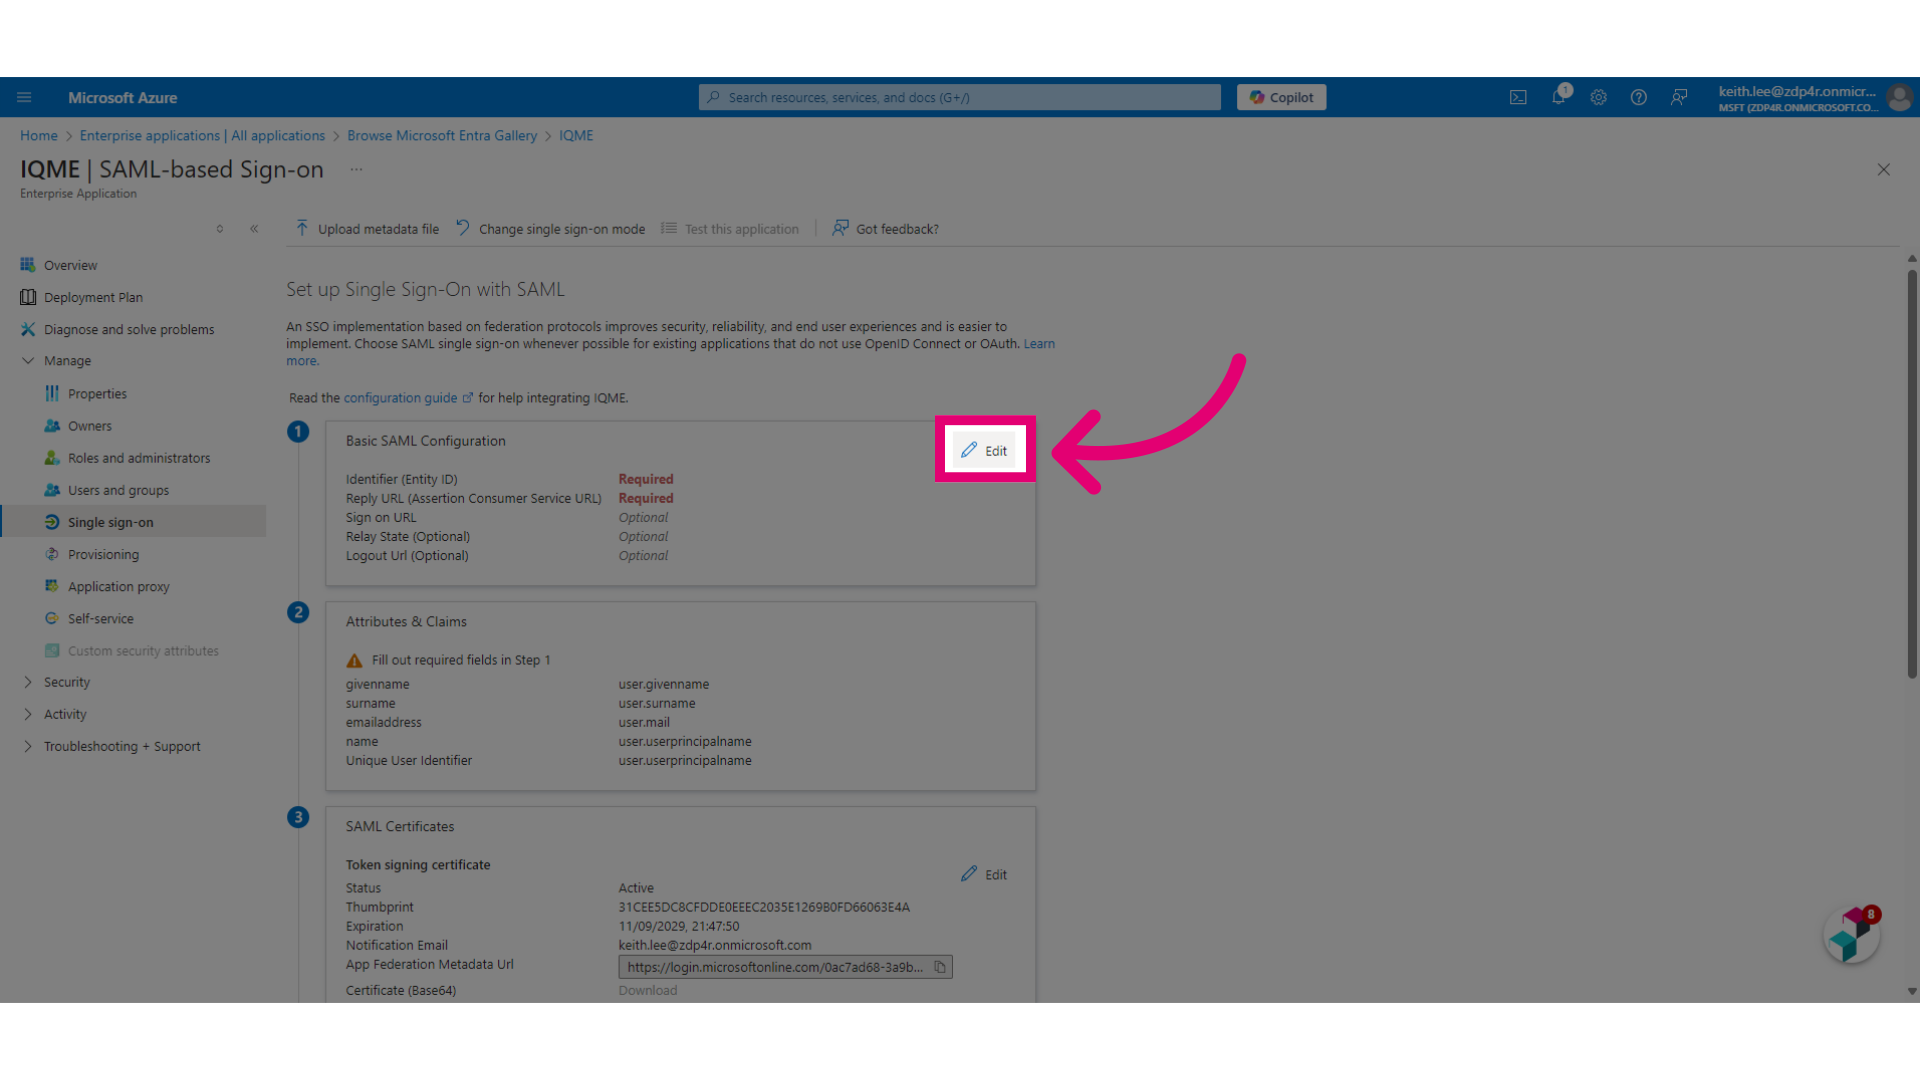
- Click Edit (Basic SAML configuration).
- Open Quality Management in a separate tab.
- Access the Administration module.
- Select System Settings.
- Switch to the Passwords tab.
- Copy the Identifier field.
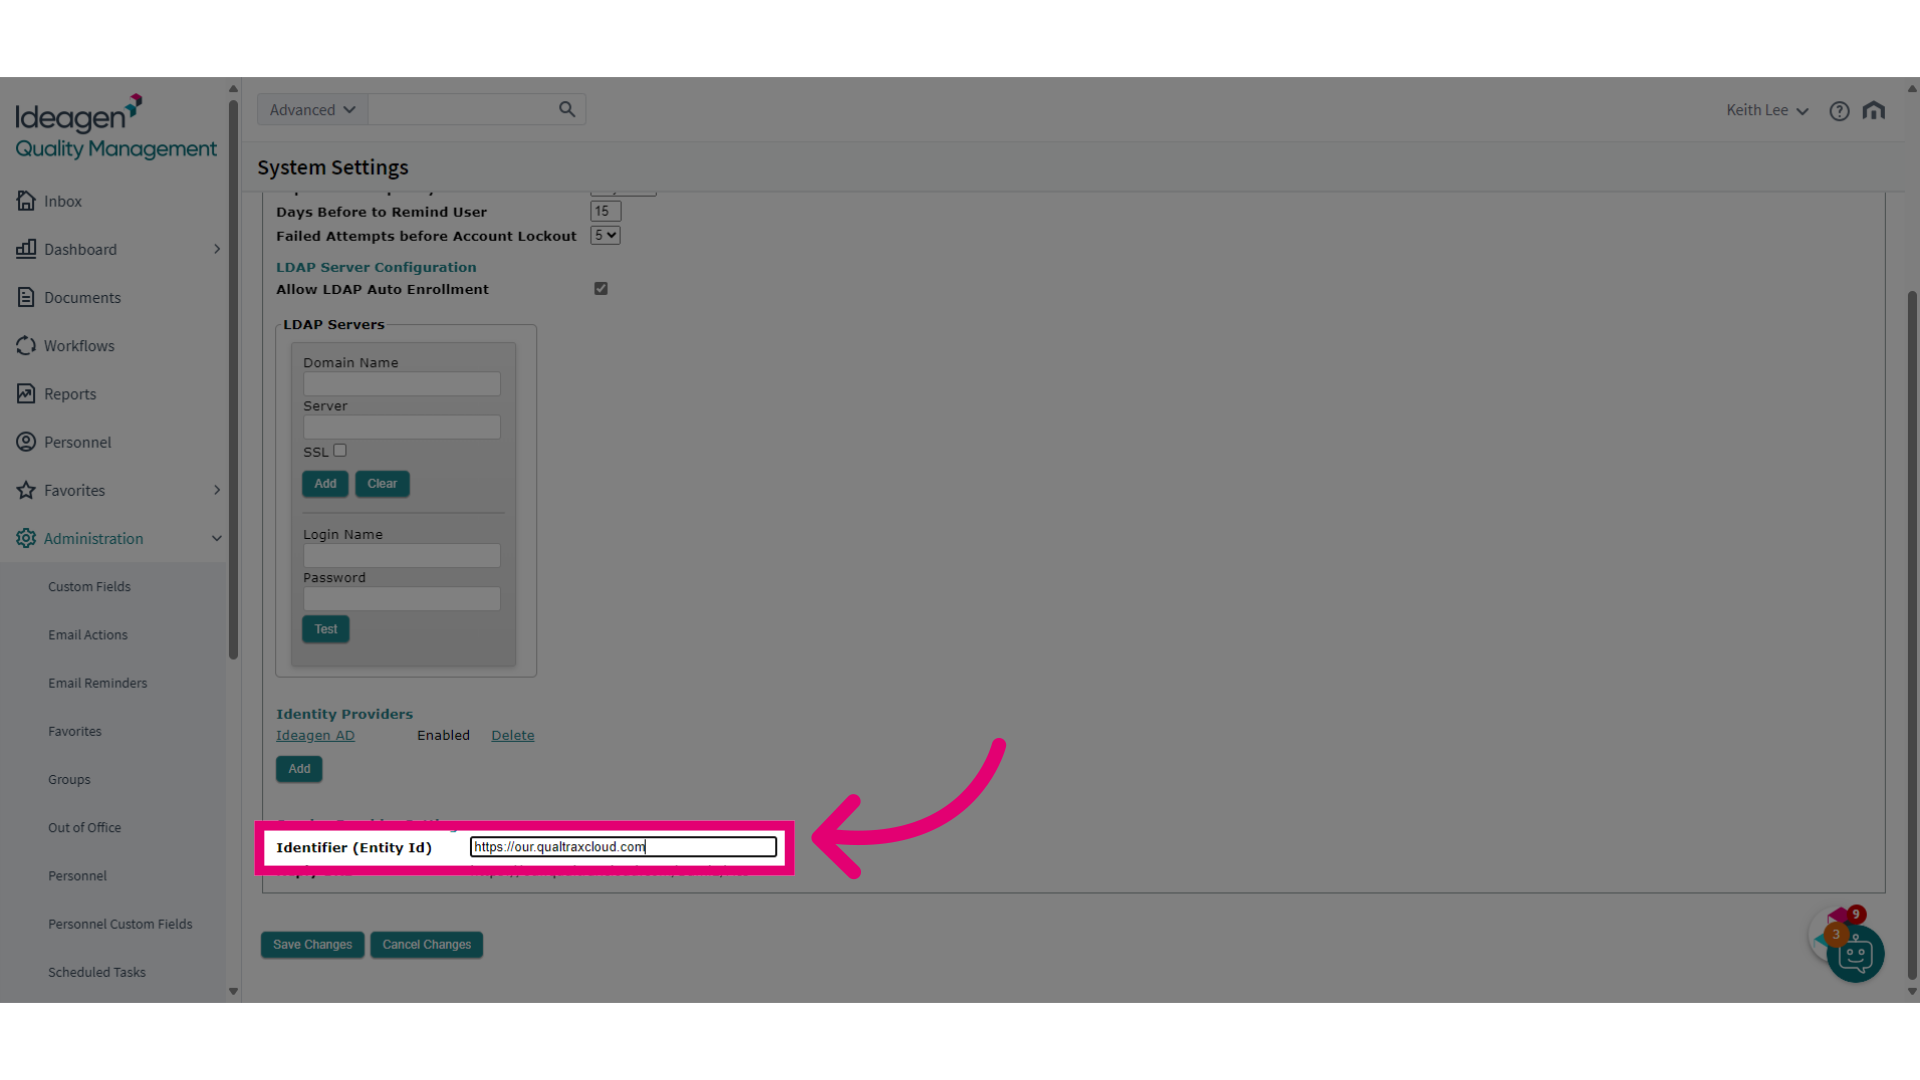
- Return to the Azure portal.
- Click Add identifier.
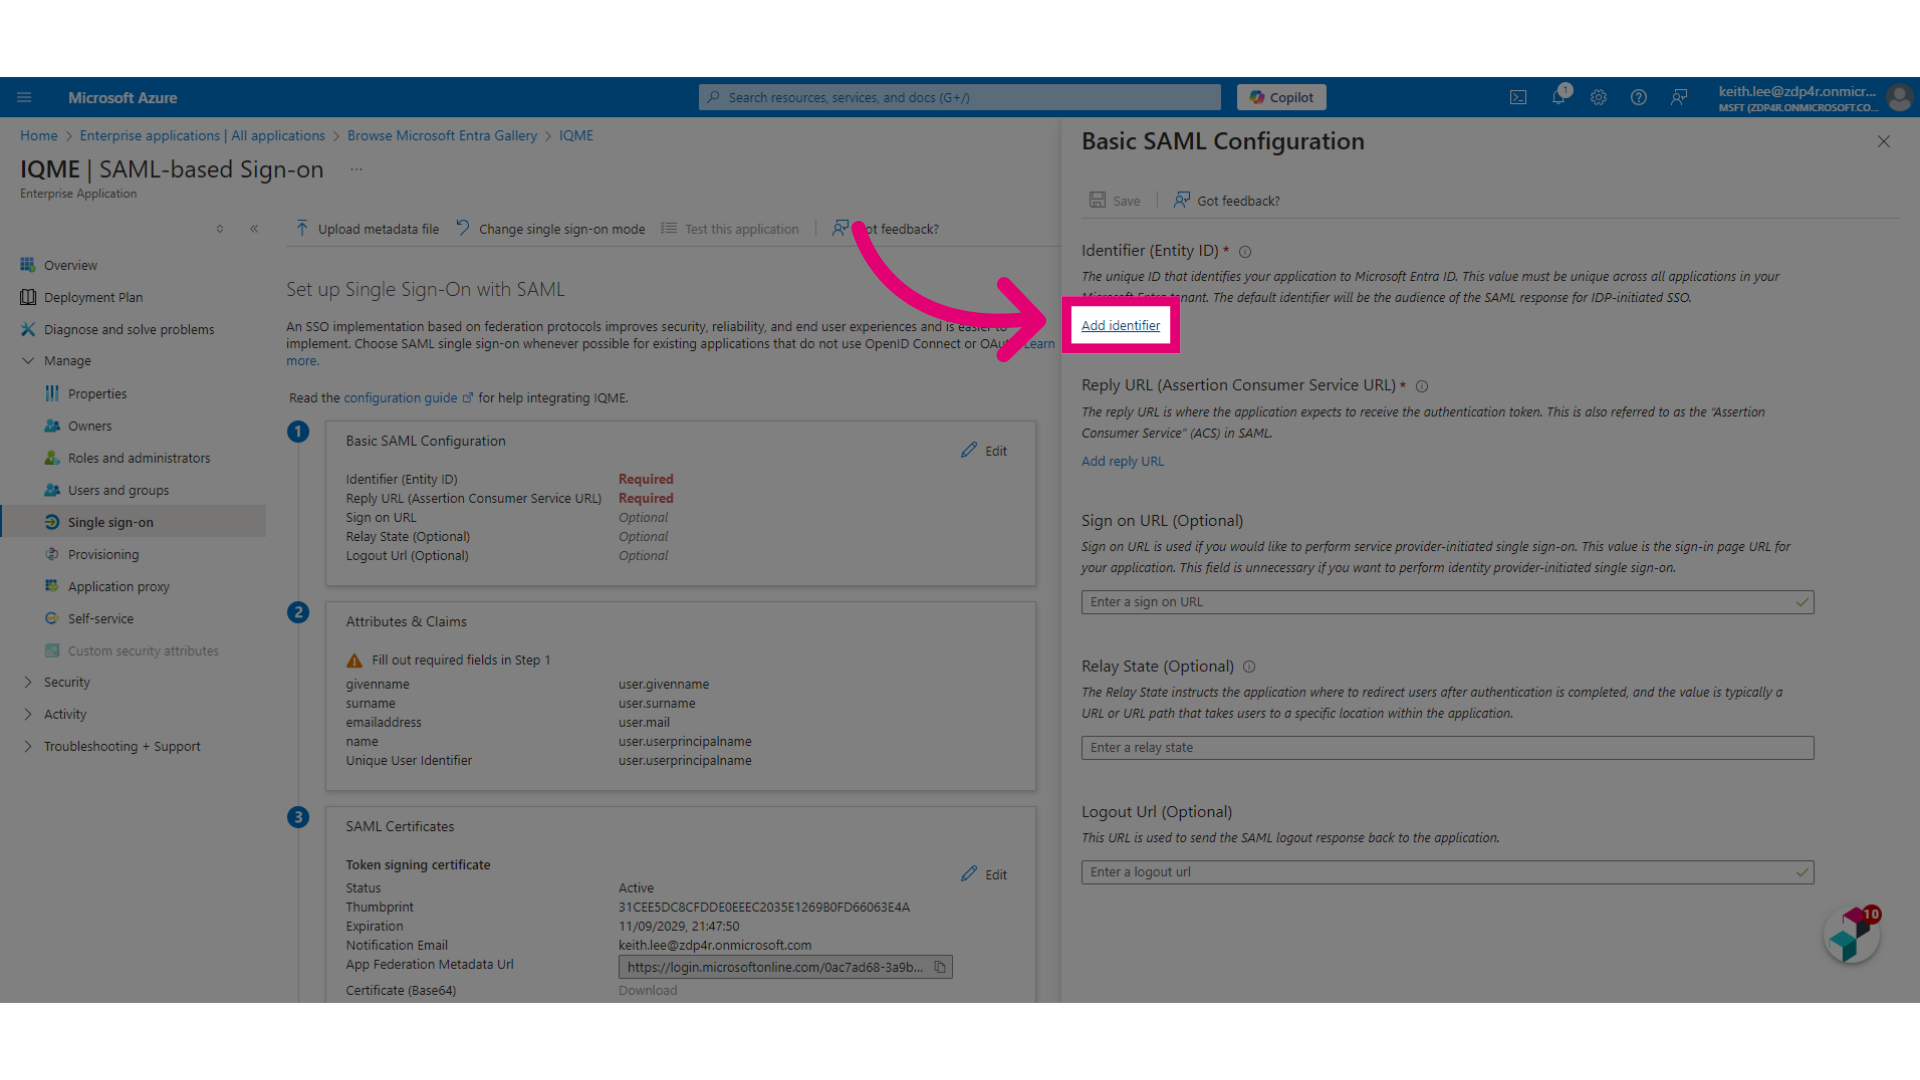
- Paste the copied identifier.
- Copy the Reply URL.
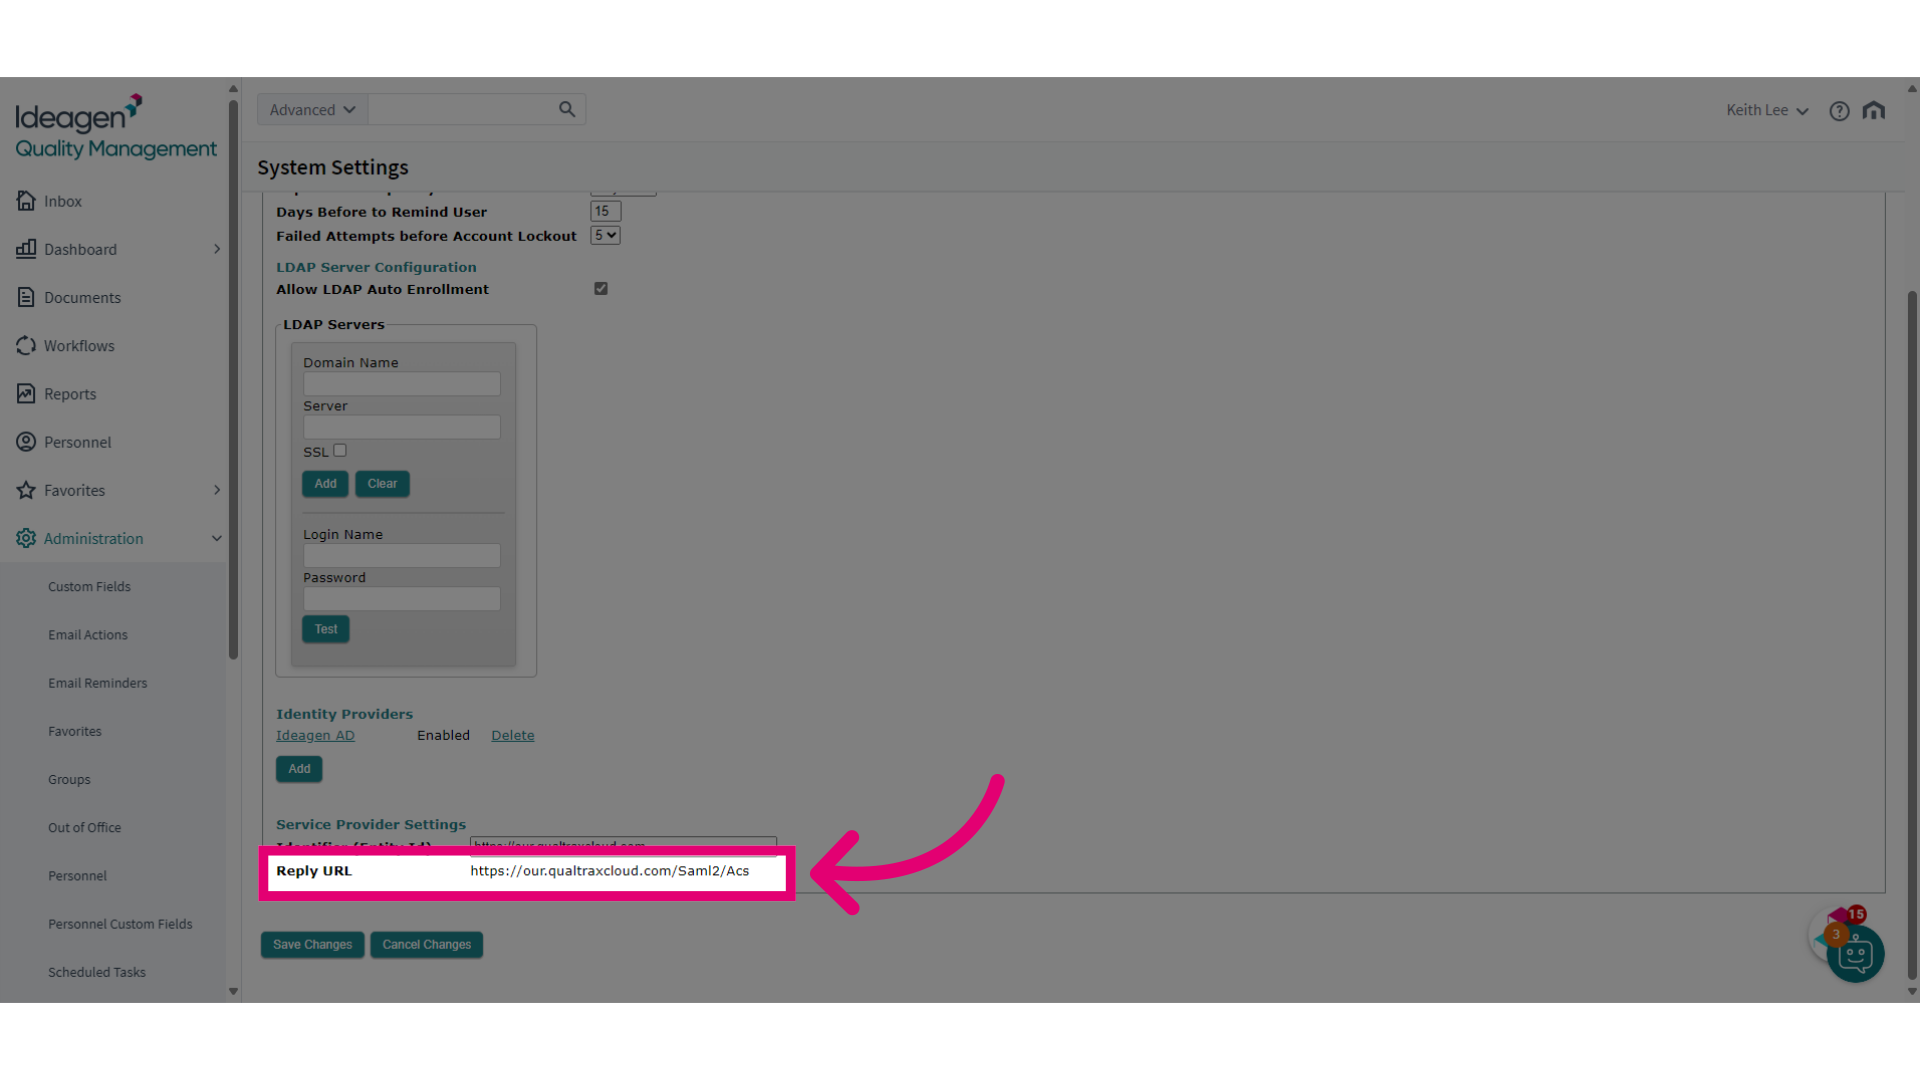
- Click Add reply URL.
- Paste the copied URL.
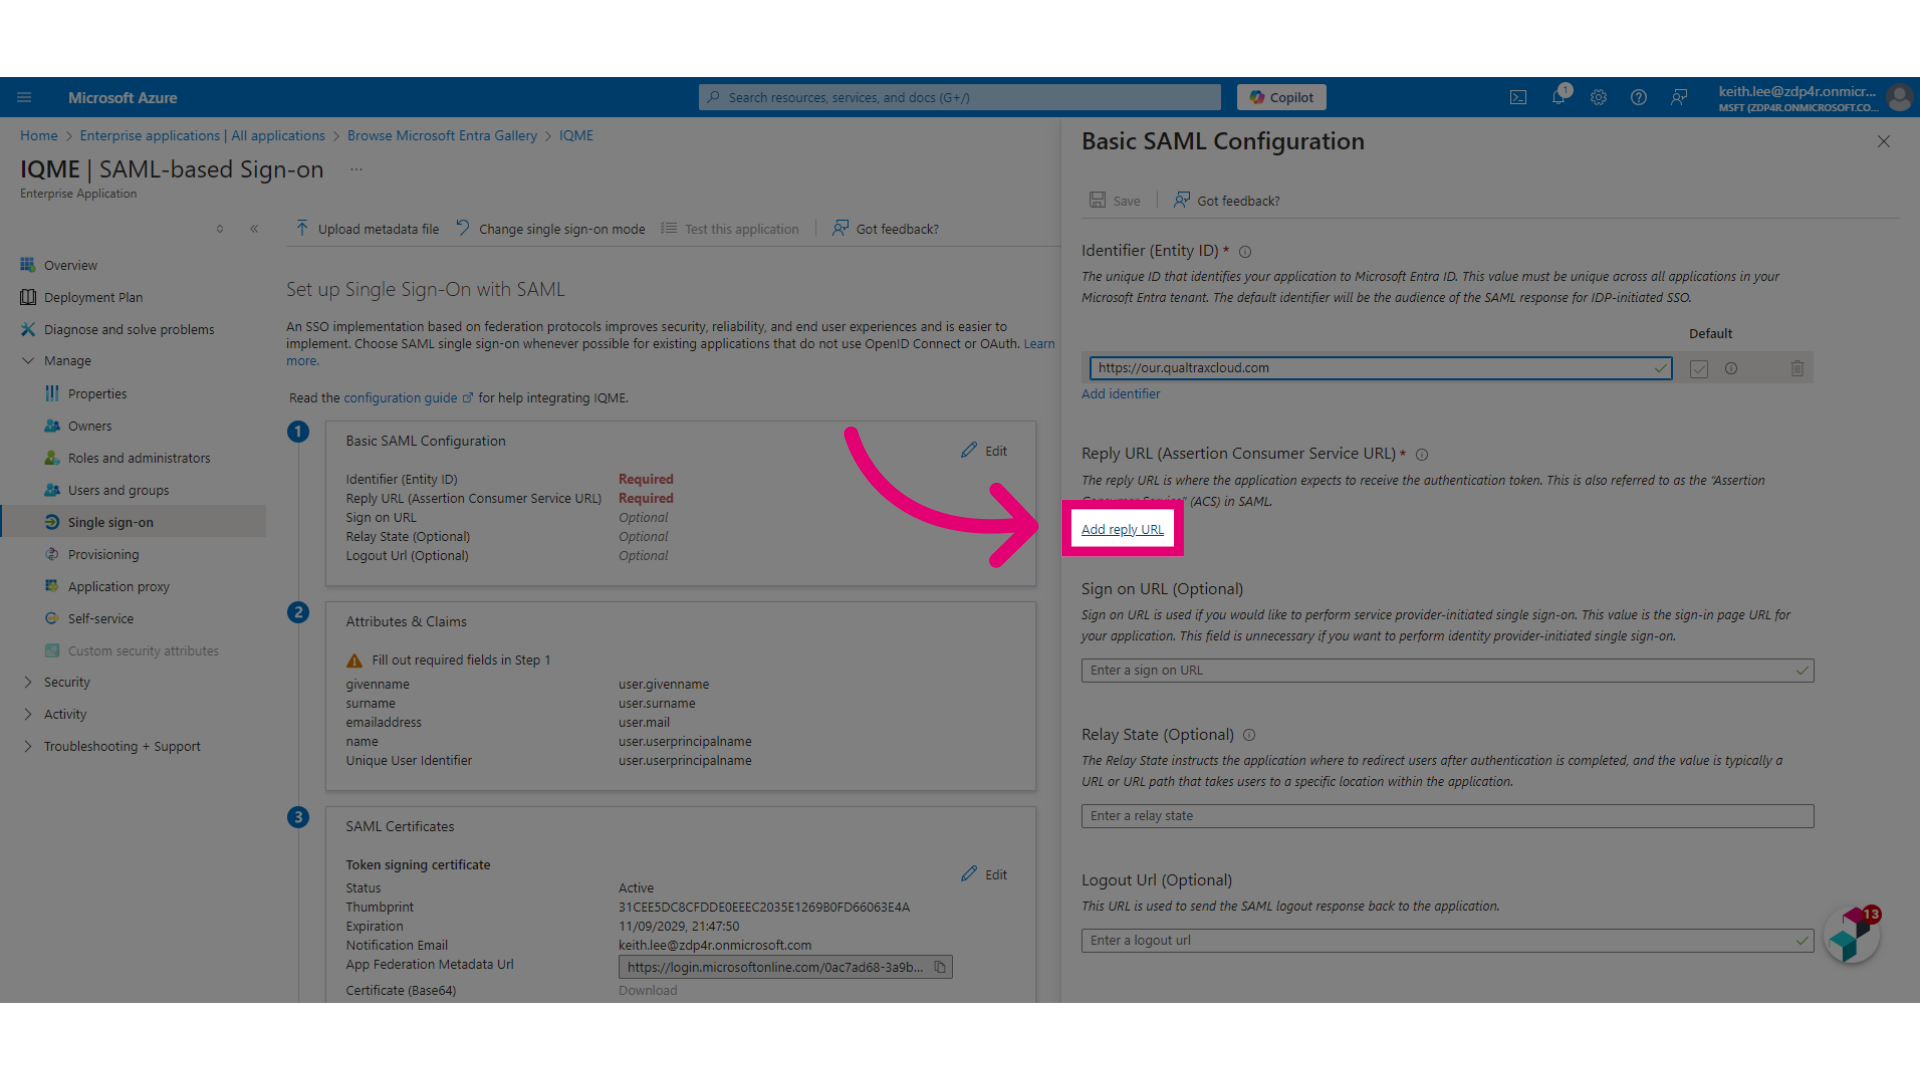
- Click Save.
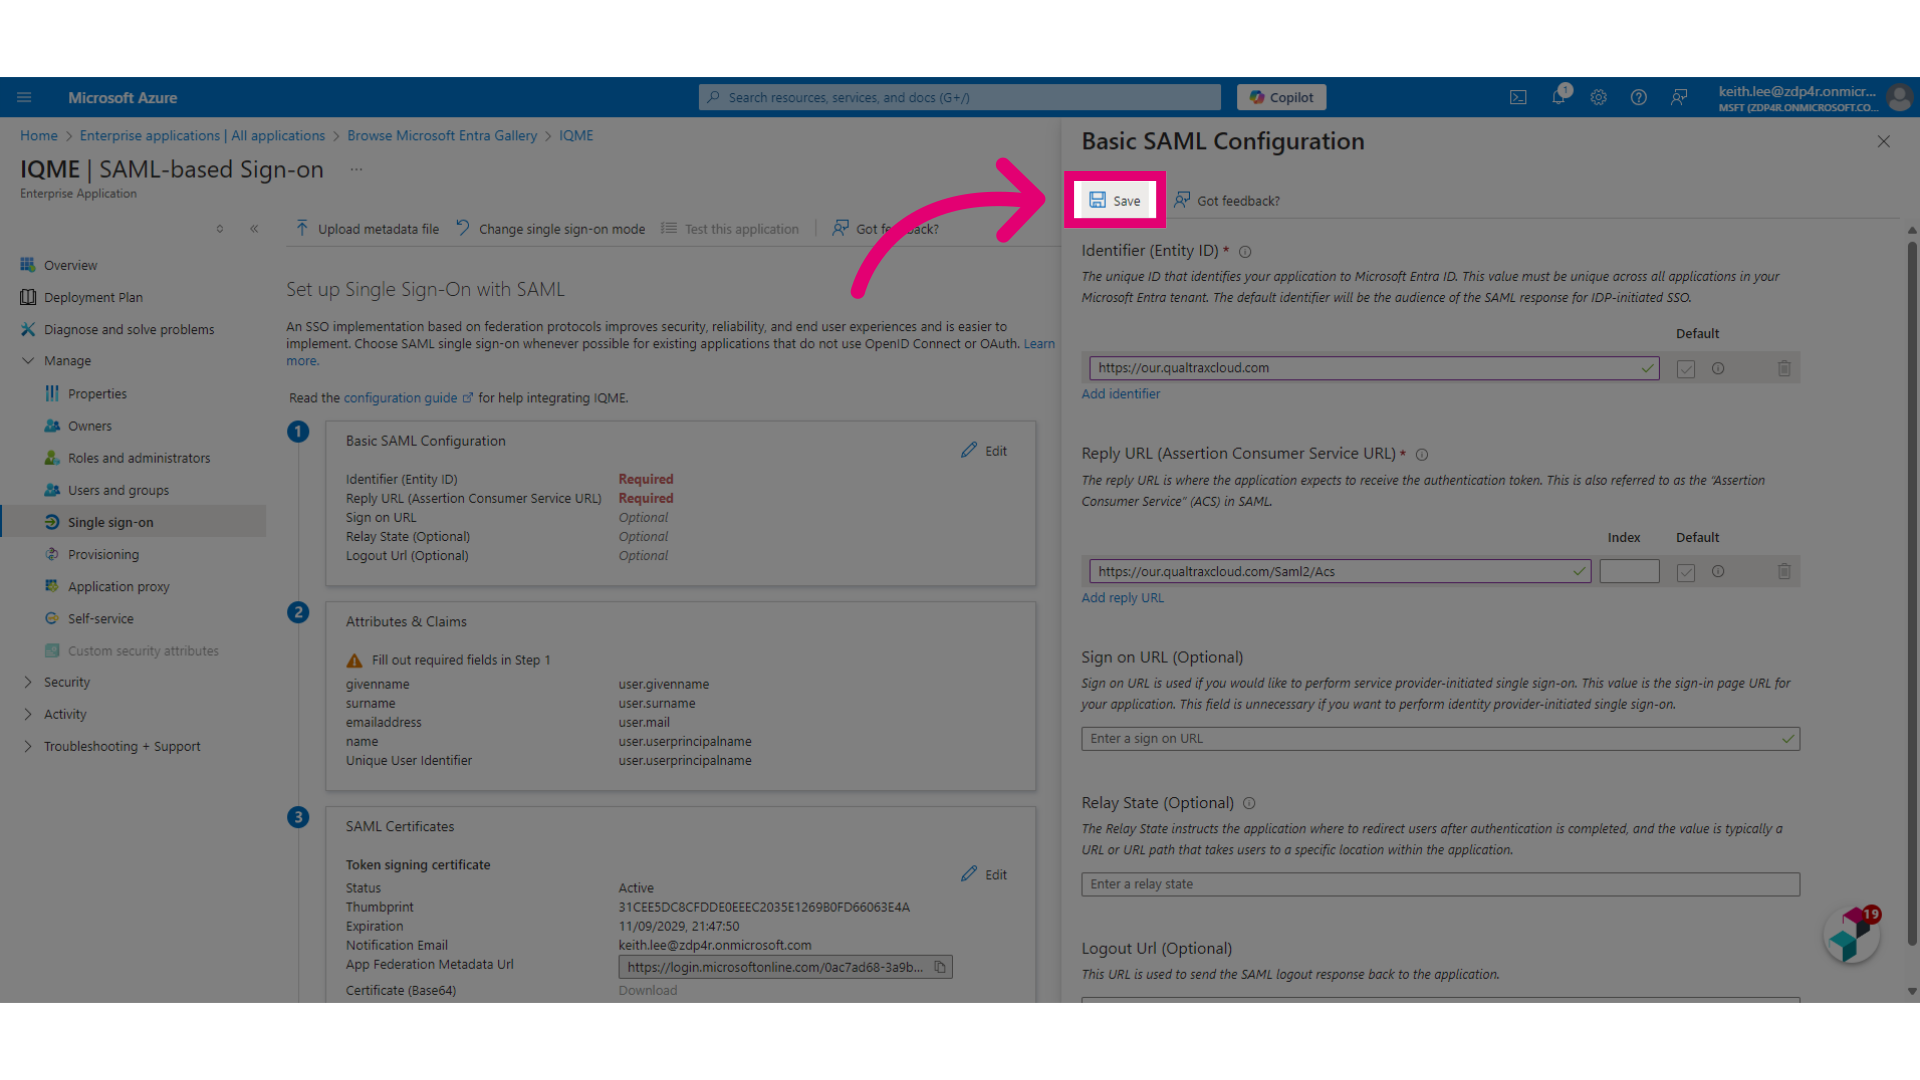
- Click Edit (Attributes and Claims).
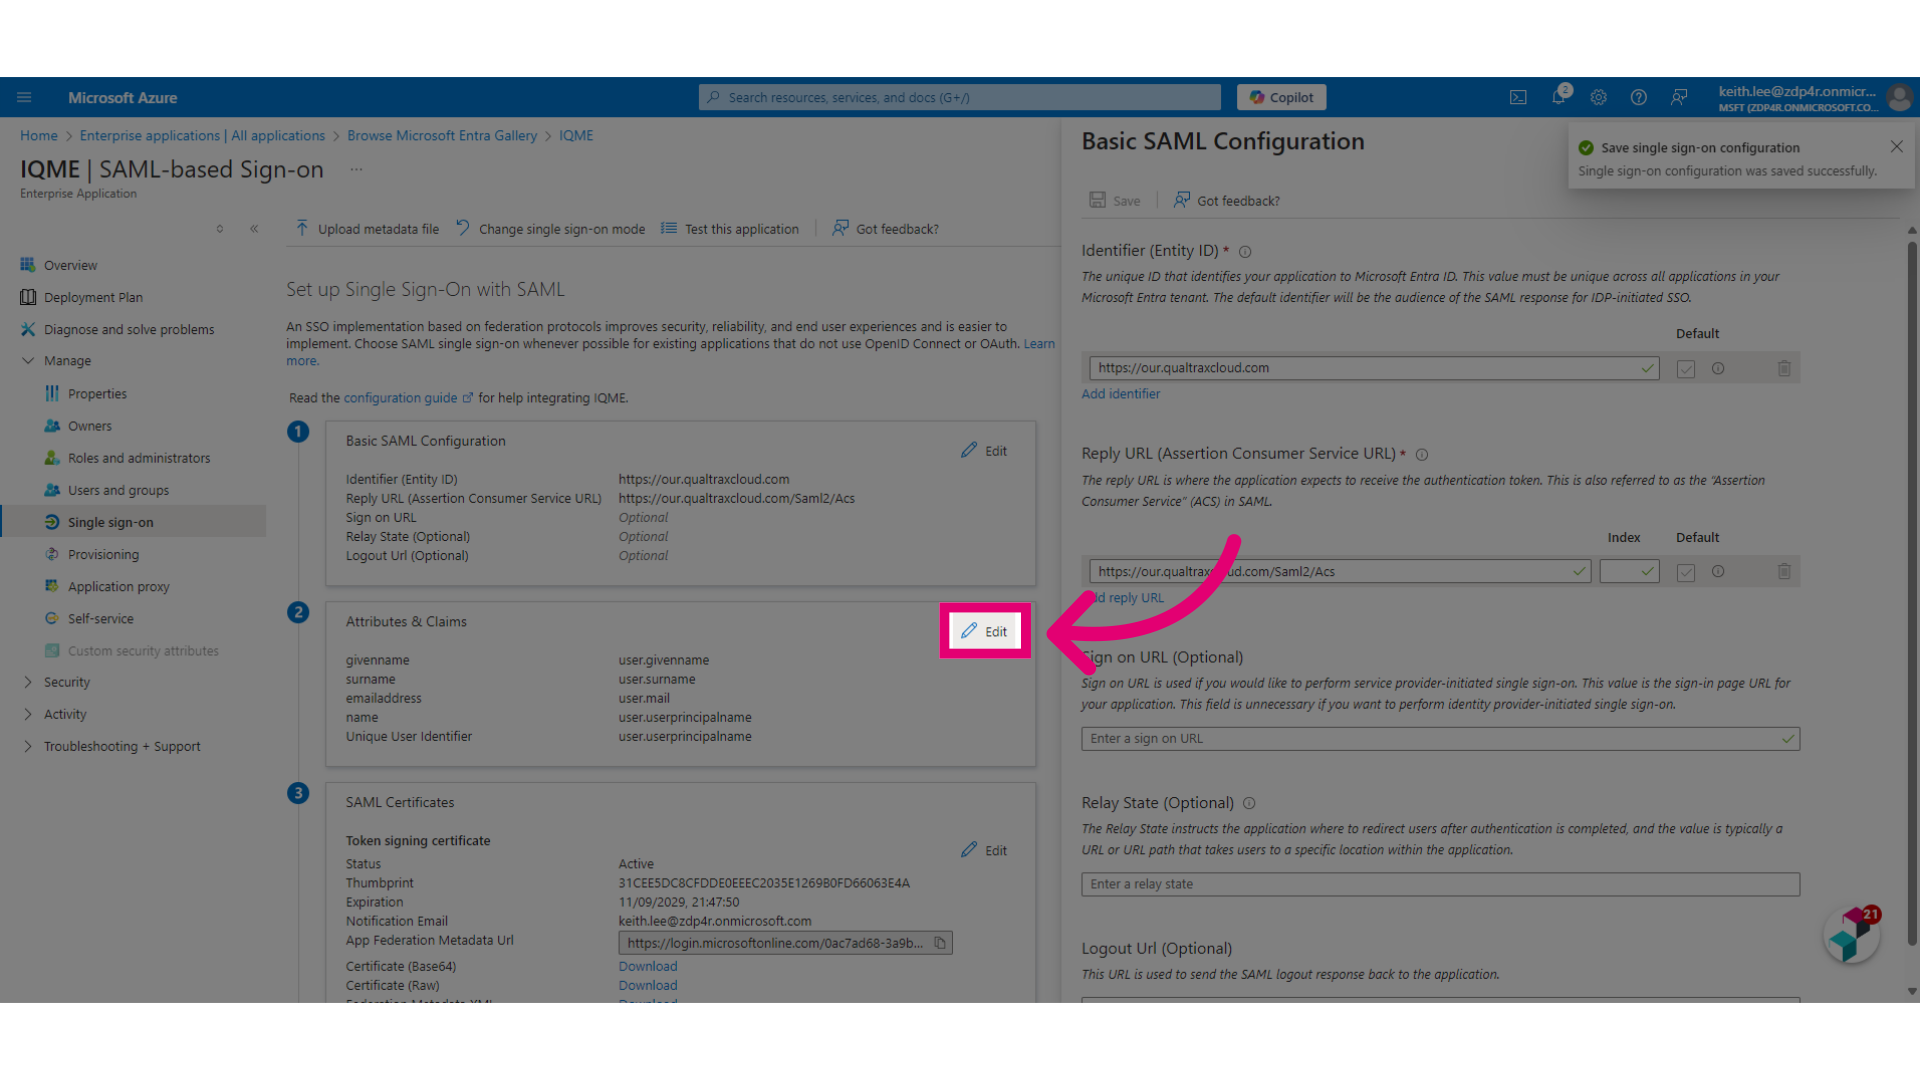
- Click the required claim value.
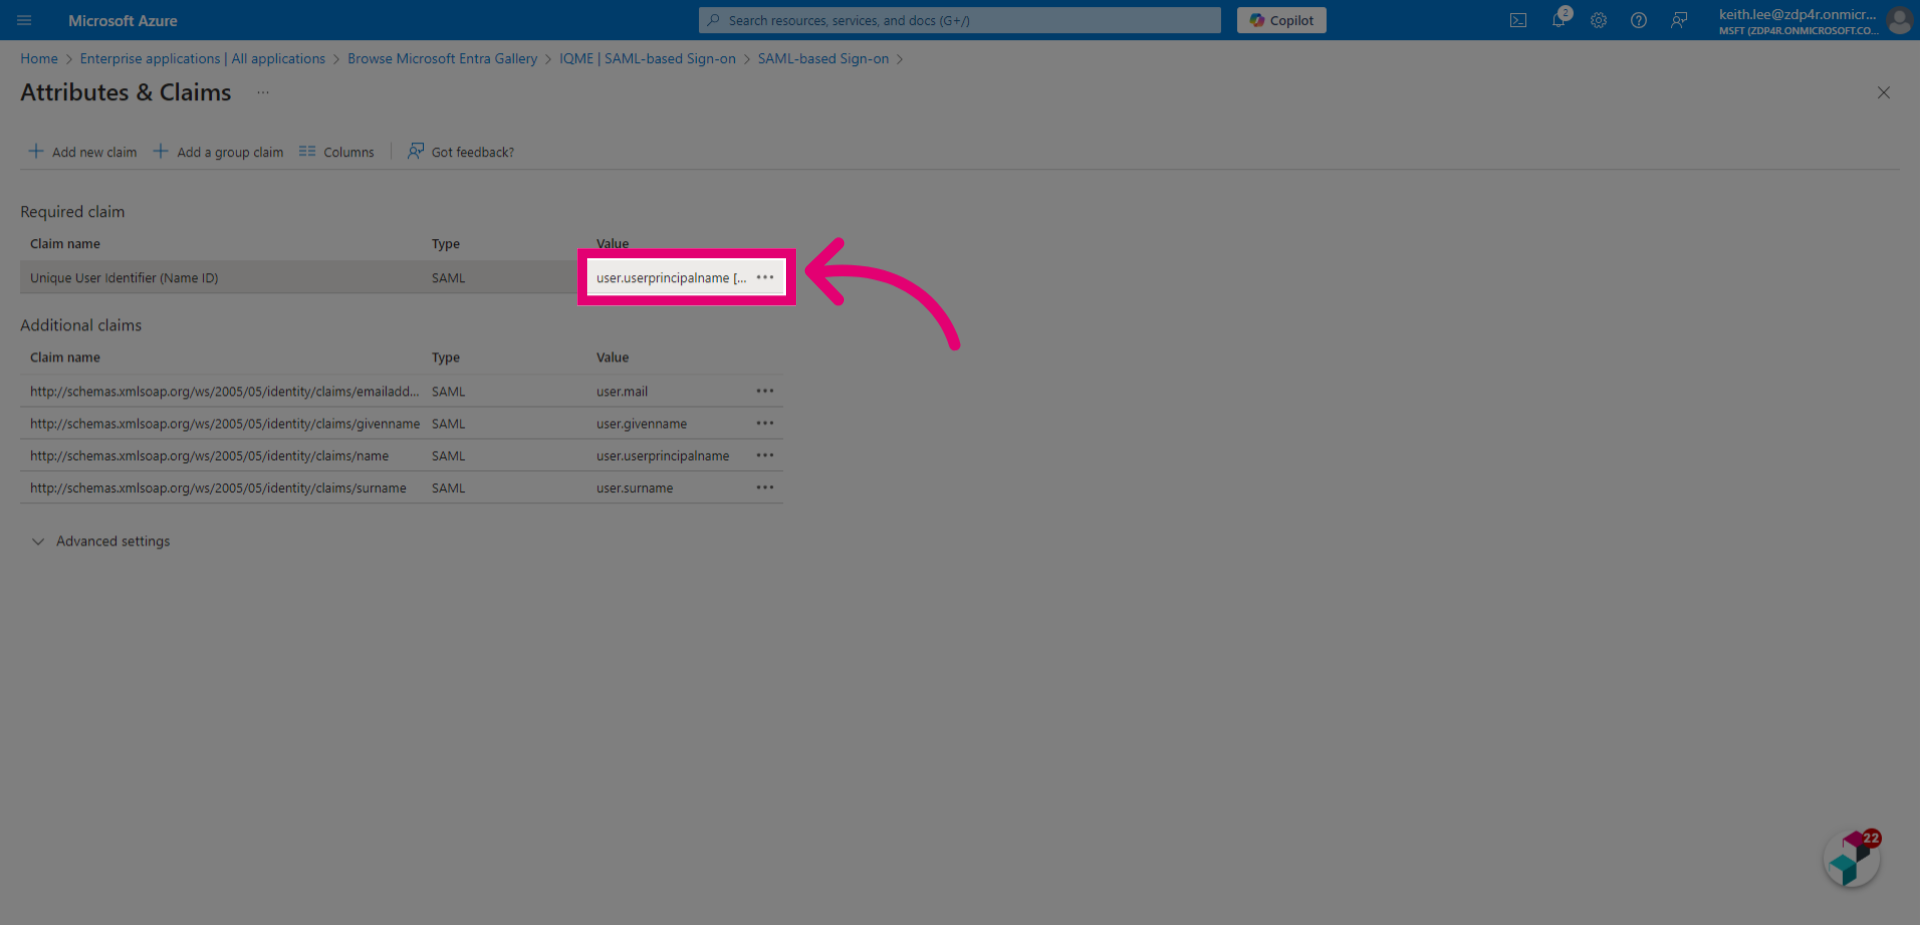
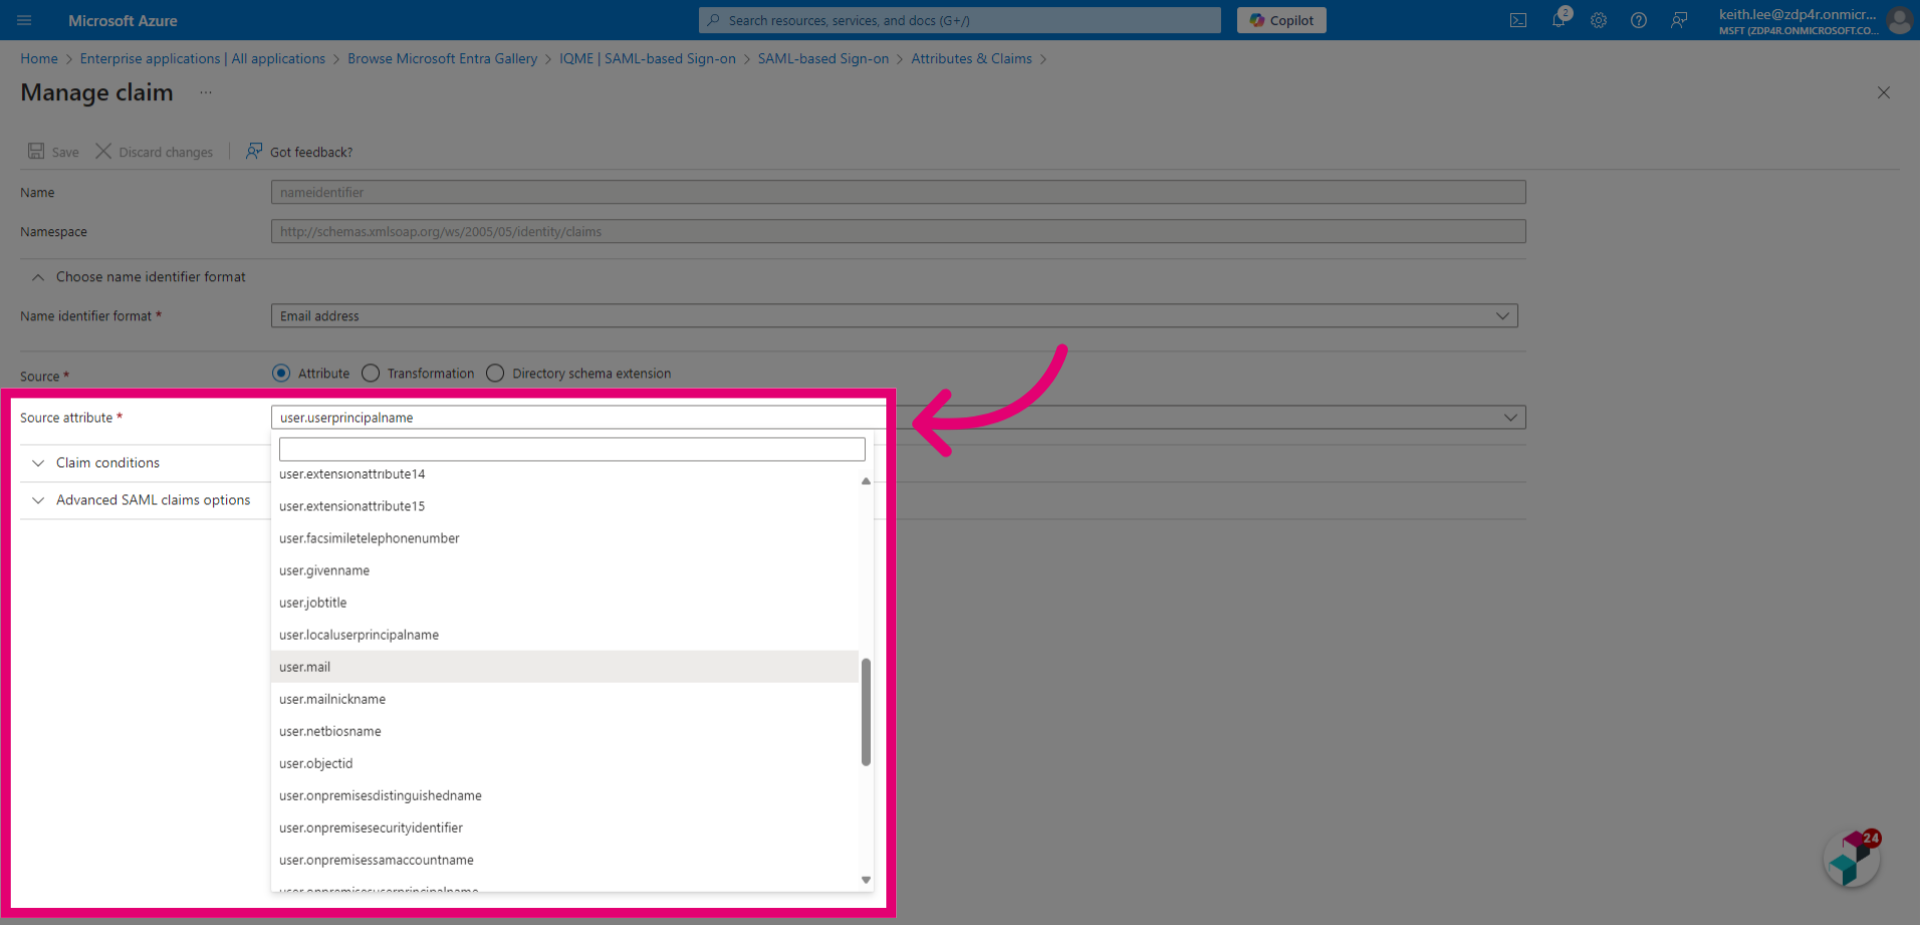
- Select user.mail from the Source attribute dropdown.
- Enter emailaddress in the Name field.
- Enter the schema the Namespace field.
http://schemas.xmlsoap.org/ws/2005/05/identity/claims/emailaddress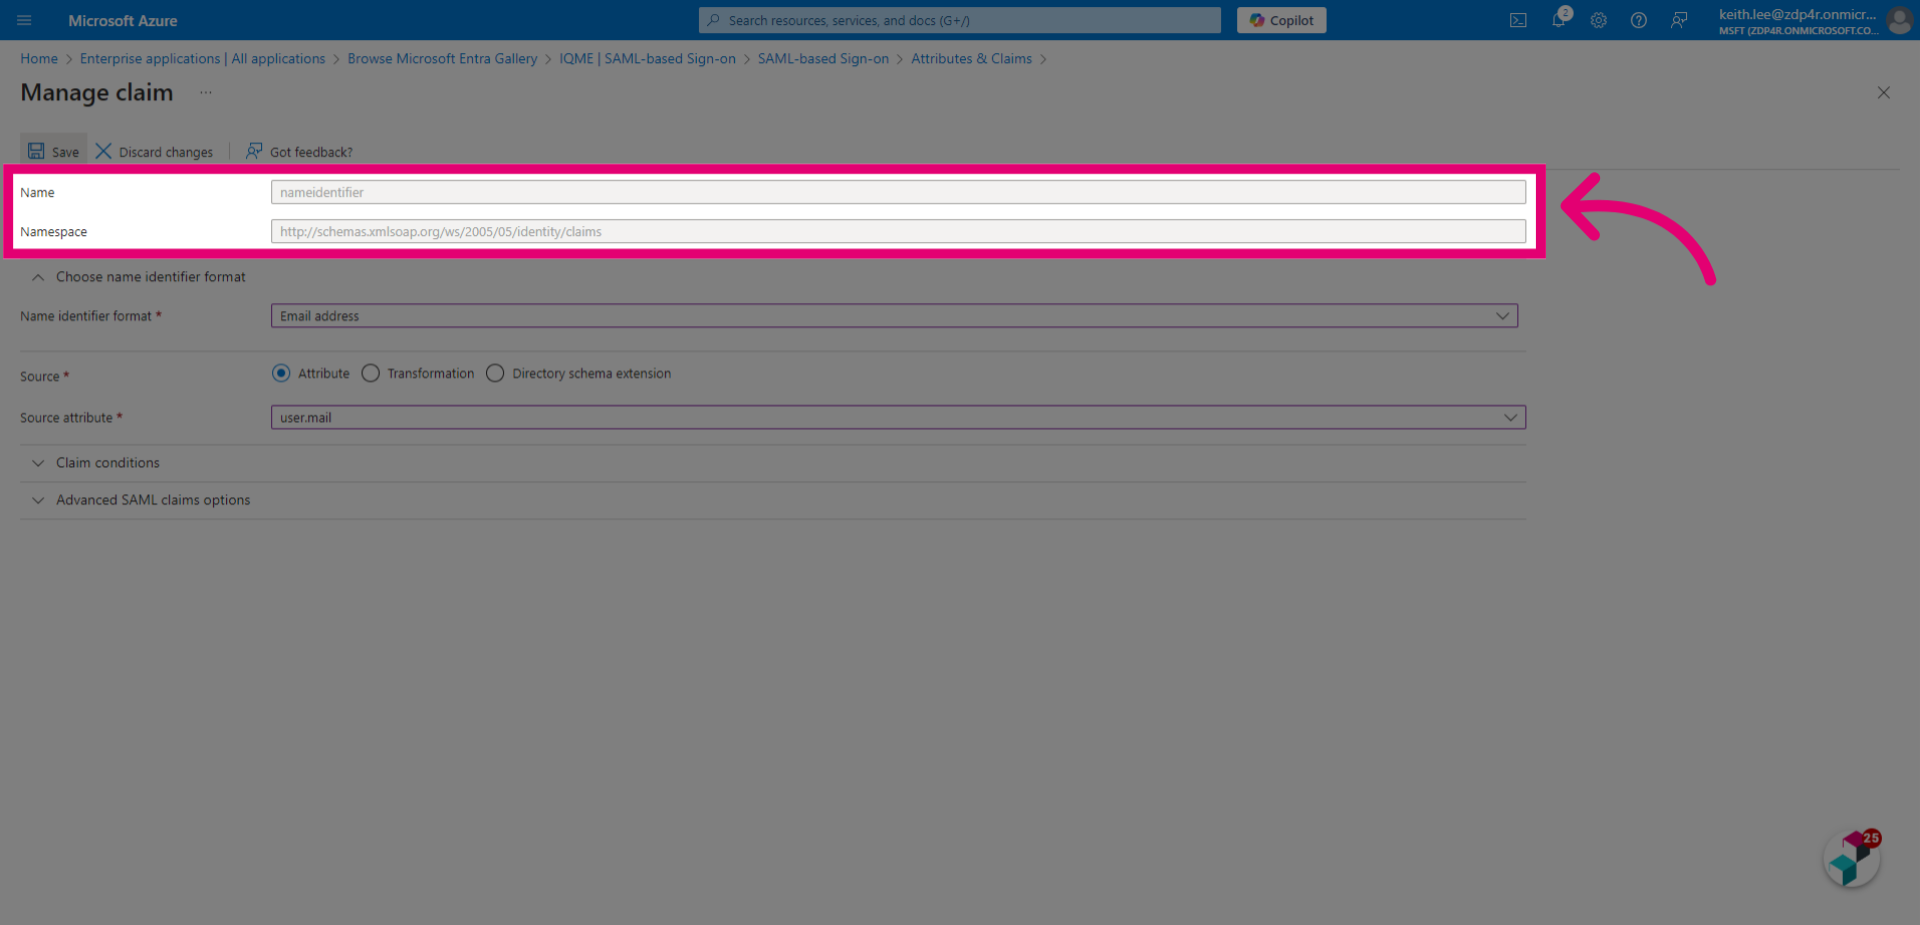
- Navigate back to the main configuration page.
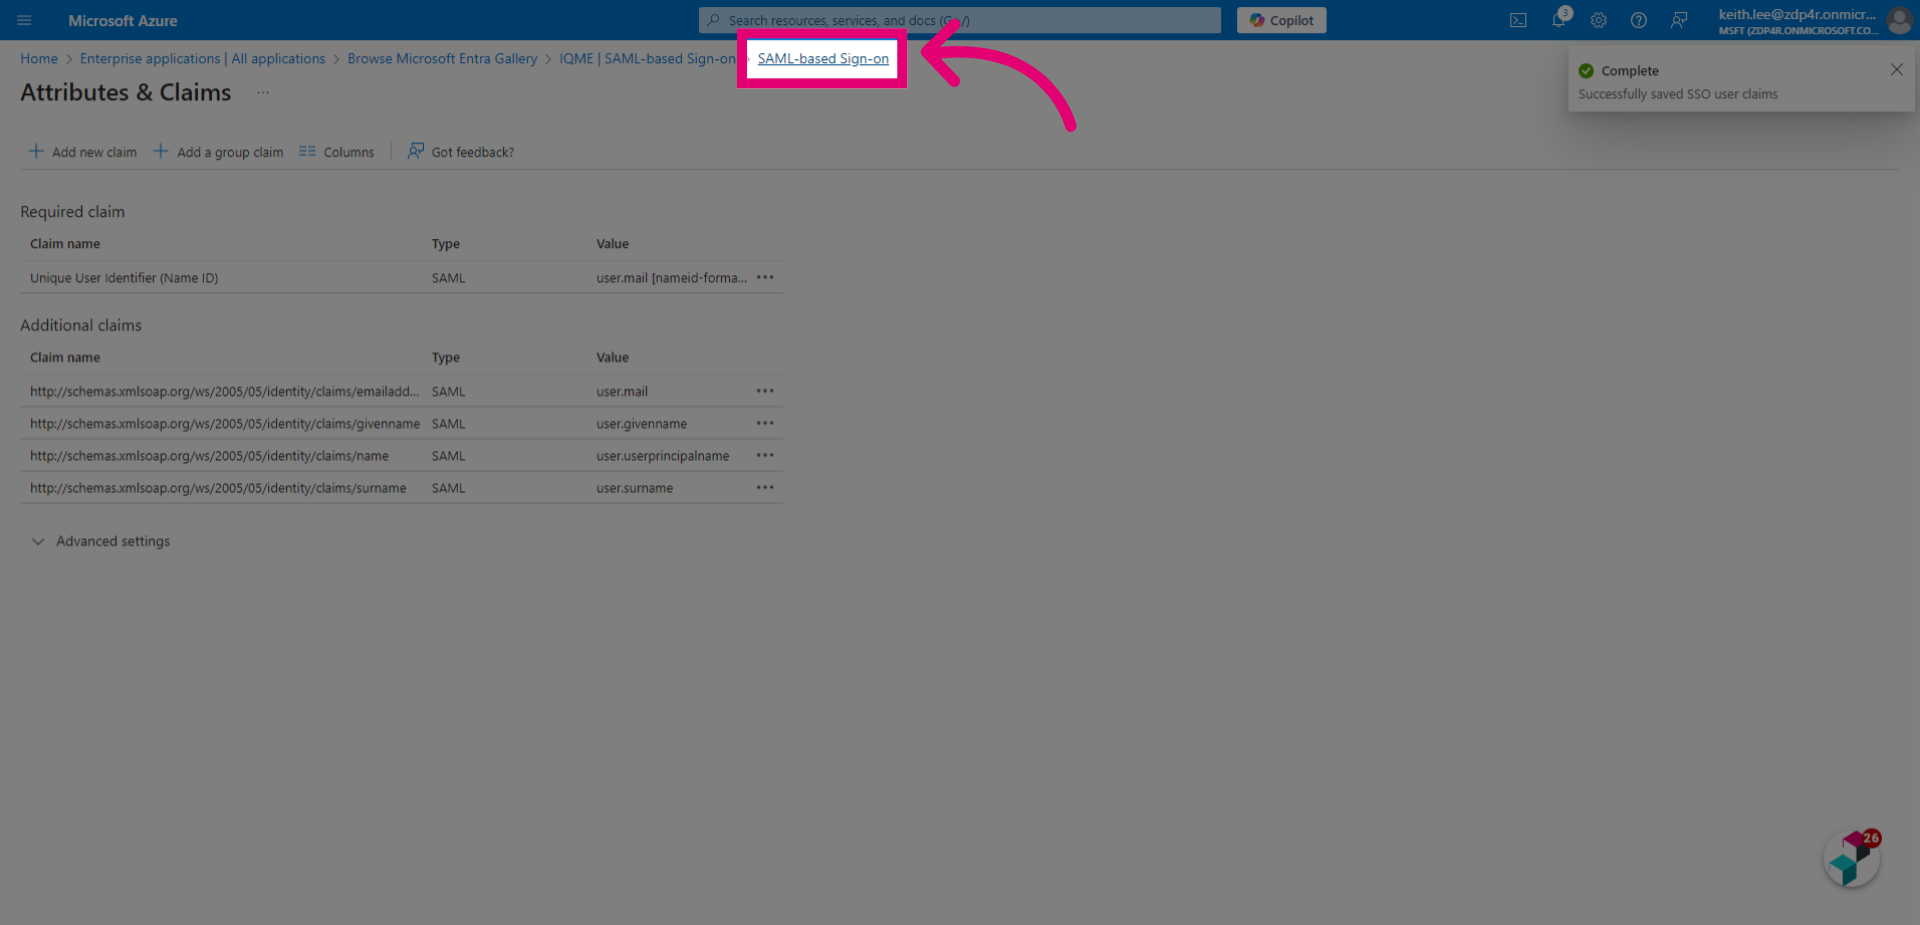
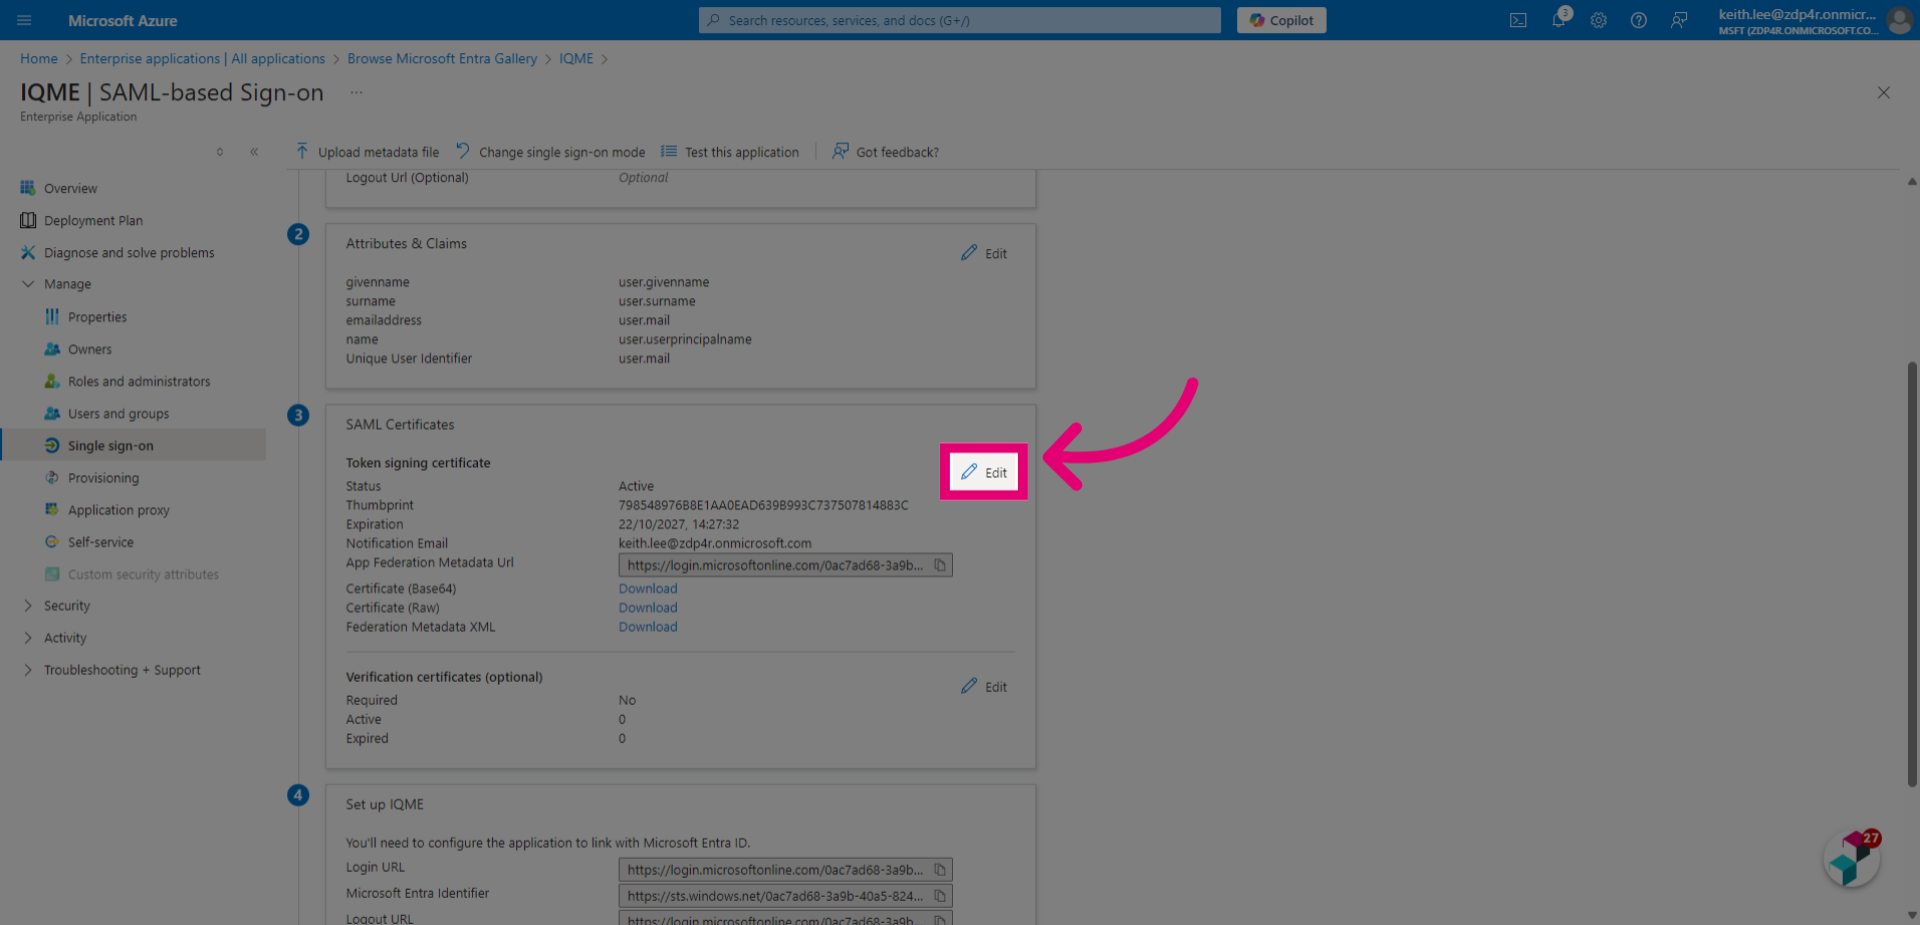
- Click Edit (SAML certificates).
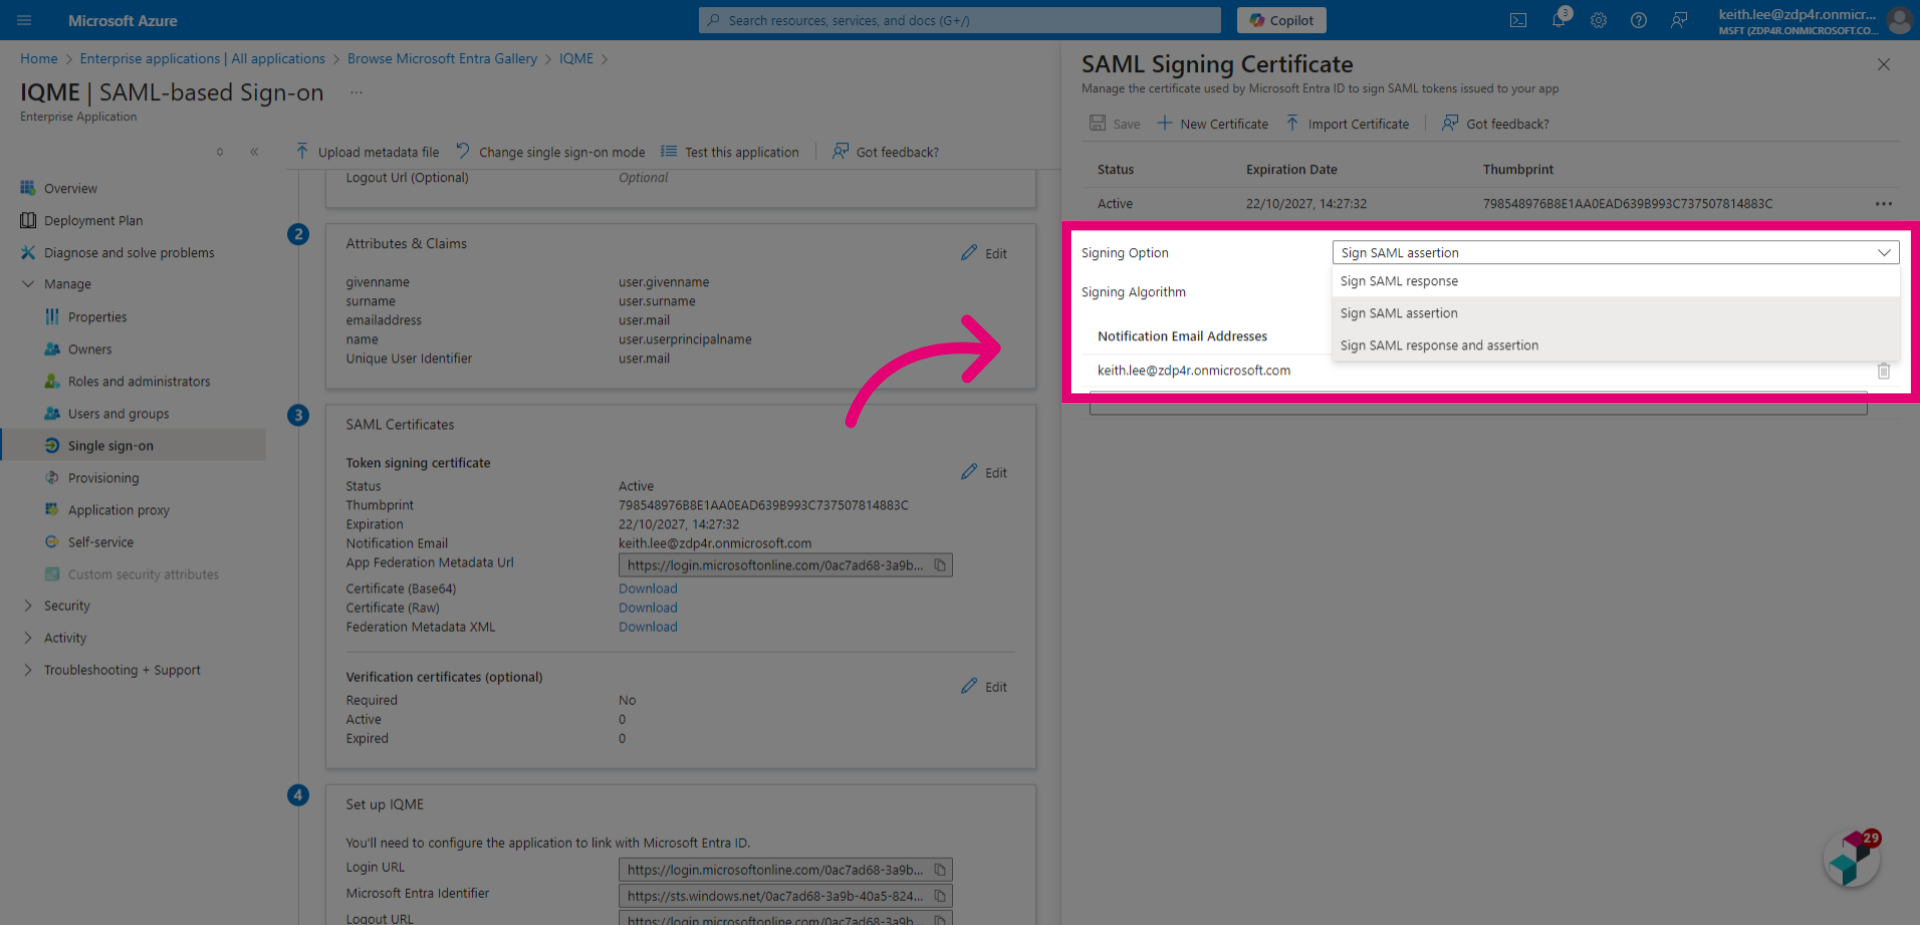
- Select SAML response and assertion from the Signing options dropdown.
- Click Save.
- Download the certificate.
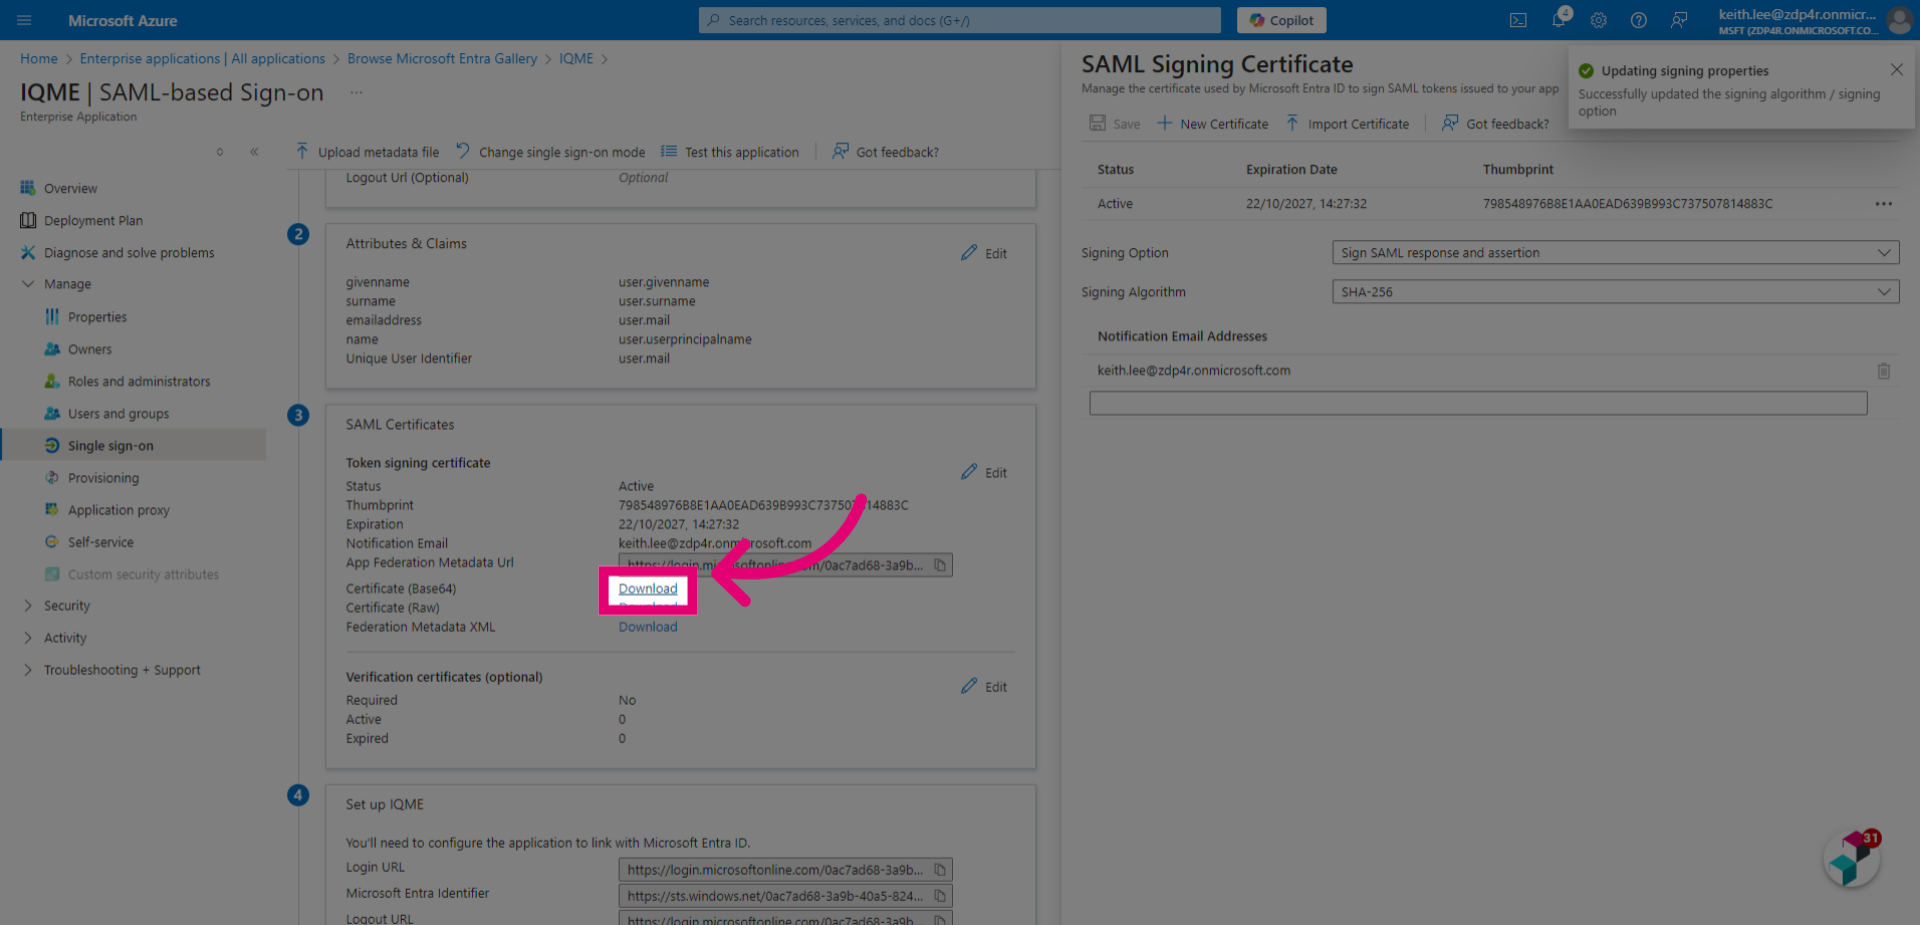
- Return to Quality Management.
- Click Add (under Identity Providers).
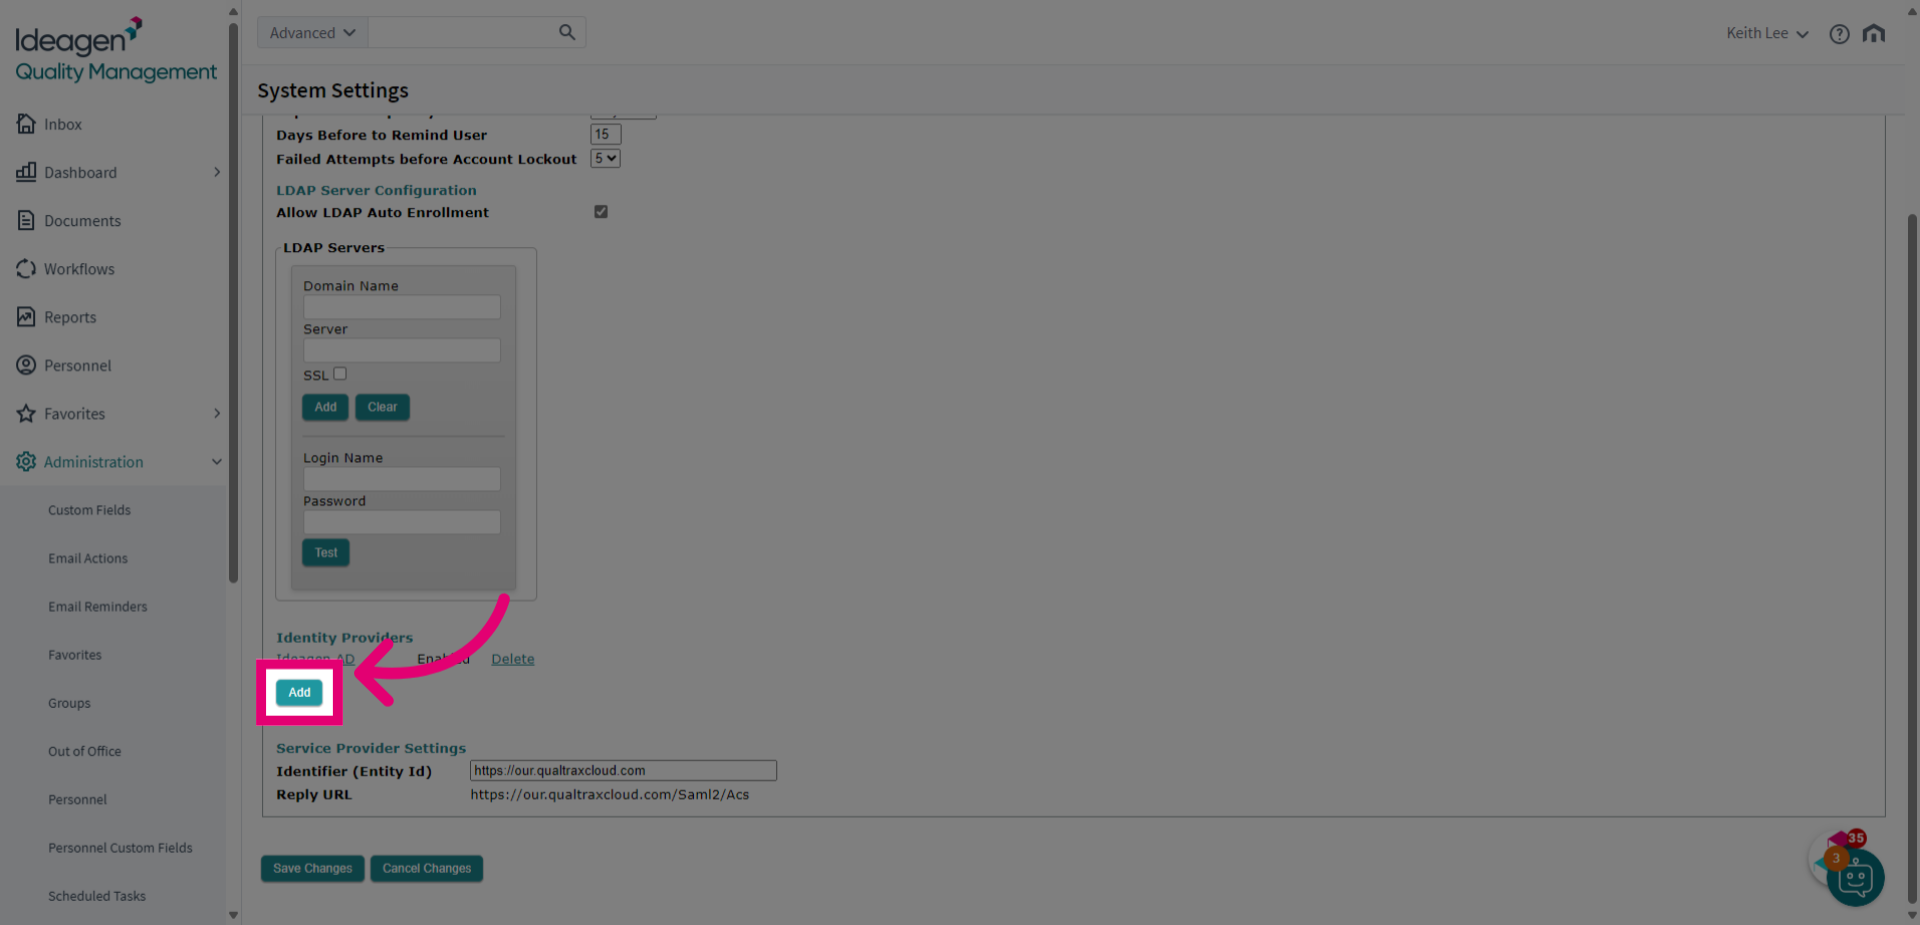
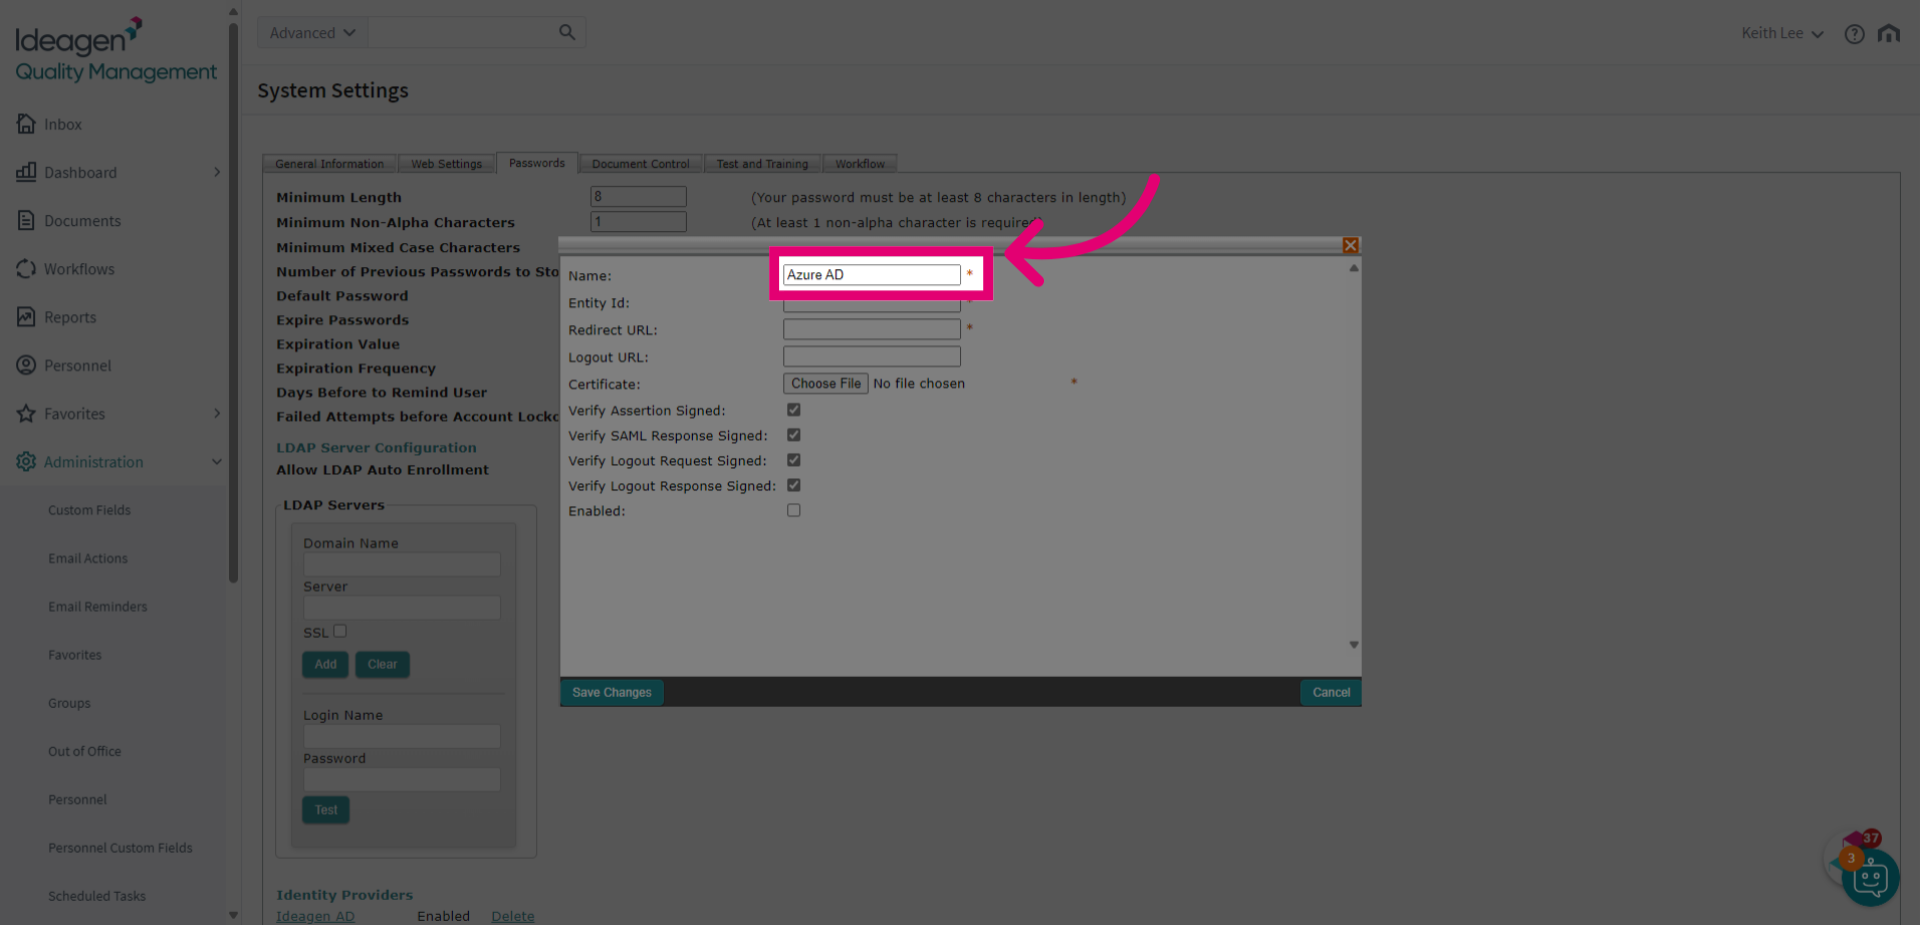
- Enter a Name for your provider.
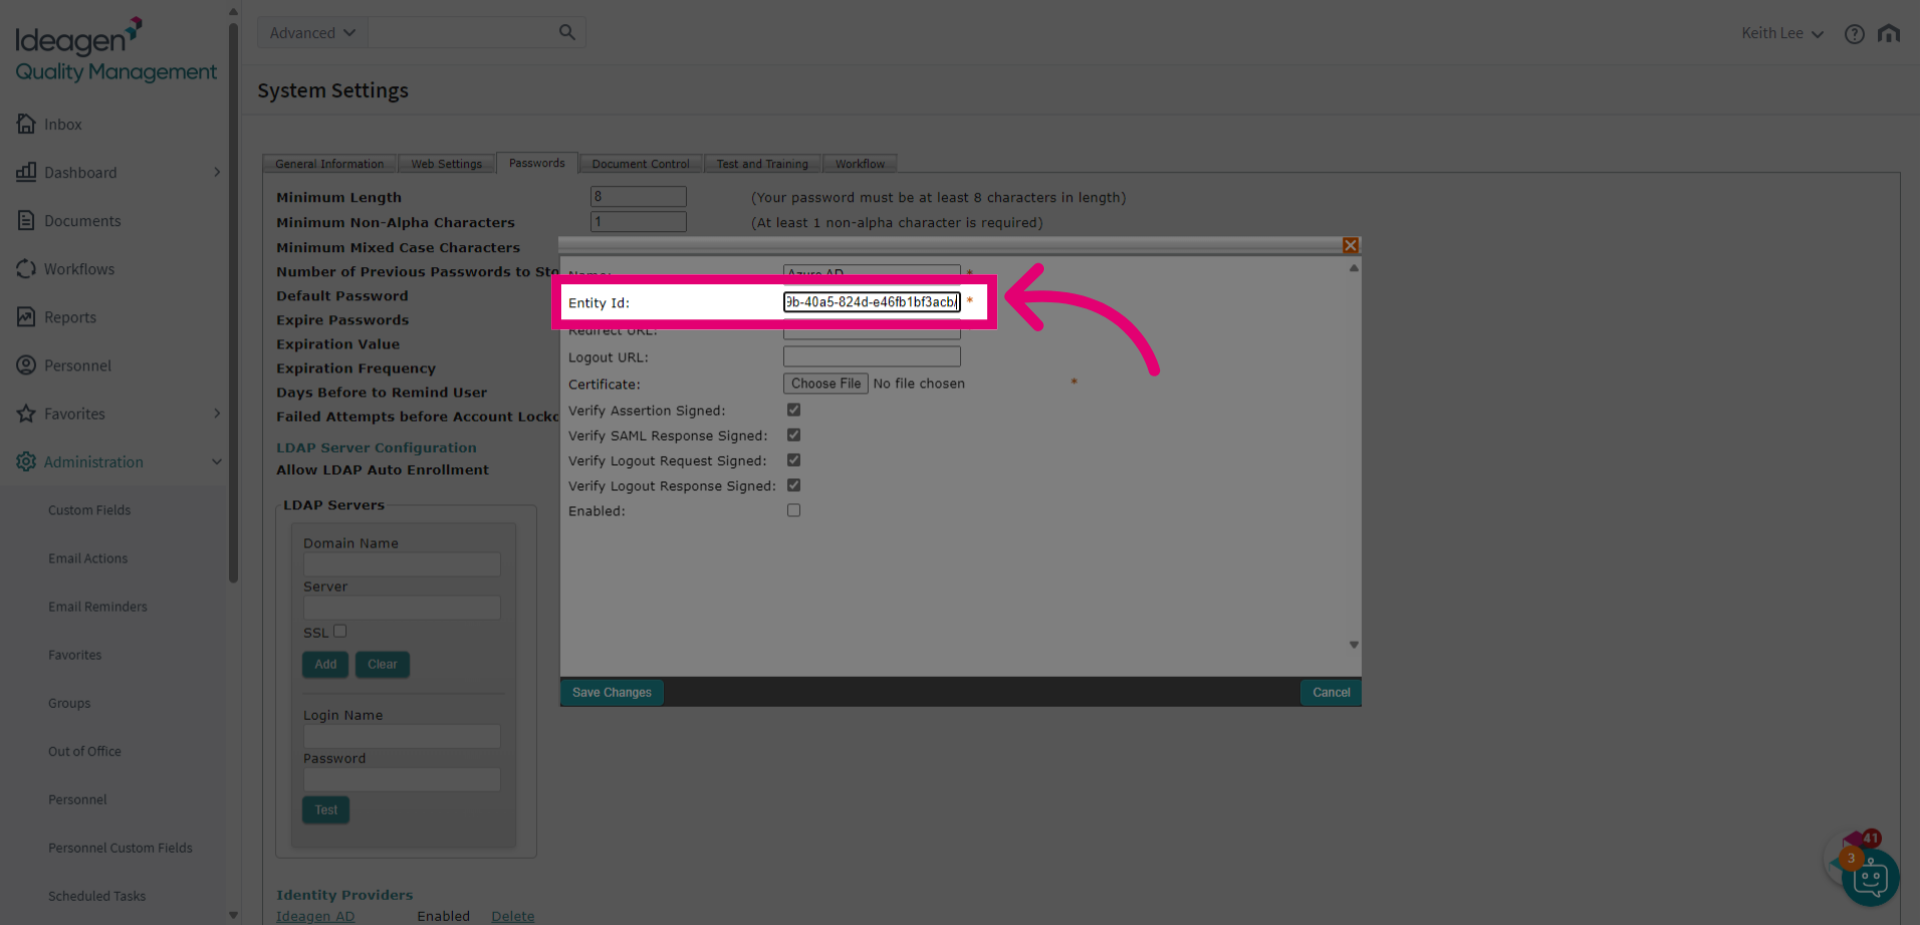
- Copy the Microsoft Entra identifier.
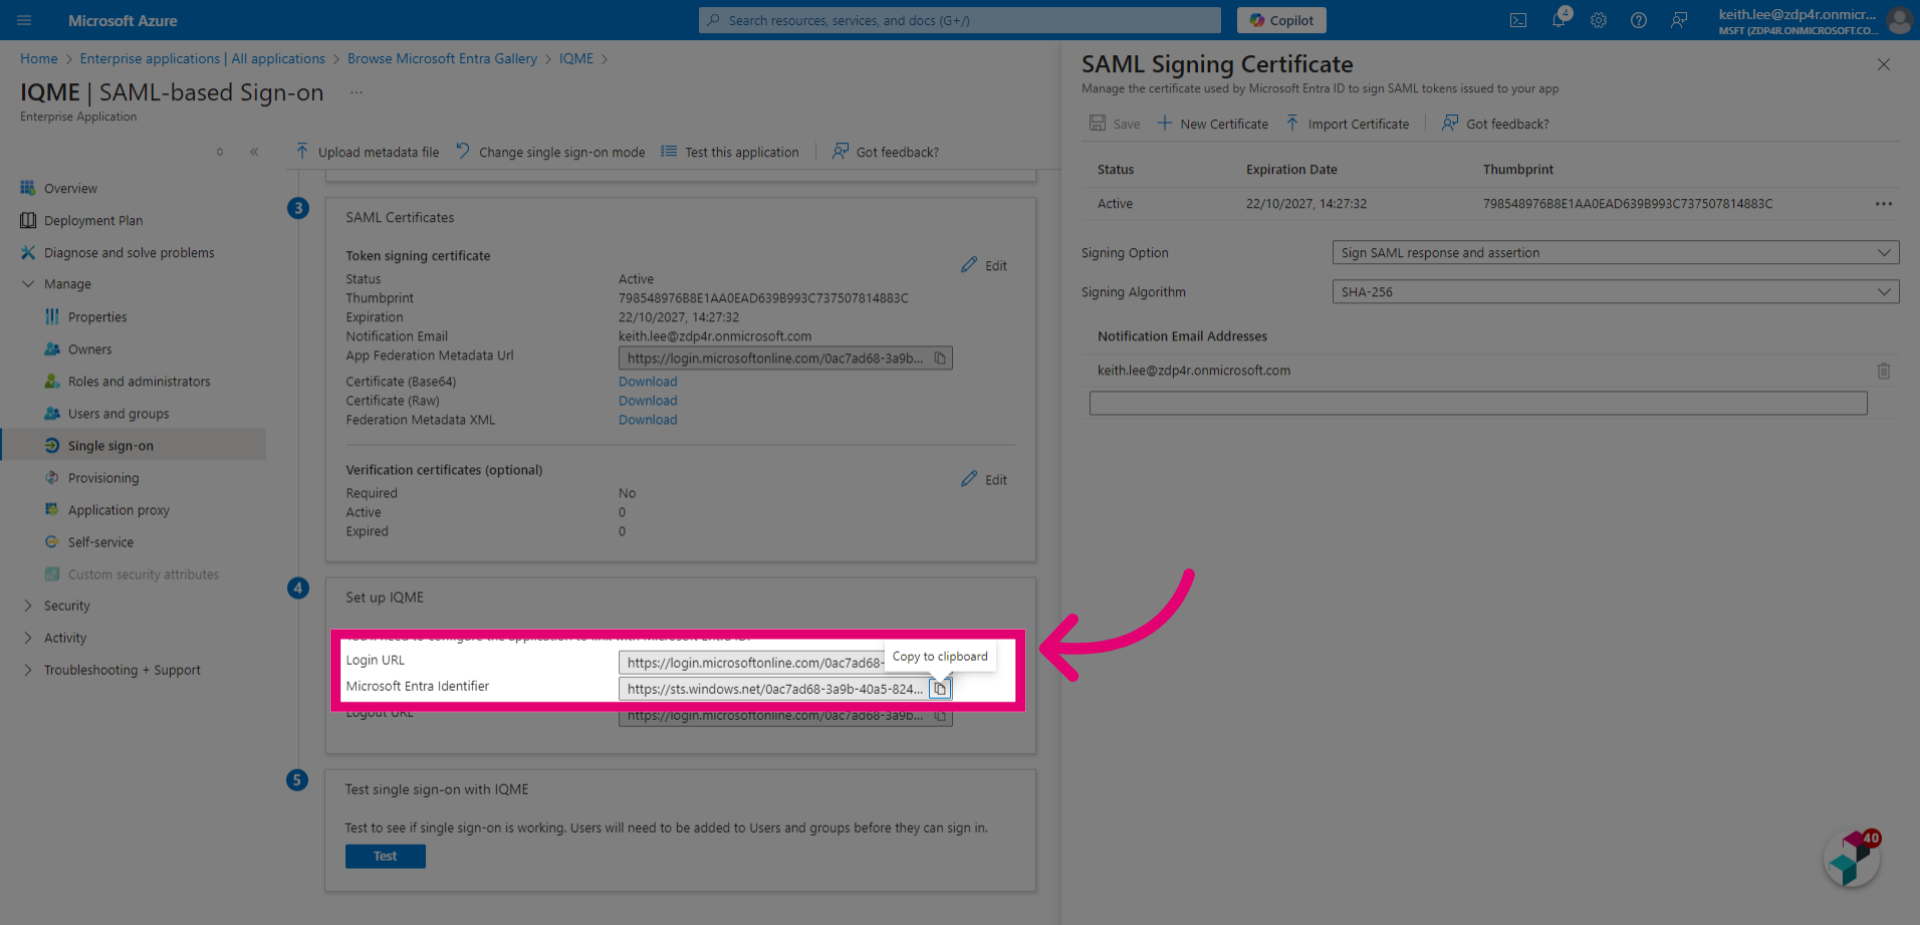
- Paste it the Entity ID field.
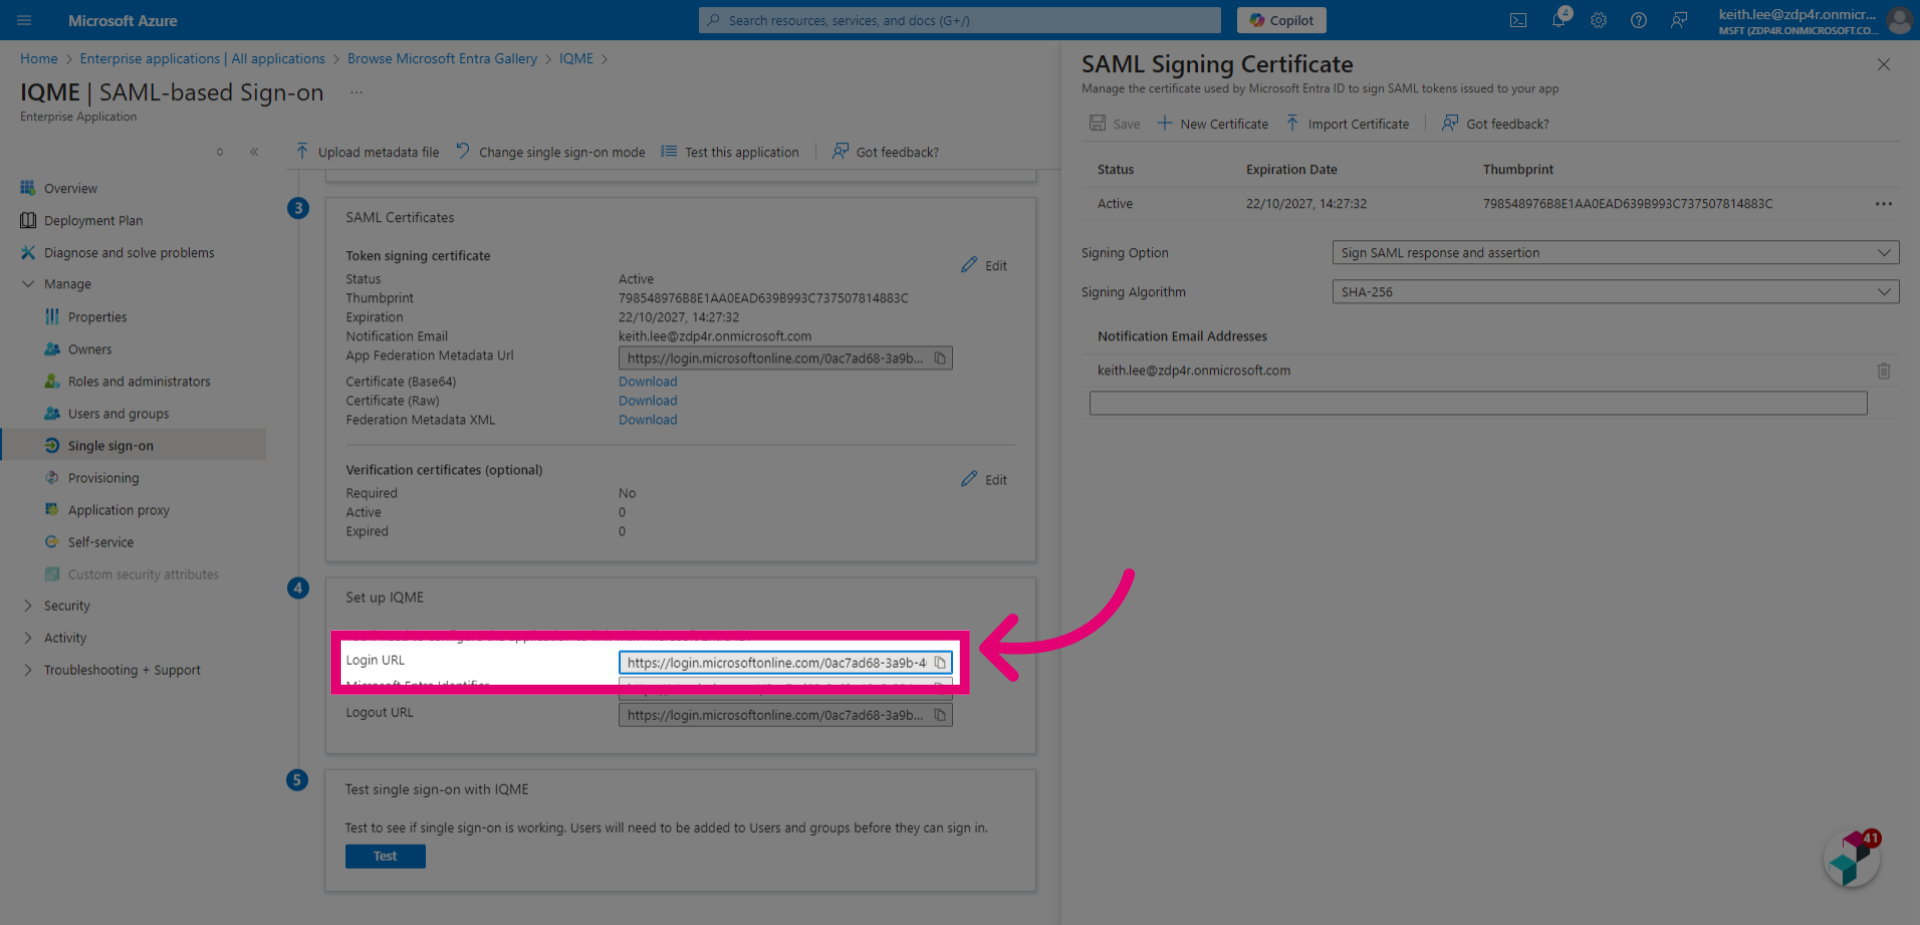
- Copy the Login URL.
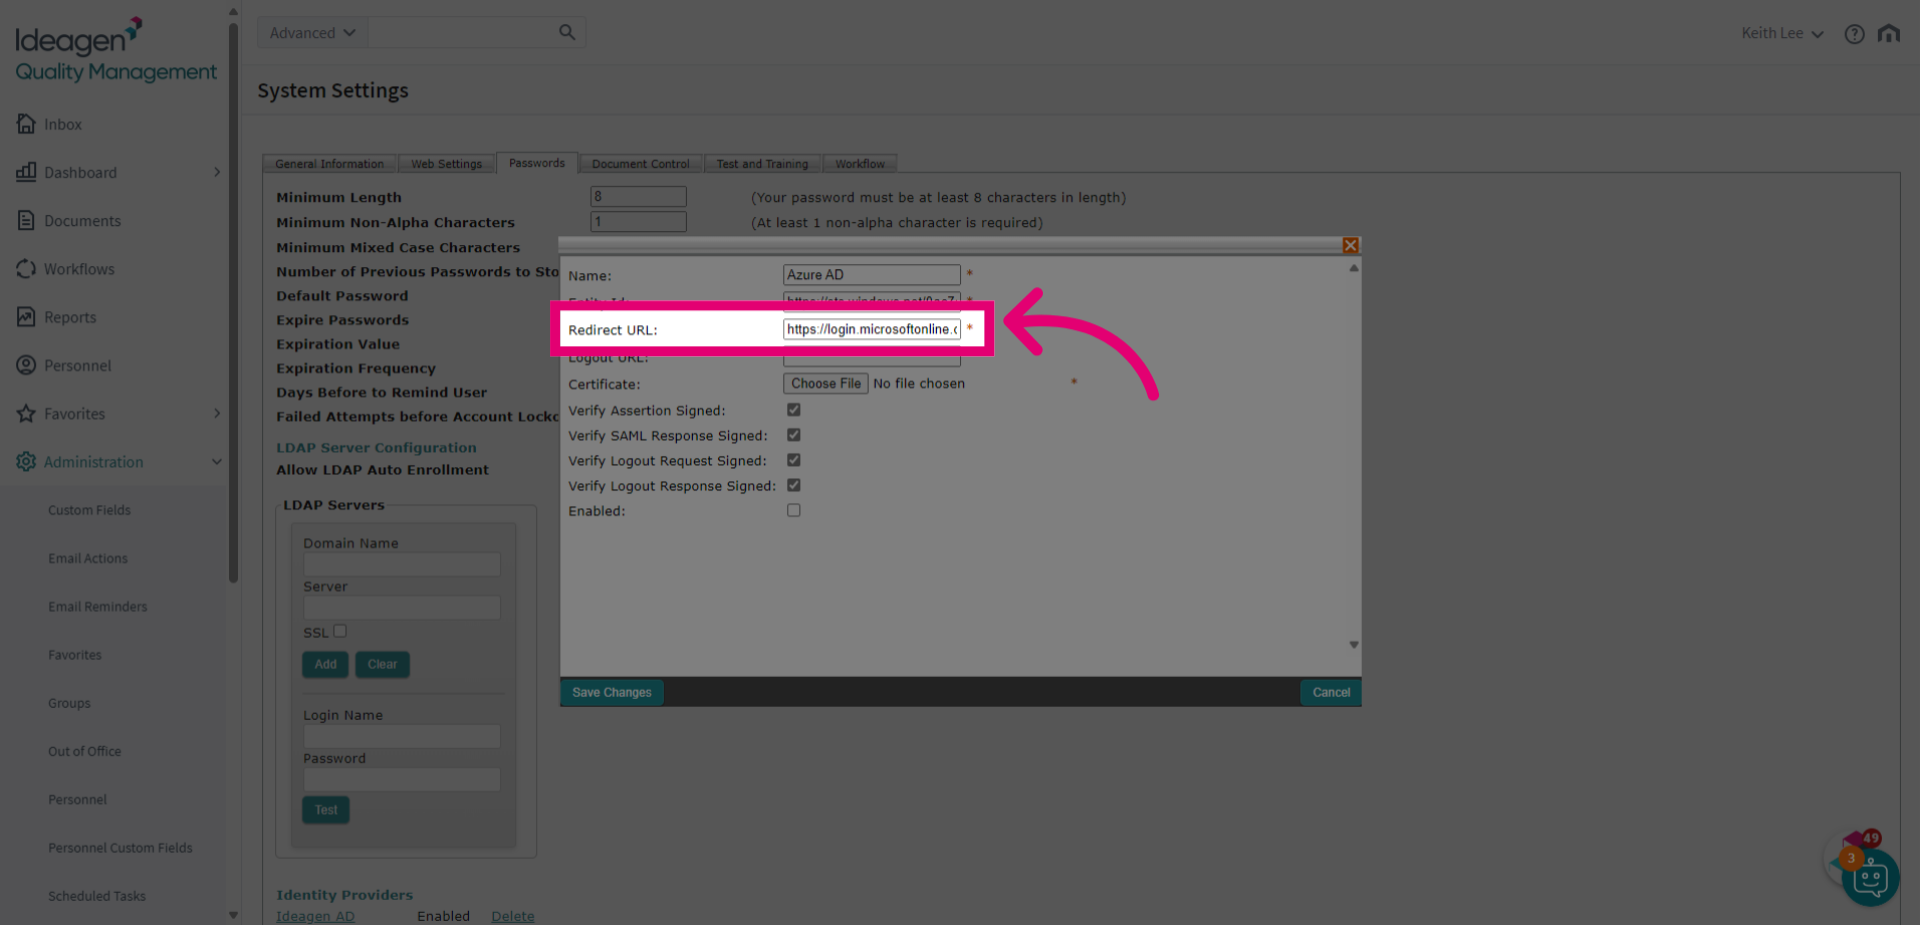
- Paste it into the Redirect URL field.
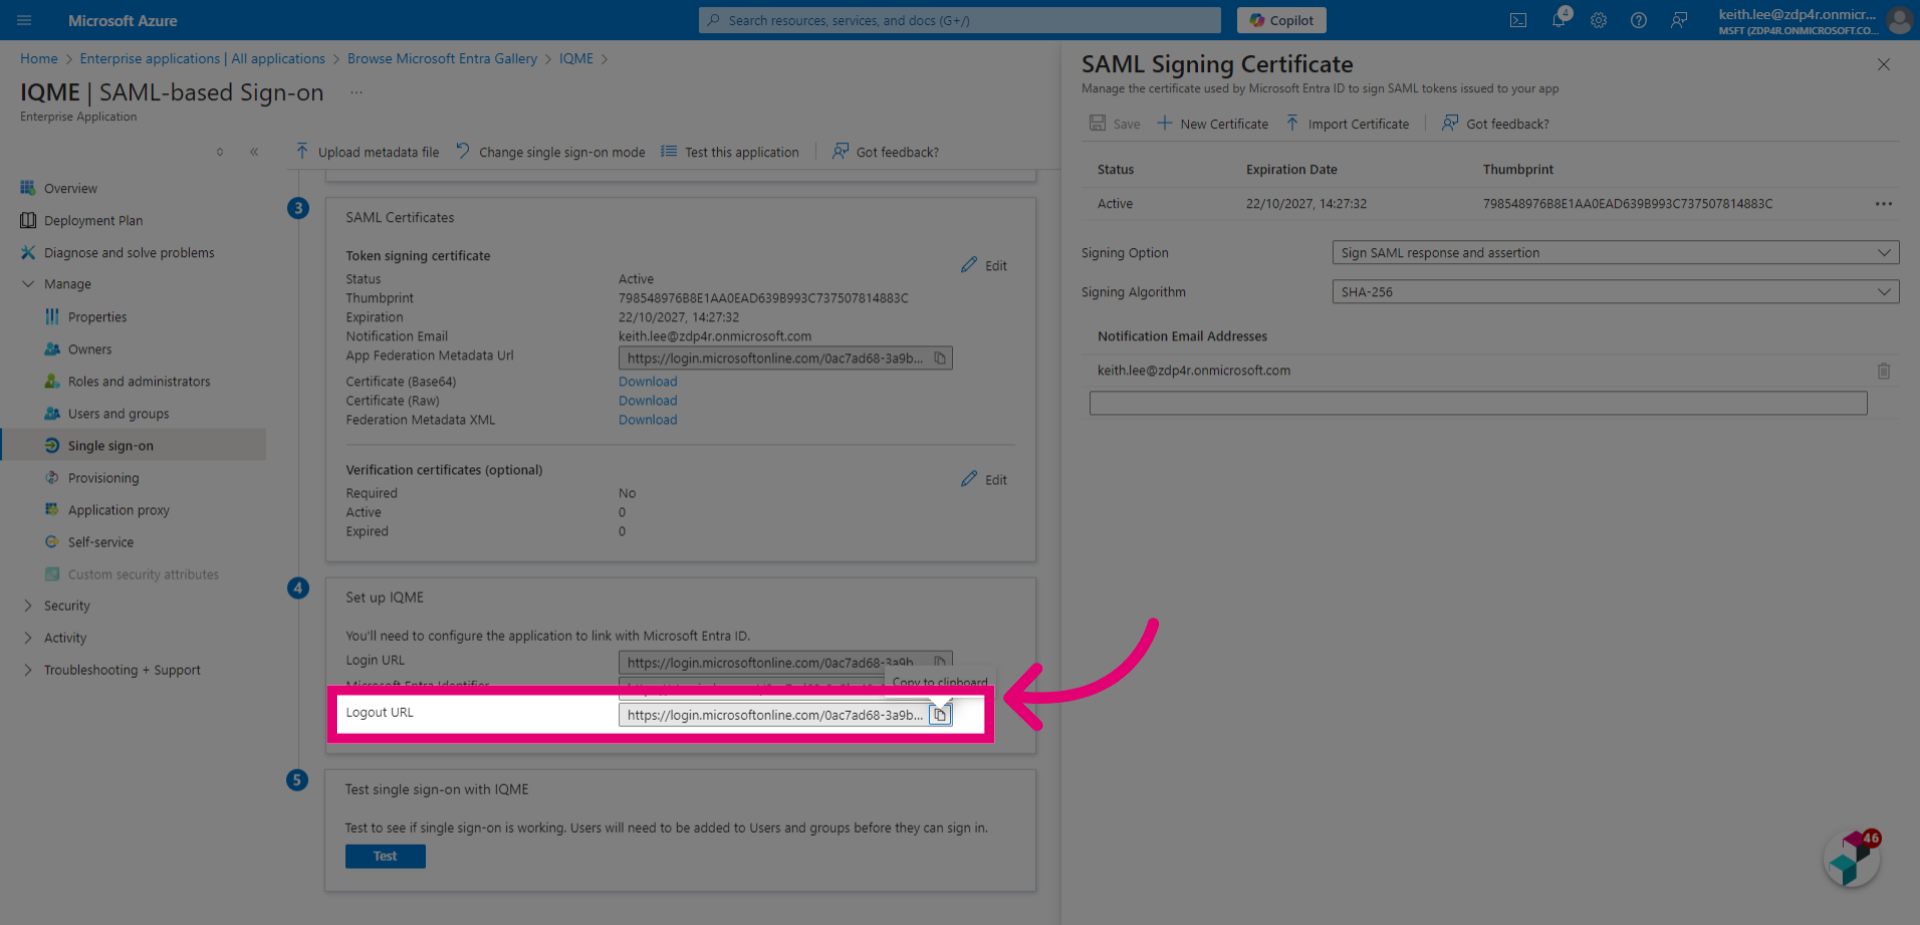
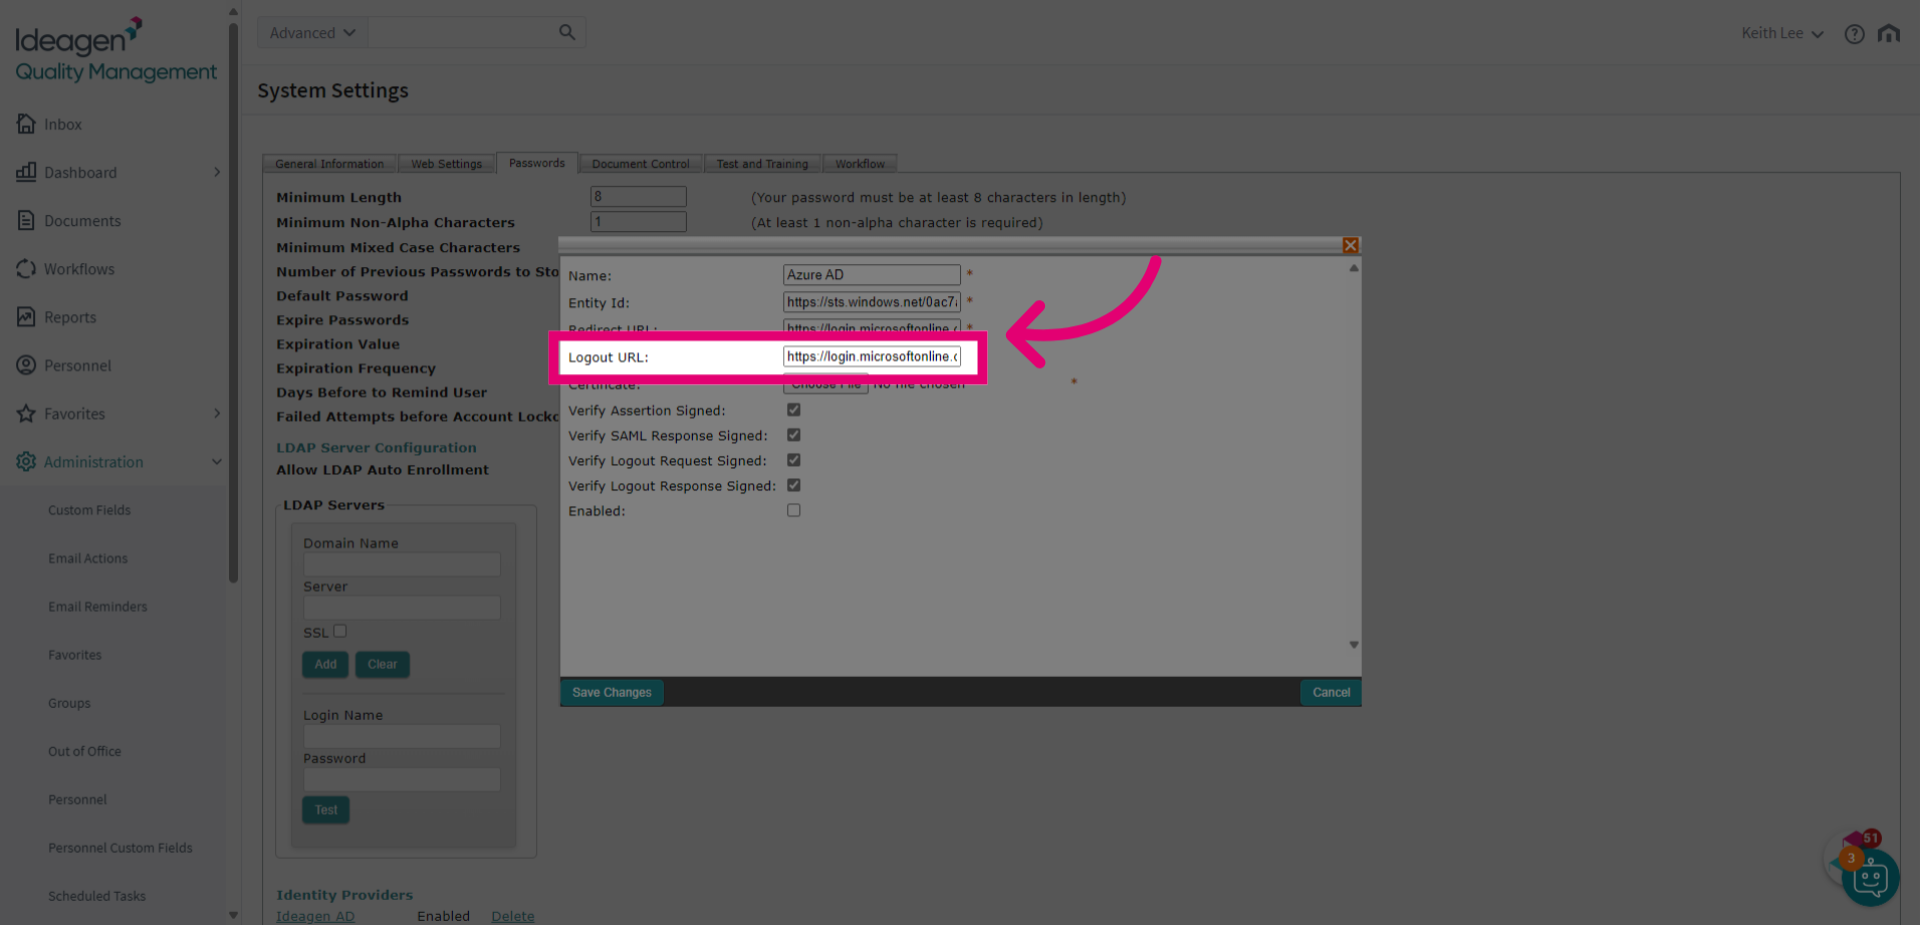
- Copy the Logout URL.
- Paste it into the Logout URL field.
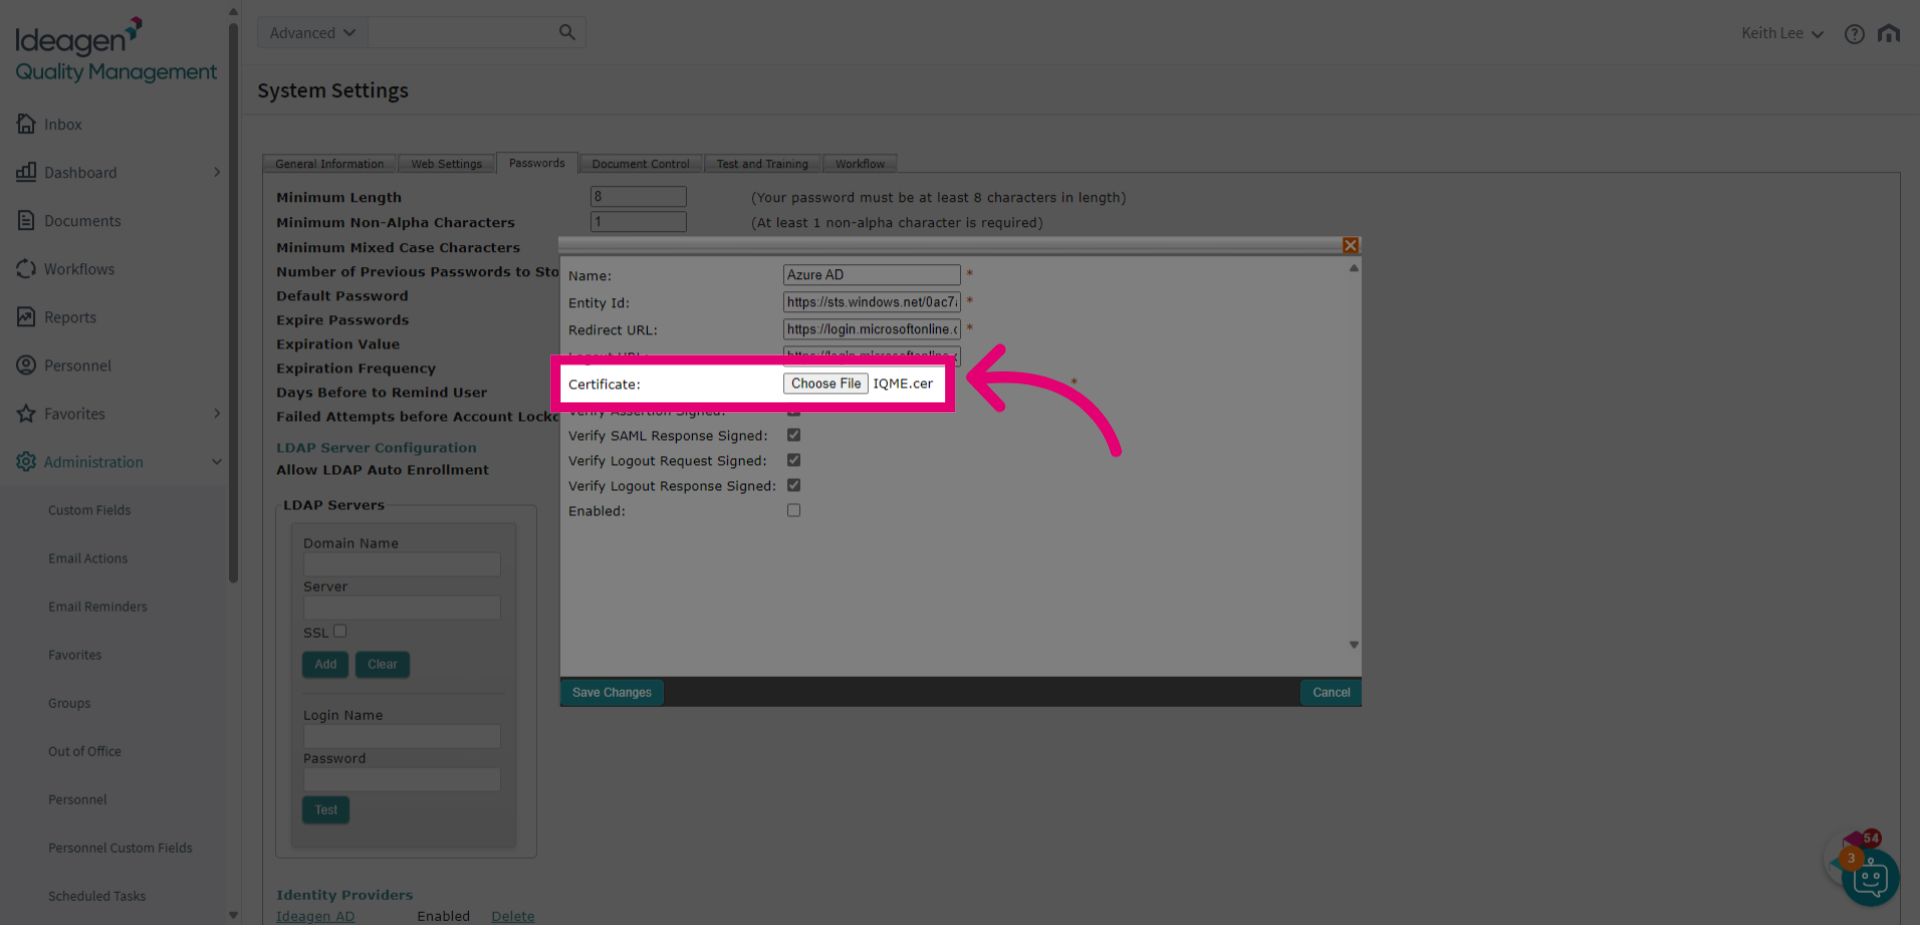
- Click Choose File.
- Select the certificate you downloaded.
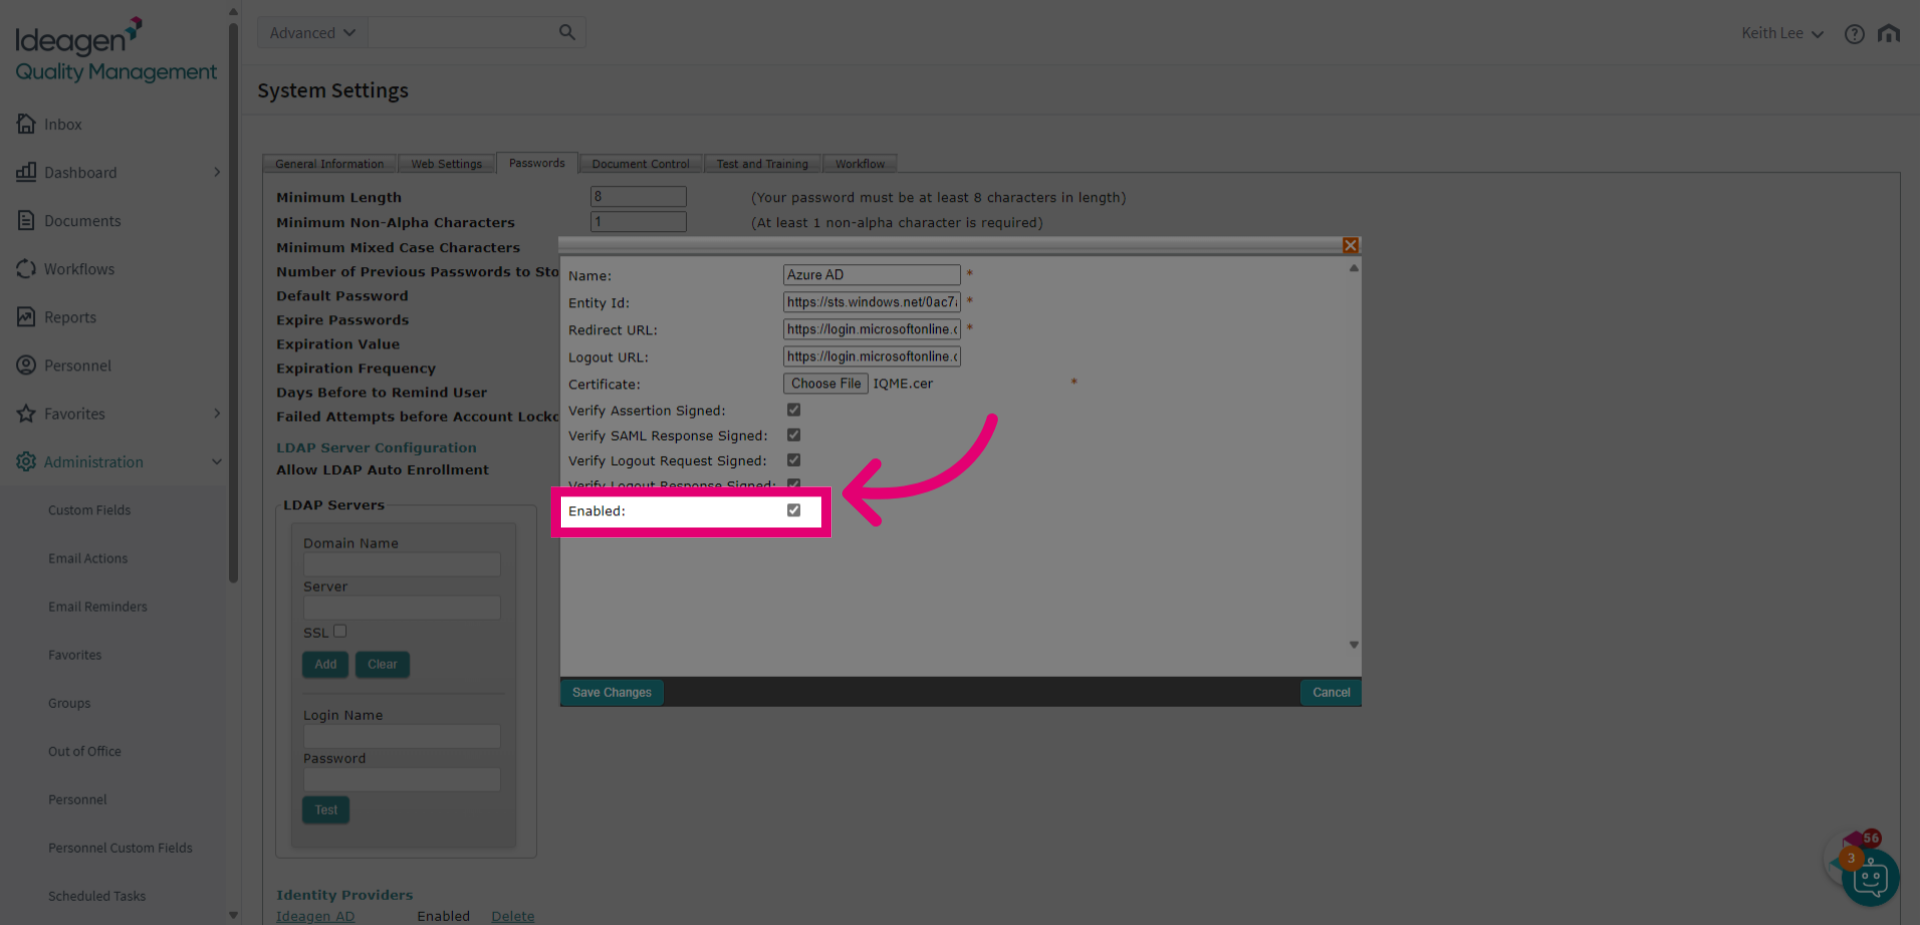
- Tick Enabled.
- Click Save Changes.
This video walkthrough illustrates the SAML response signed configuration steps.
1. Configuring Google SSO
Google SSO is an authentication solution offered by Google.
1.1. SAML response signed
In this setup, Google signs the Response, and Ideagen Quality Management (Core) verifies the Response signature. This is the most common configuration.
To enable this configuration:
- Start by accessing the Google Workspace via the Admin console.
- Choose Web and mobile apps from the list on the left.
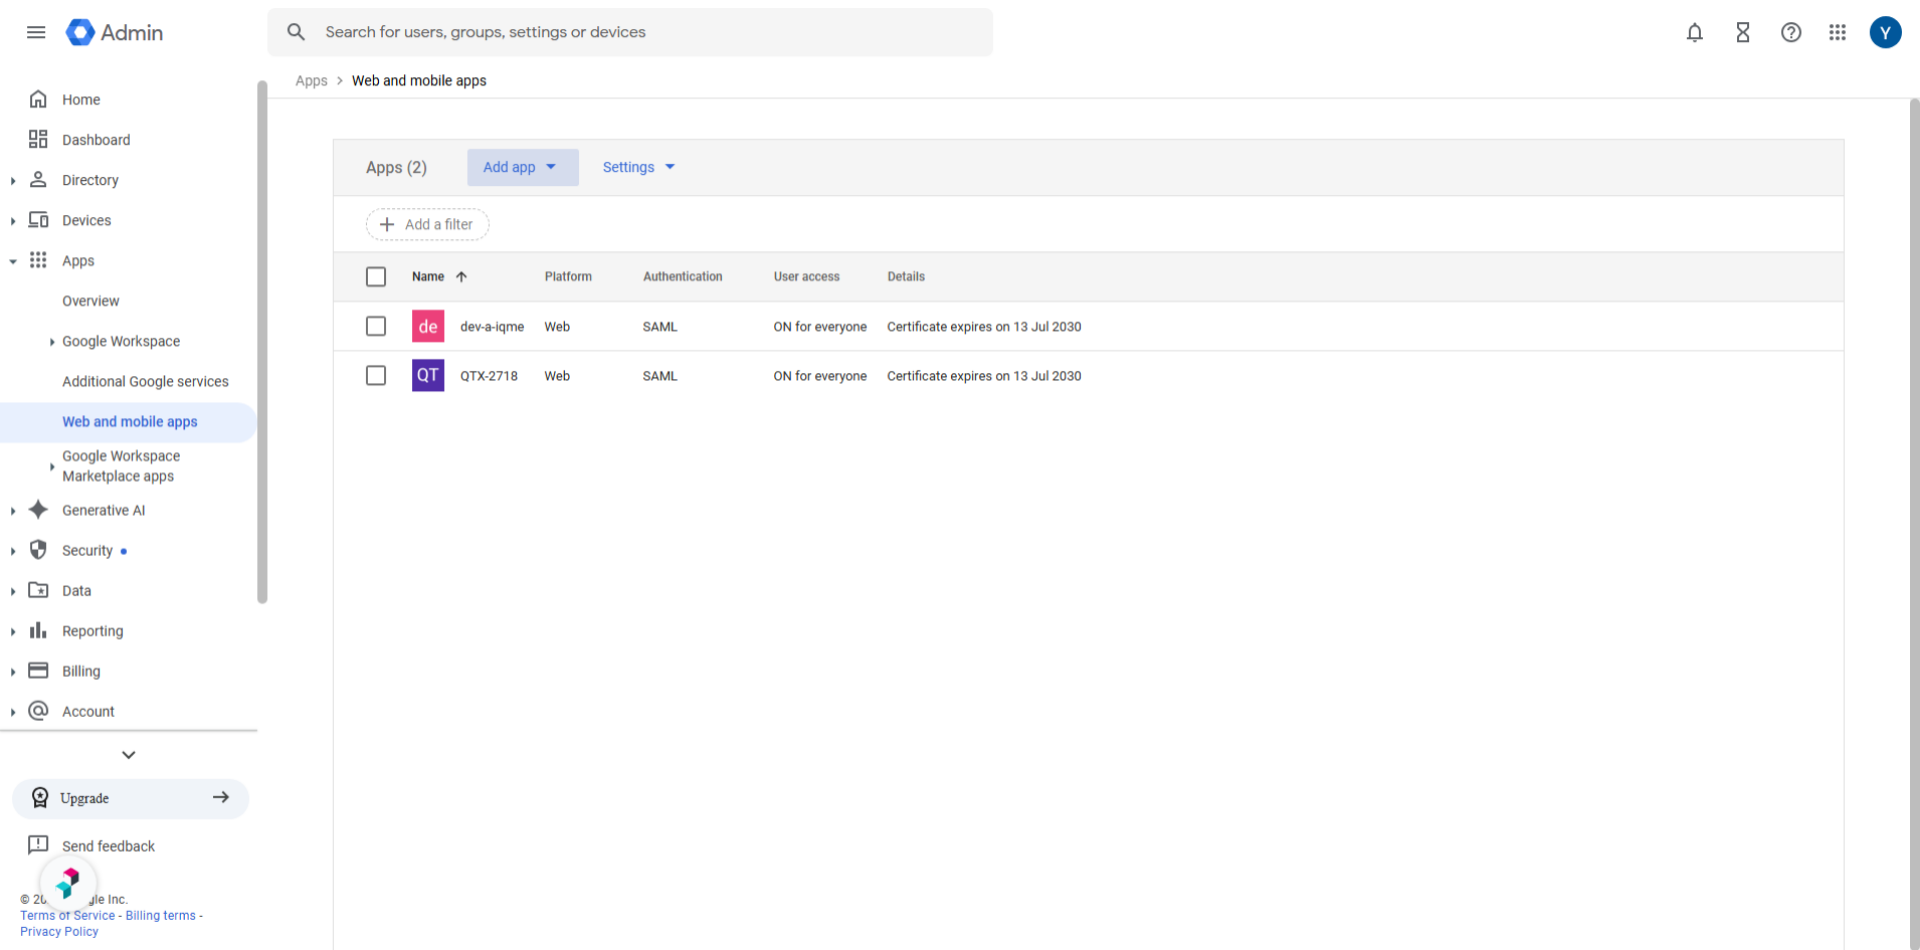
- Click Add app.
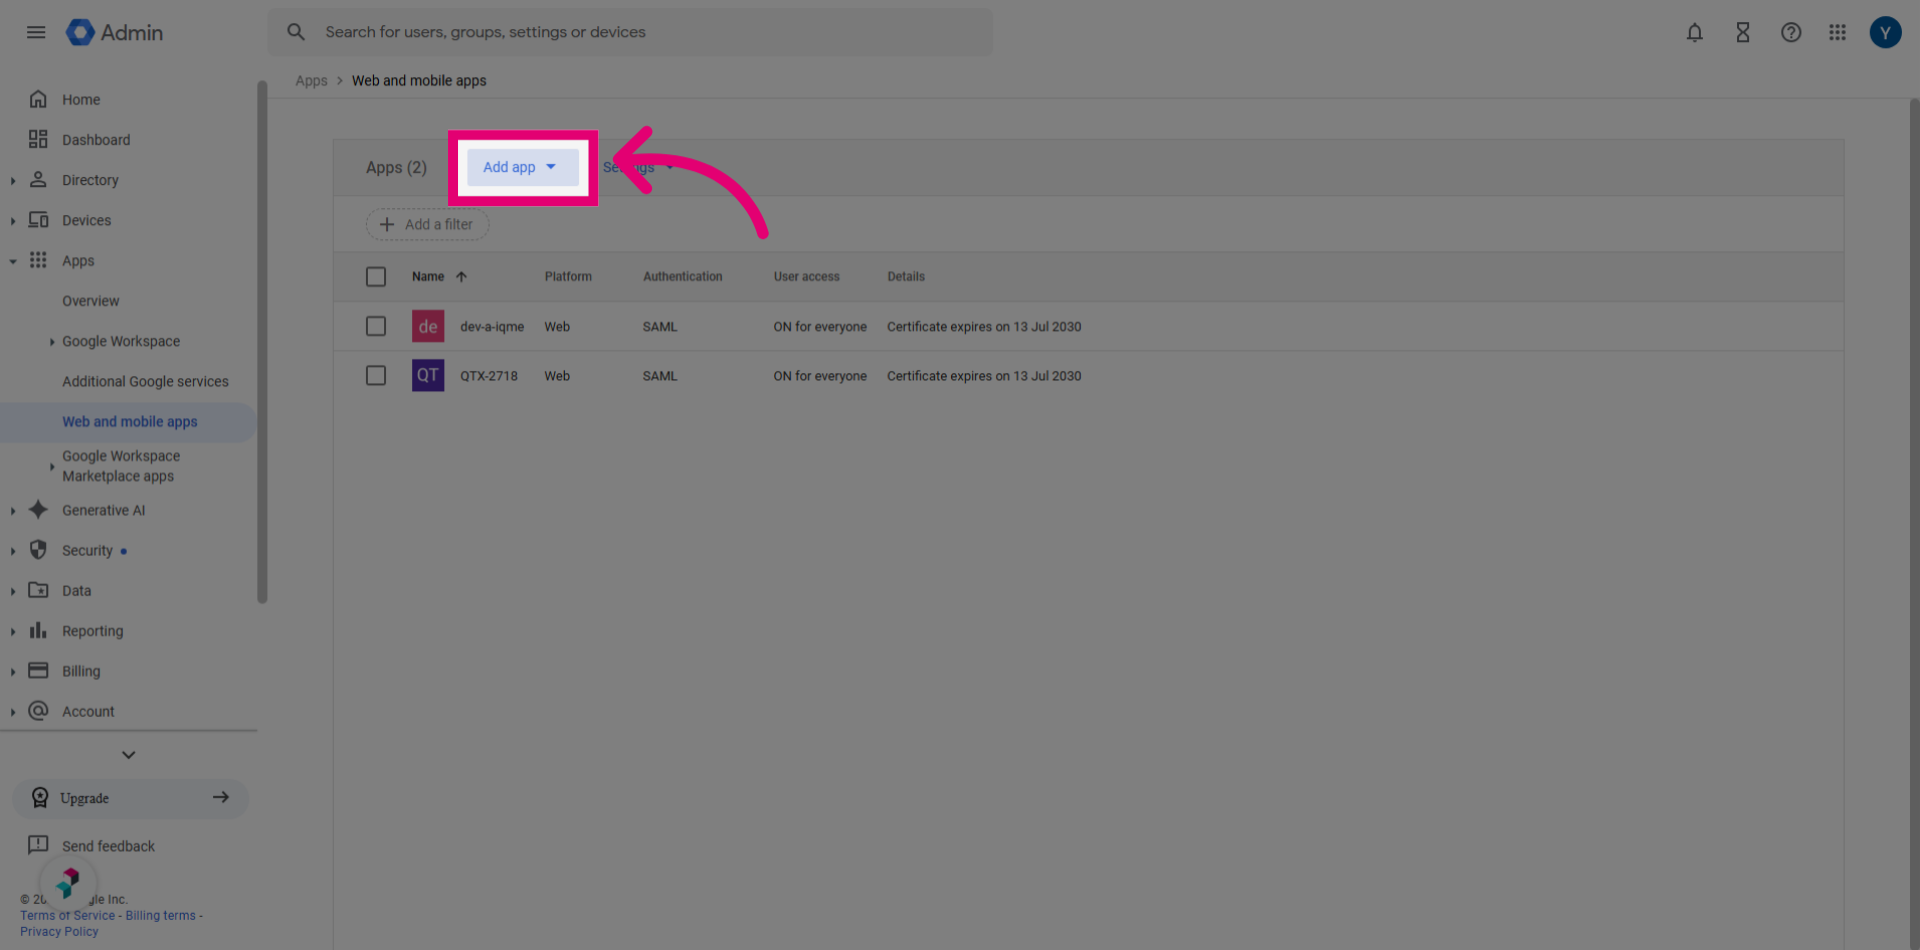
- Select Add custom SAML app from the list.
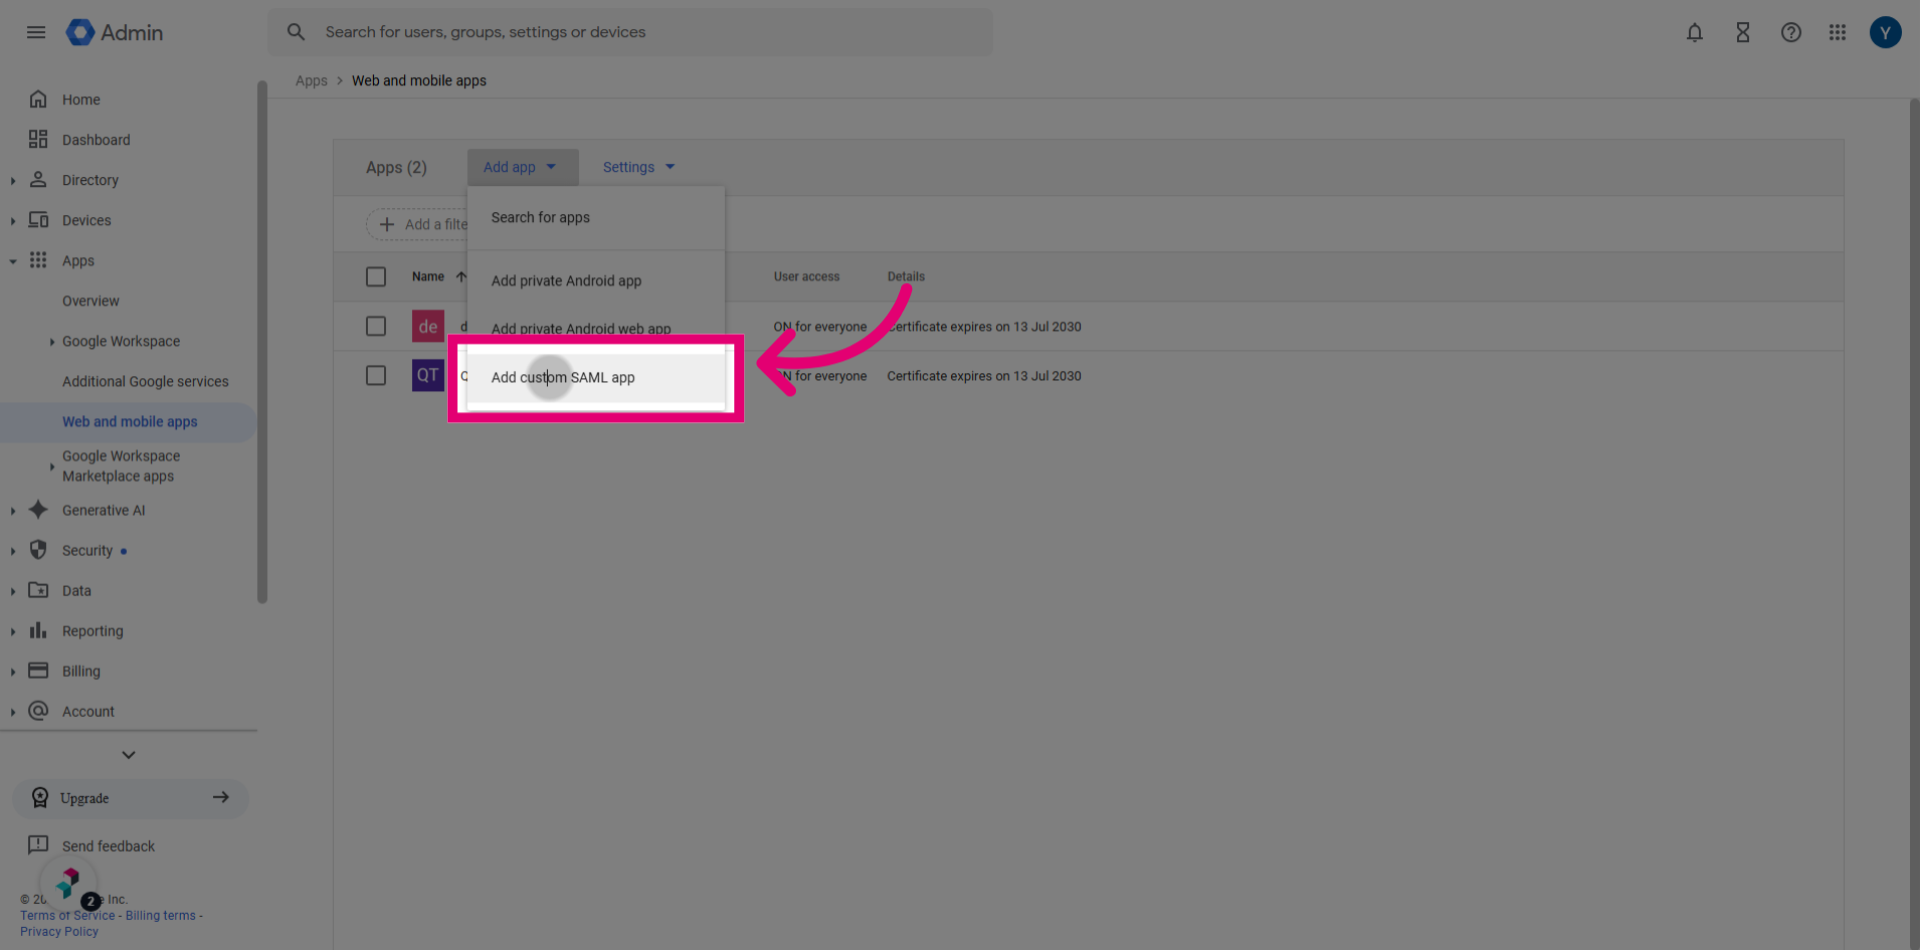
- Enter our-iqme as the App name.
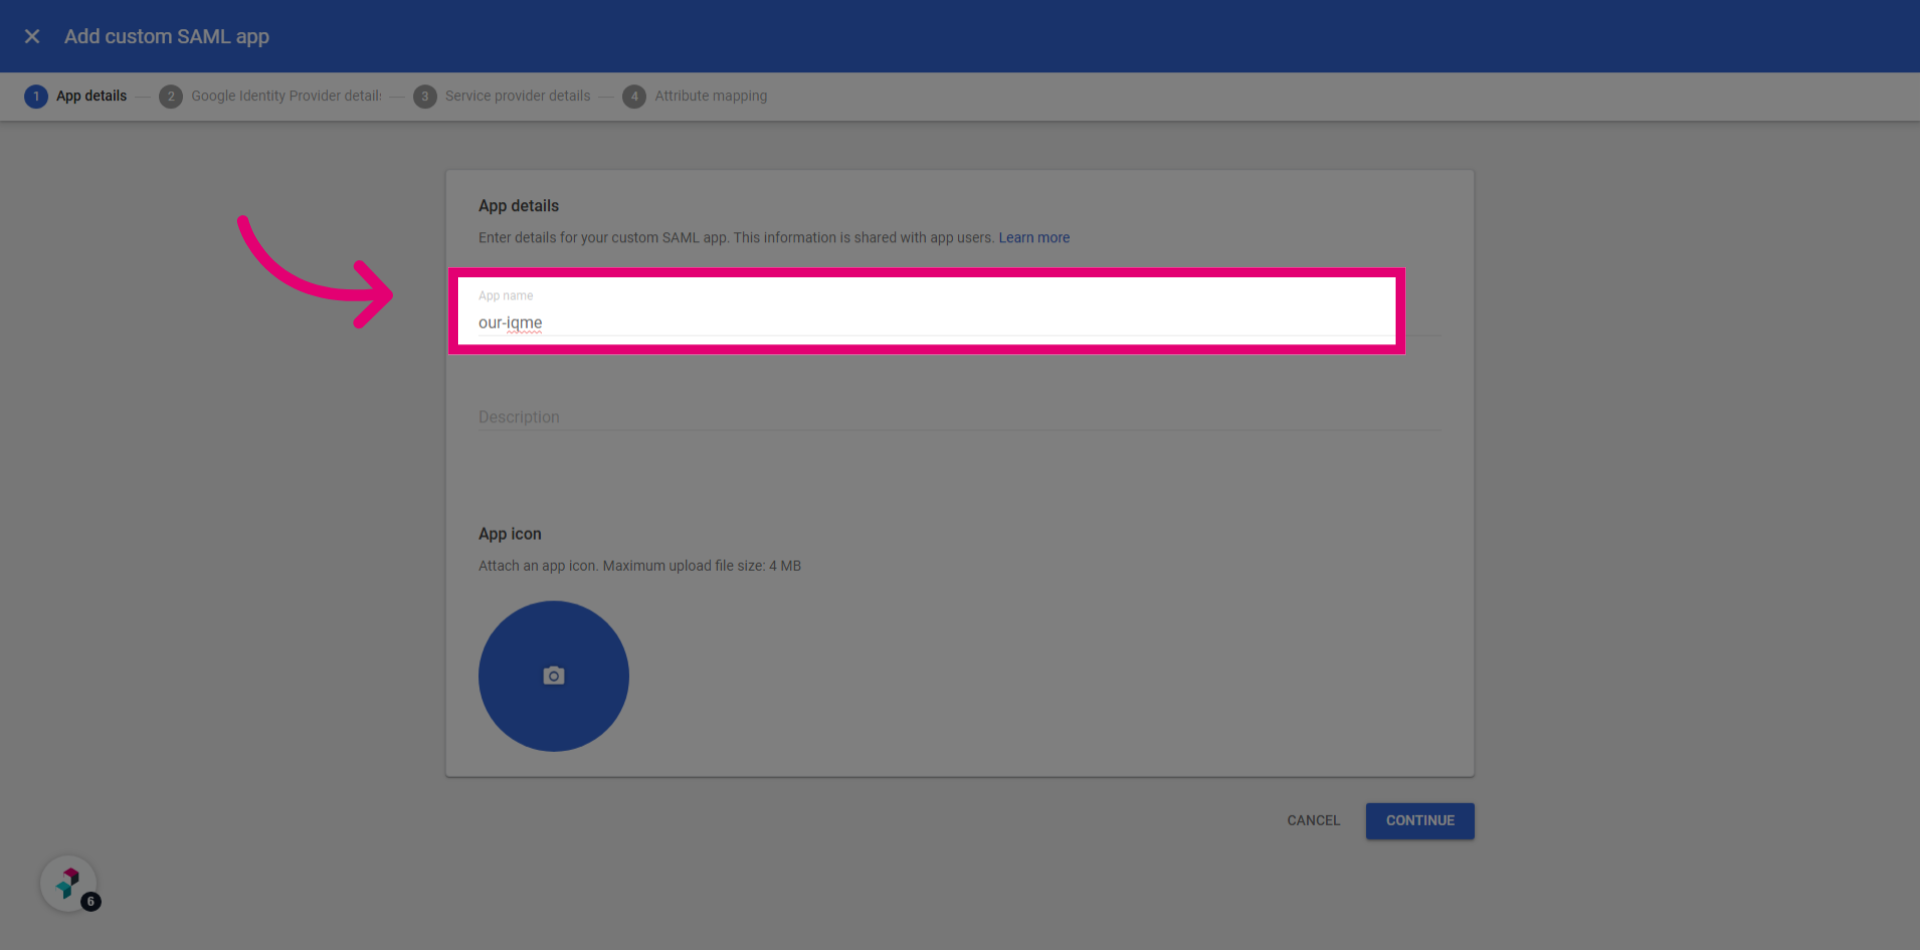
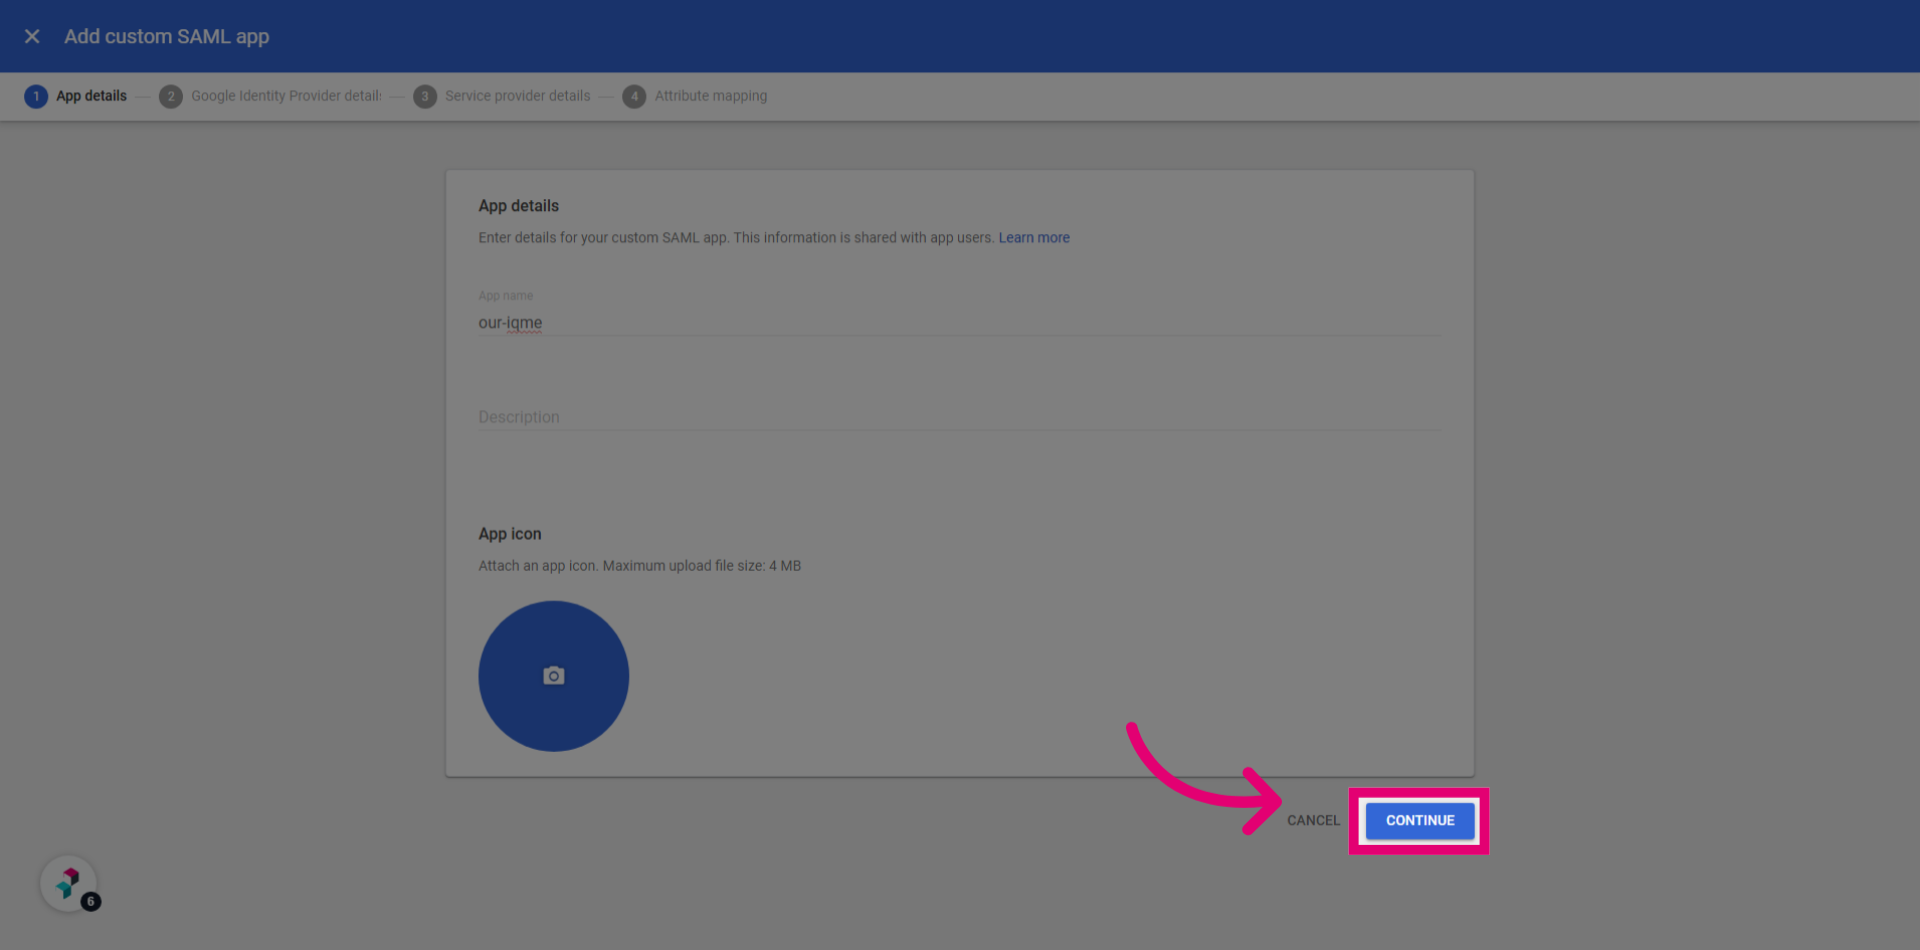
- Click Continue button.
- Copy the SSO URL value.
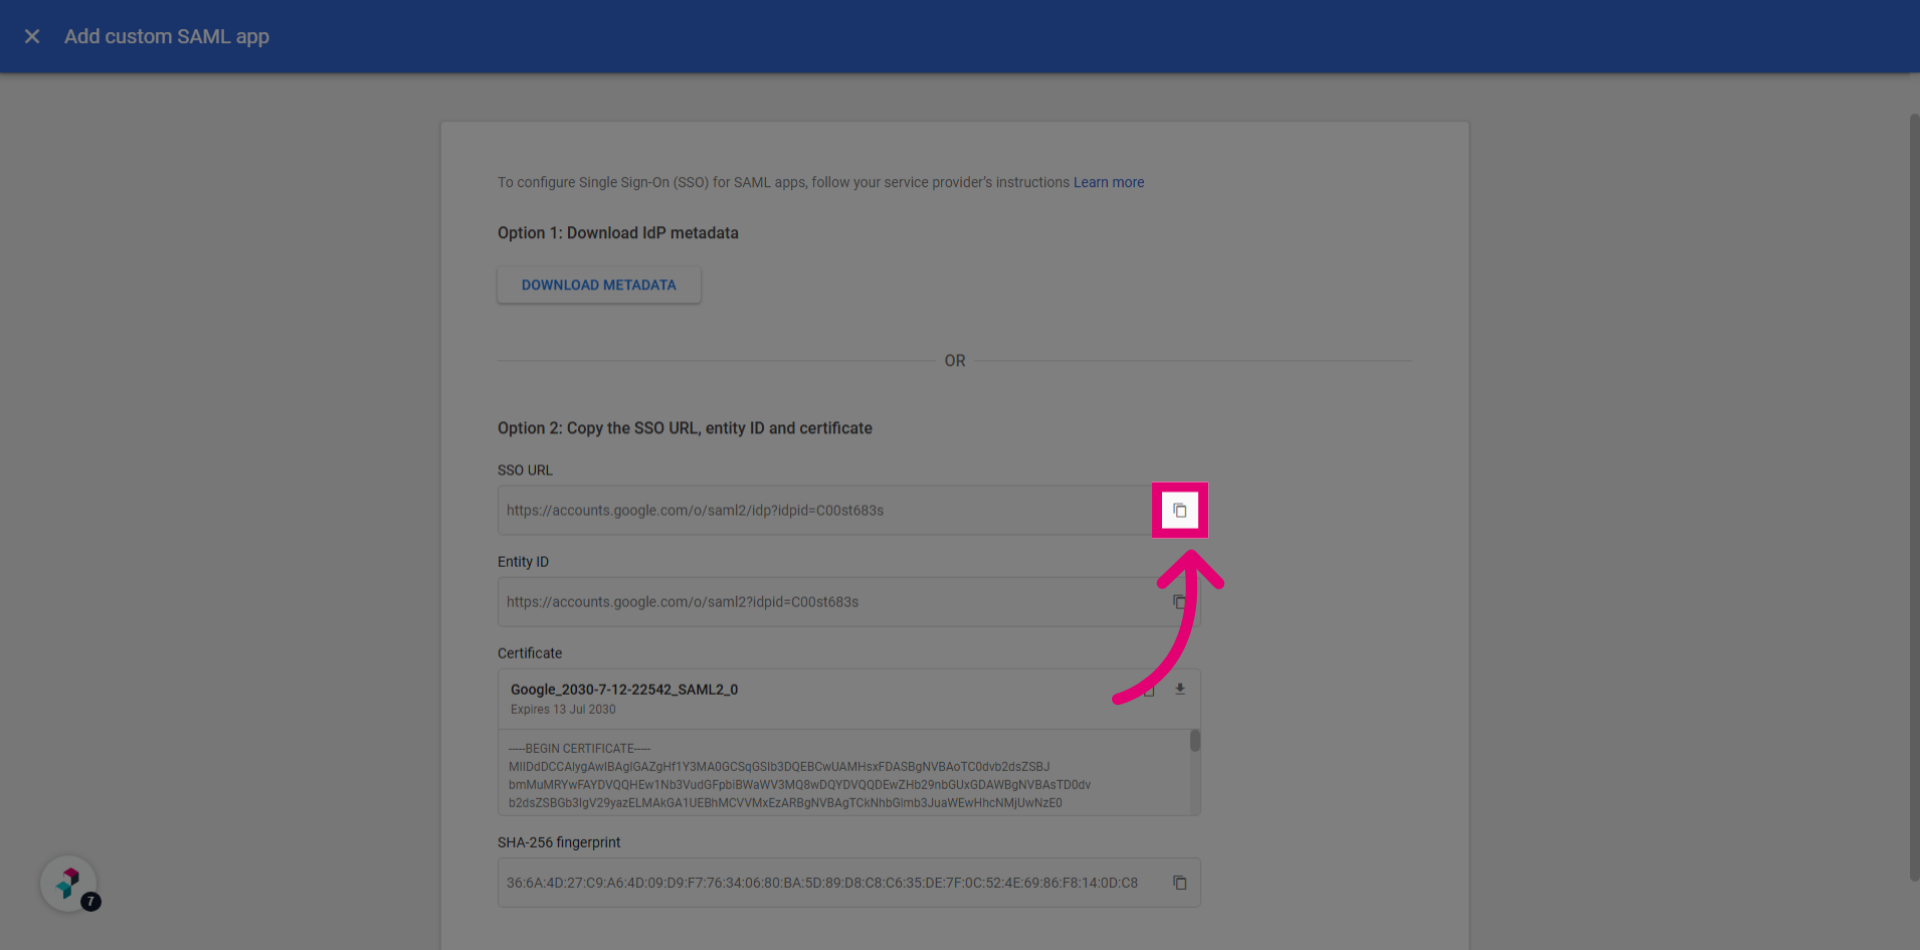
- Open Quality Management in a separate tab.
- Access the Administration module.
- Select System Settings.
- Switch to the Passwords tab.
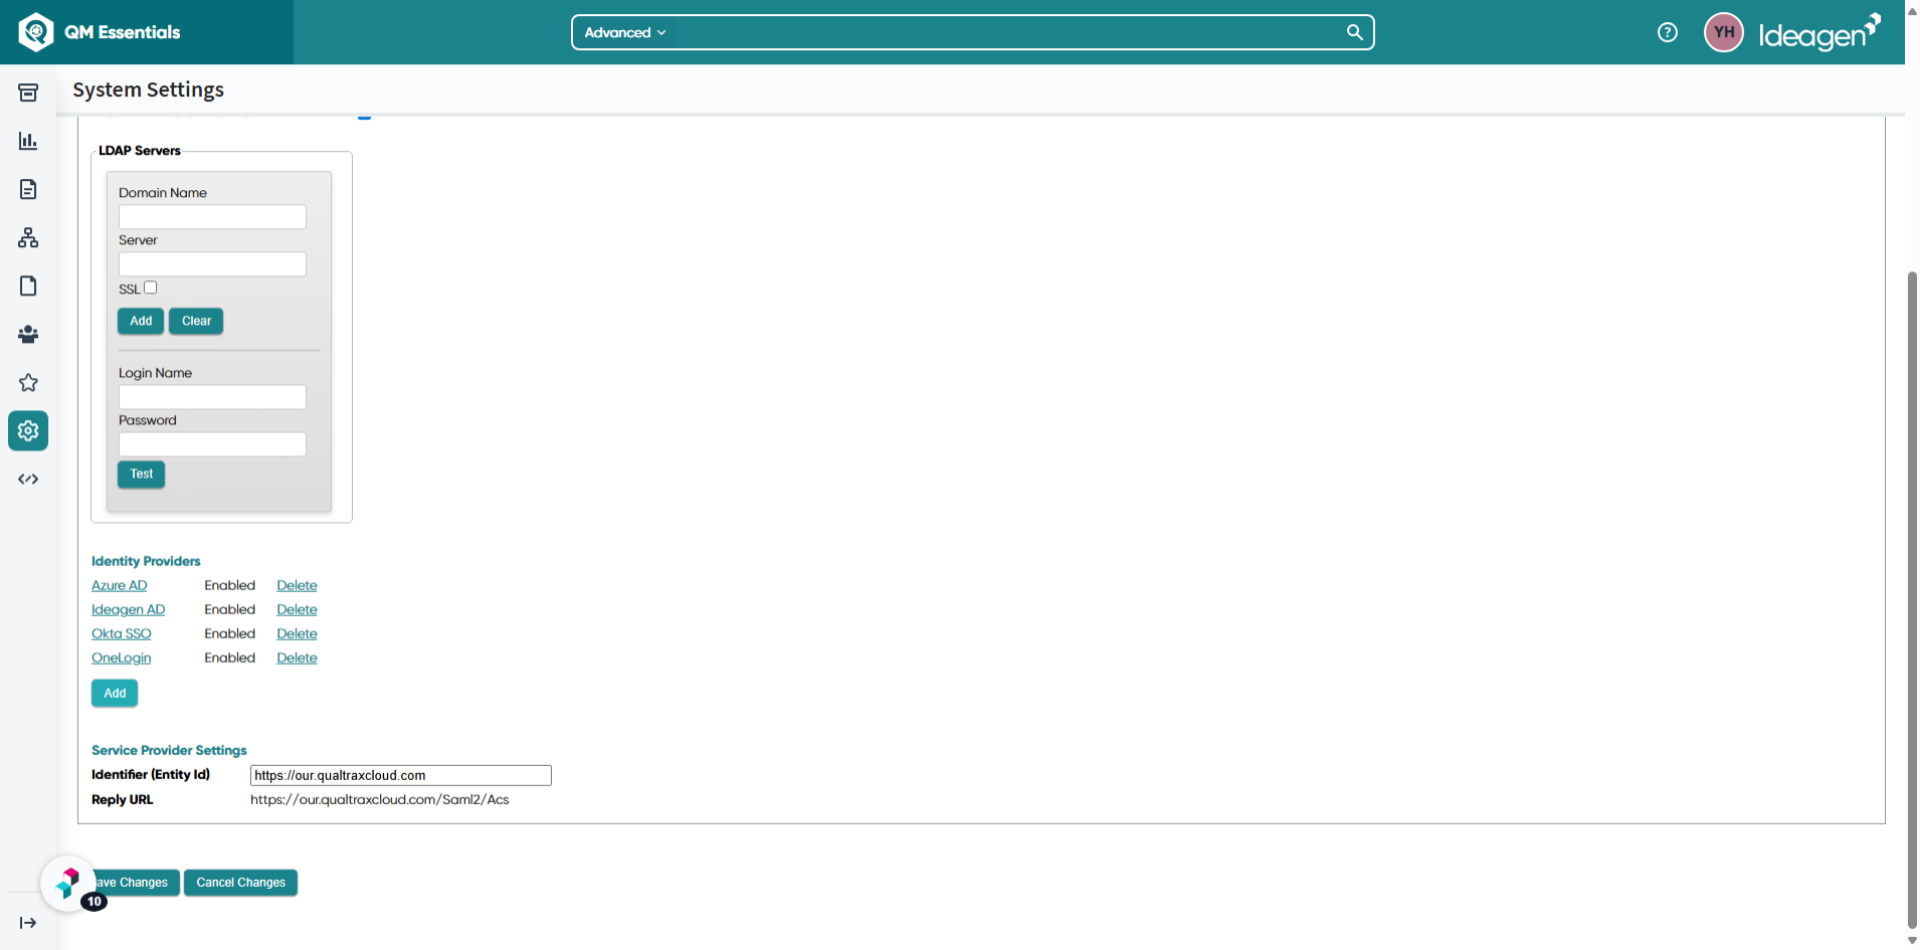
- Click Add in the Identity Providers section.
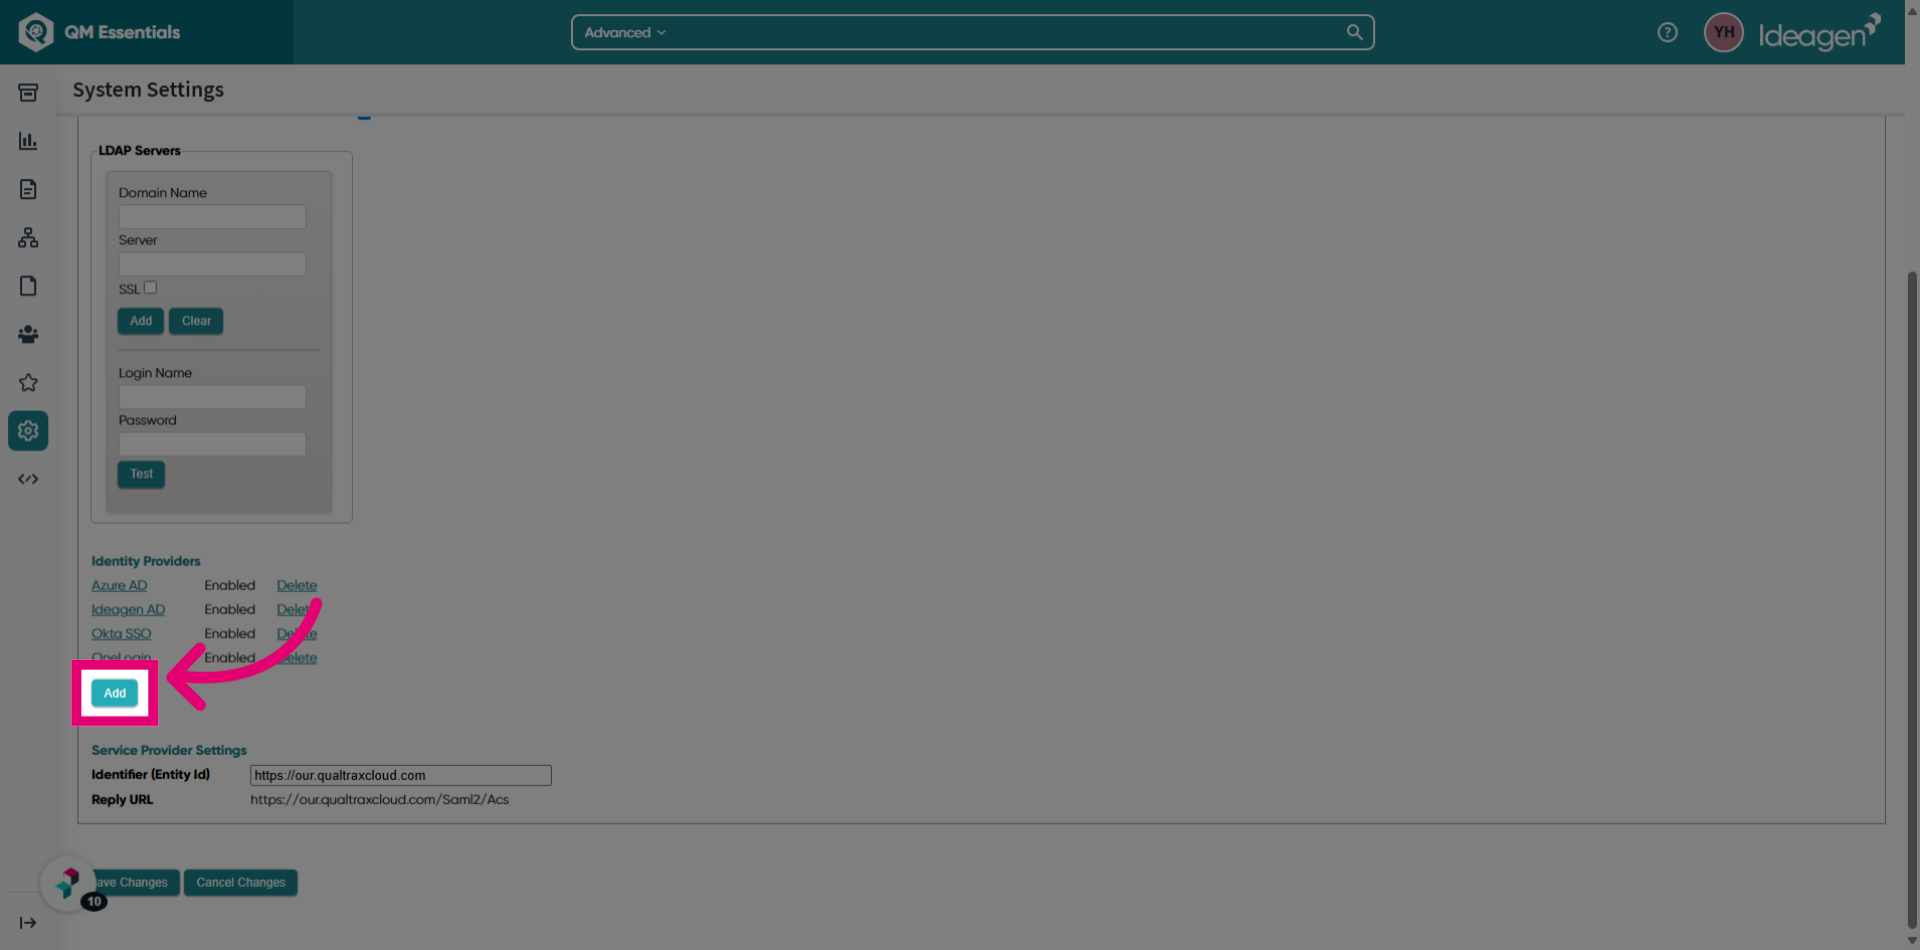
- Paste the previously copied value into the Redirect URL field.
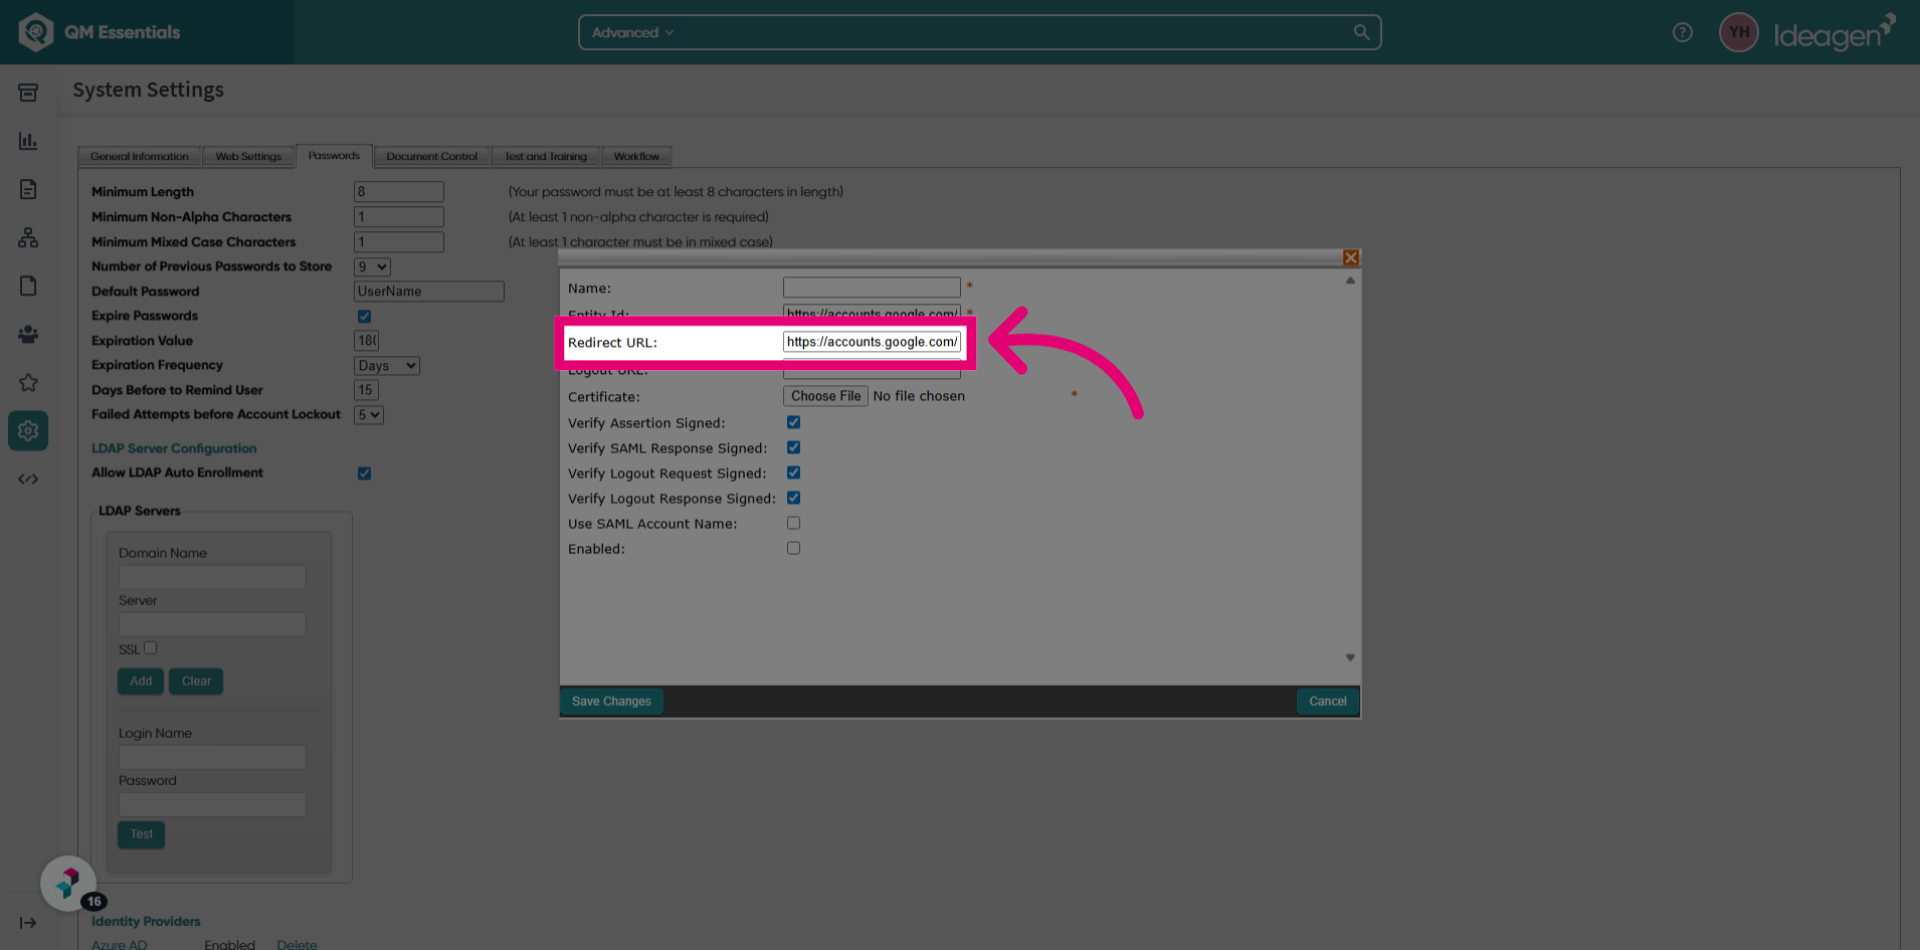
- Switch back to Google Workspace.
- Copy the Entity ID value.
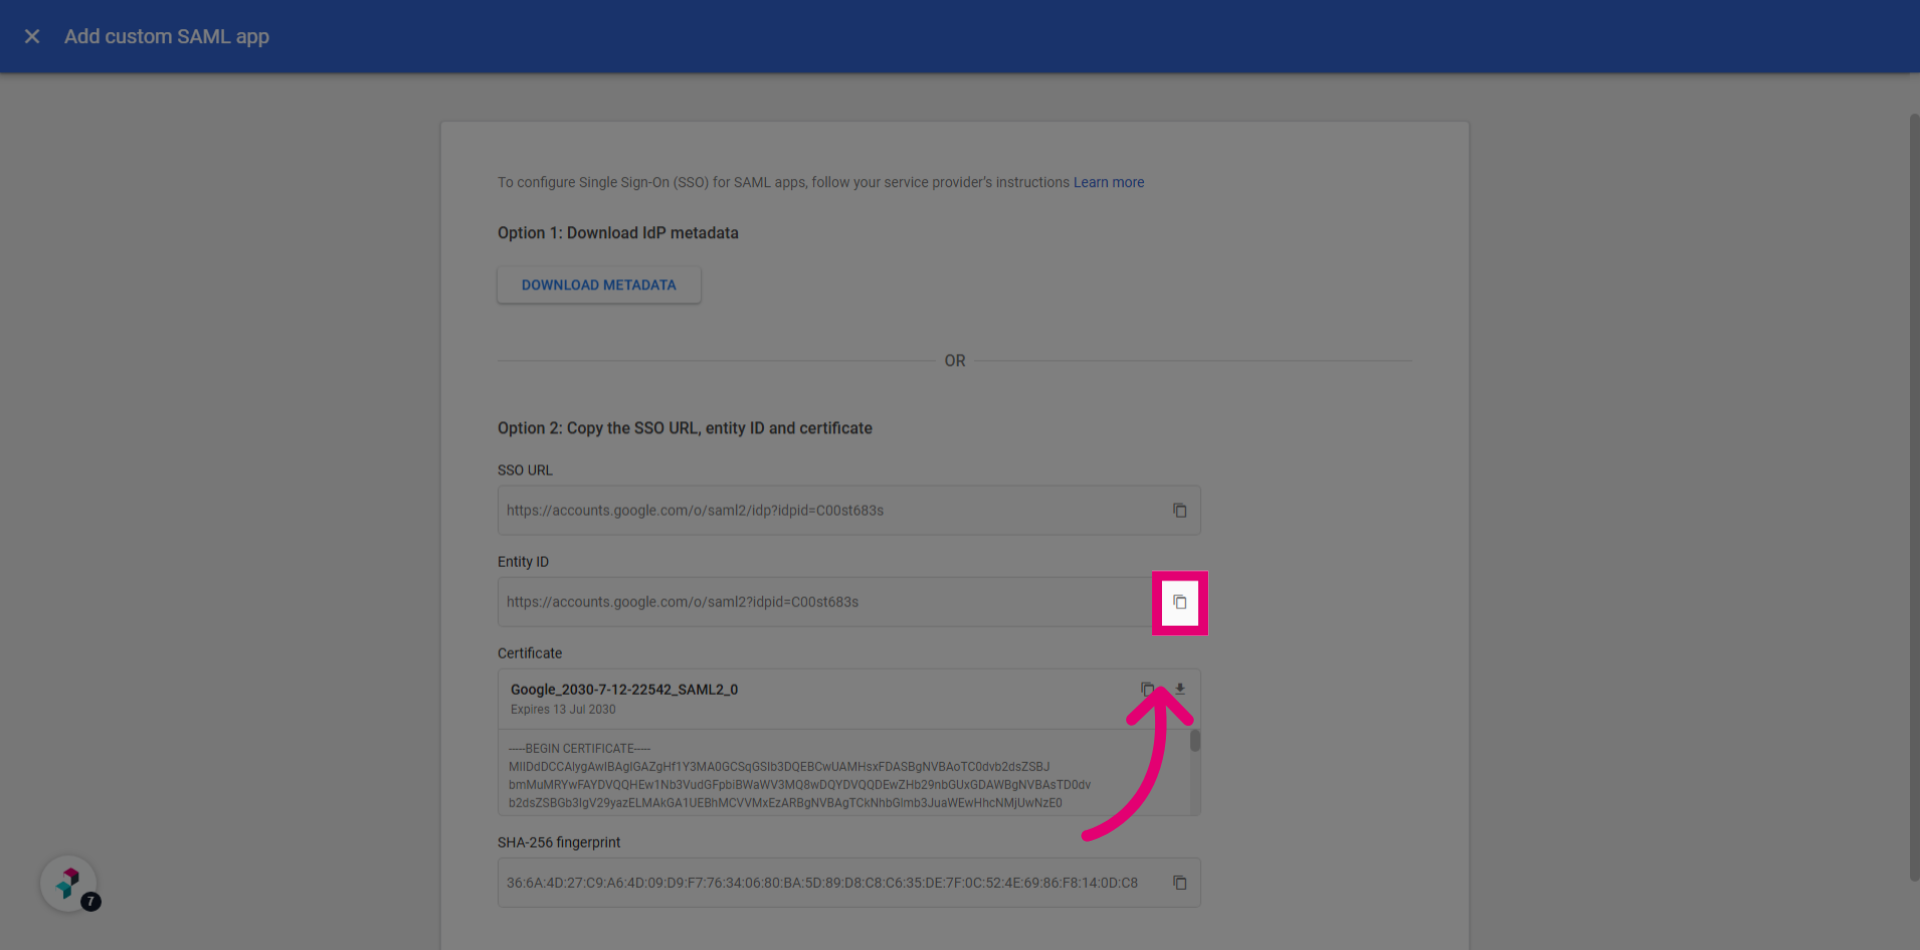
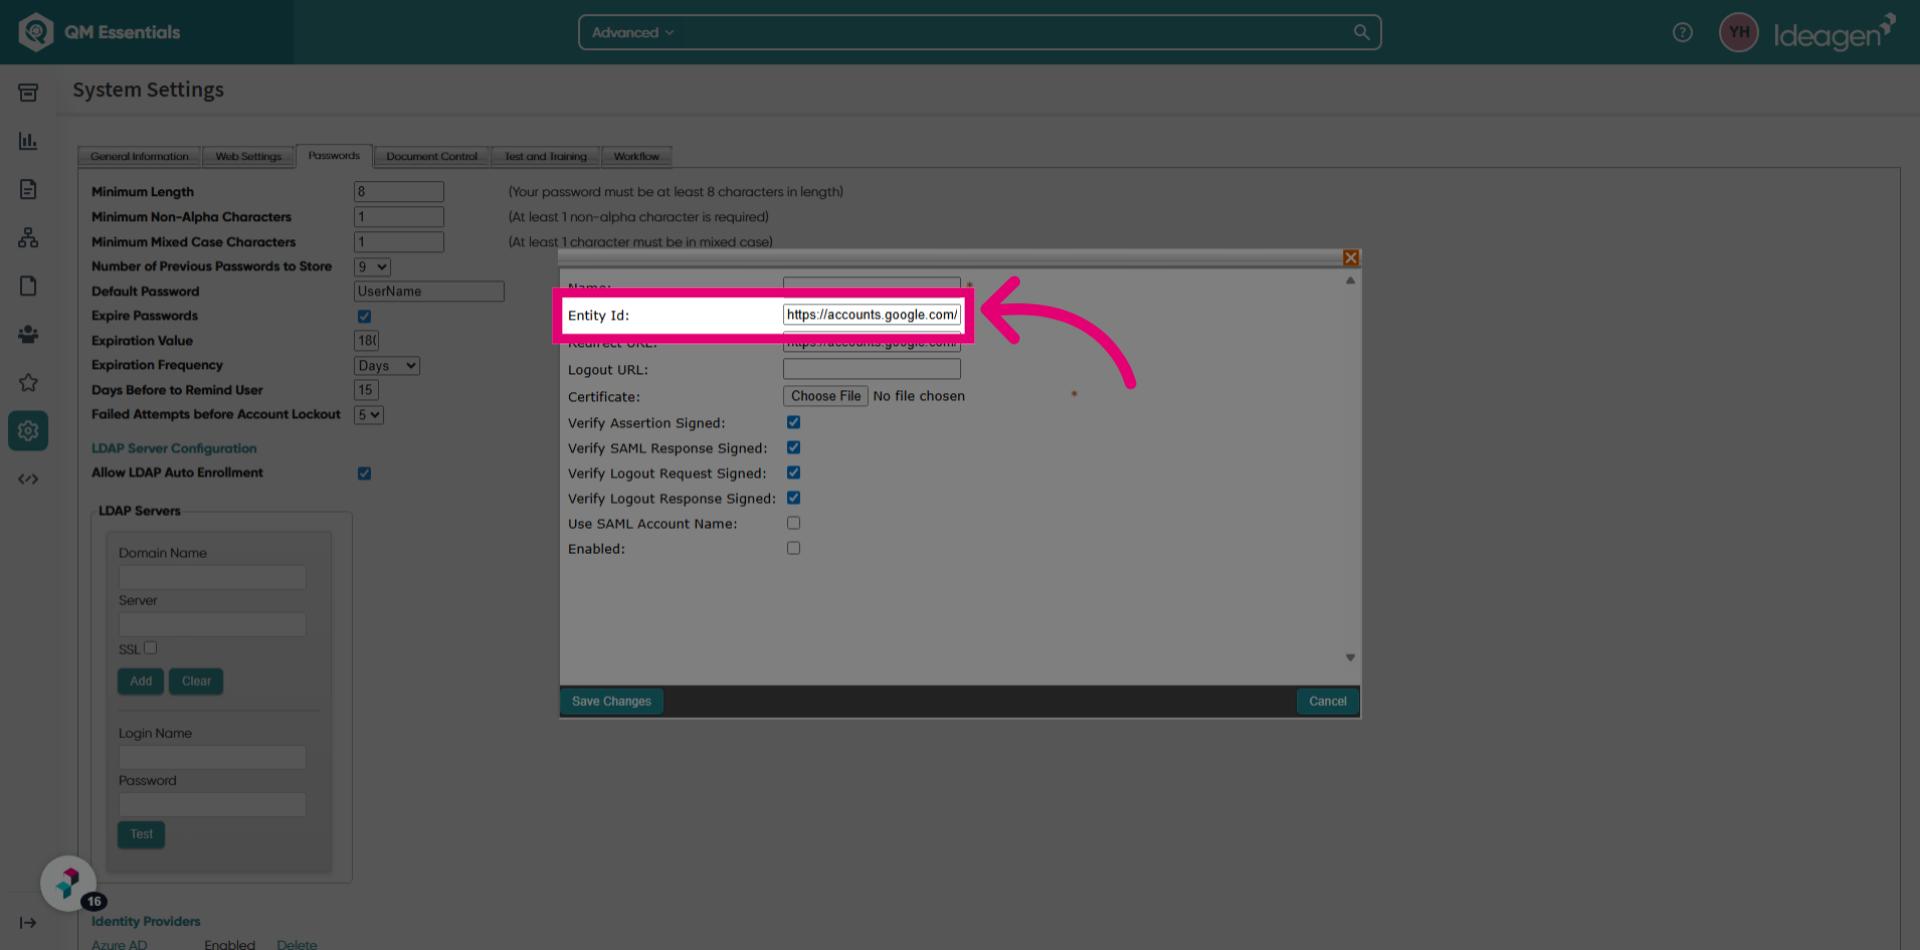
- Return to Quality Management.
- Paste the copied value into the Entity ID field.
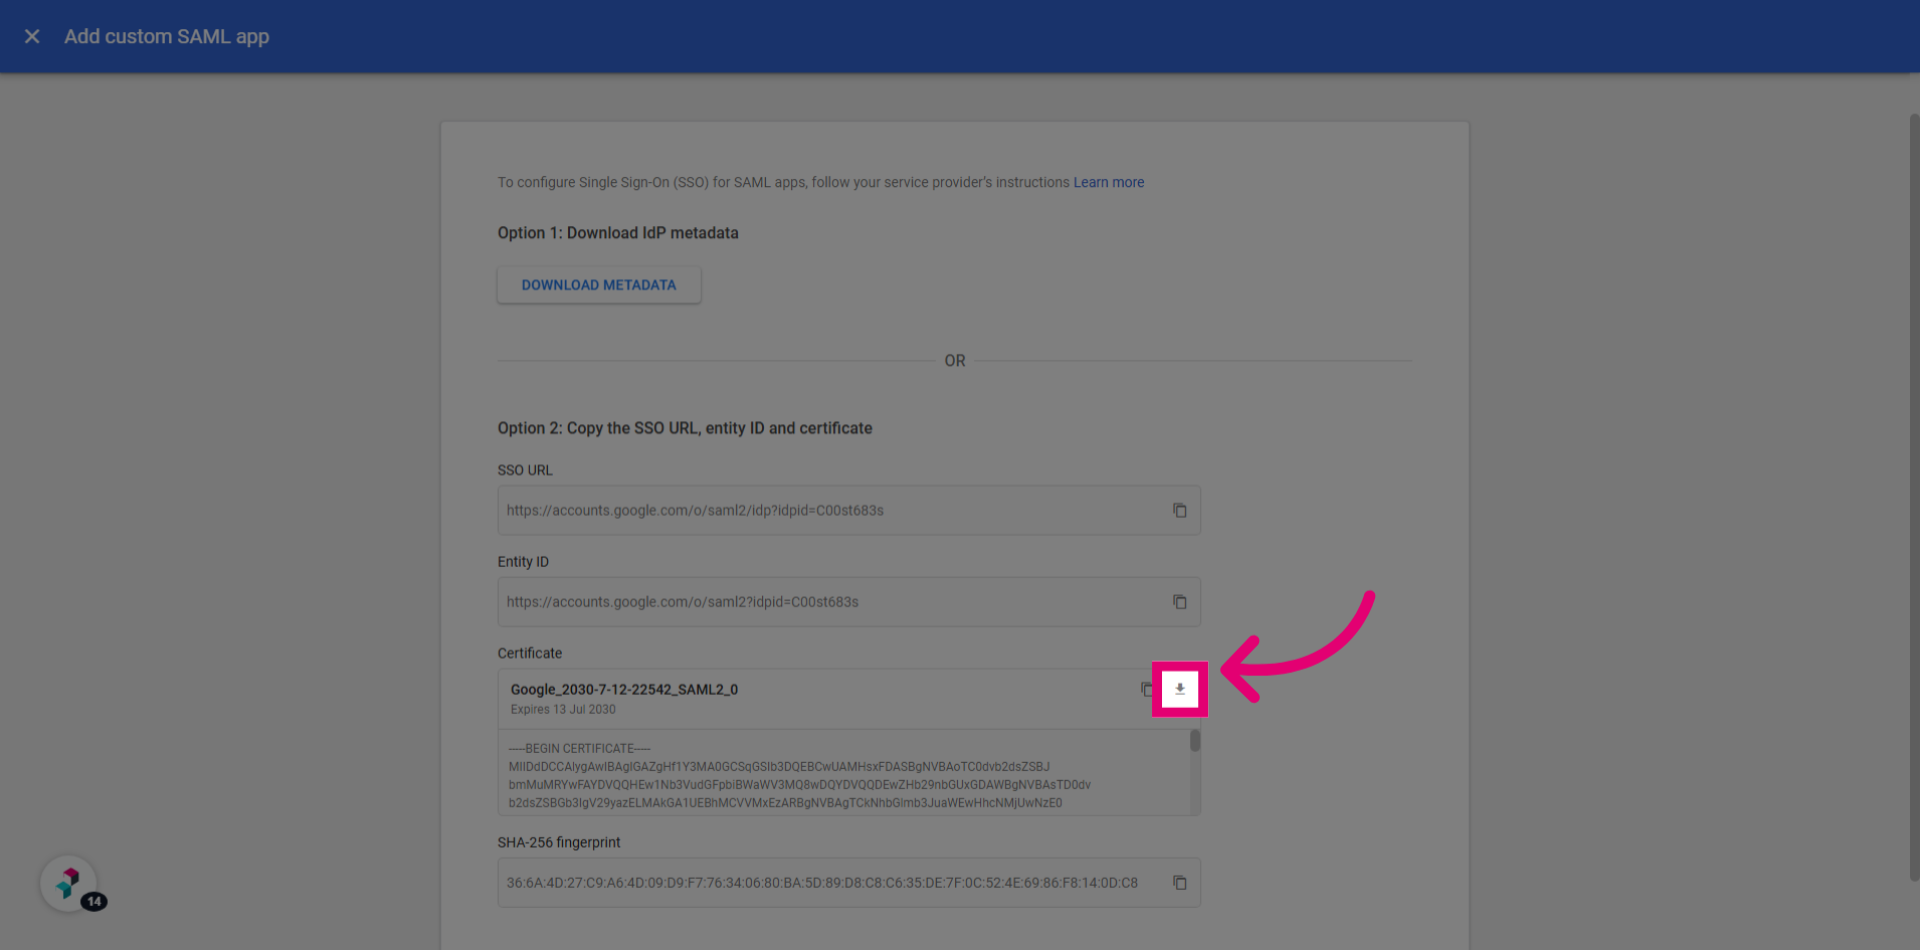
- Go back to Google Workspace.
- Click the Arrow to download the certificate.
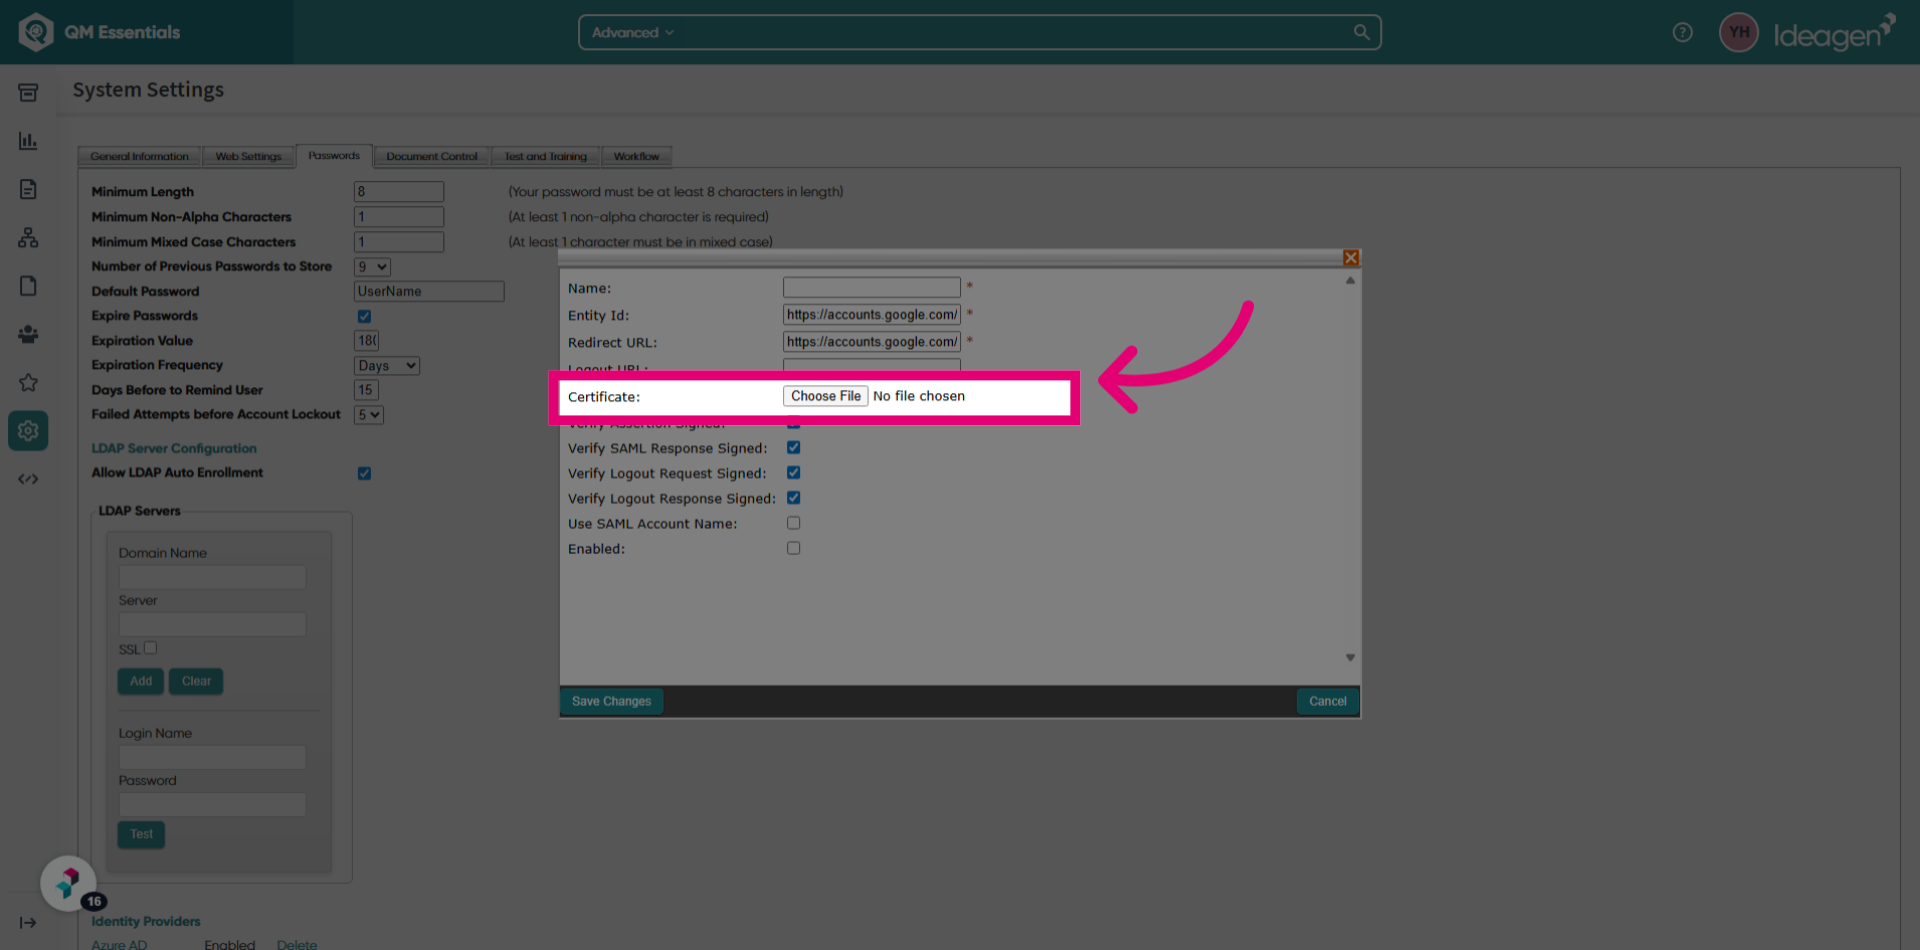
- Switch to Quality Management.
- Click Choose file.
- Select the certificate you previously downloaded.
- Enter the provider identifier into the Name field.
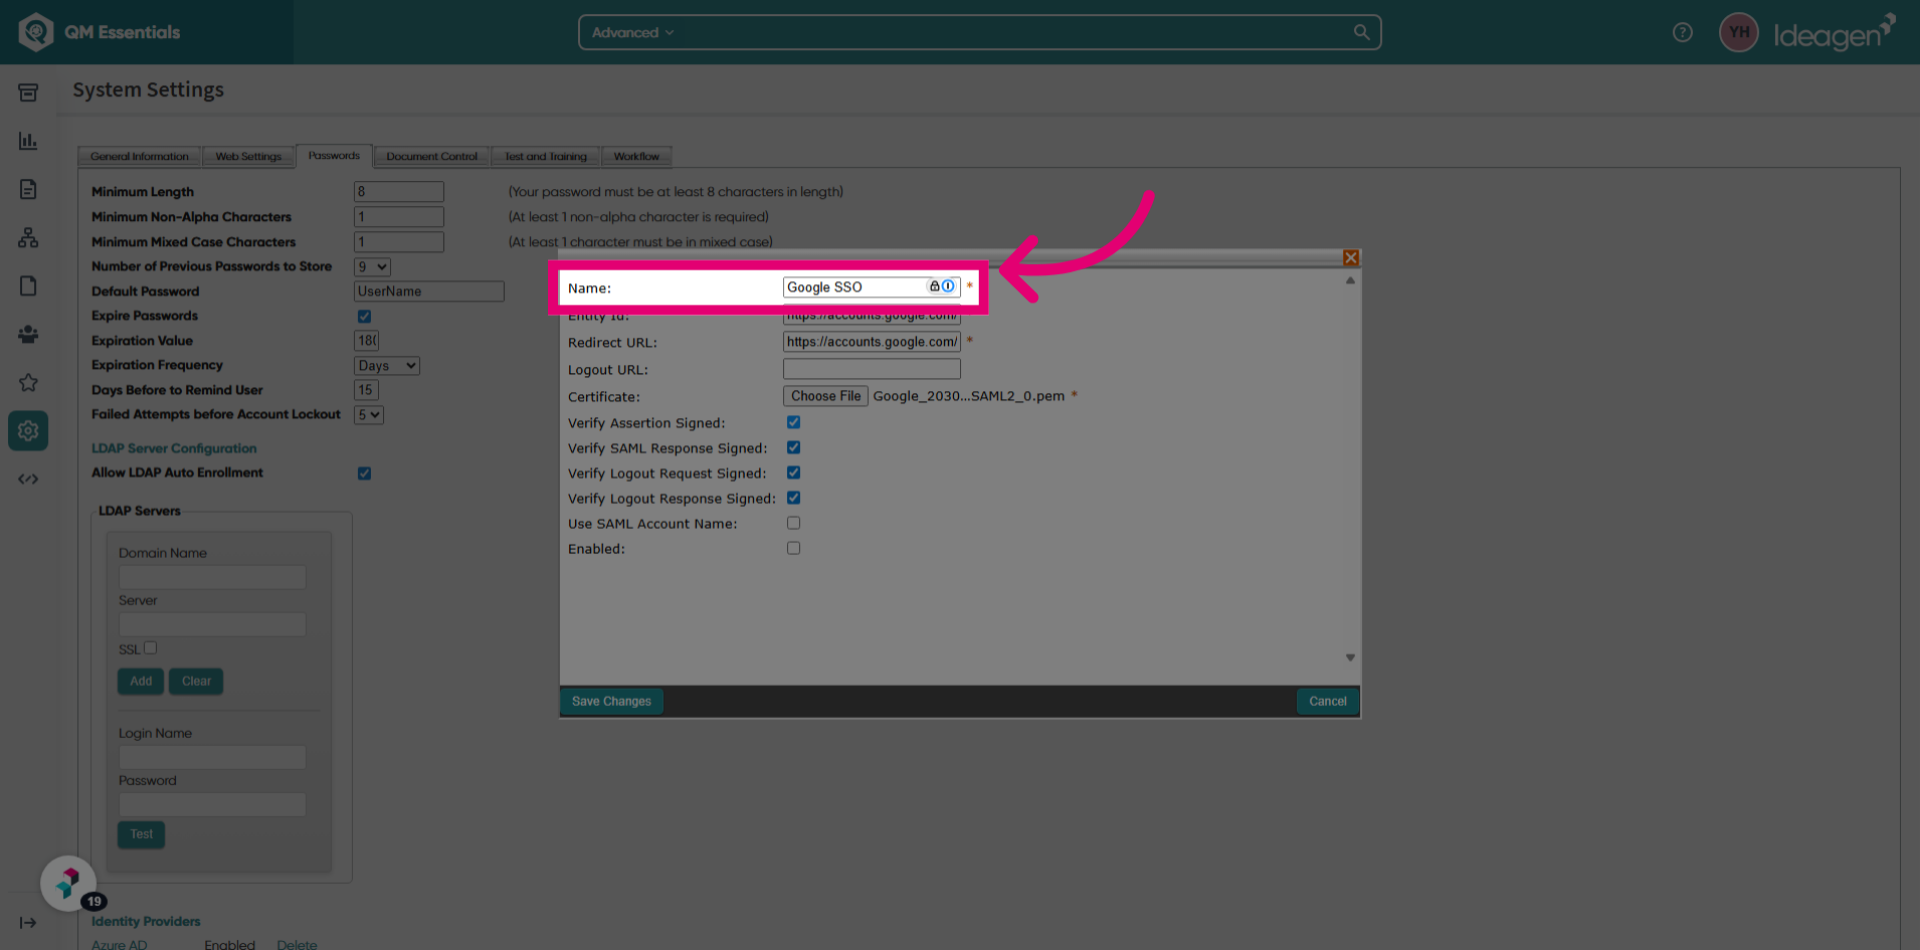
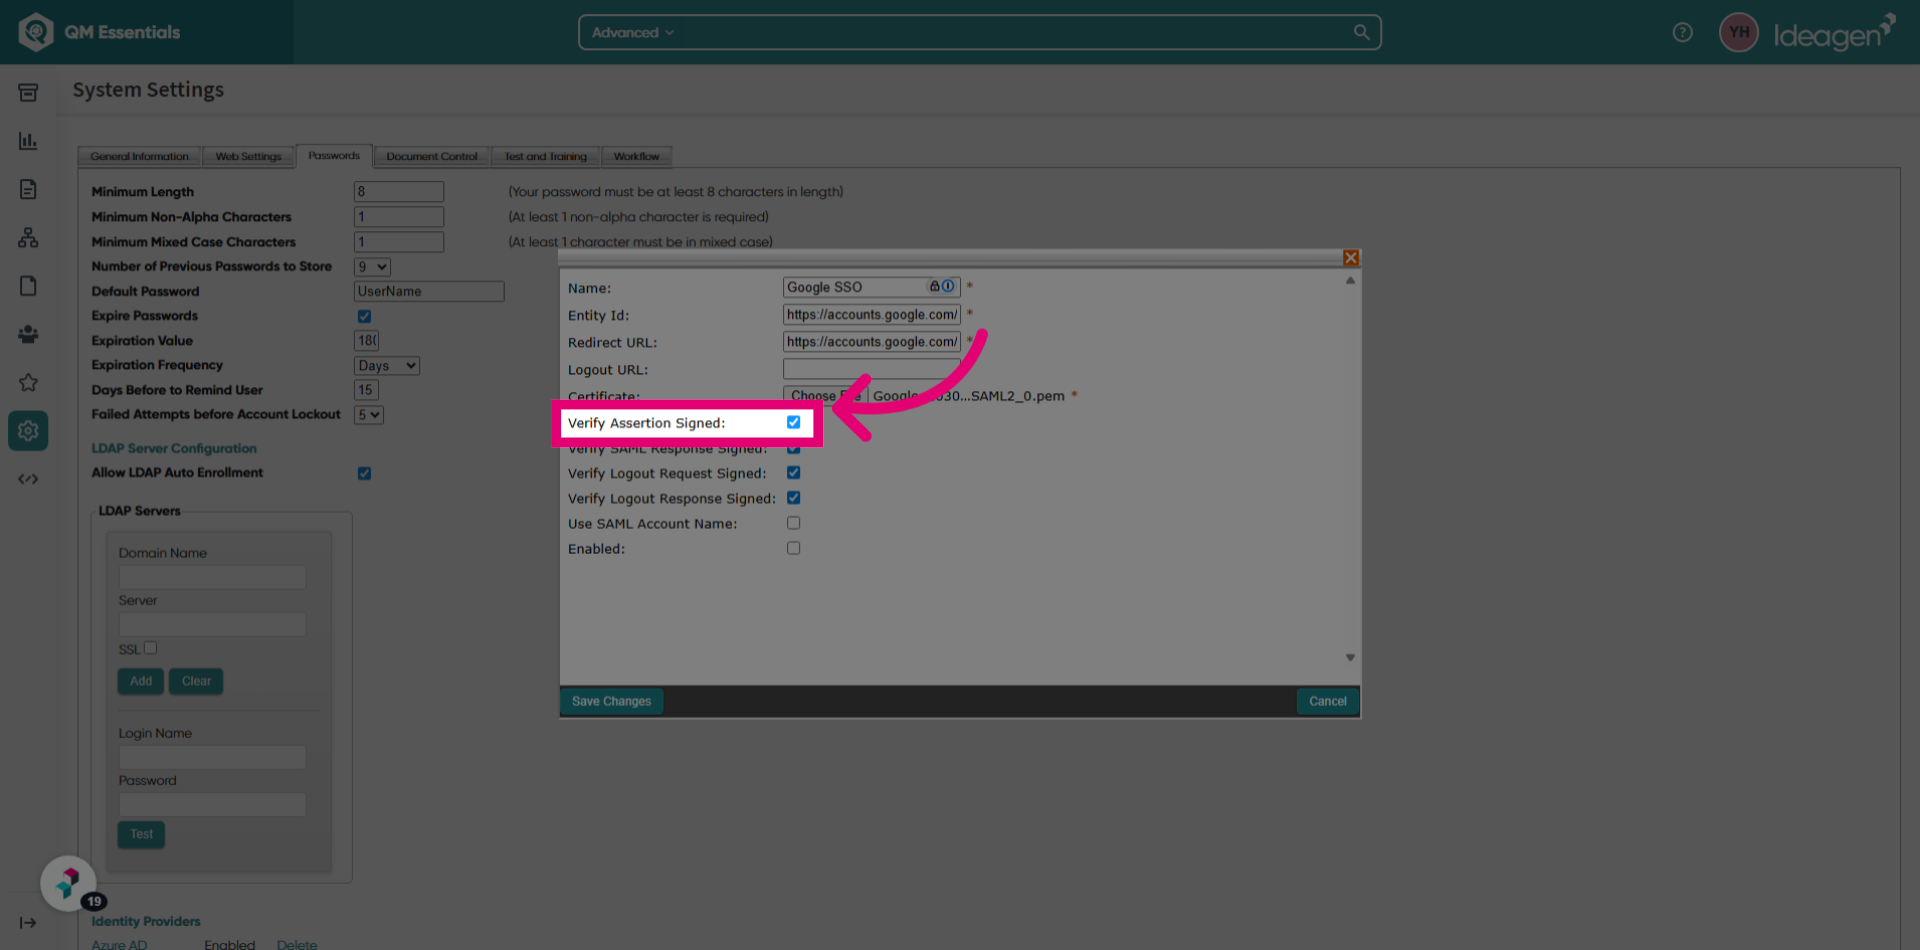
- Untick Verify Assertion Signed.
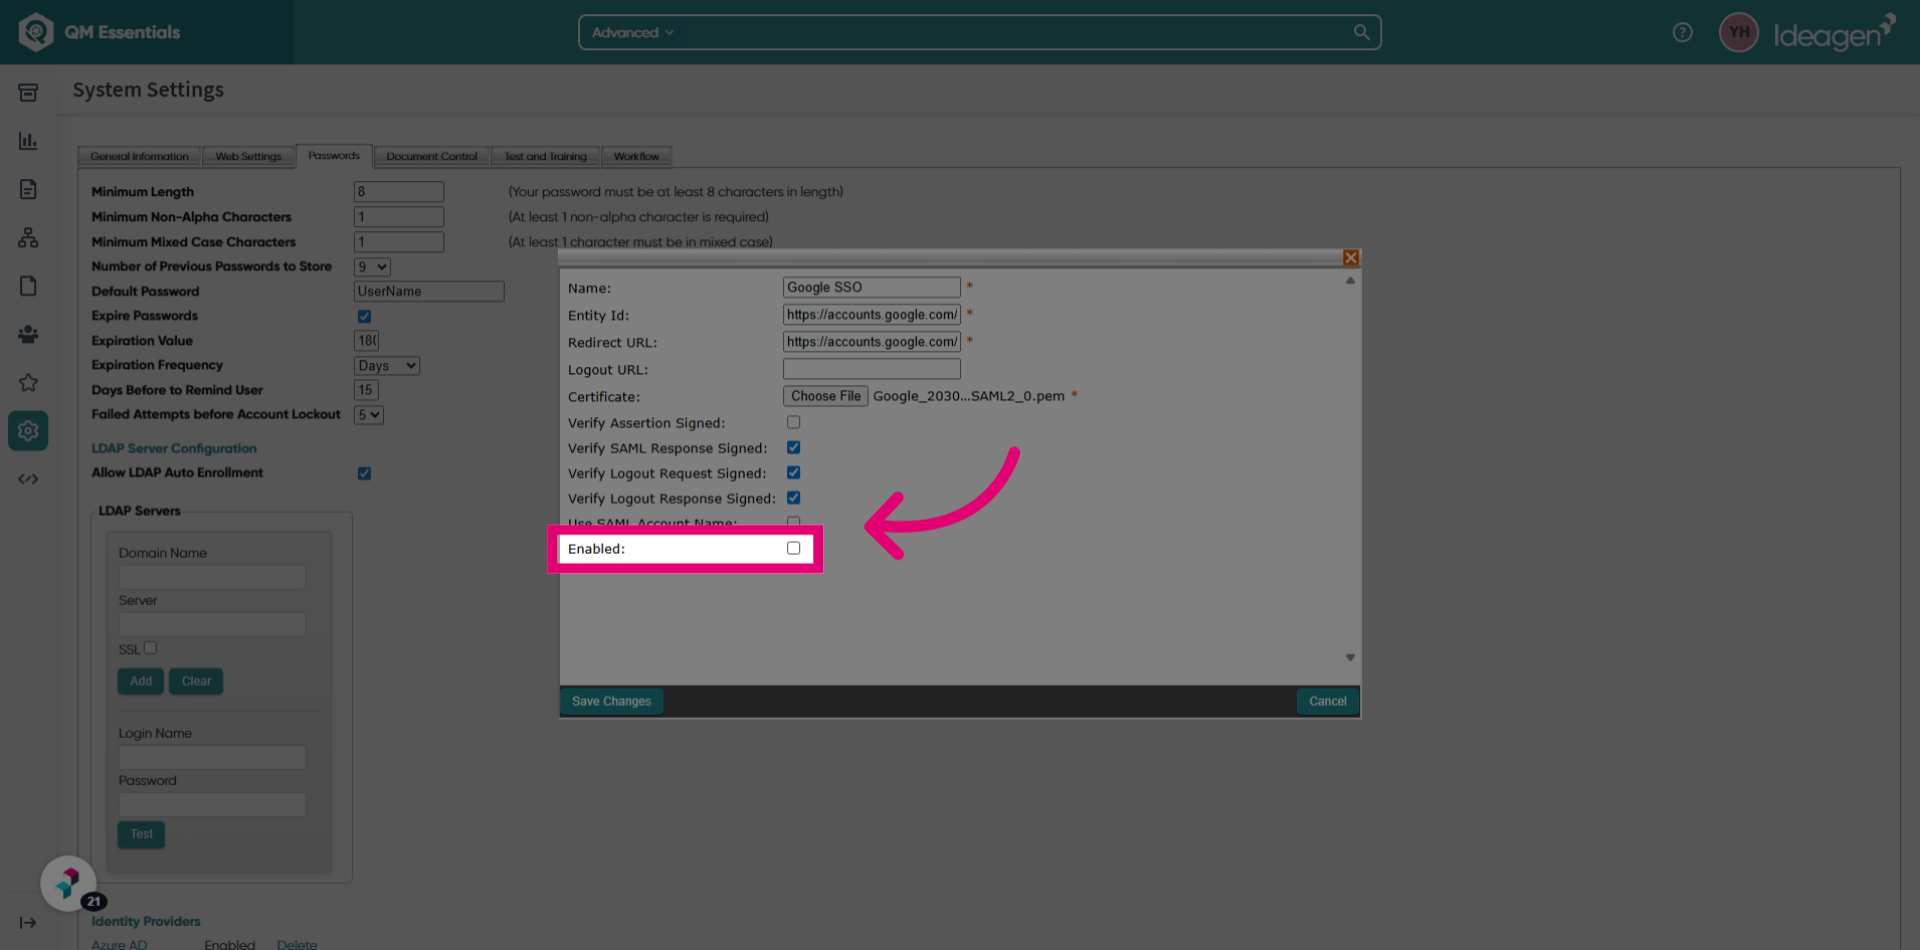
- Tick Enabled.
- Click Save Changes.
- Return to Google Workspace.
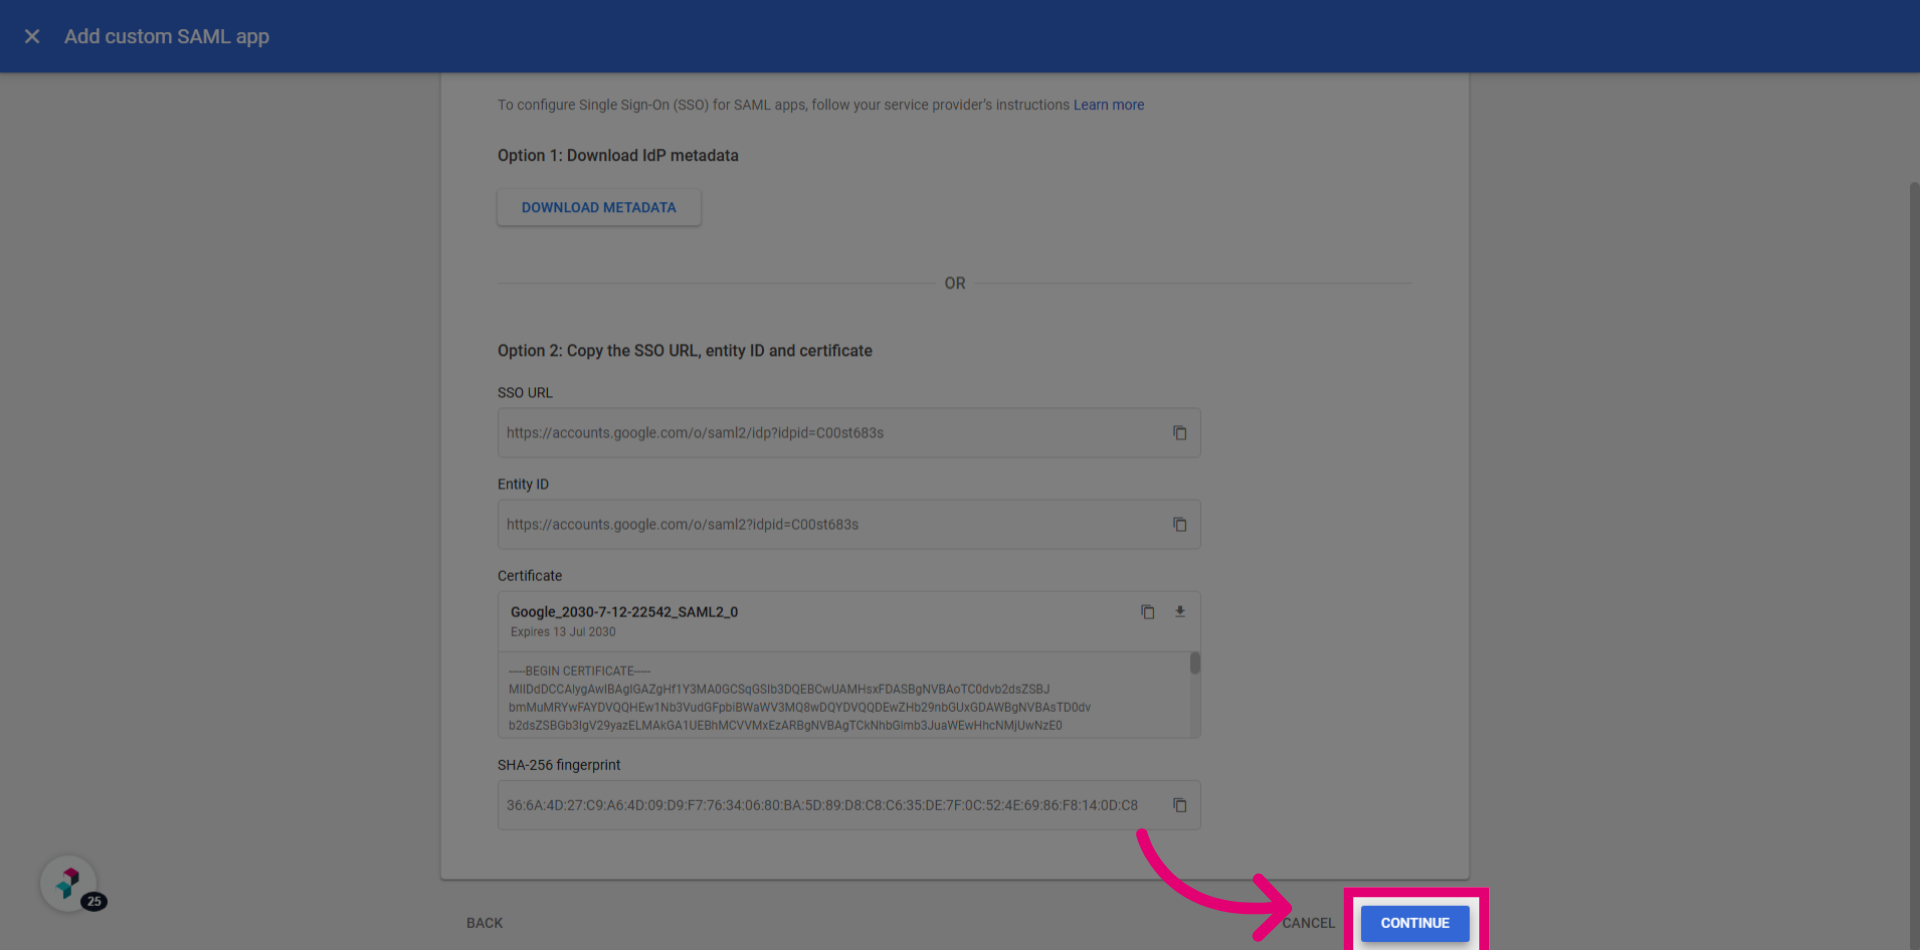
- Click Continue.
- Copy the Identifier (Entity Id) value in Quality Management.
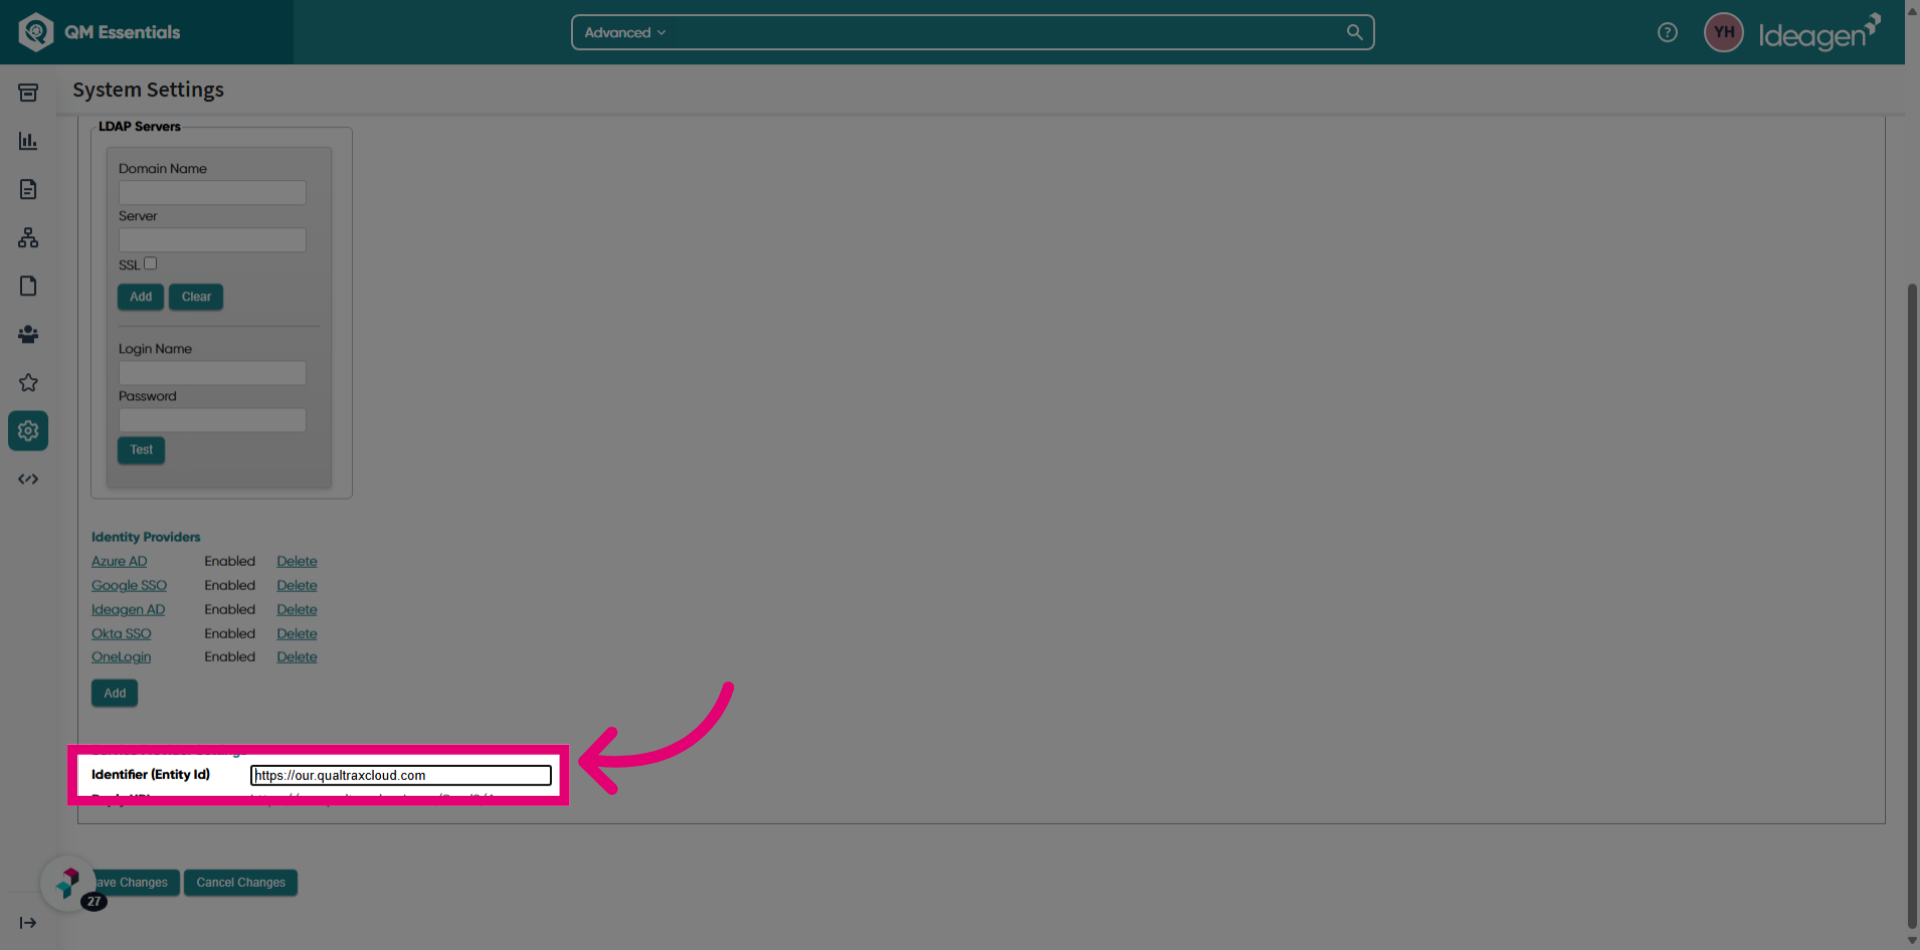
- Paste it into the Entity ID field in Google Workspace.
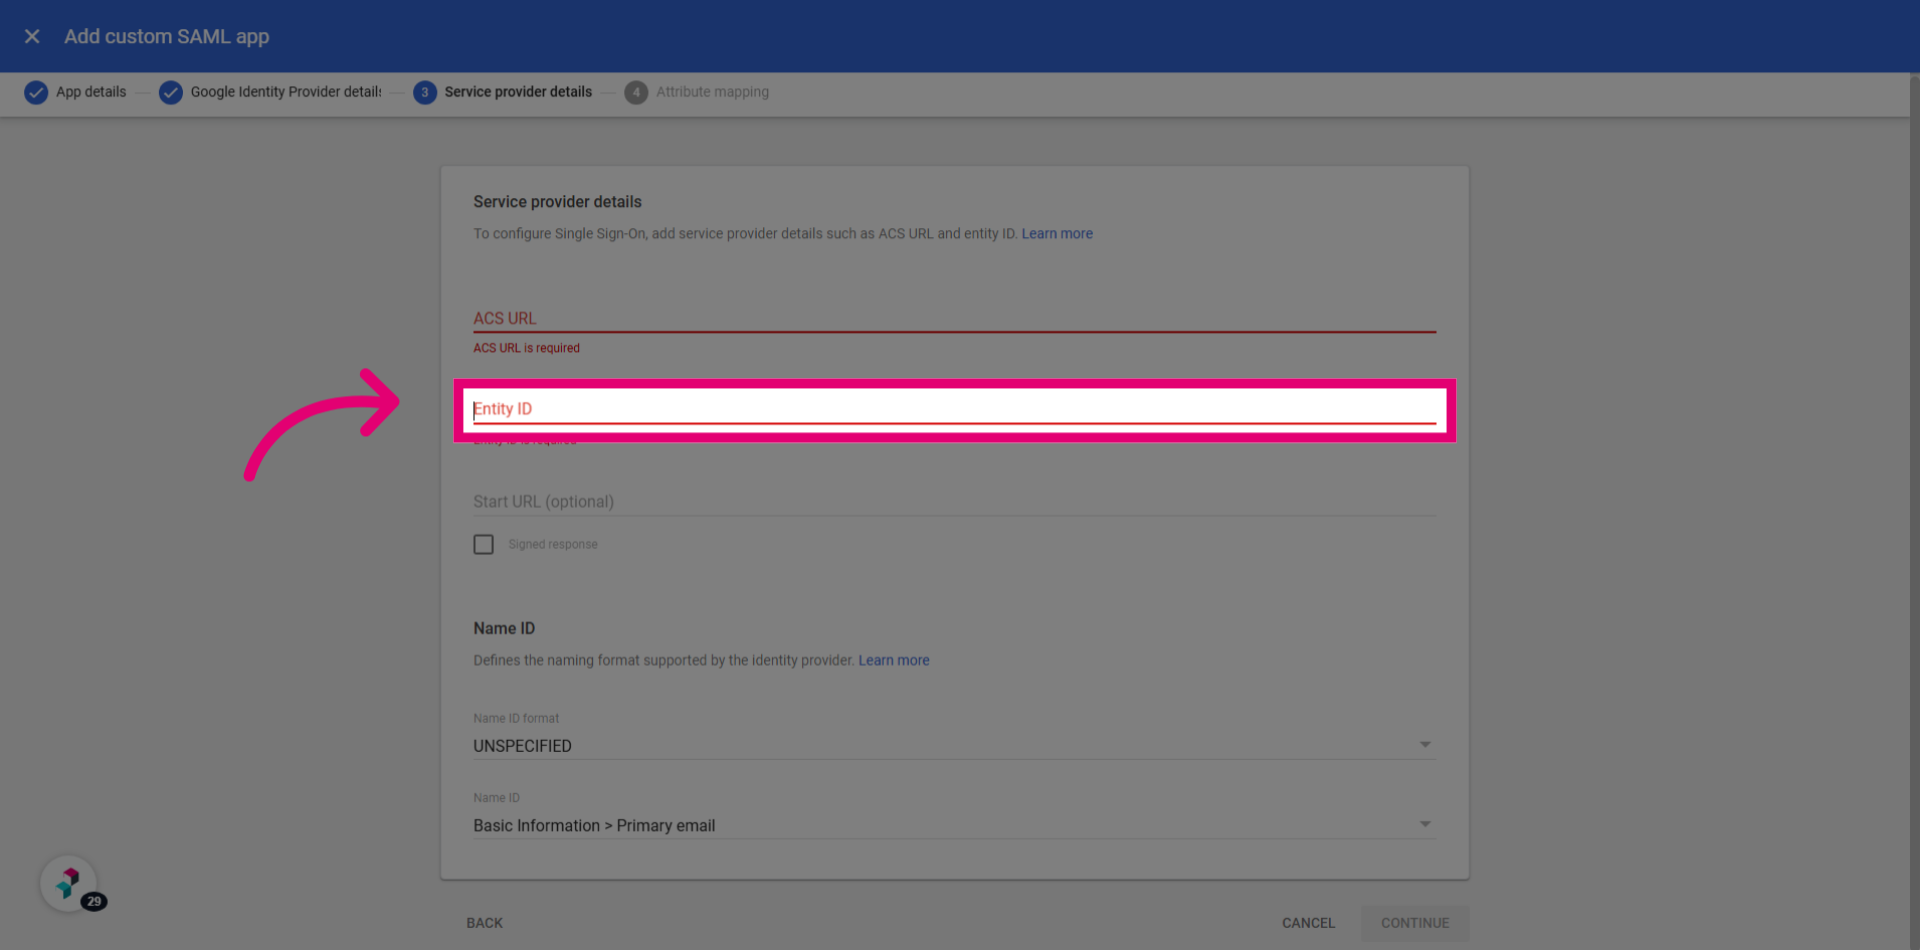
- Copy Reply URL value.
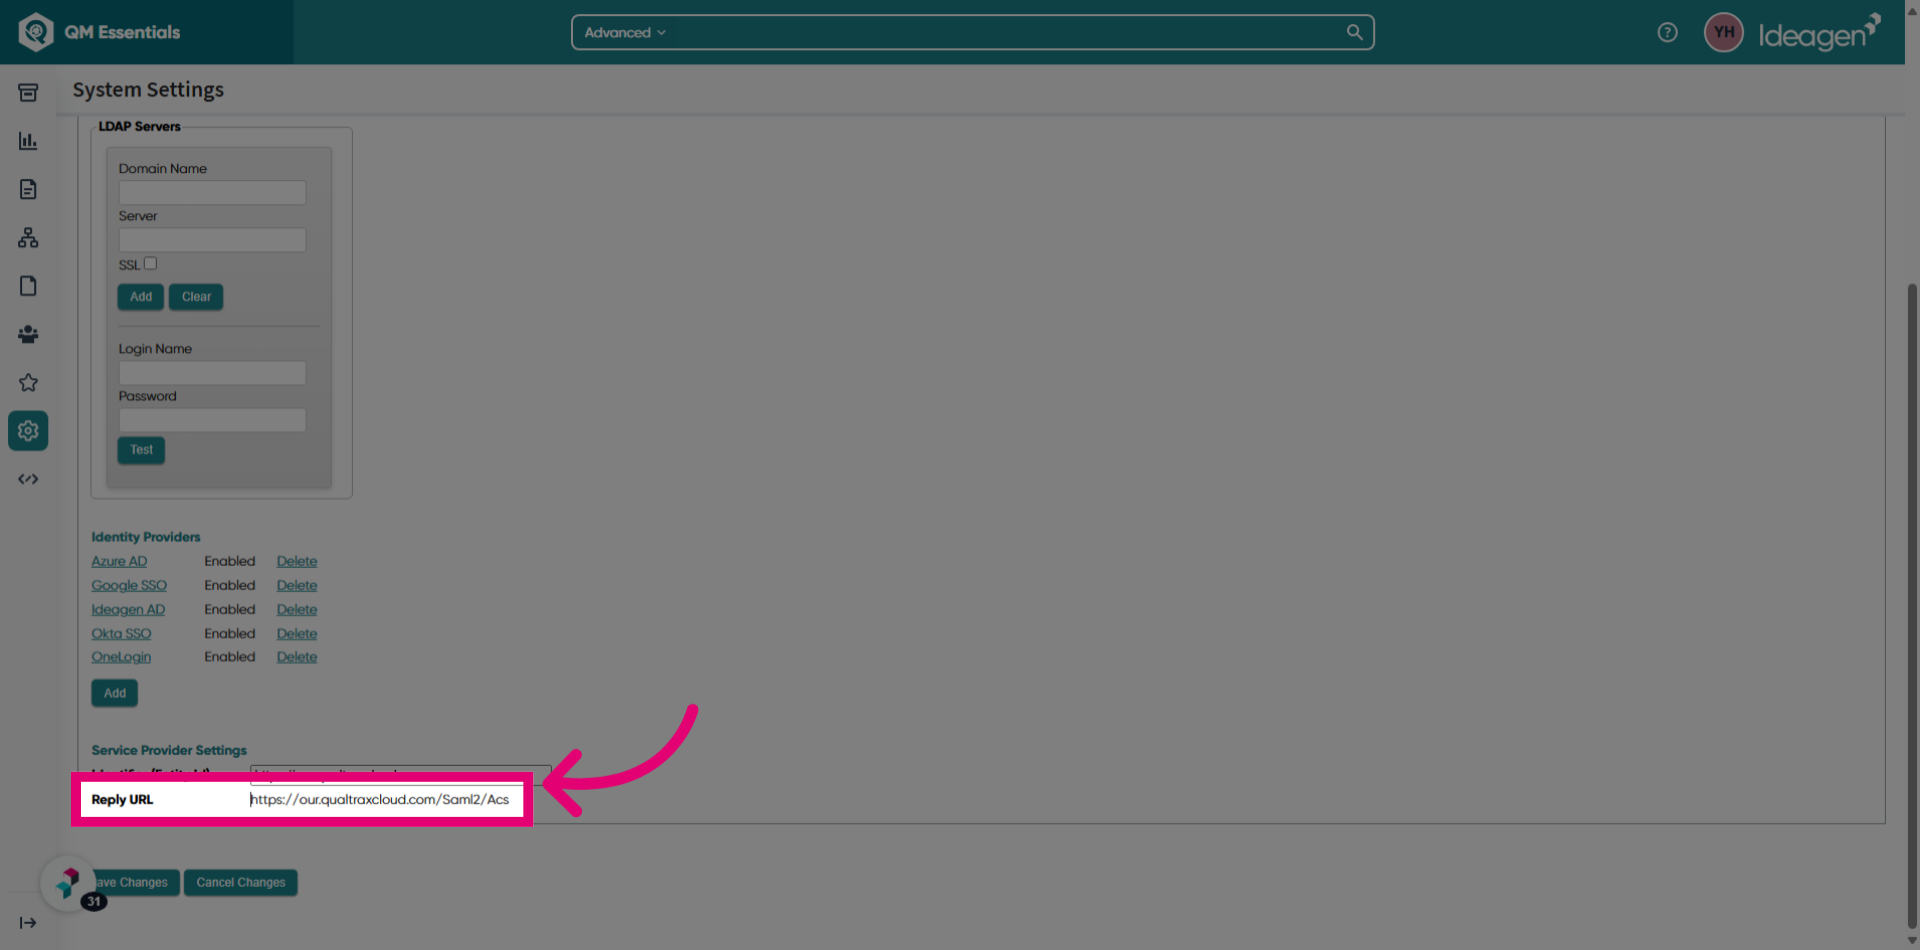
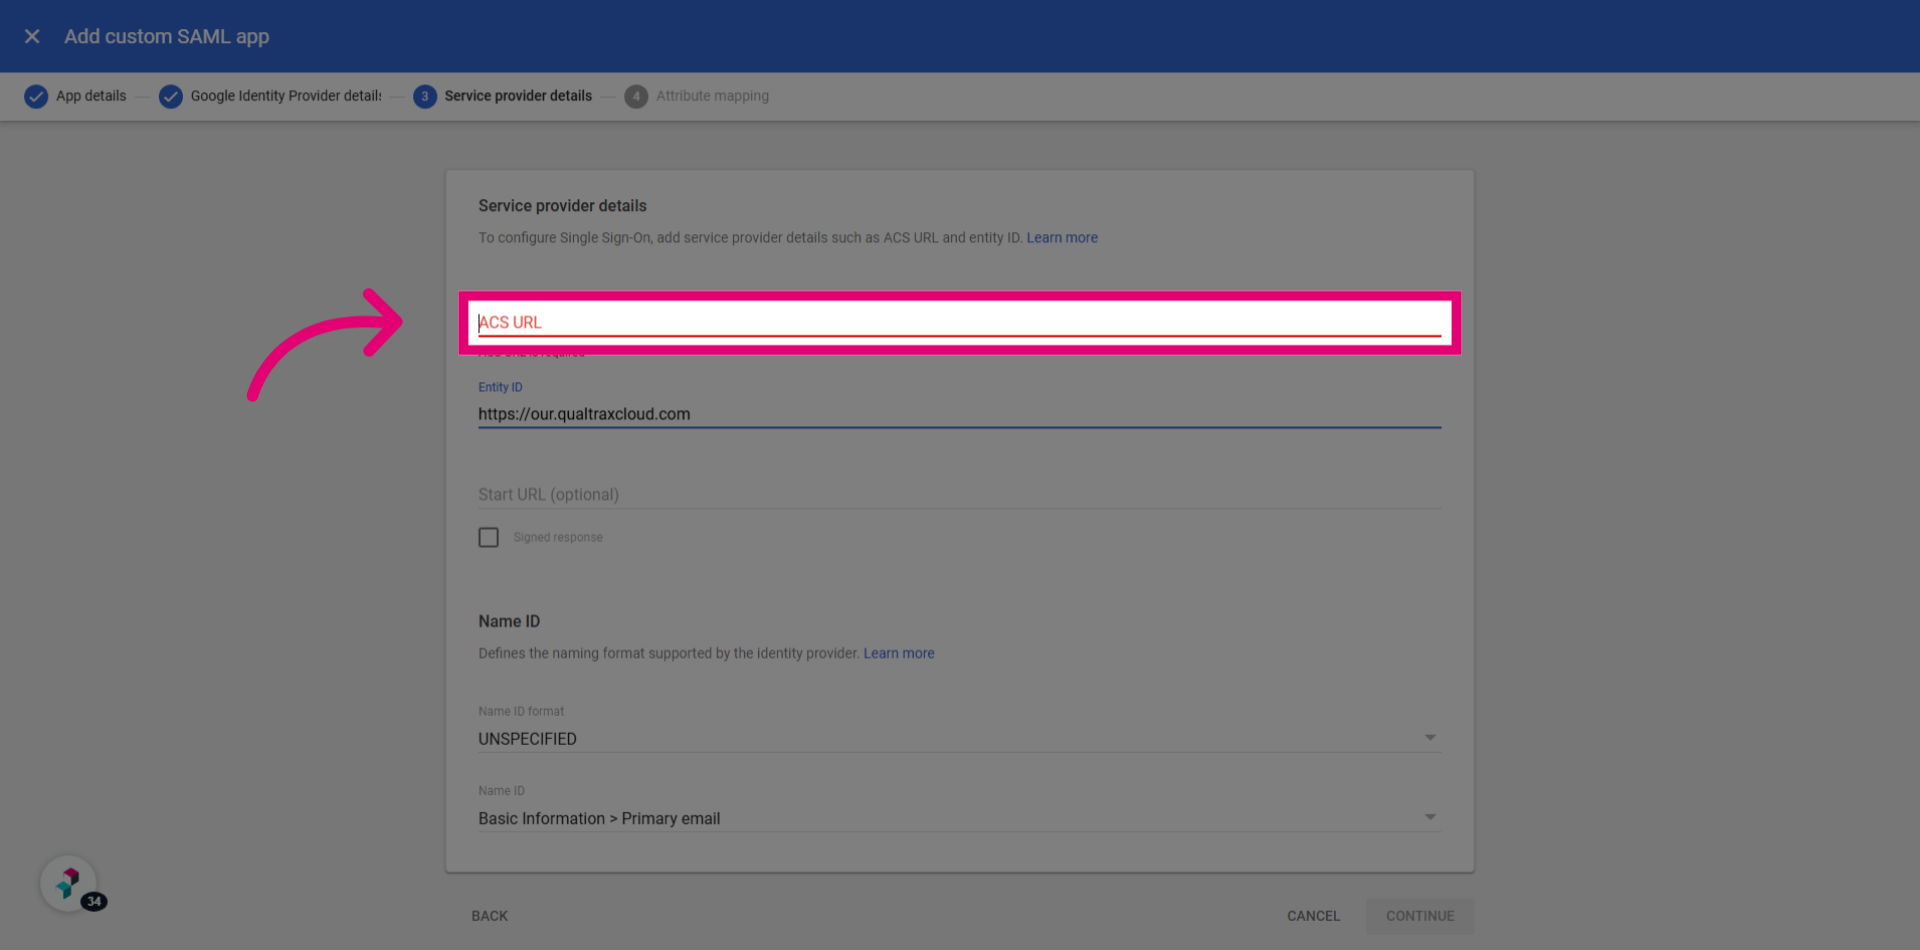
- Paste it into the ACS URL field.
- Tick Signed response.
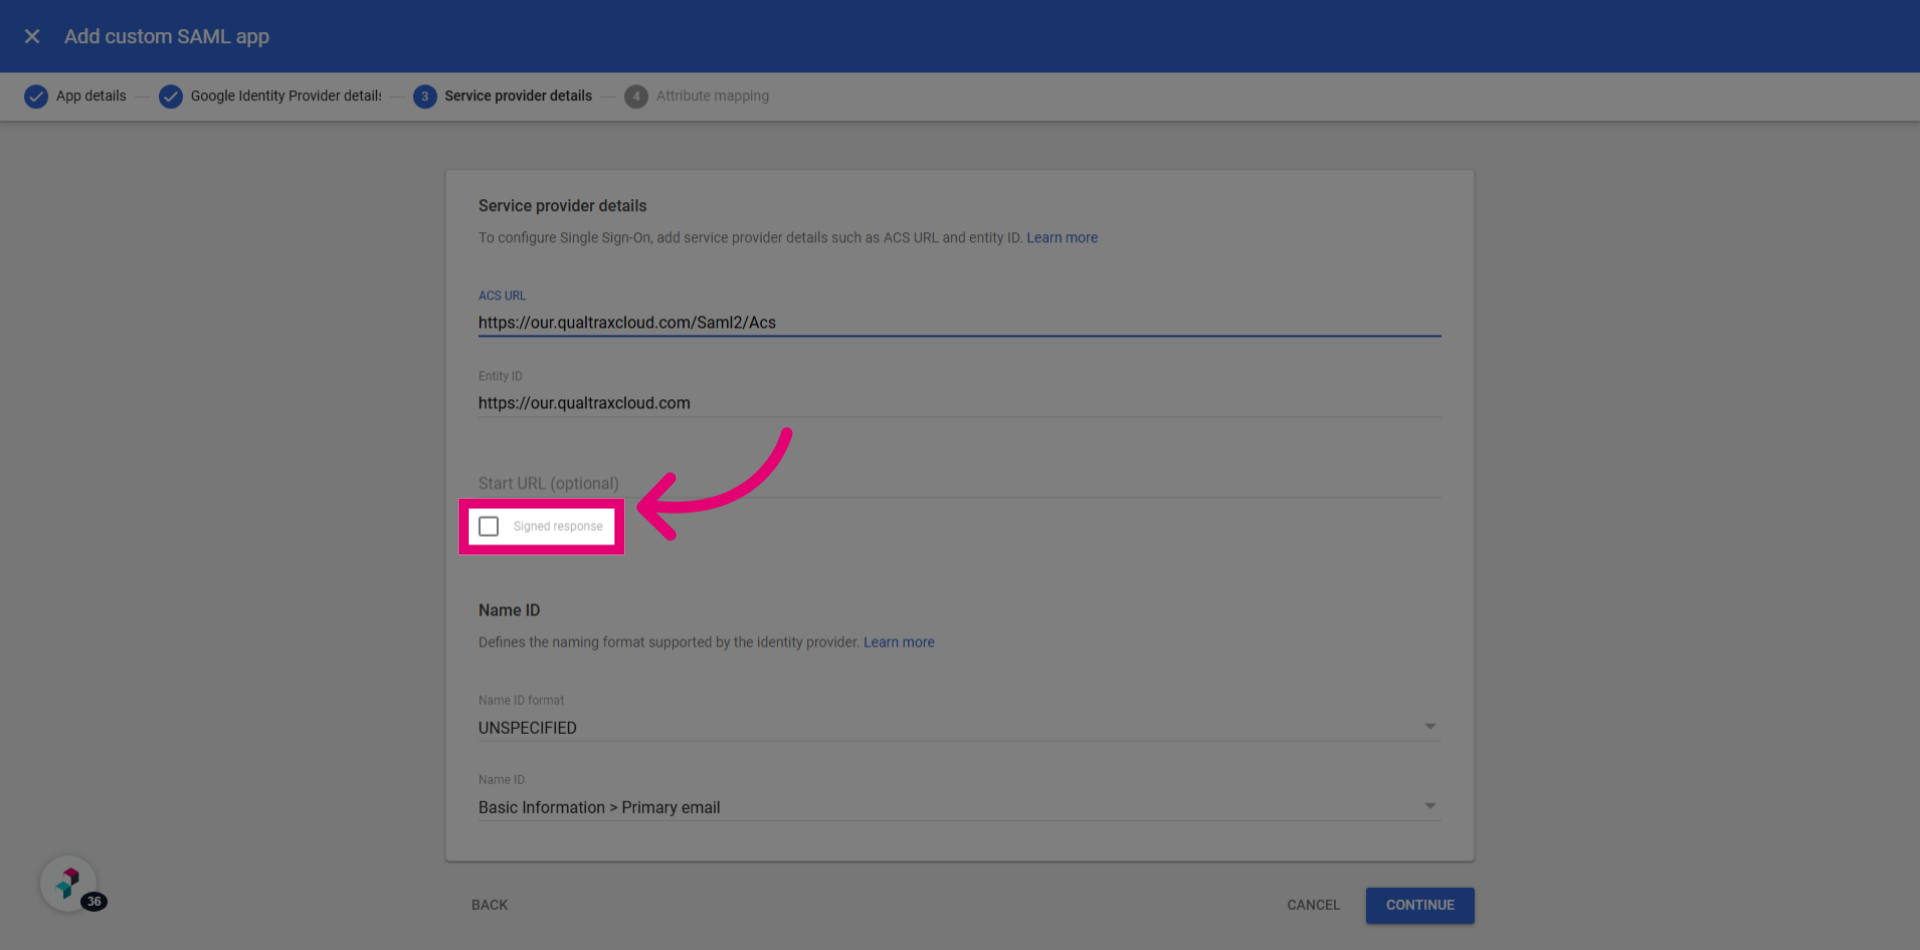
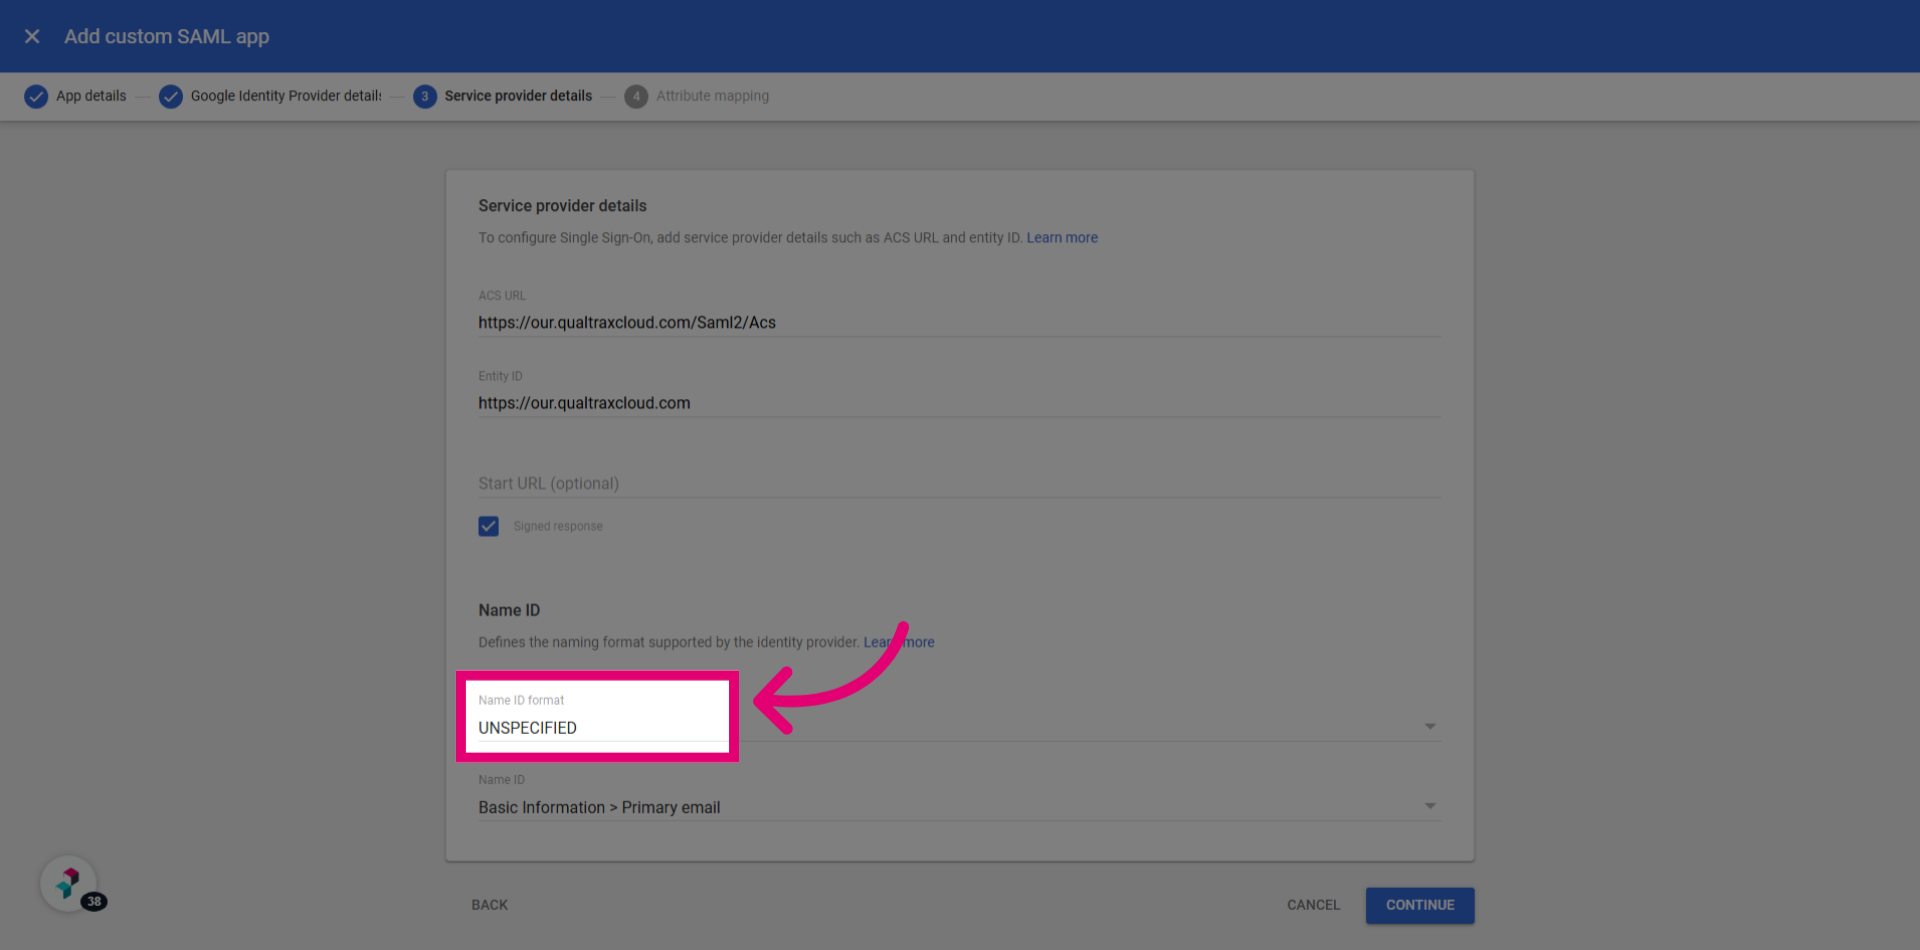
- Open the Name ID format dropdown.
- Select EMAIL.
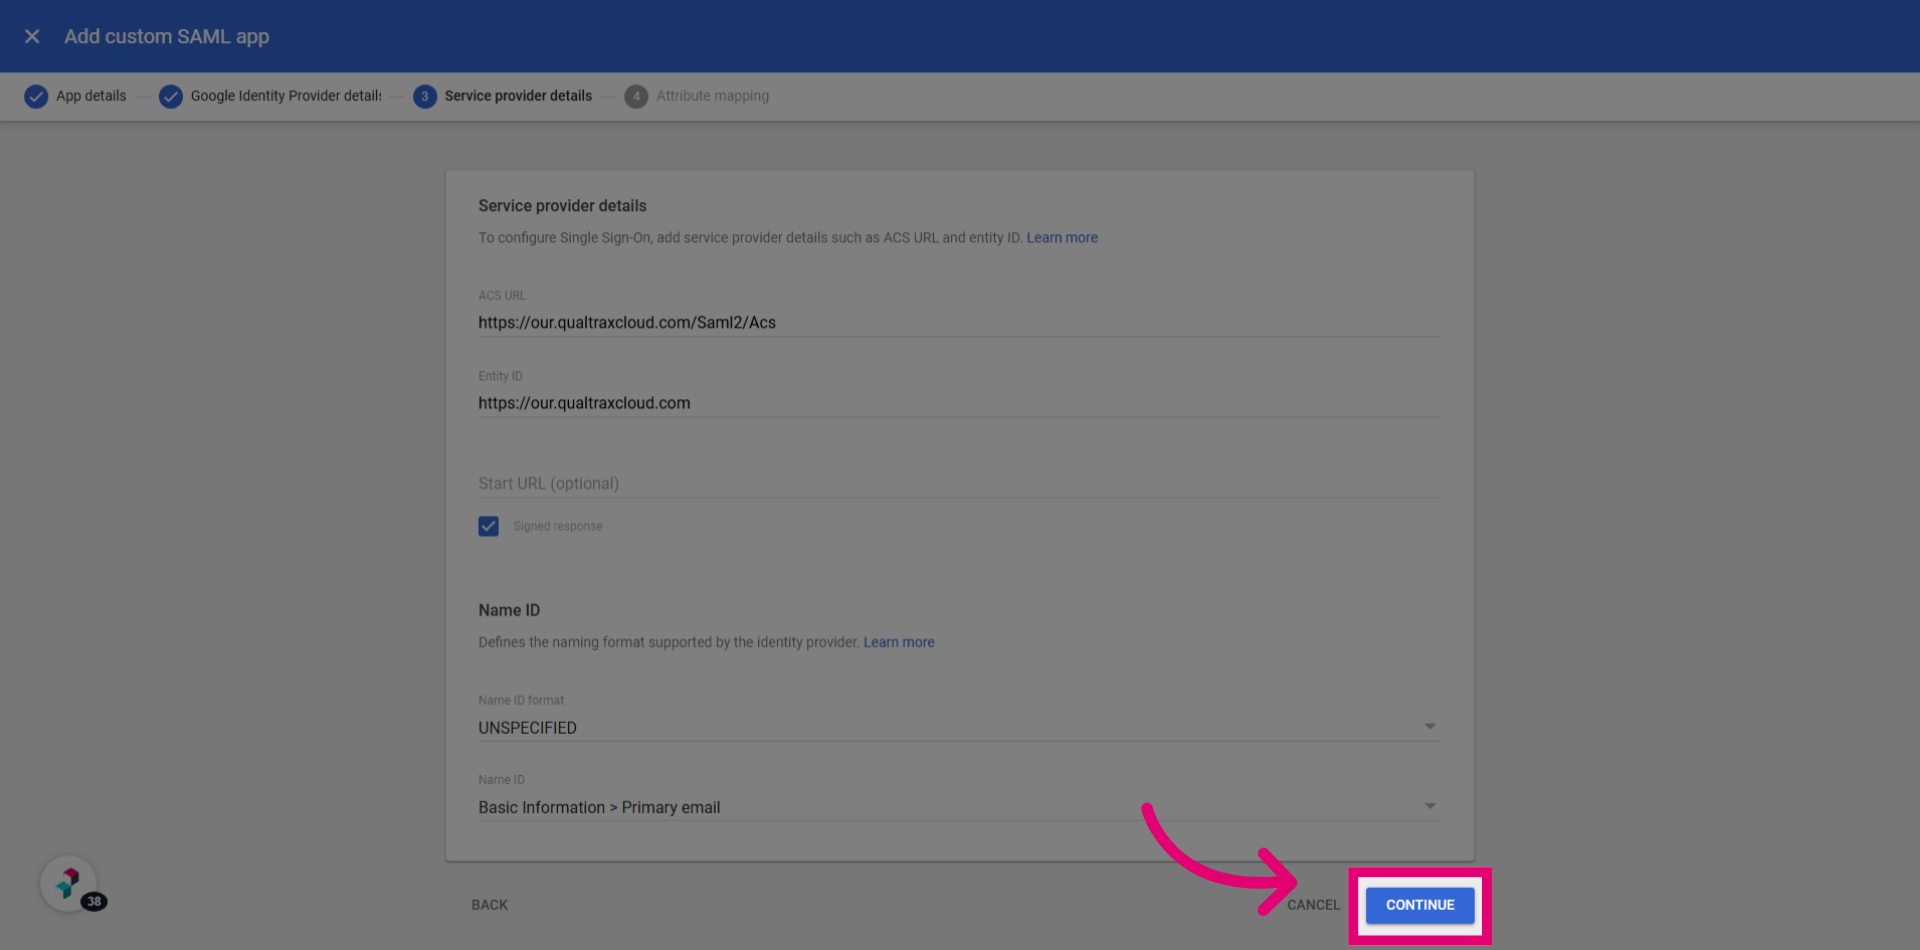
- Click Continue.
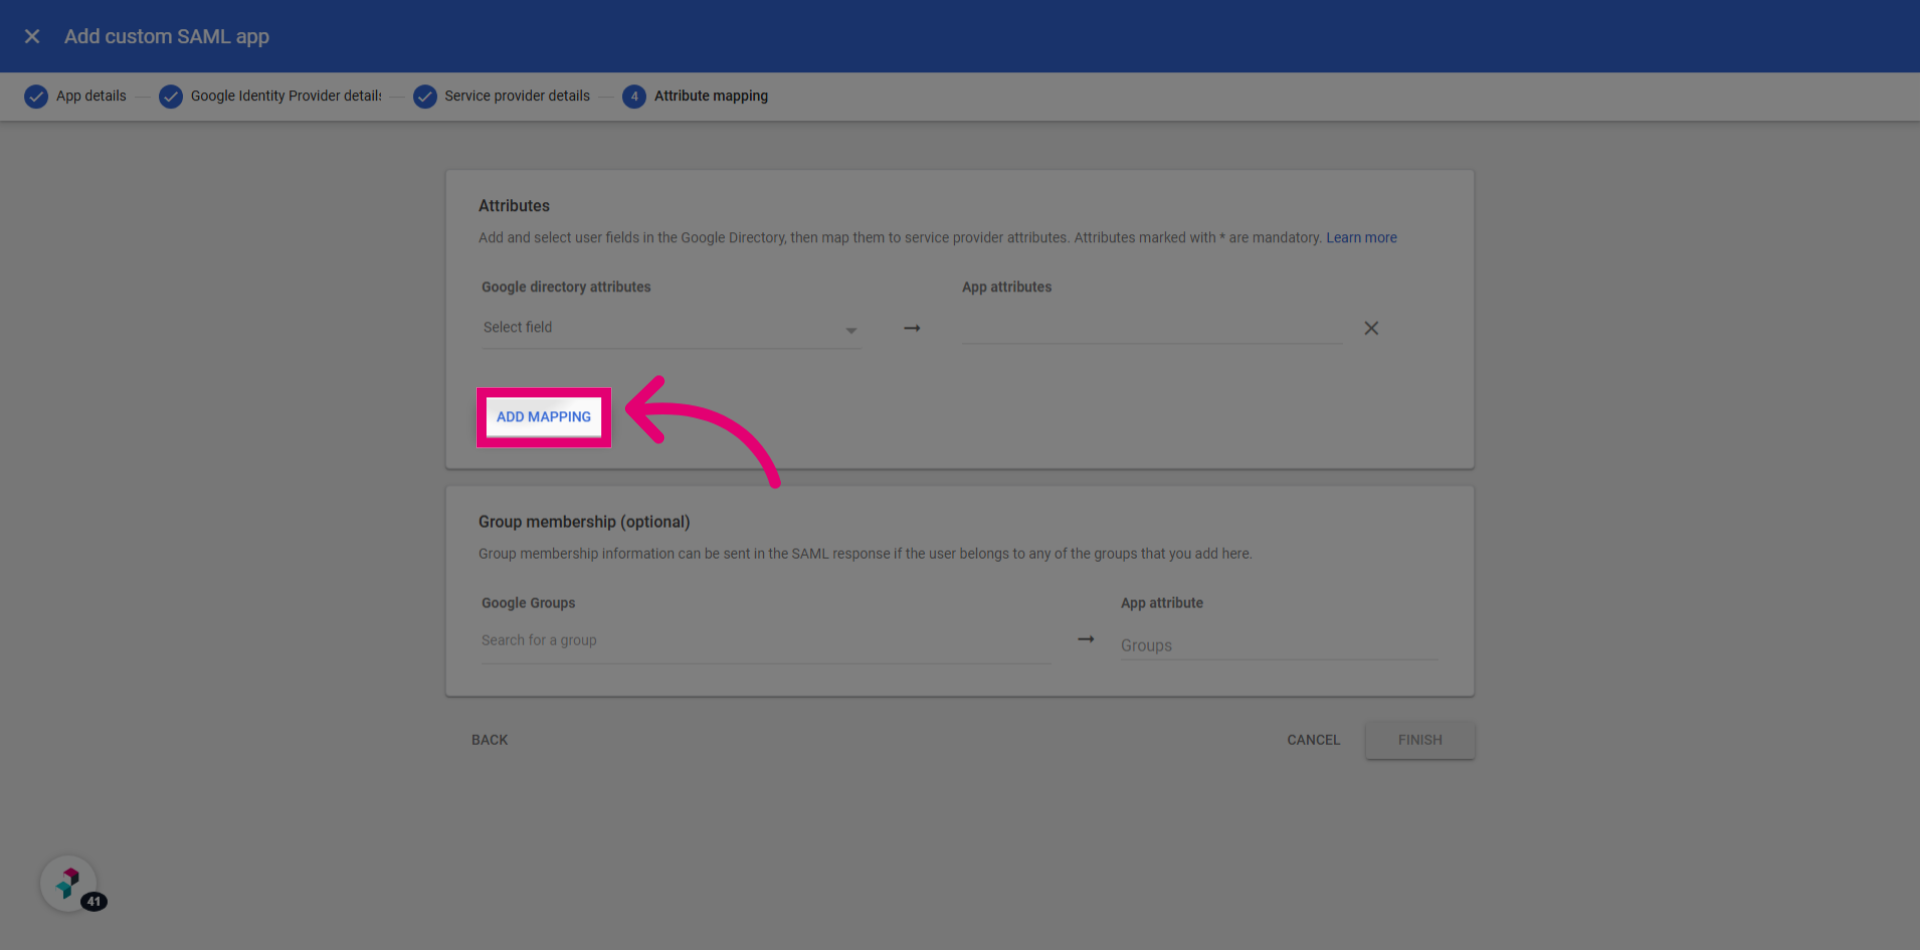
- Click Add mapping (under Attributes).
- Open the Google directory attributes dropdown.
- Select Primary email.
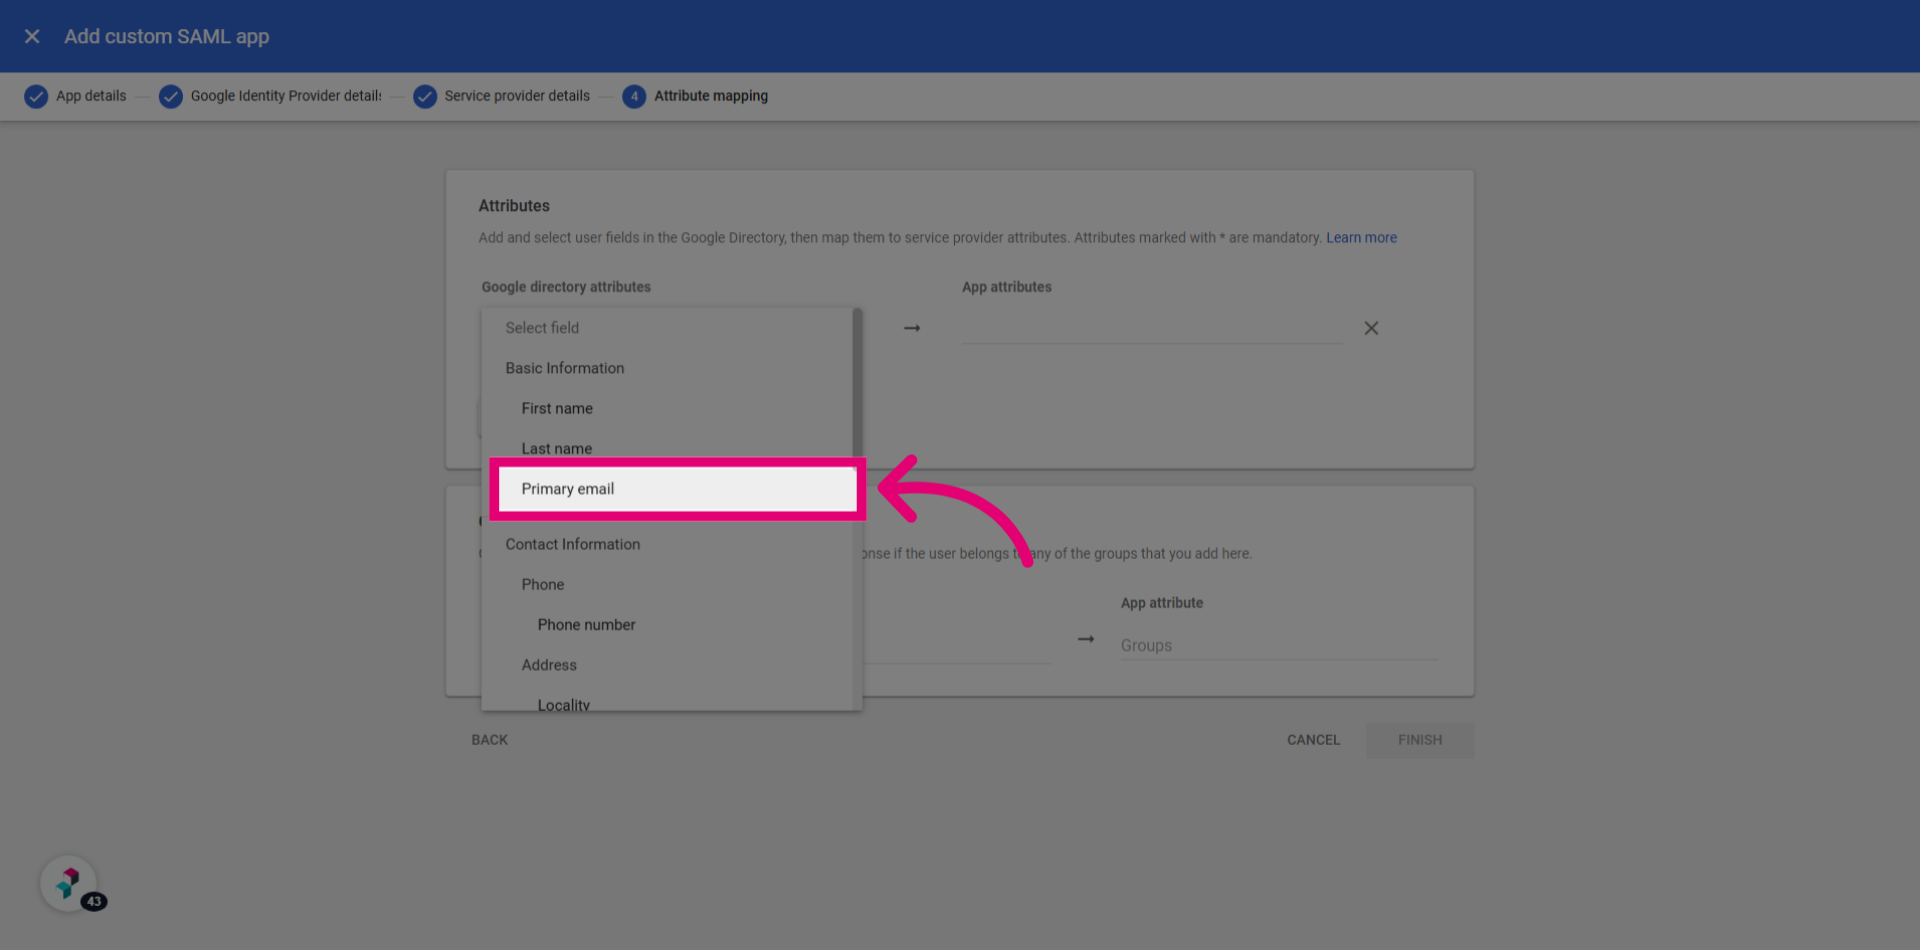
- Enter the schema into the App attributes field.
http://schemas.xmlsoap.org/ws/2005/05/identity/claims/emailaddress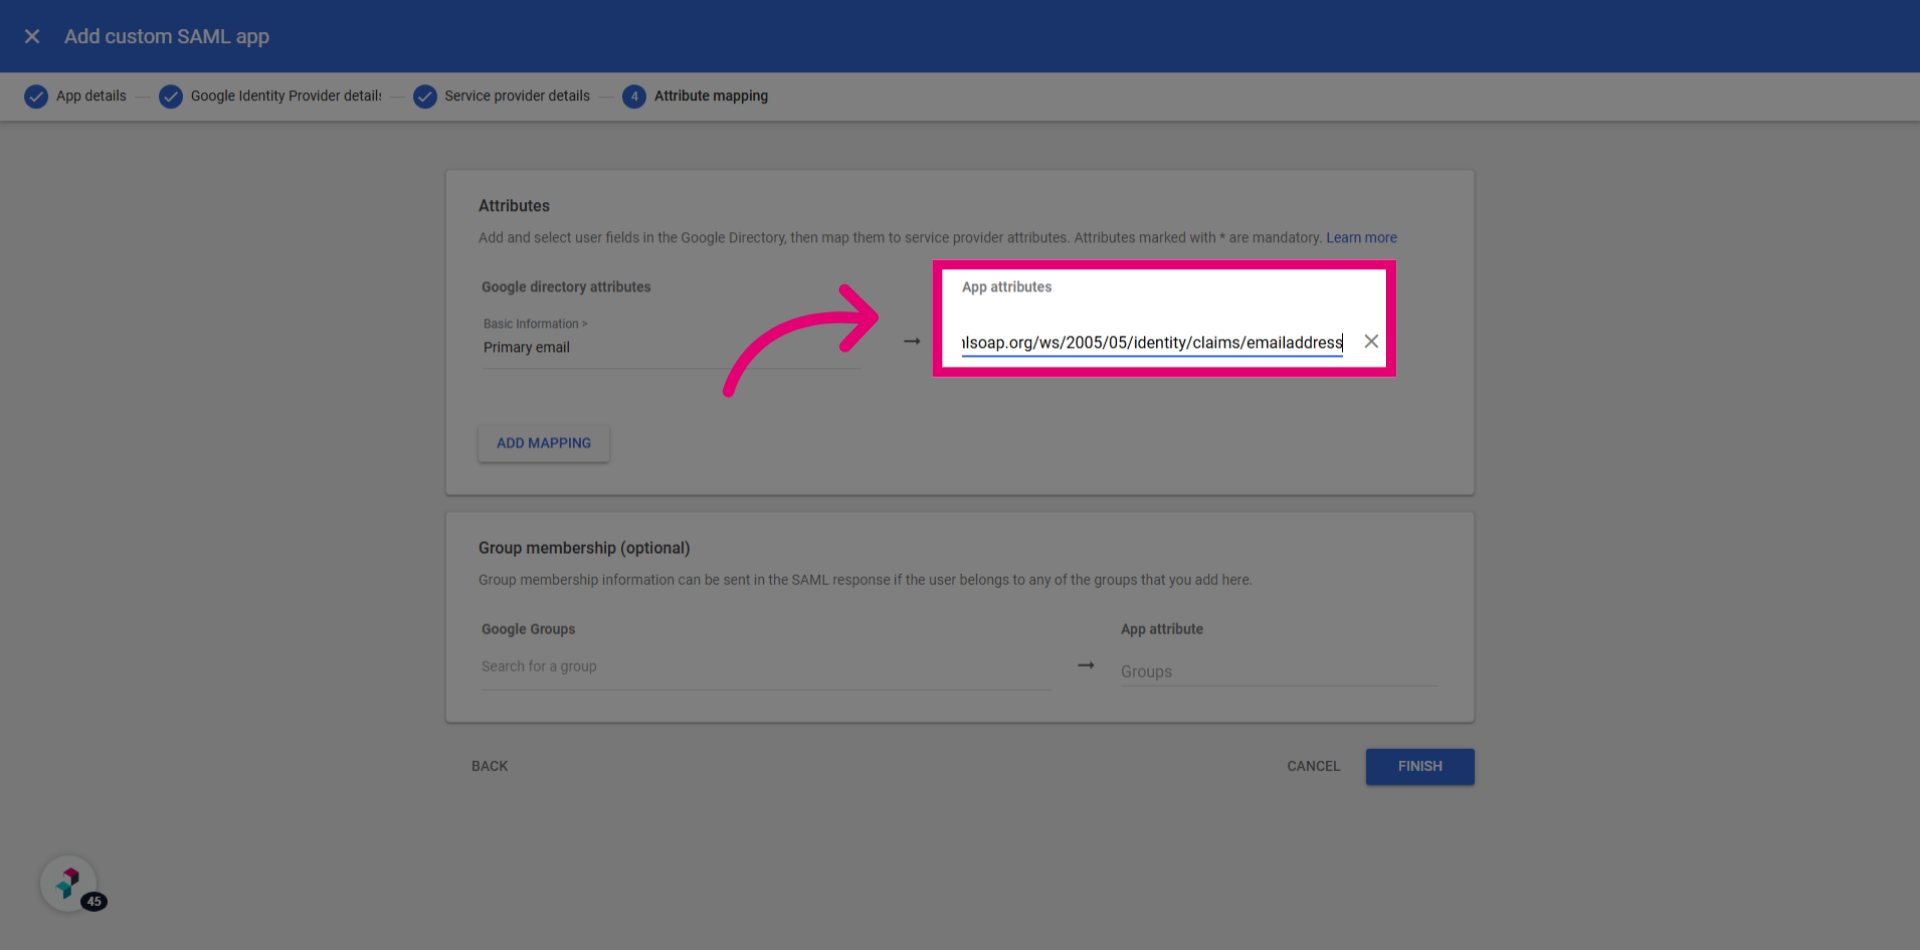
- Click Finish.
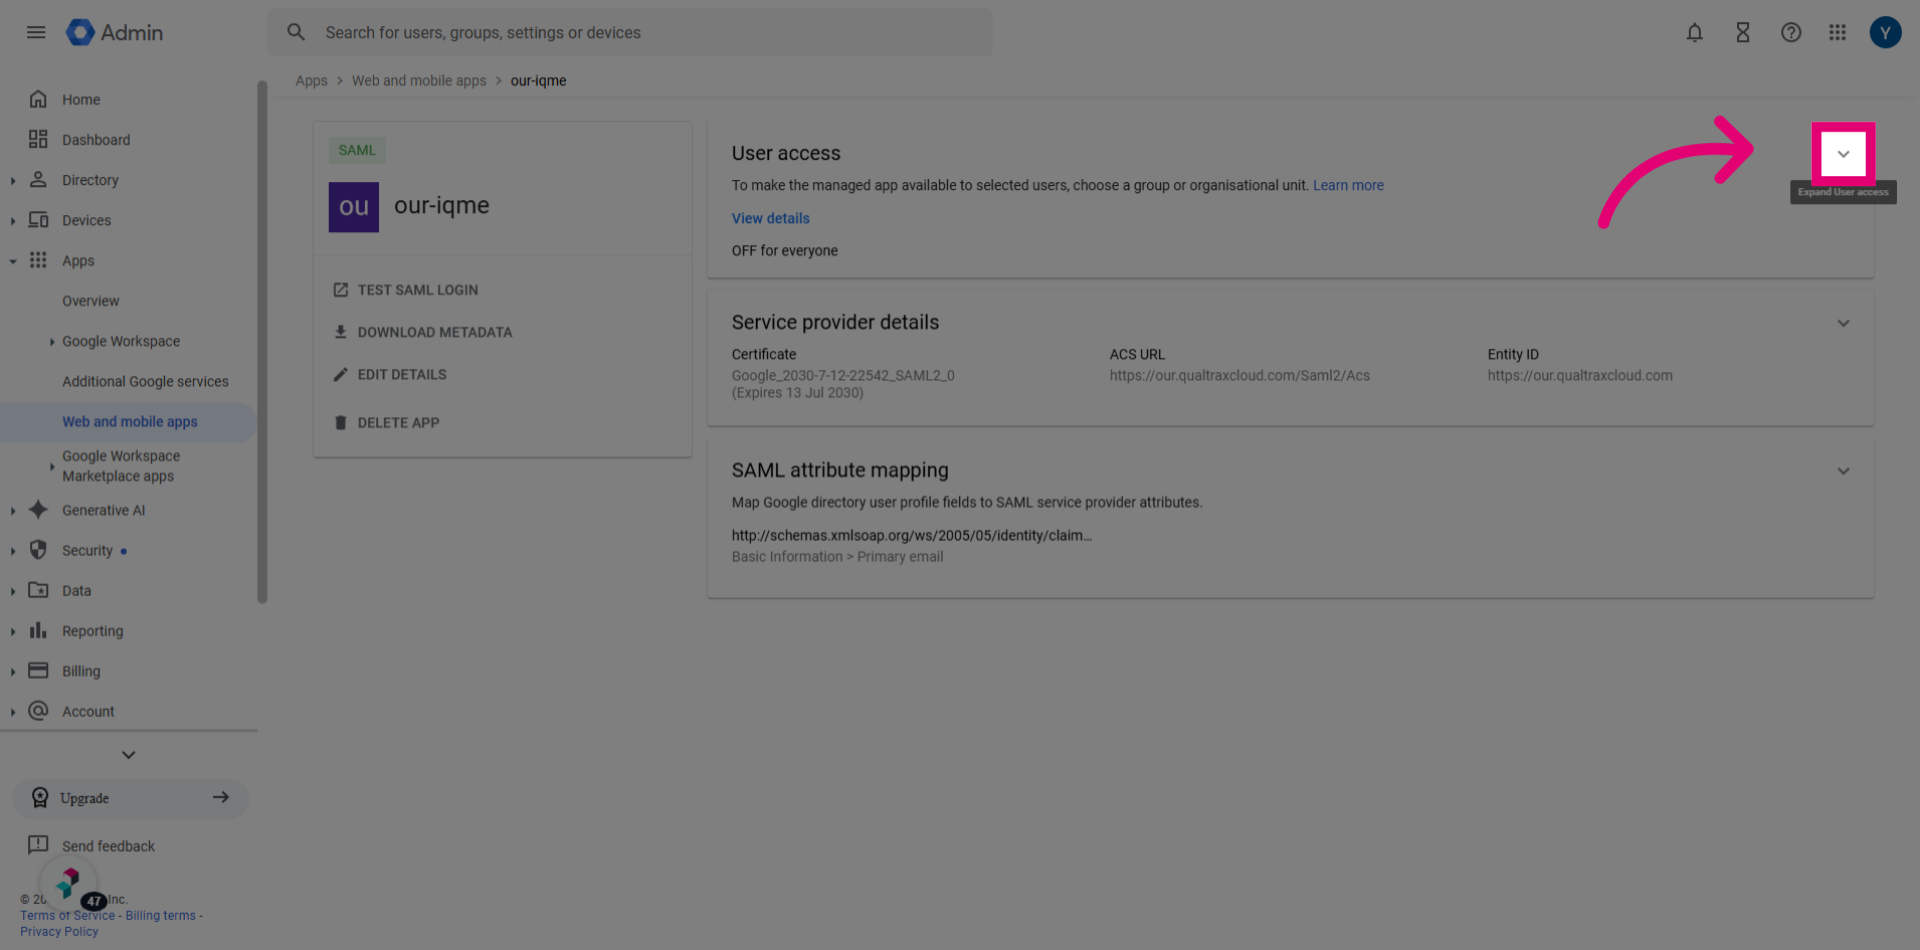
- Expand the User access section.
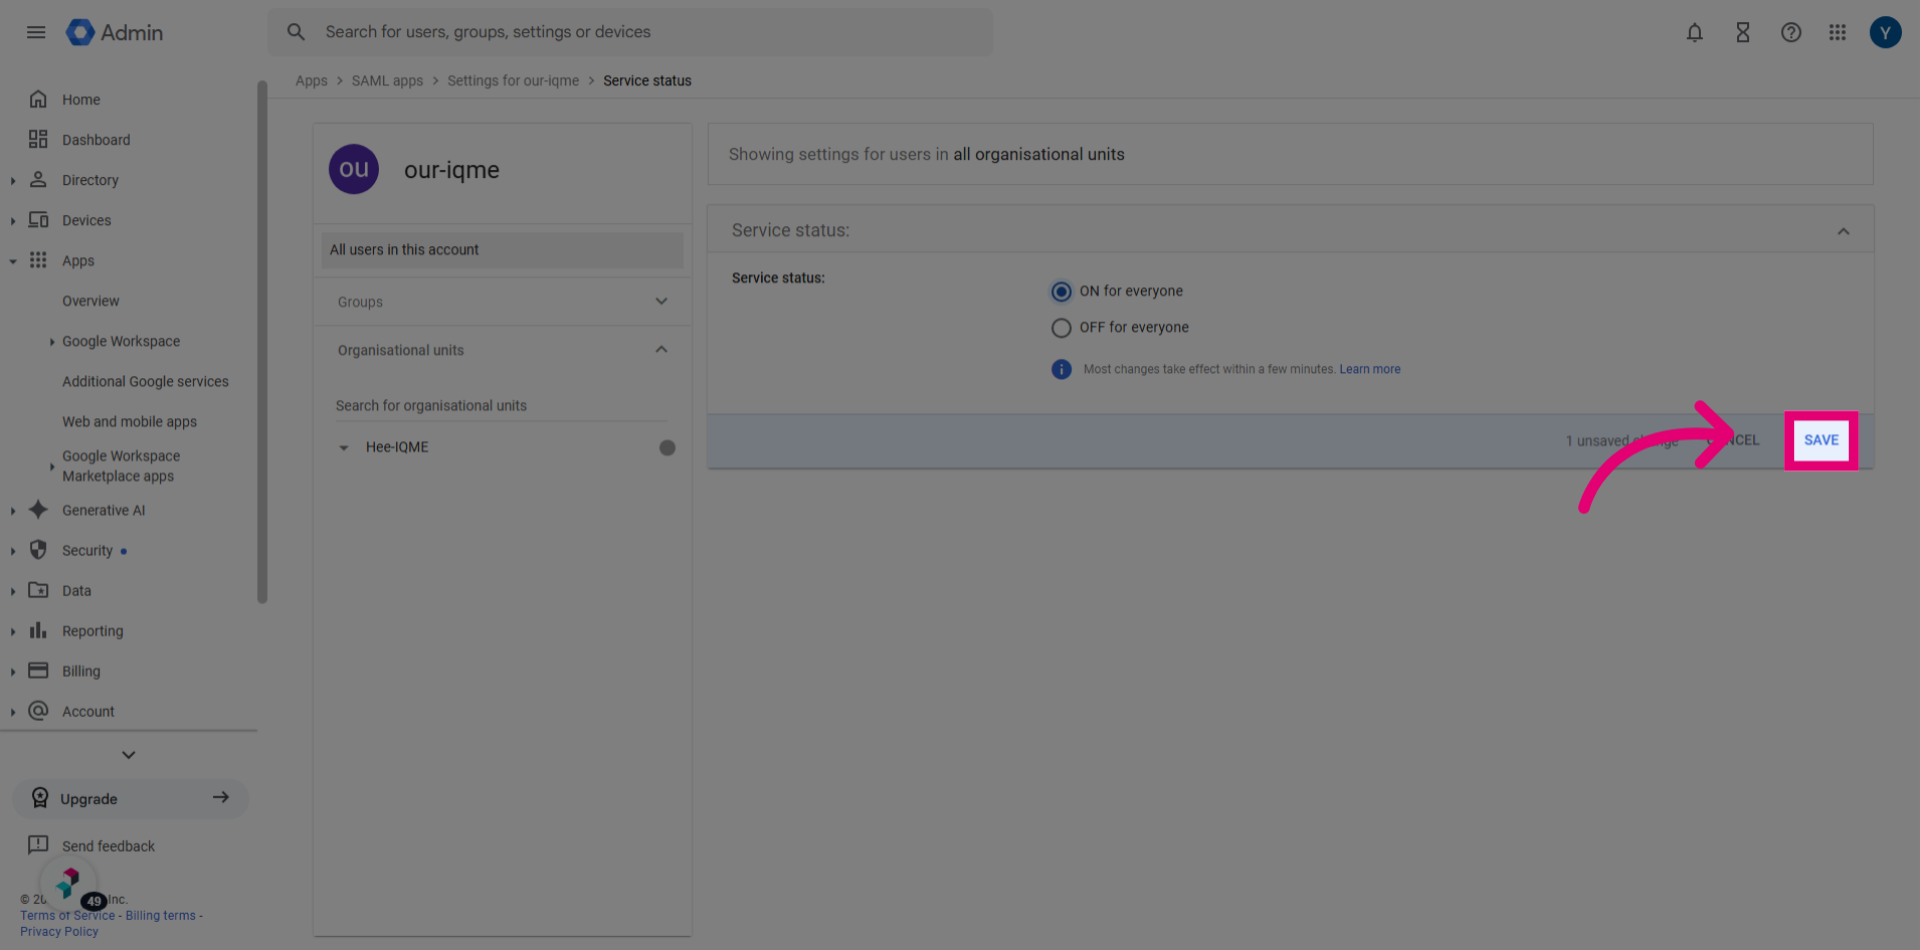
- Set Service status to Select ON for everyone.
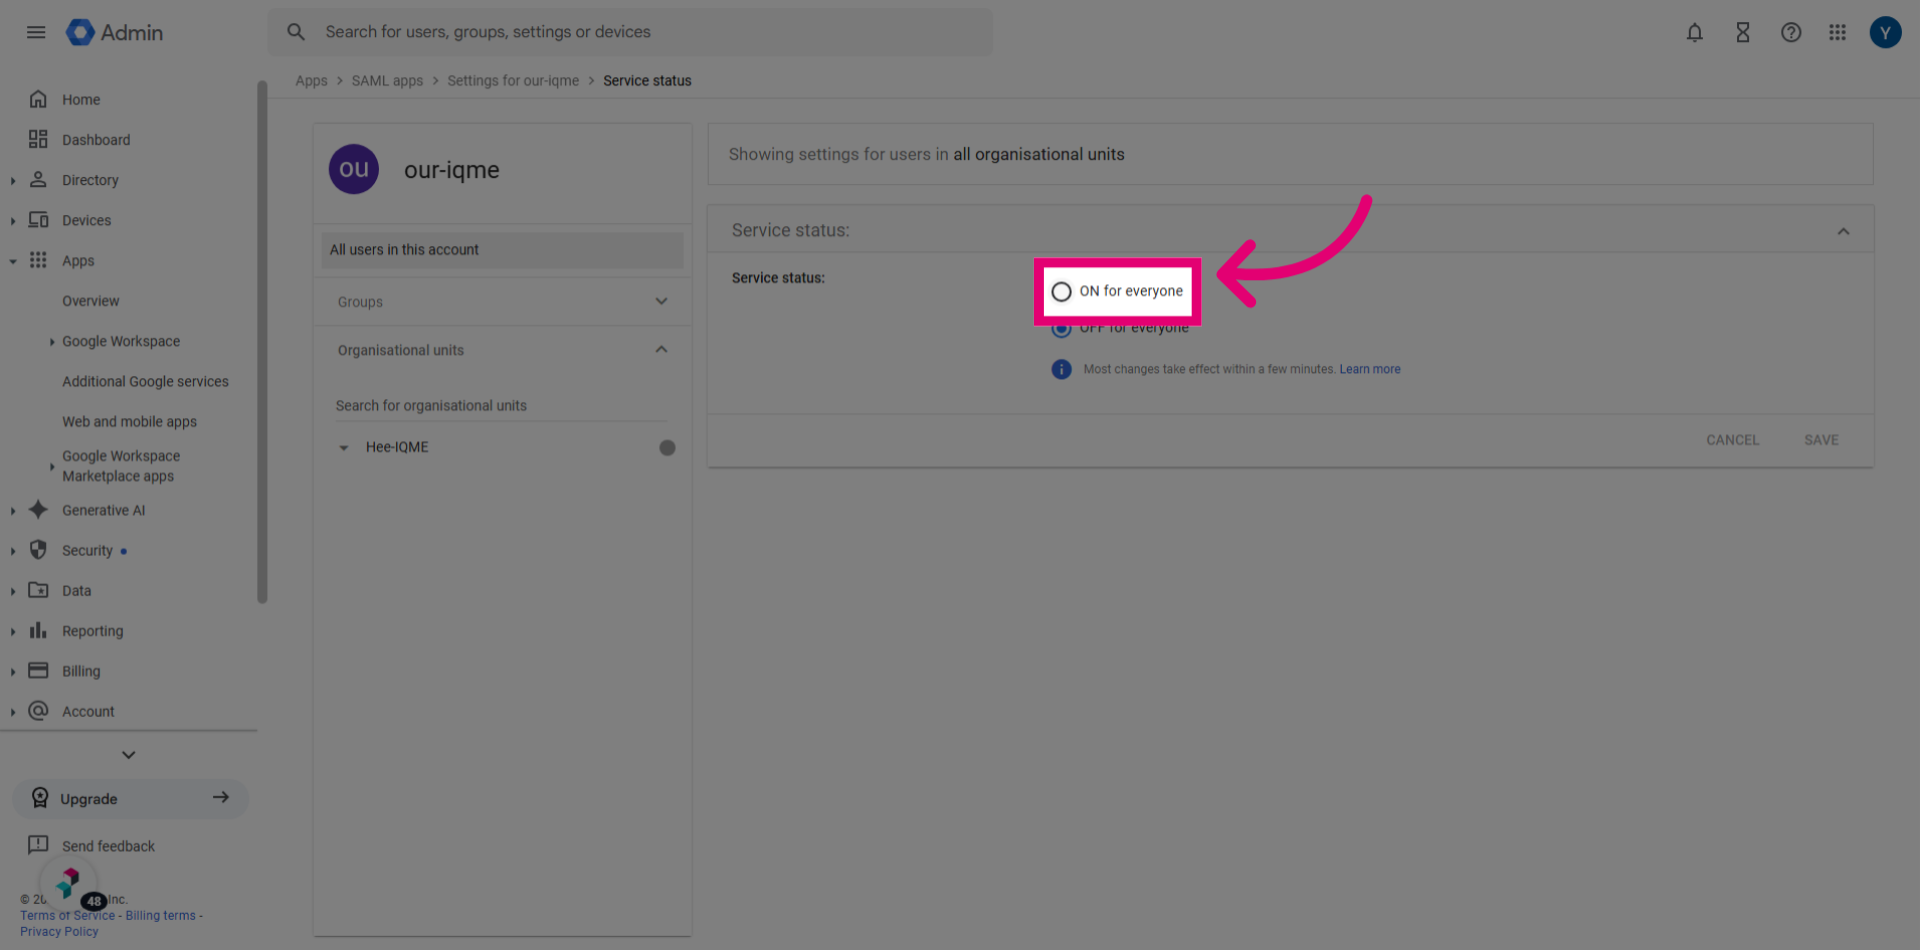
- Click Save.
1.2. Assertion response signed
In this setup, Google signs the Assertion instead of the Response, and Ideagen Quality Management (Core) verifies the Assertion signature.
To enable this configuration, follow the same steps as above, except this time:
- Untick Signed Response in Google Workspace.
- Tick Verify Assertion Signed in Ideagen Quality Management (Core).
- Untick Verify SAML Response Signed in Ideagen Quality Management (Core).
1. Configuring Okta SSO
Okta SSO is an authentication solution offered by Okta.
To configure Okta SSO:
- Access the Okta portal.
- Open the Applications section.
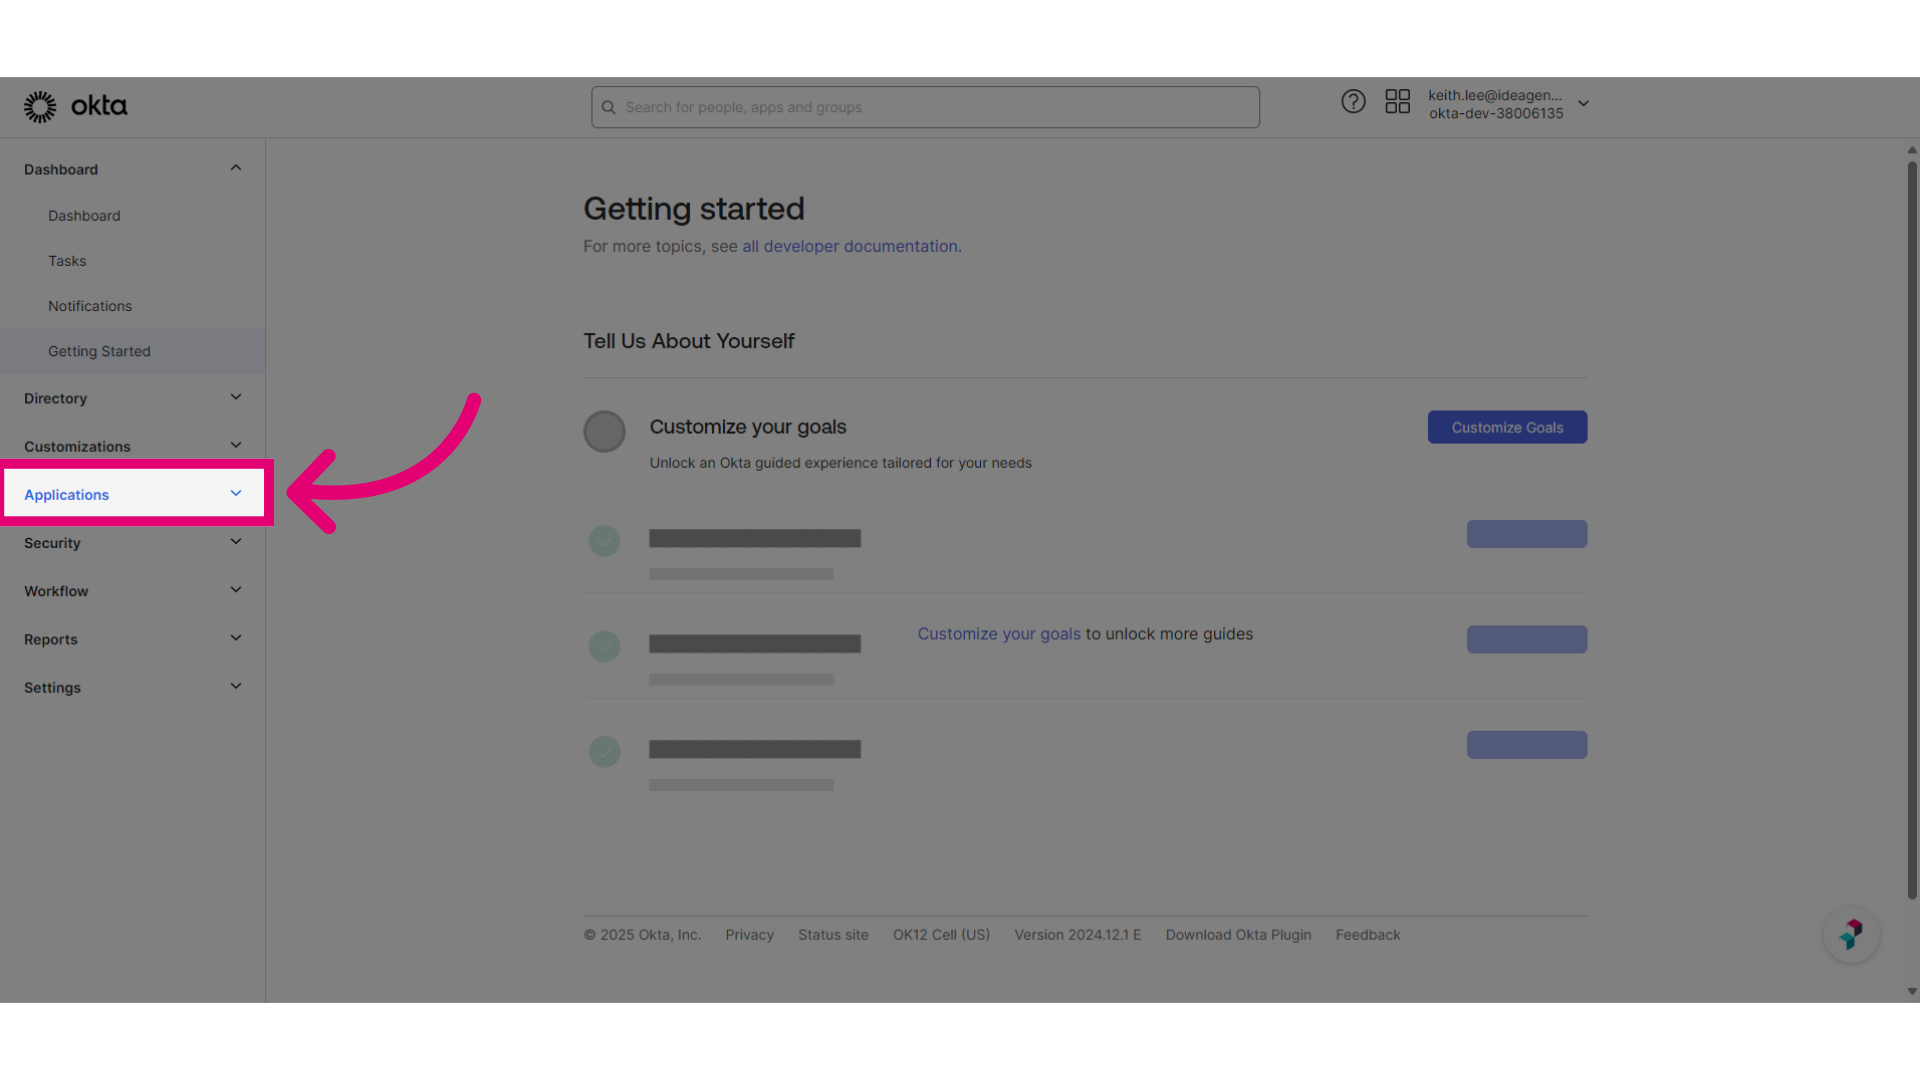
- Select Applications.
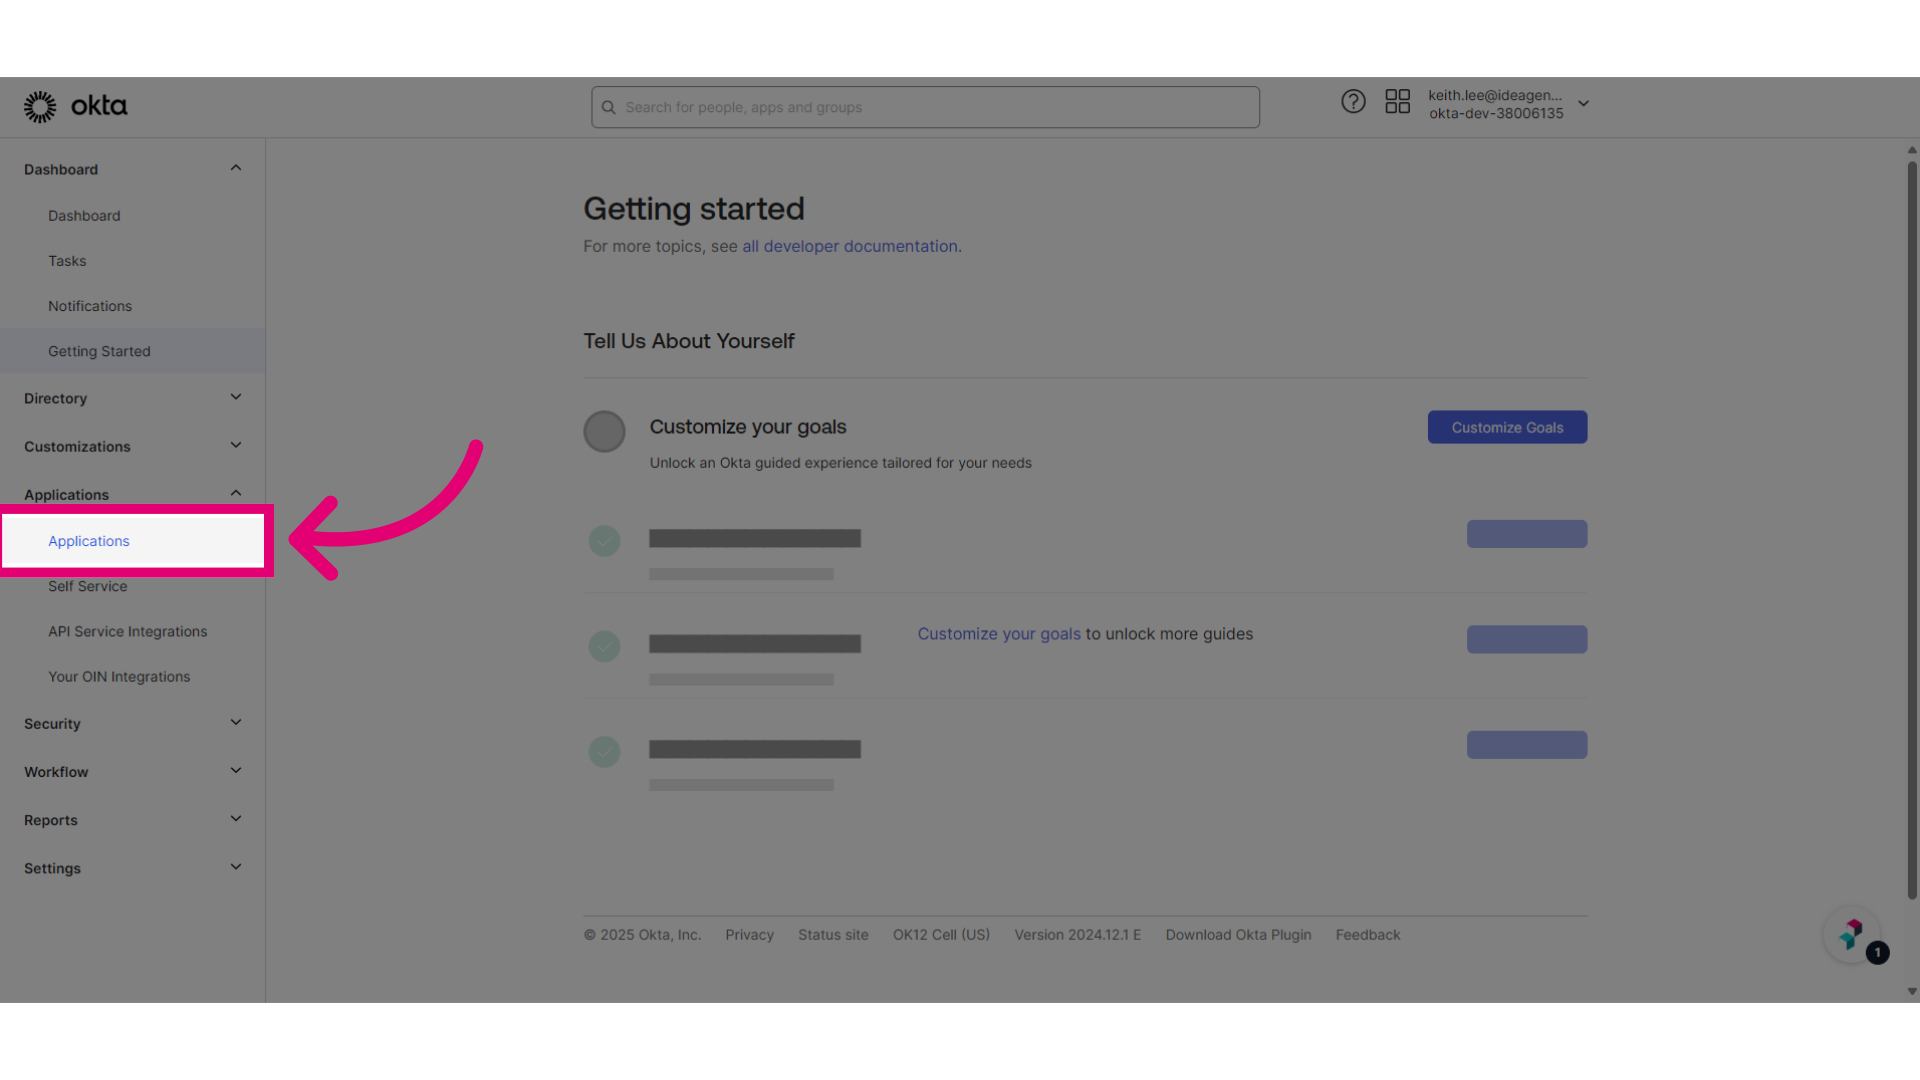
- Click Create App Integration.
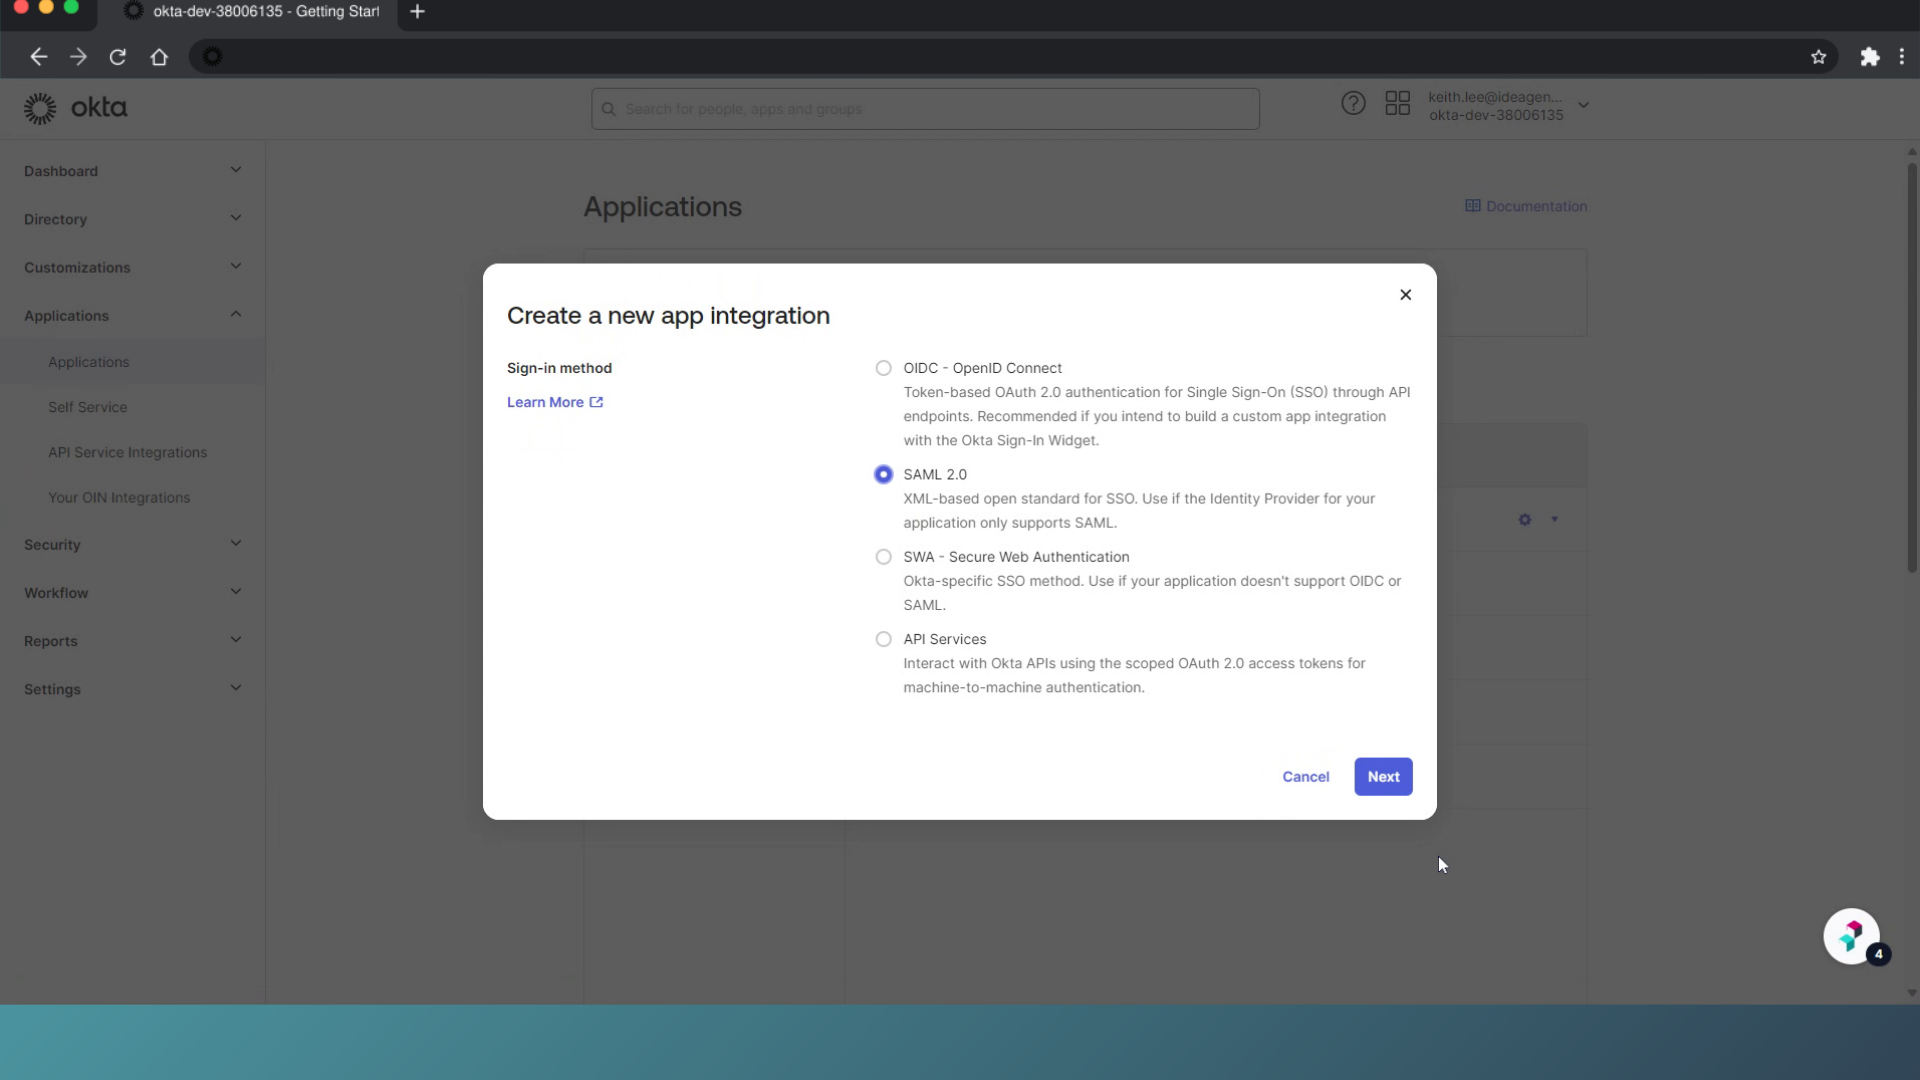
- Select SAML 2.0 as the Sign-in method.
- Click Next.
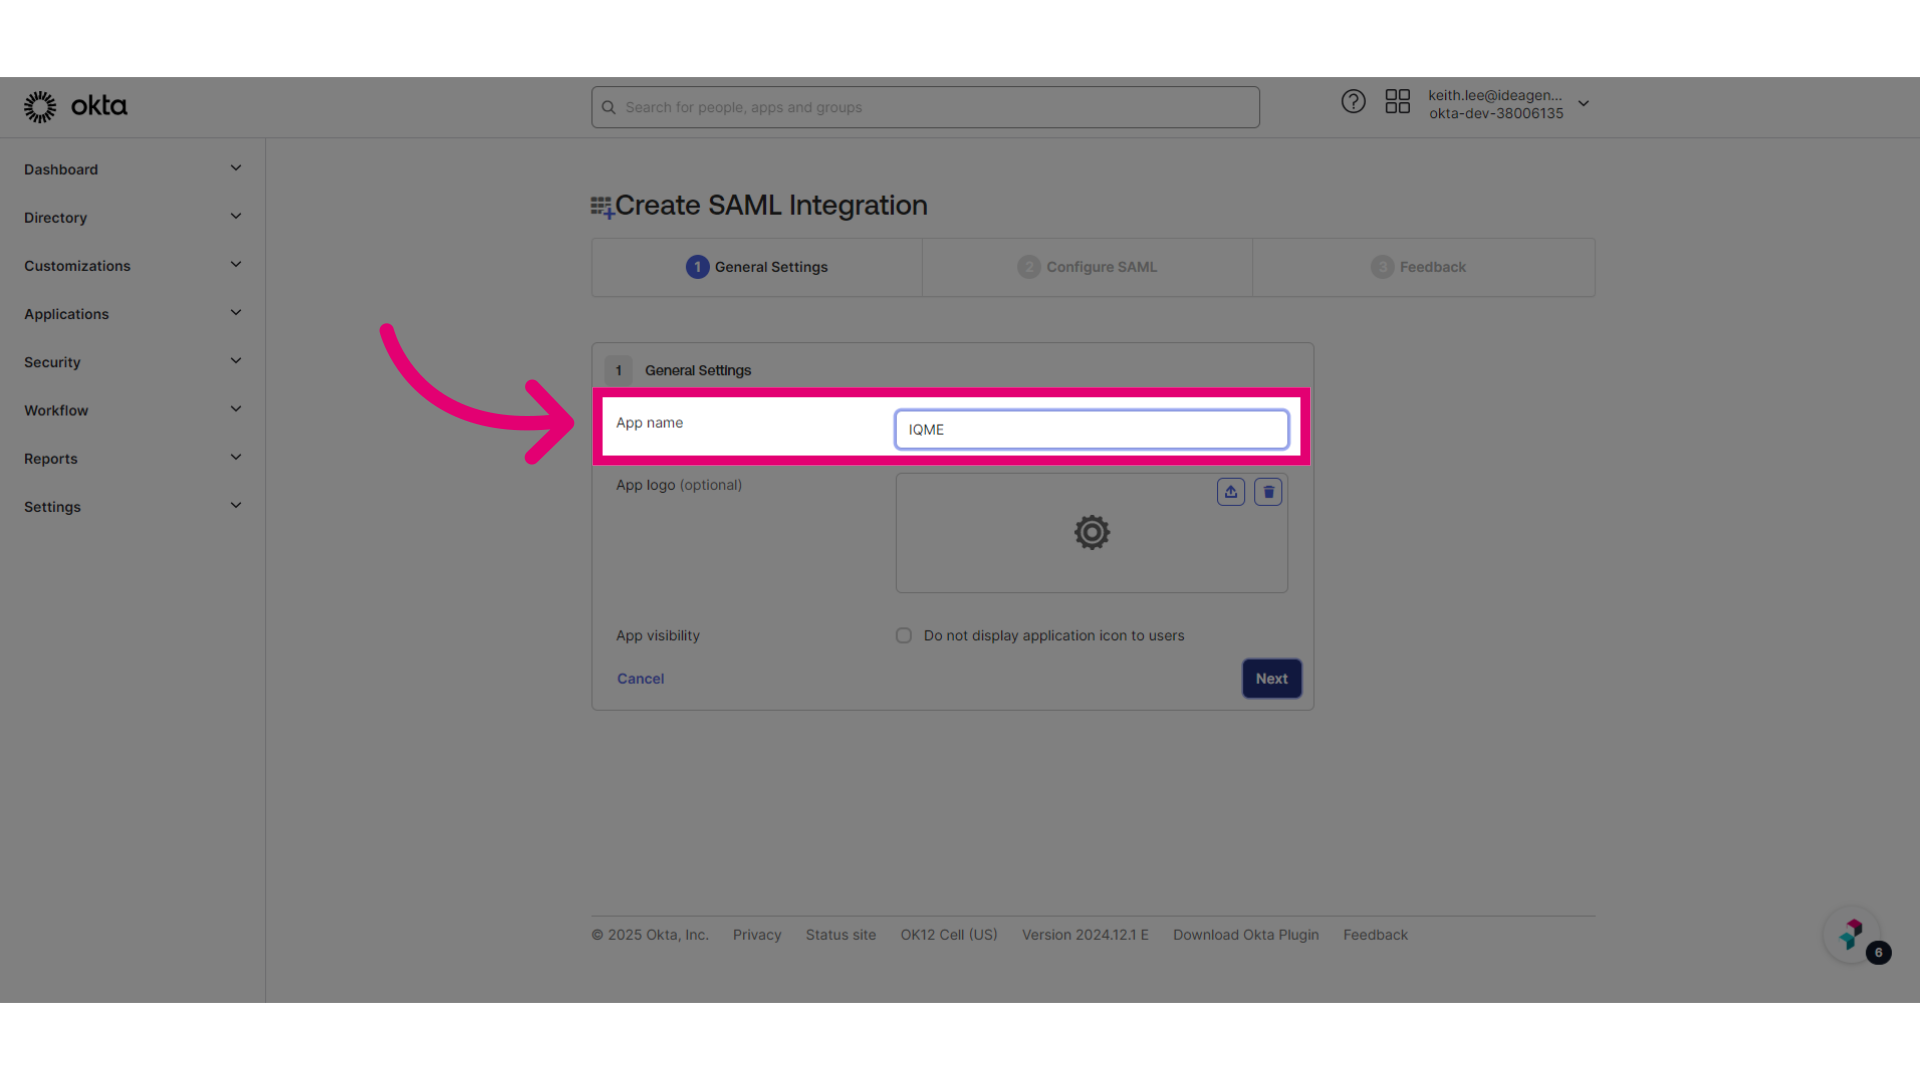
- Enter Ideagen Quality Management (Core) into the App name field.
- Click Next.
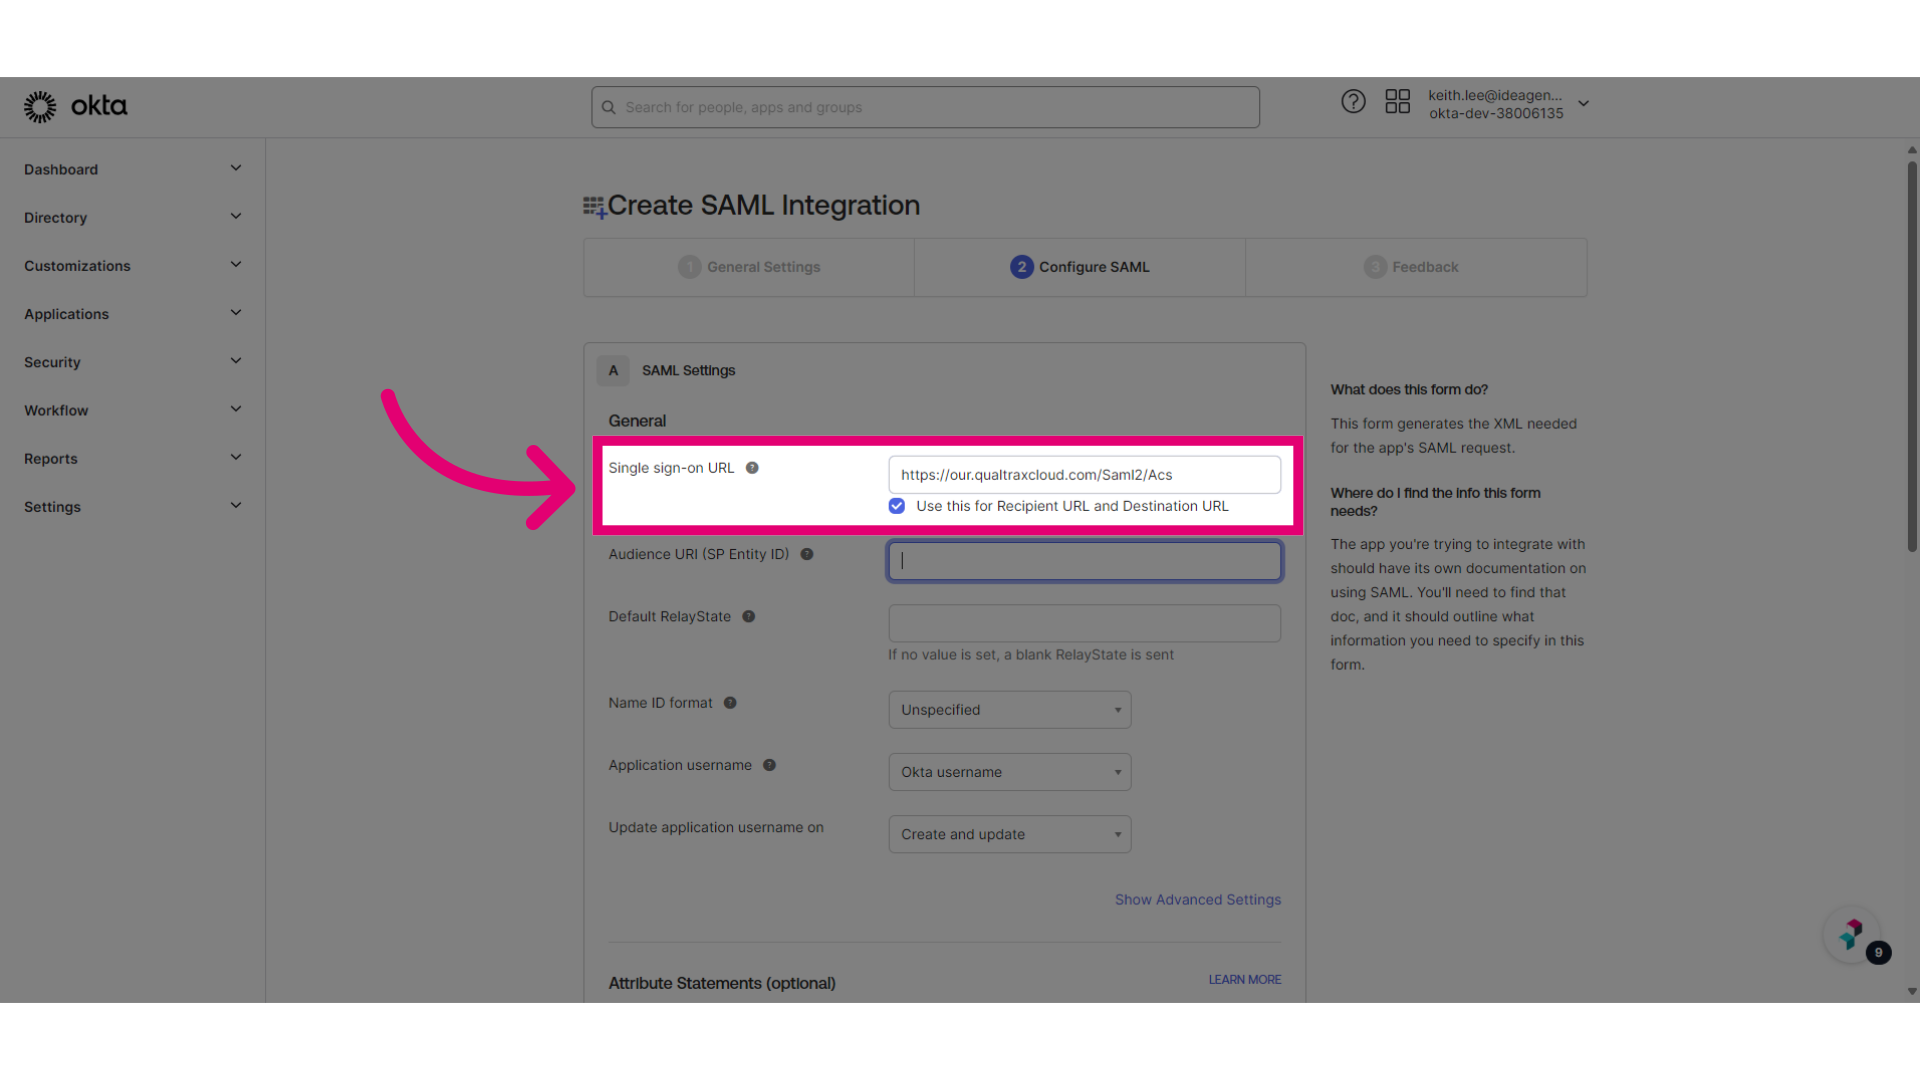
- Enter the Recipient URL from your Quality Management (Essentials) system.
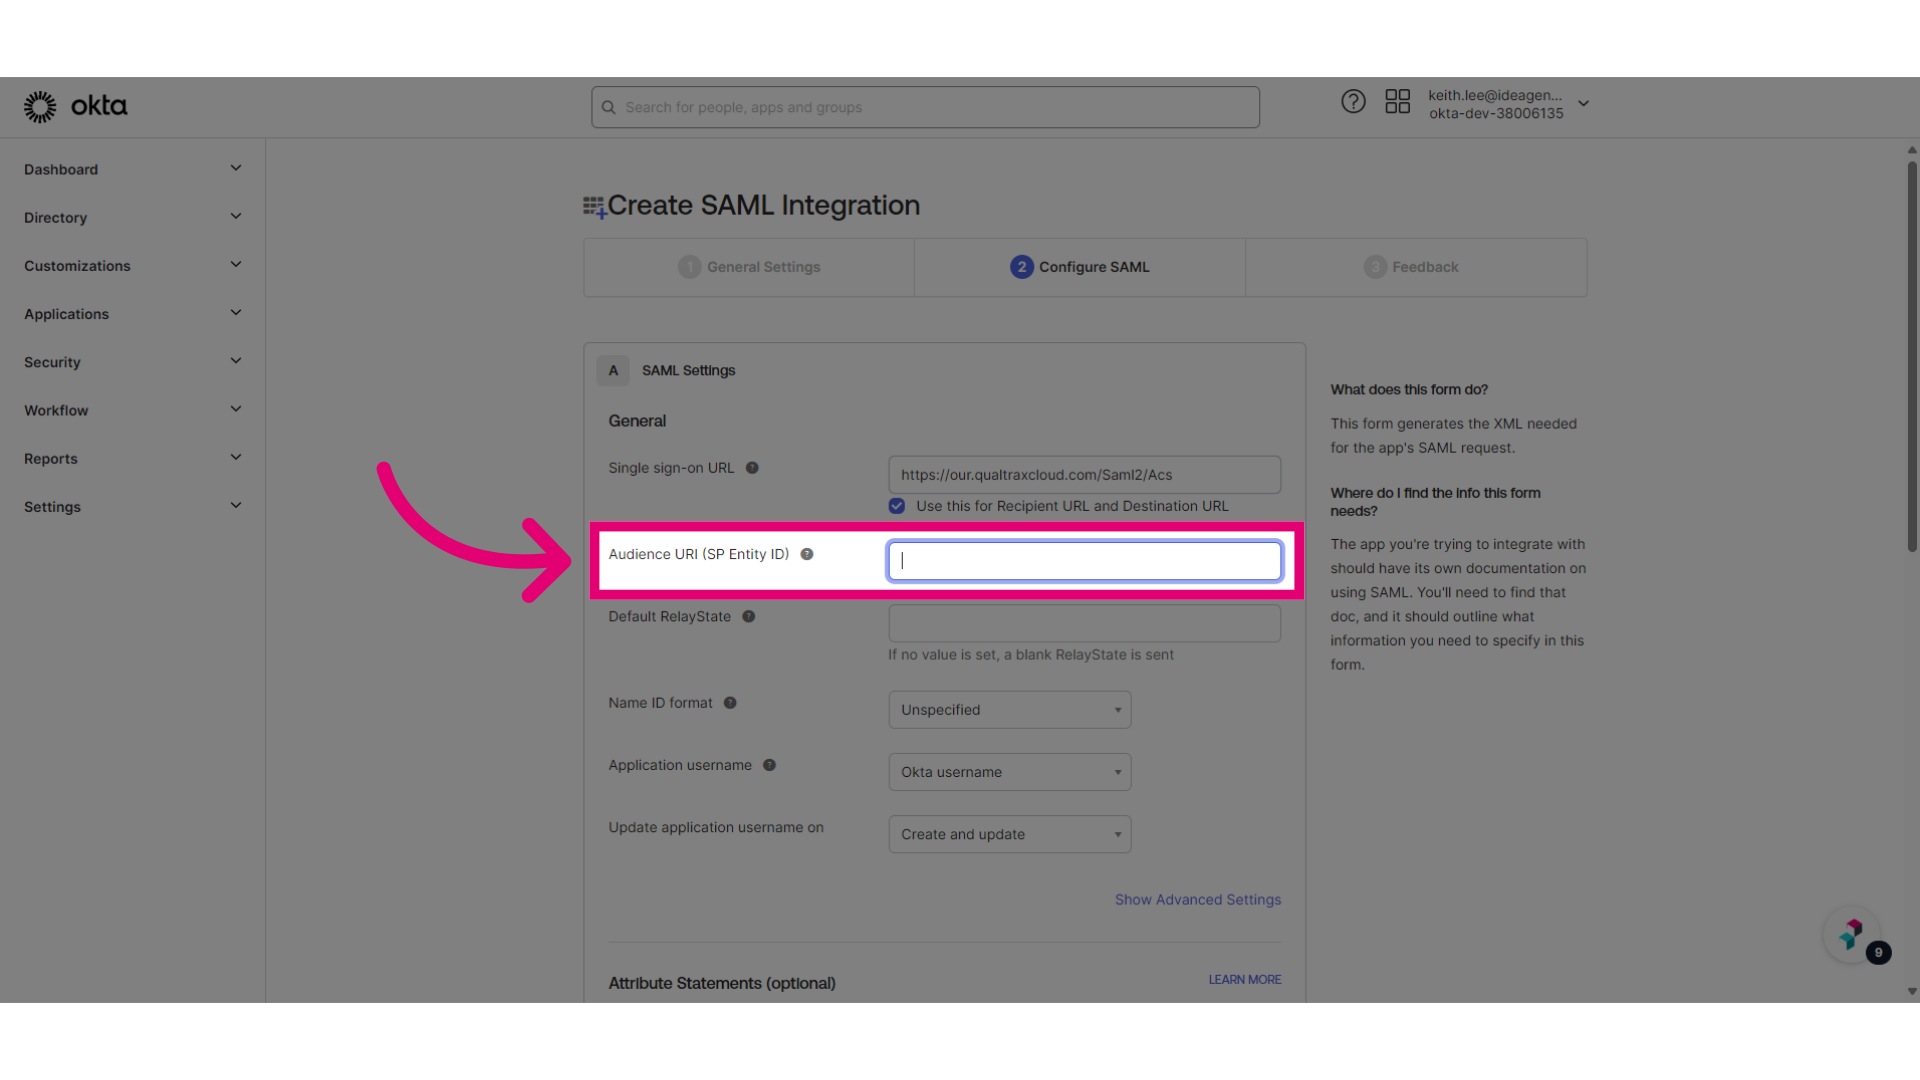
- Provide the Audience URI.
- Scroll down to the Attribute Statements section.
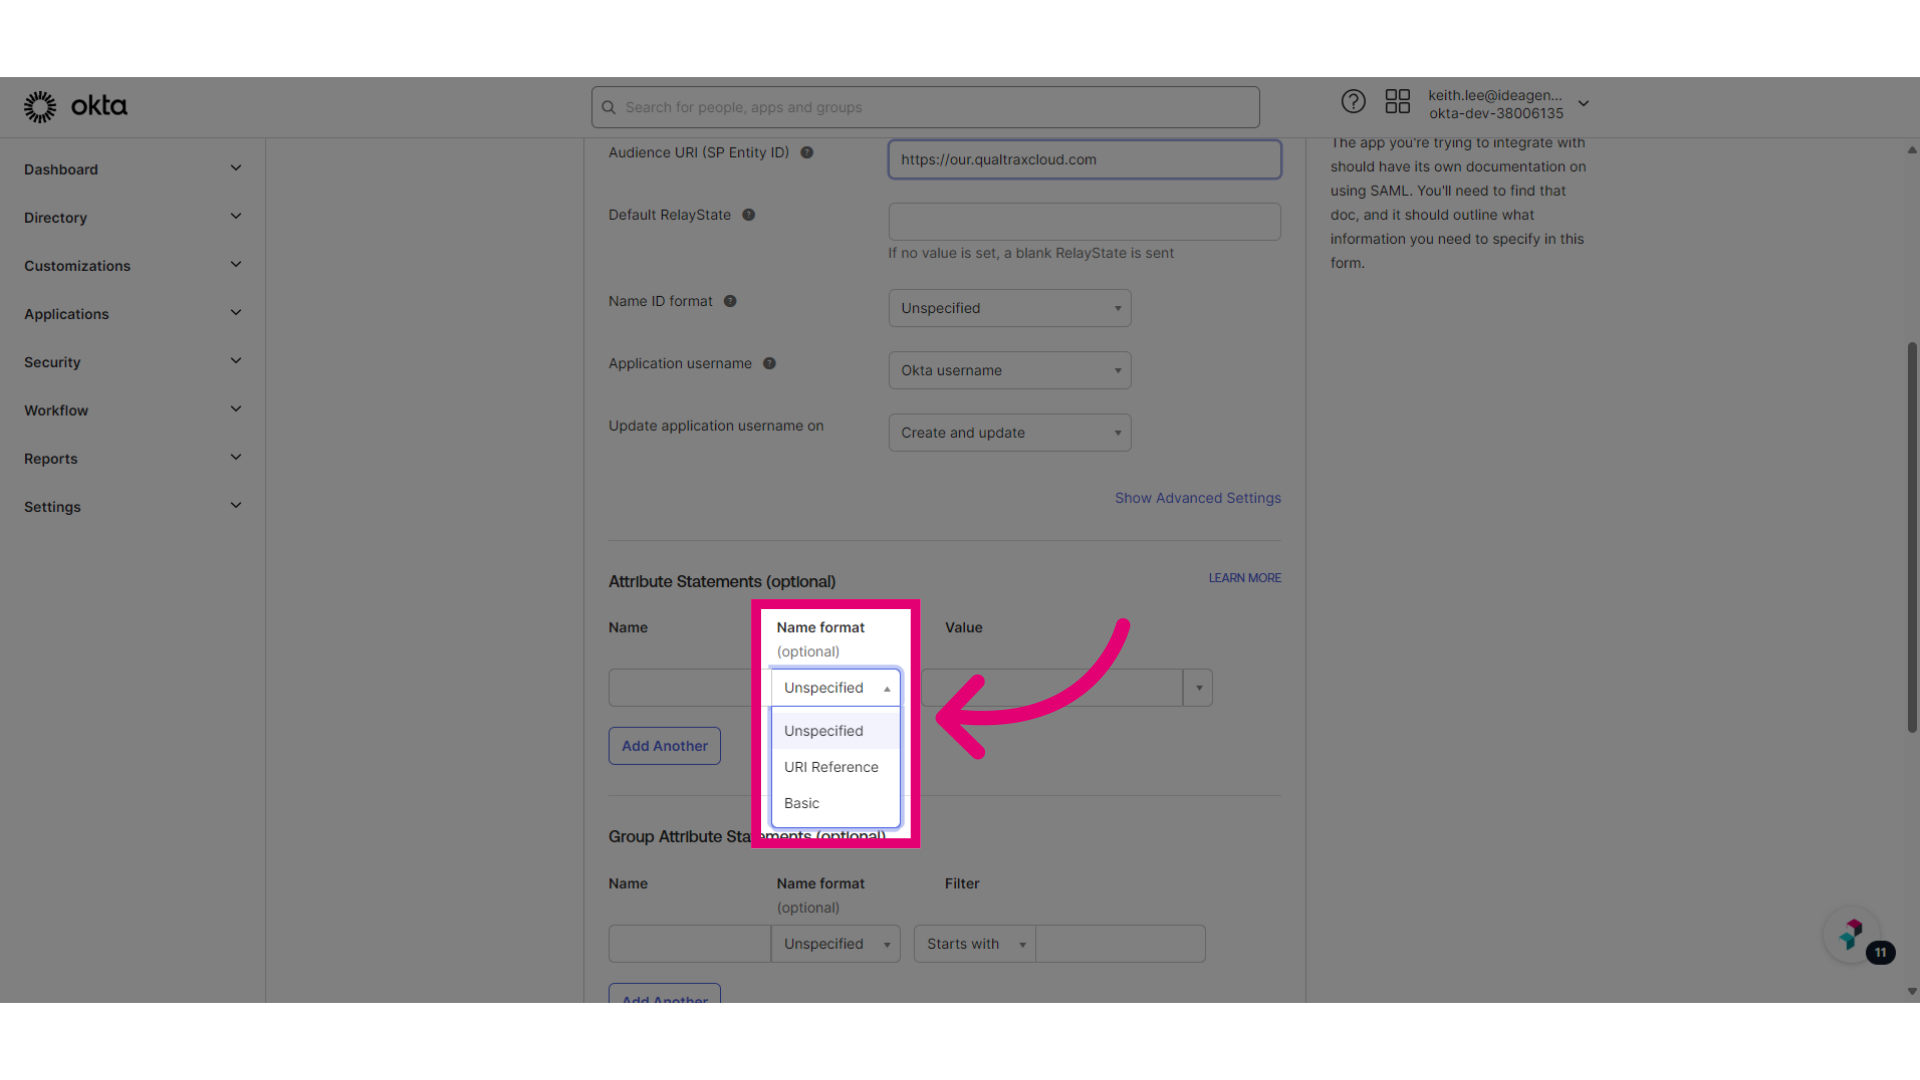
- Open the Name format dropdown.
- Choose URI Reference.
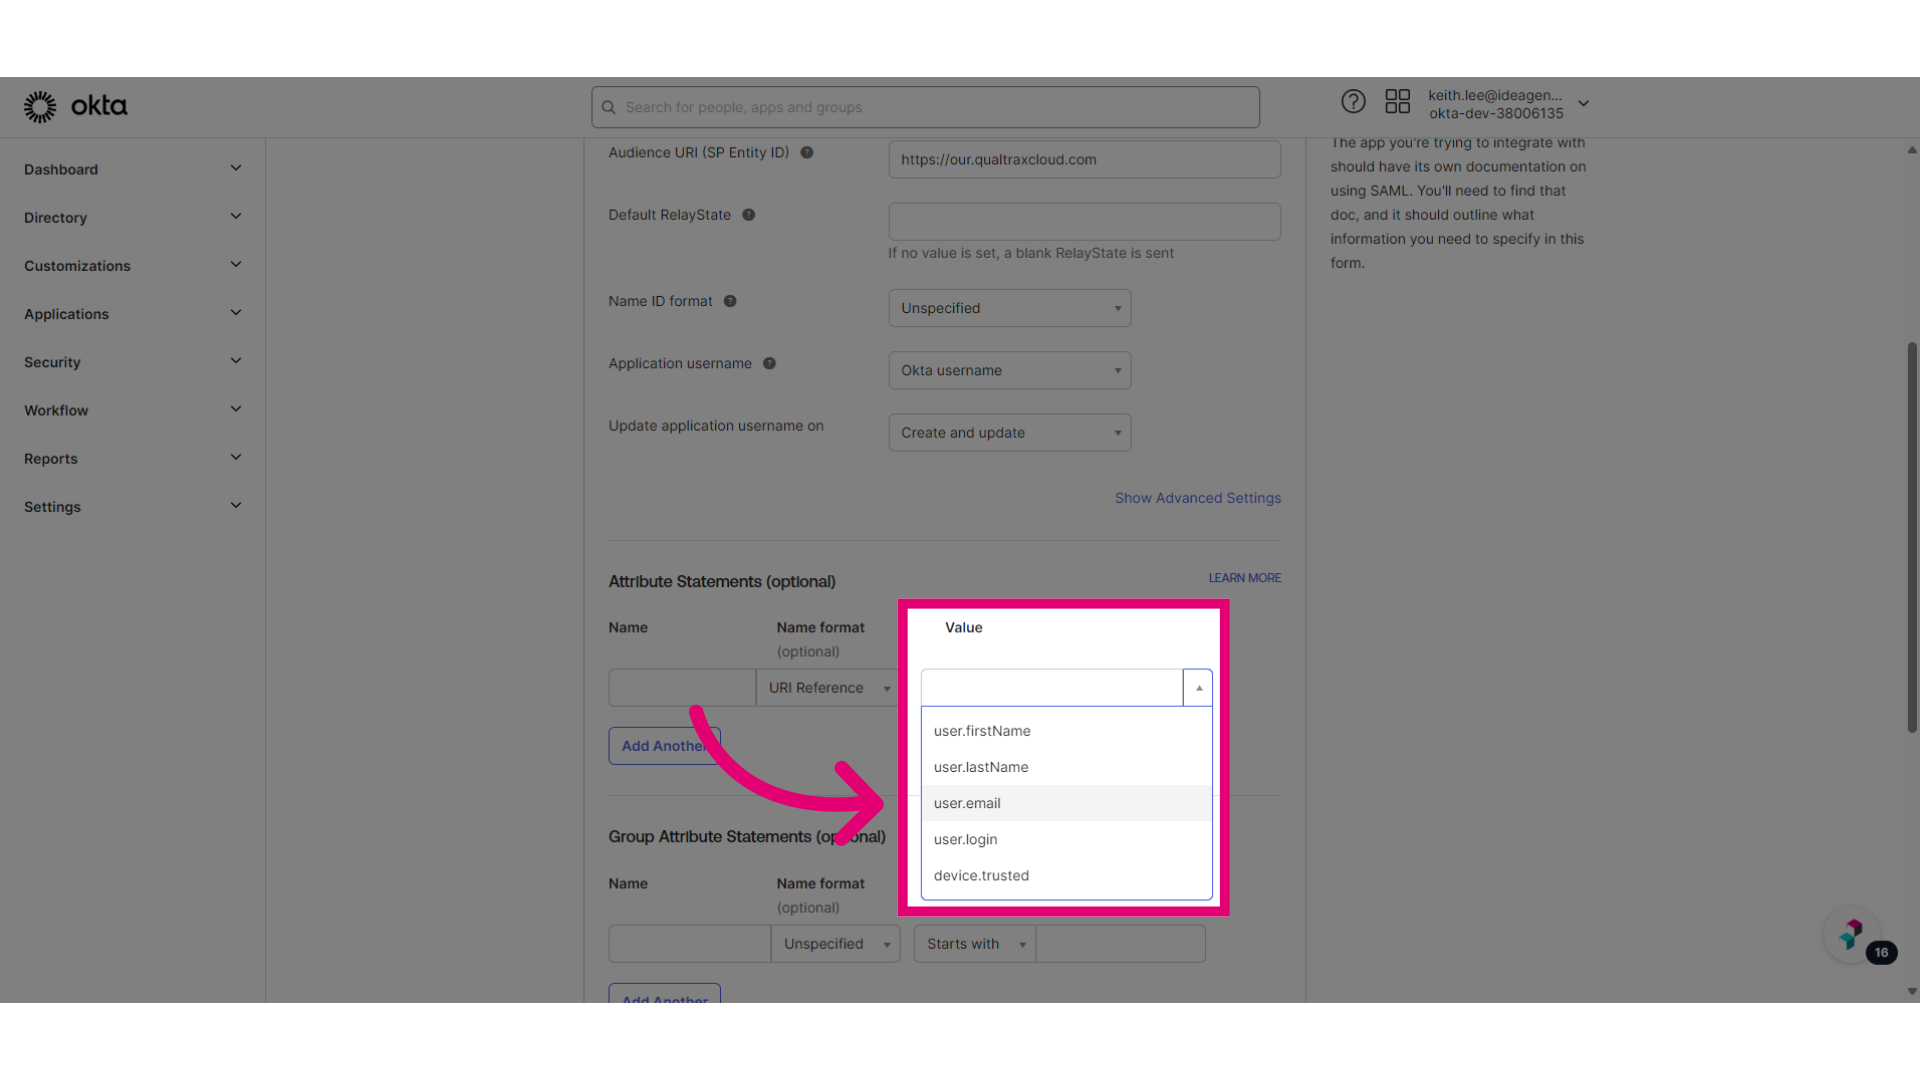
- Open the Value dropdown.
- Choose user.email.
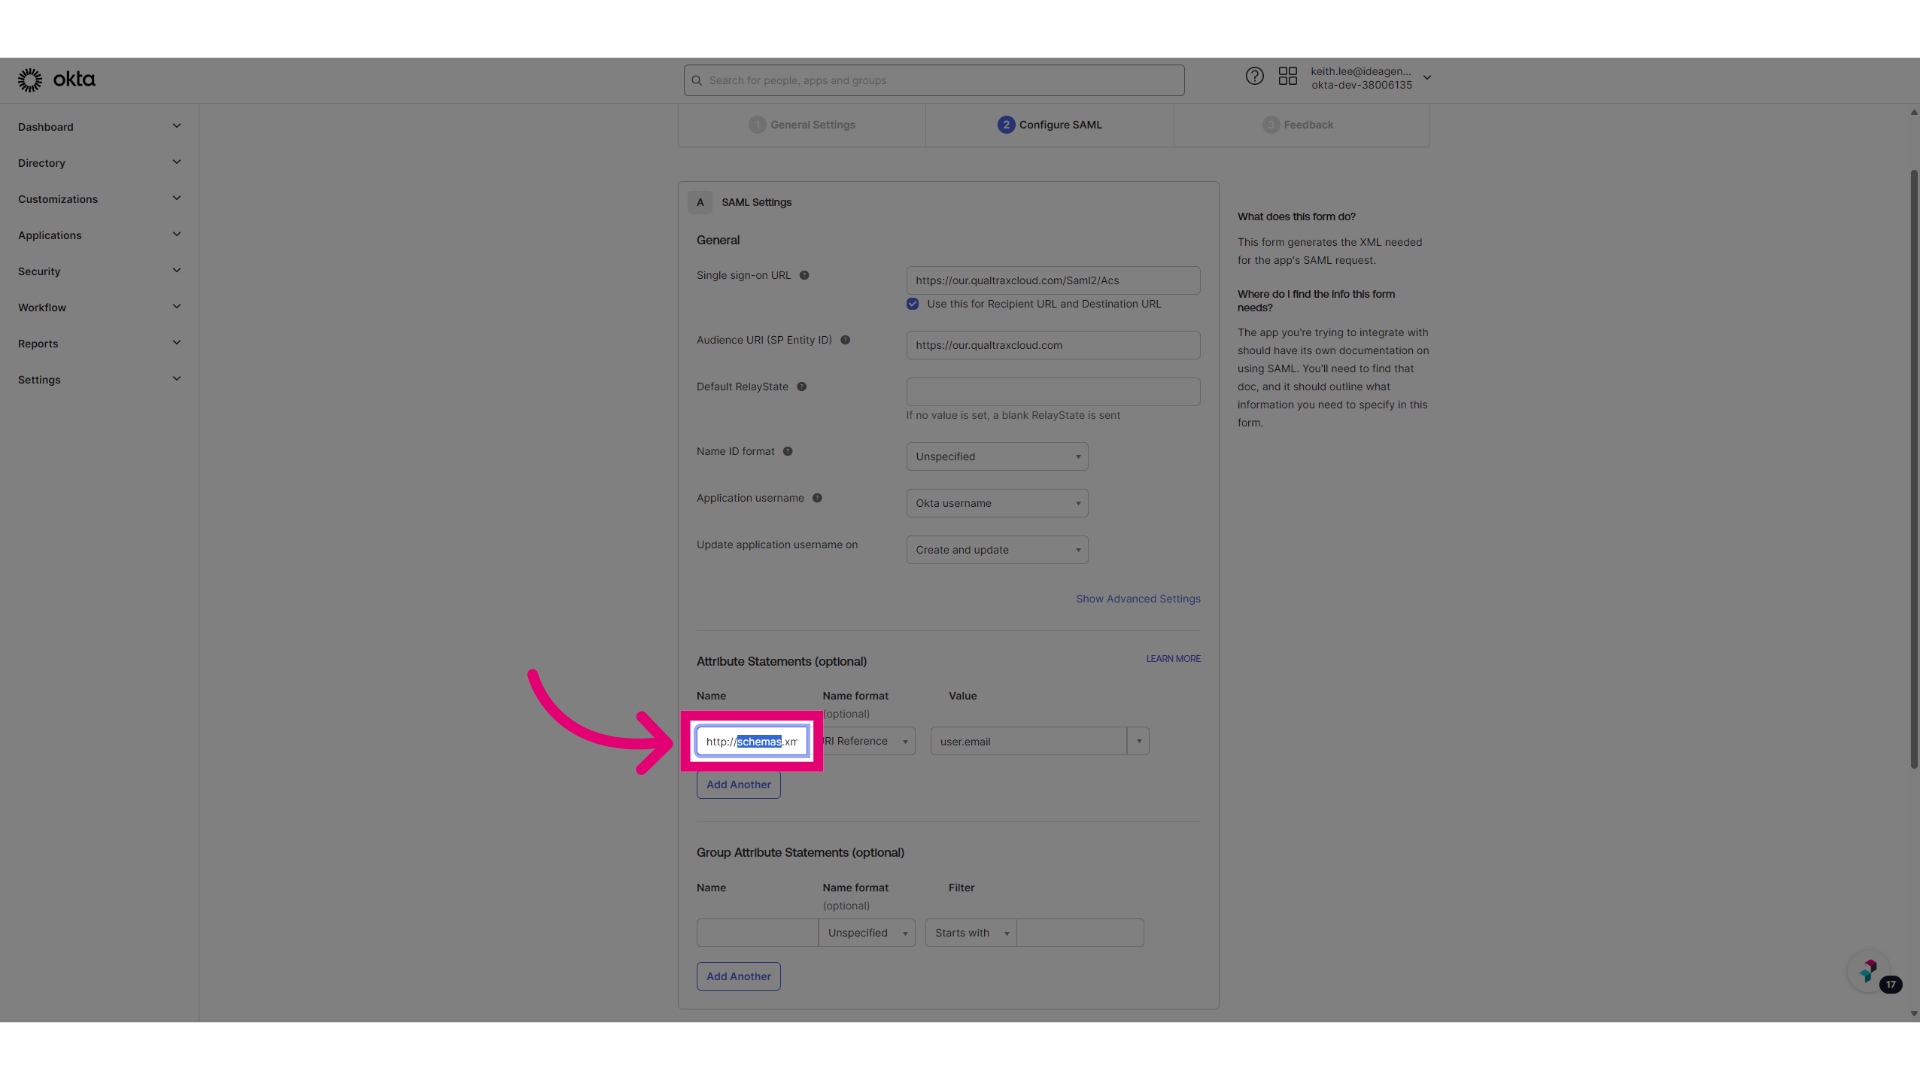
- Enter the schema in the Name field.
http://schemas.xmlsoap.org/ws/2005/05/identity/claims/emailaddress- Click Next.
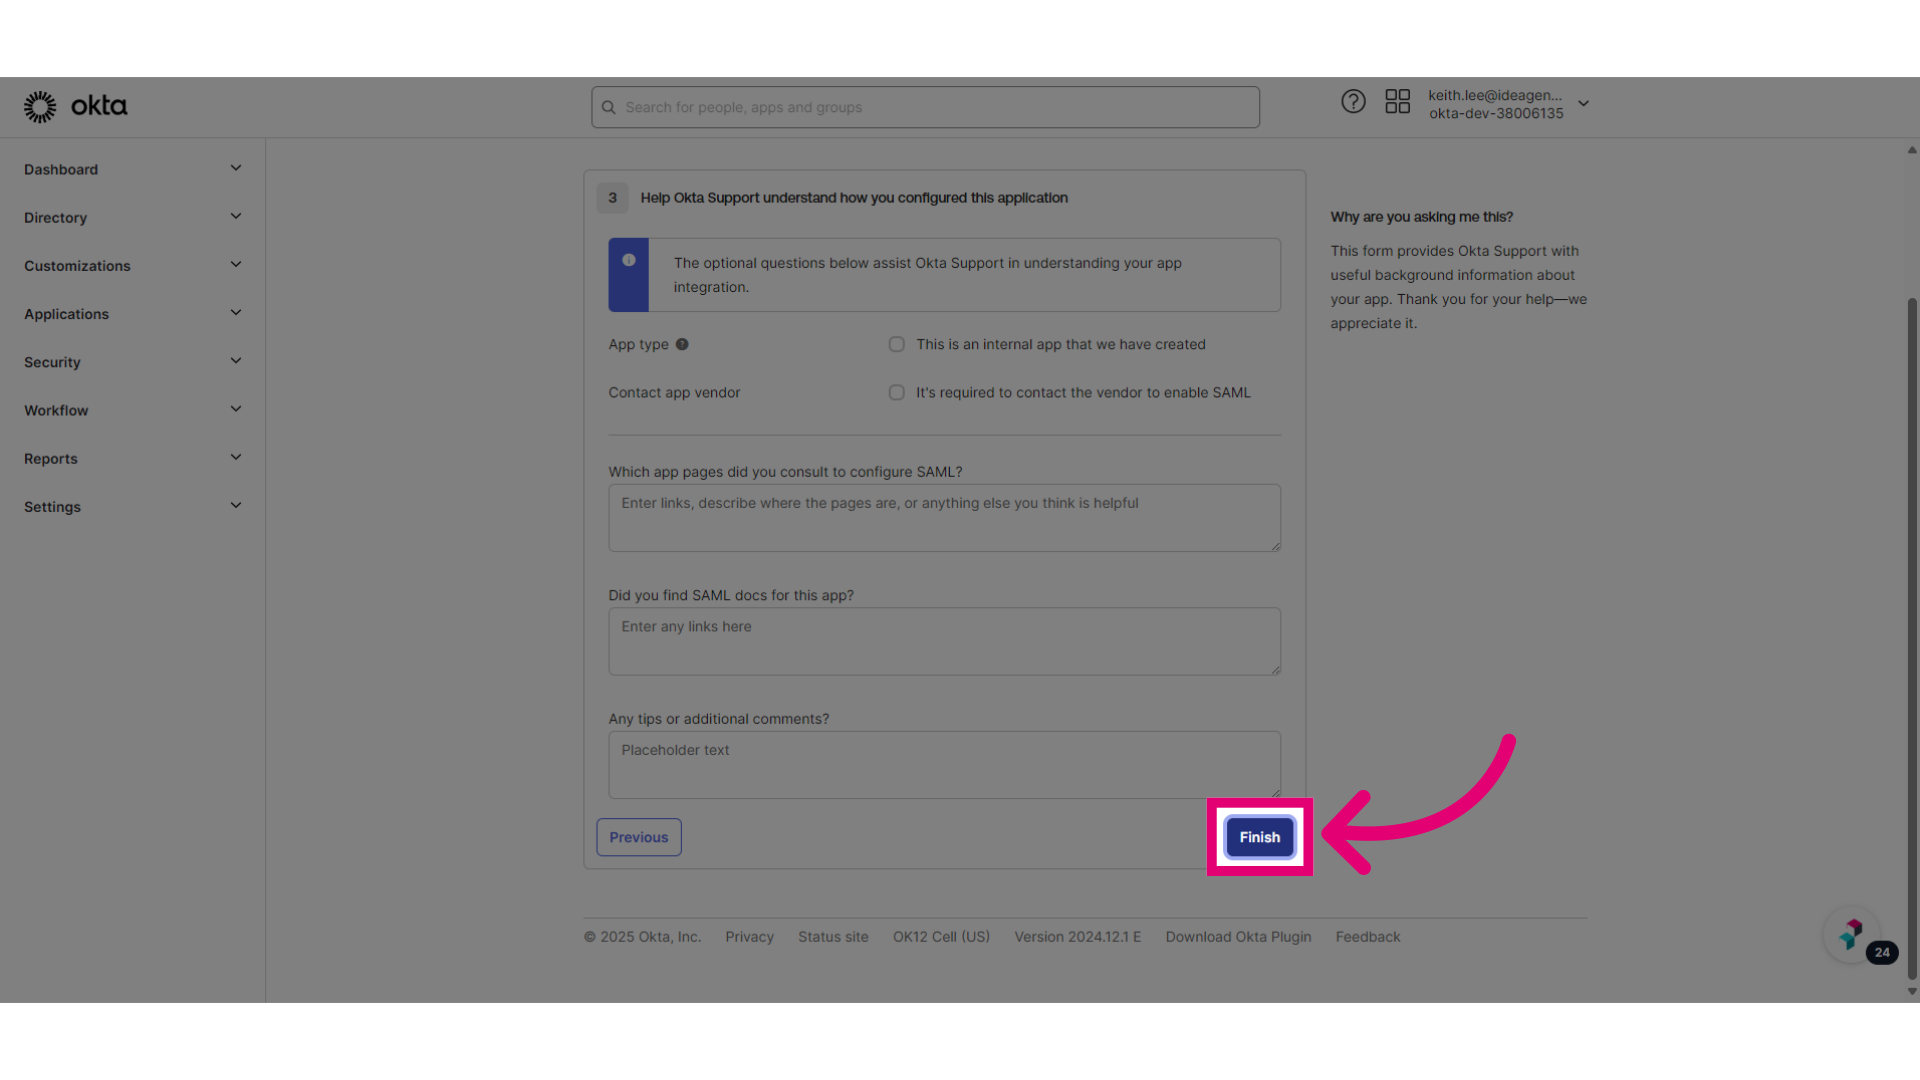
- Click Finish to complete the setup.
- Access Actions for the certificate.
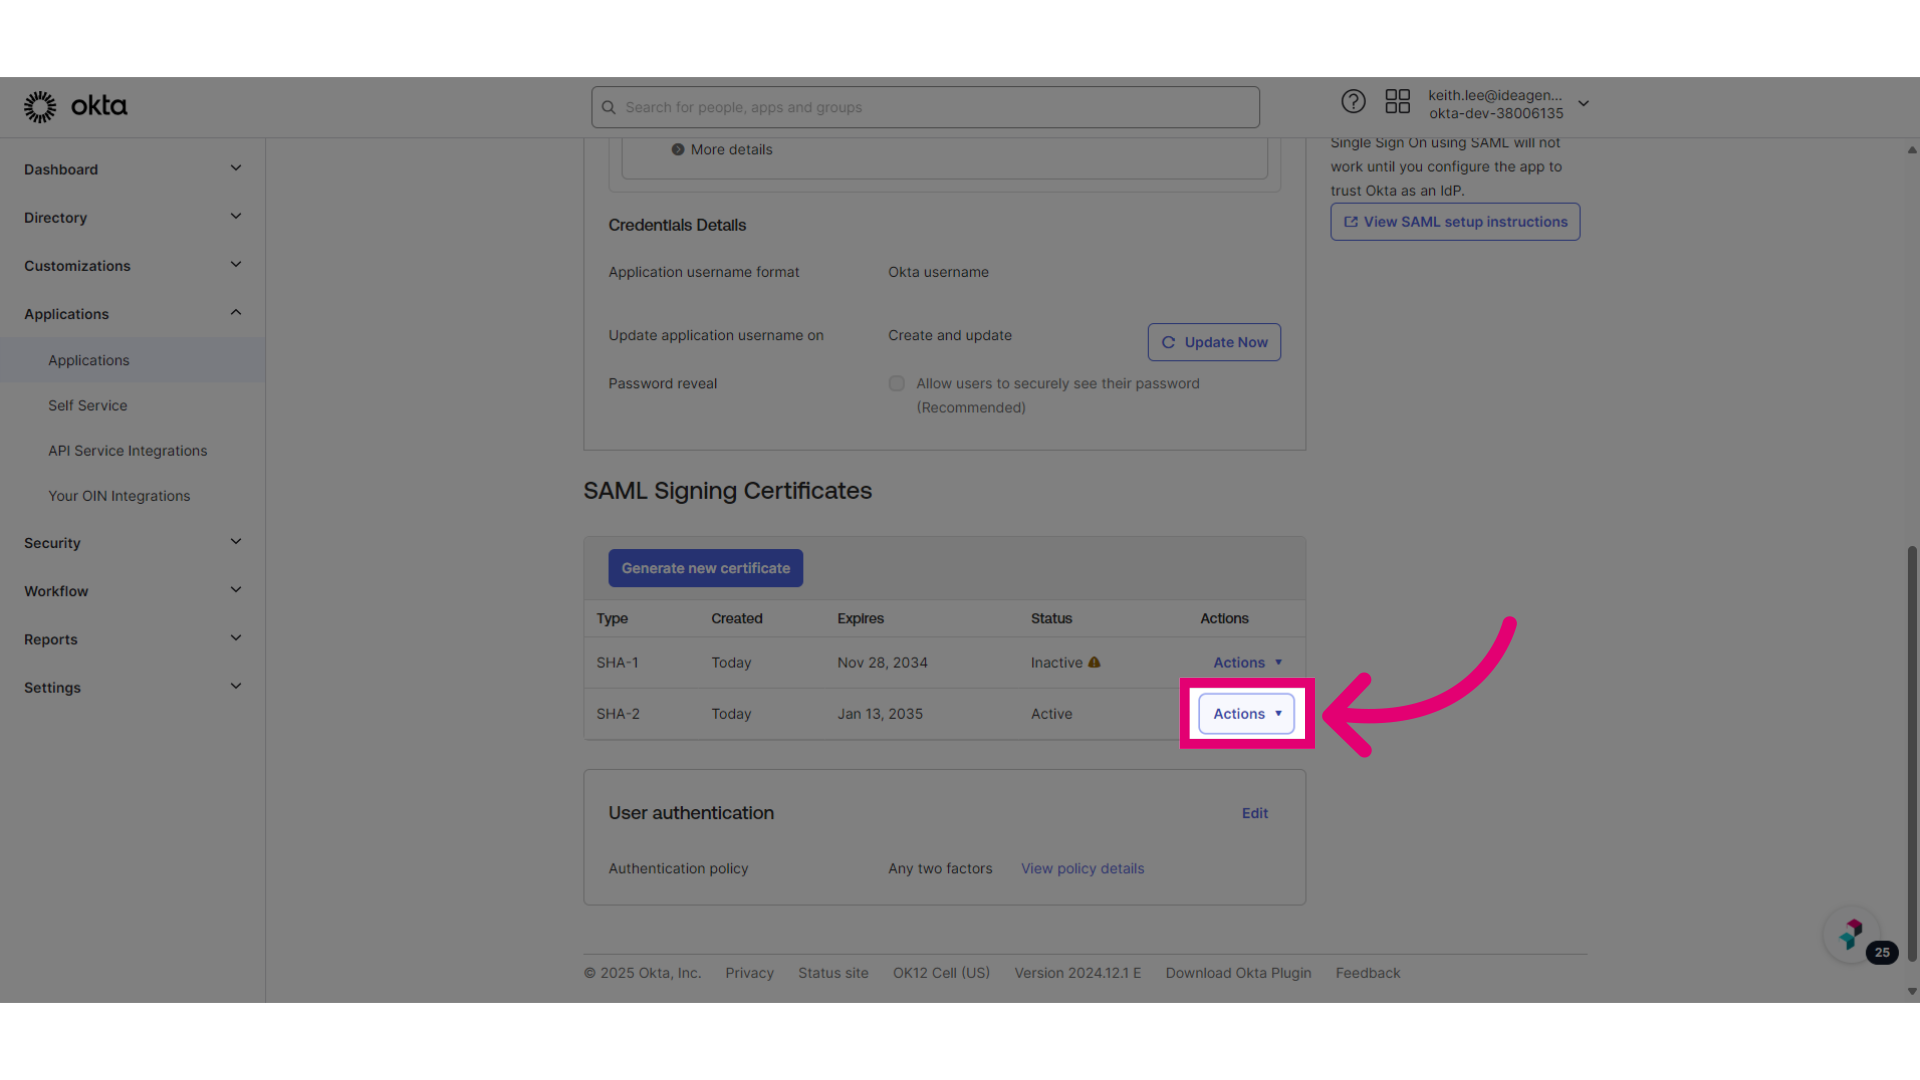
- Select Download certificate.
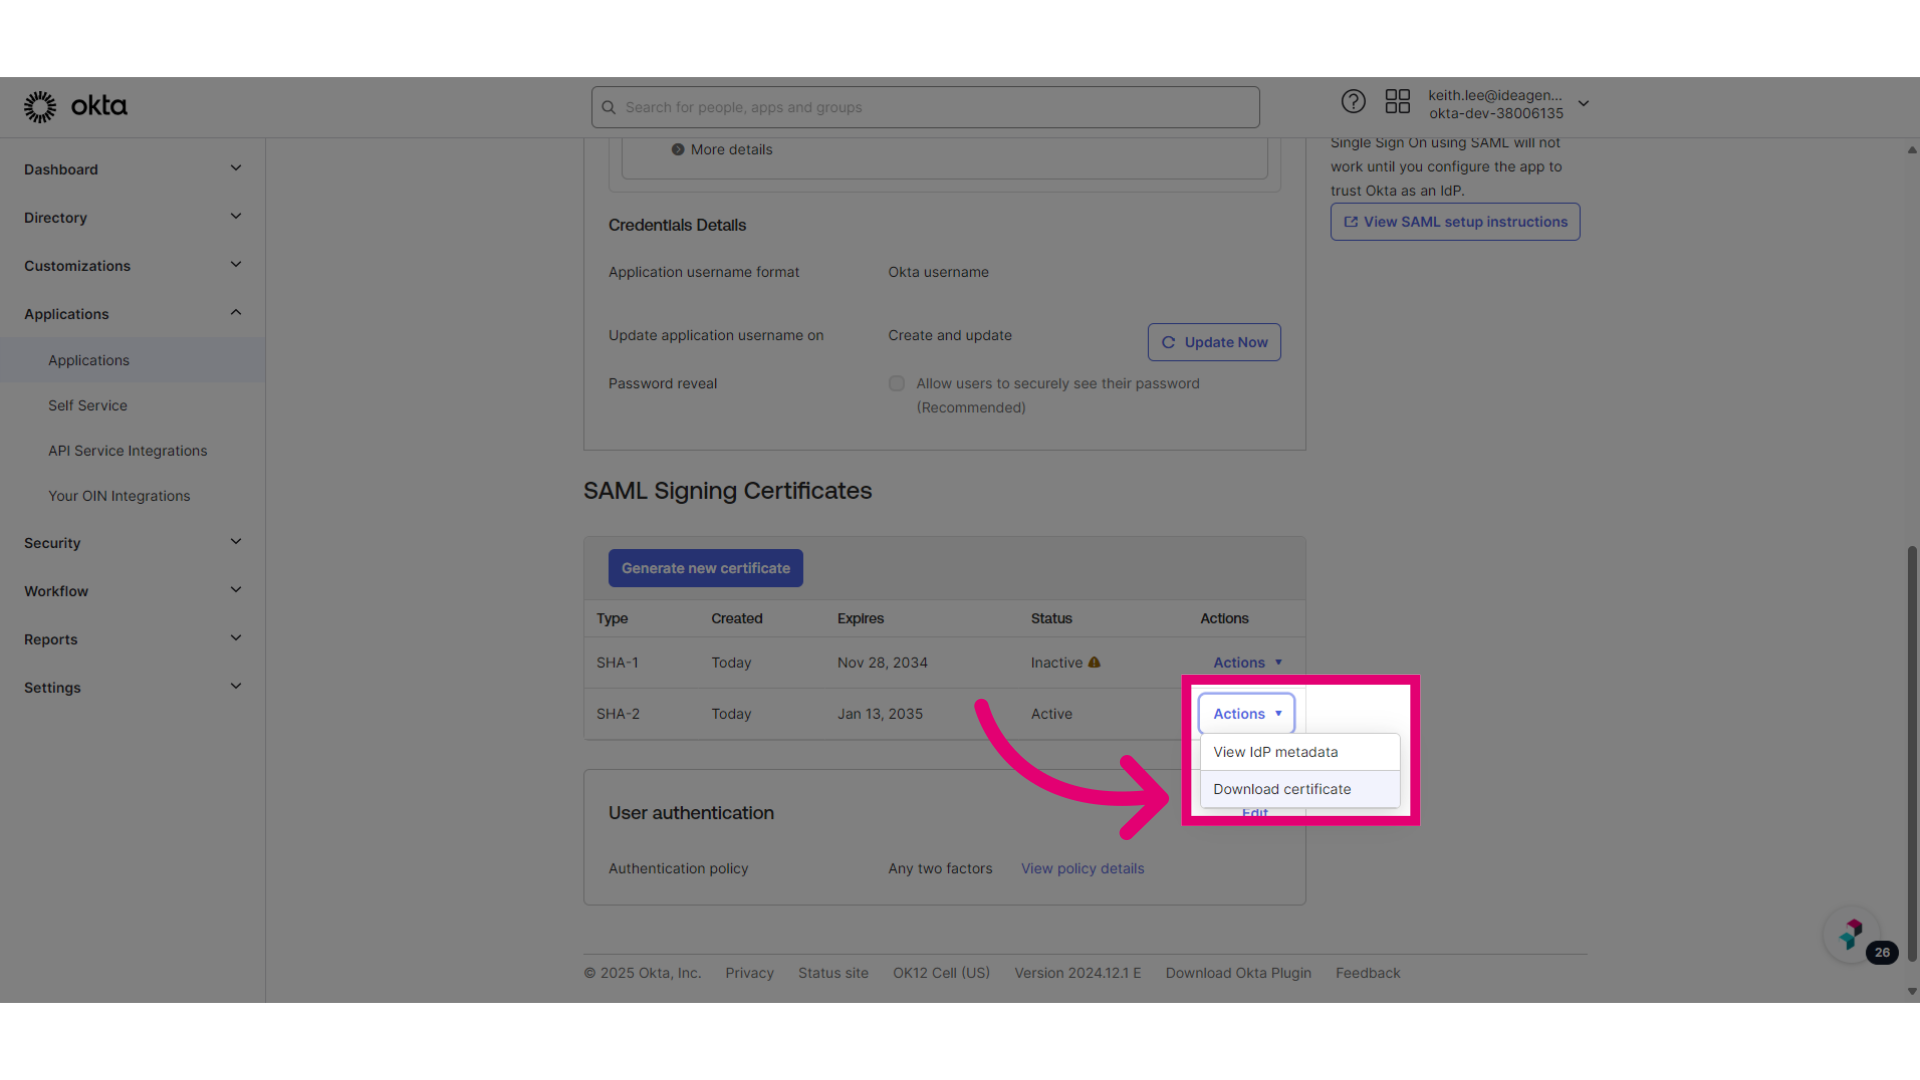
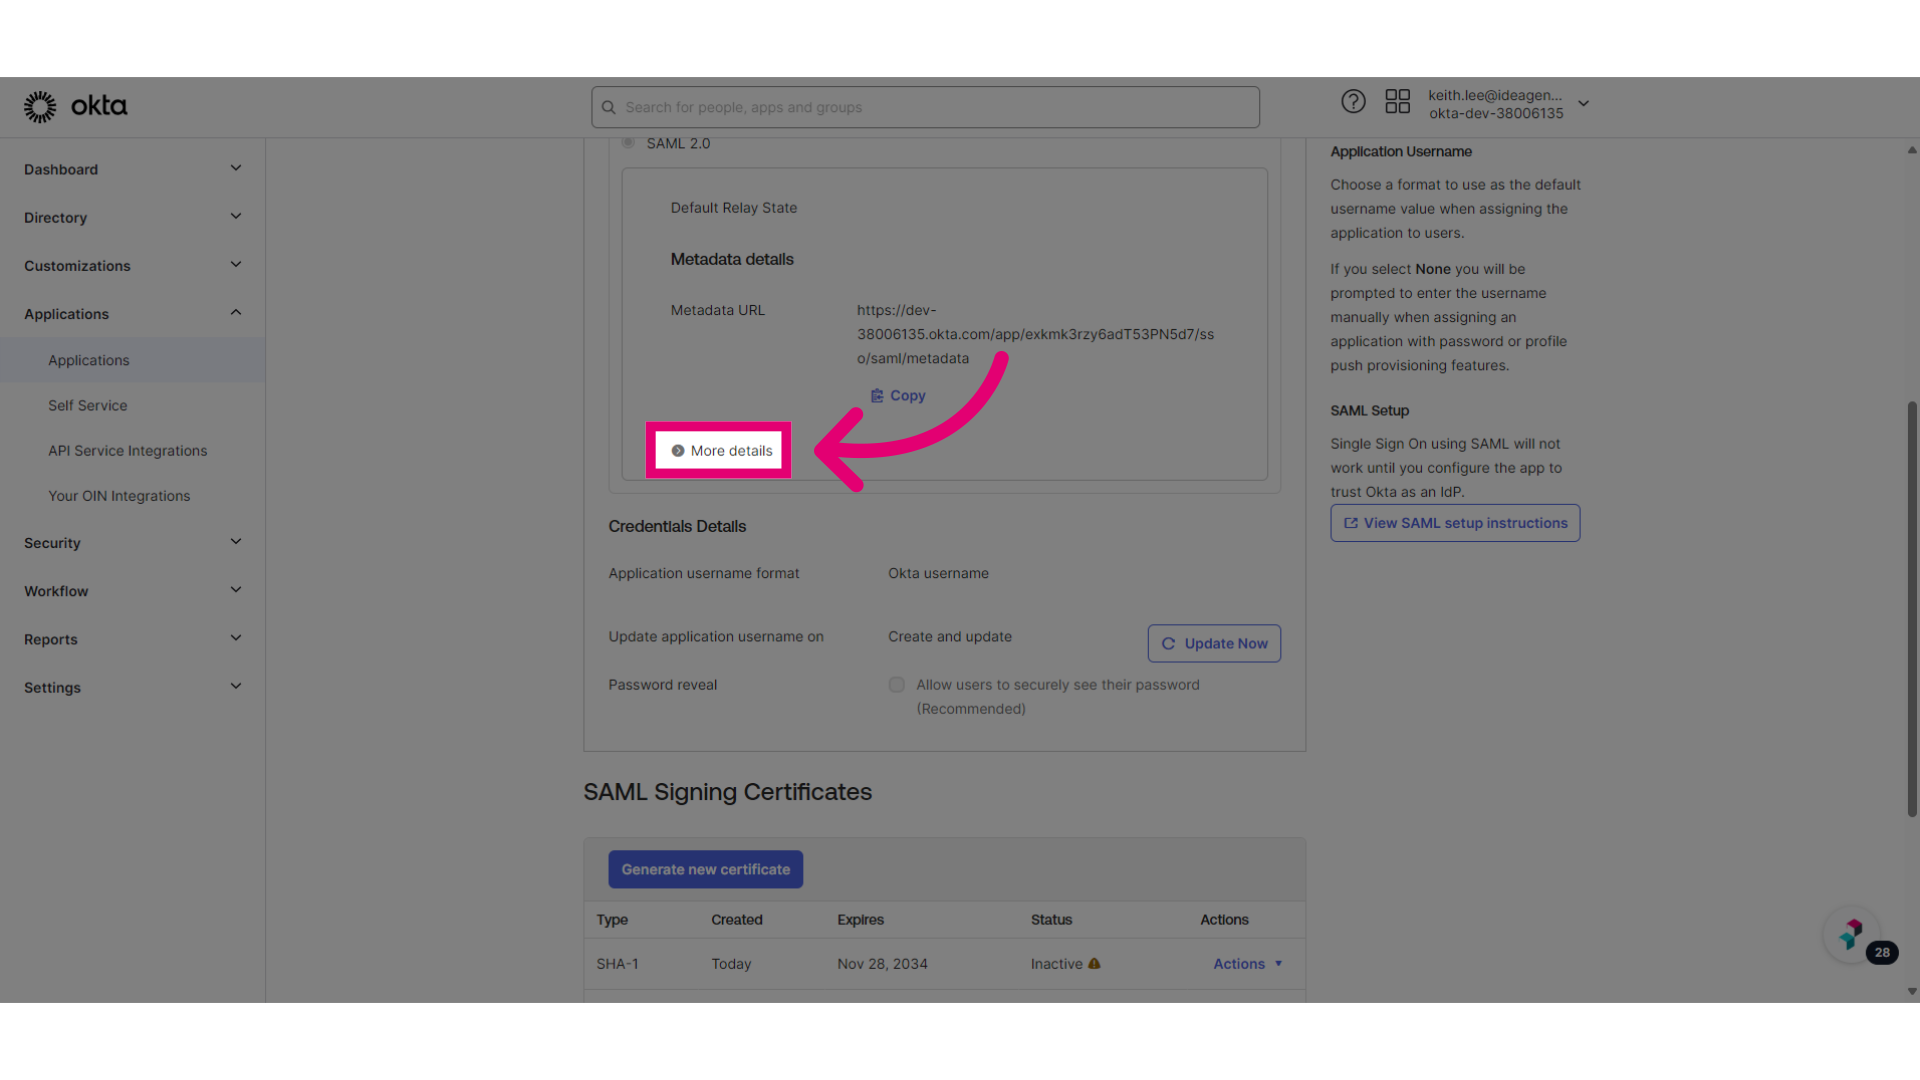
- Scroll up to the SAML 2.0 entry.
- Click More details.
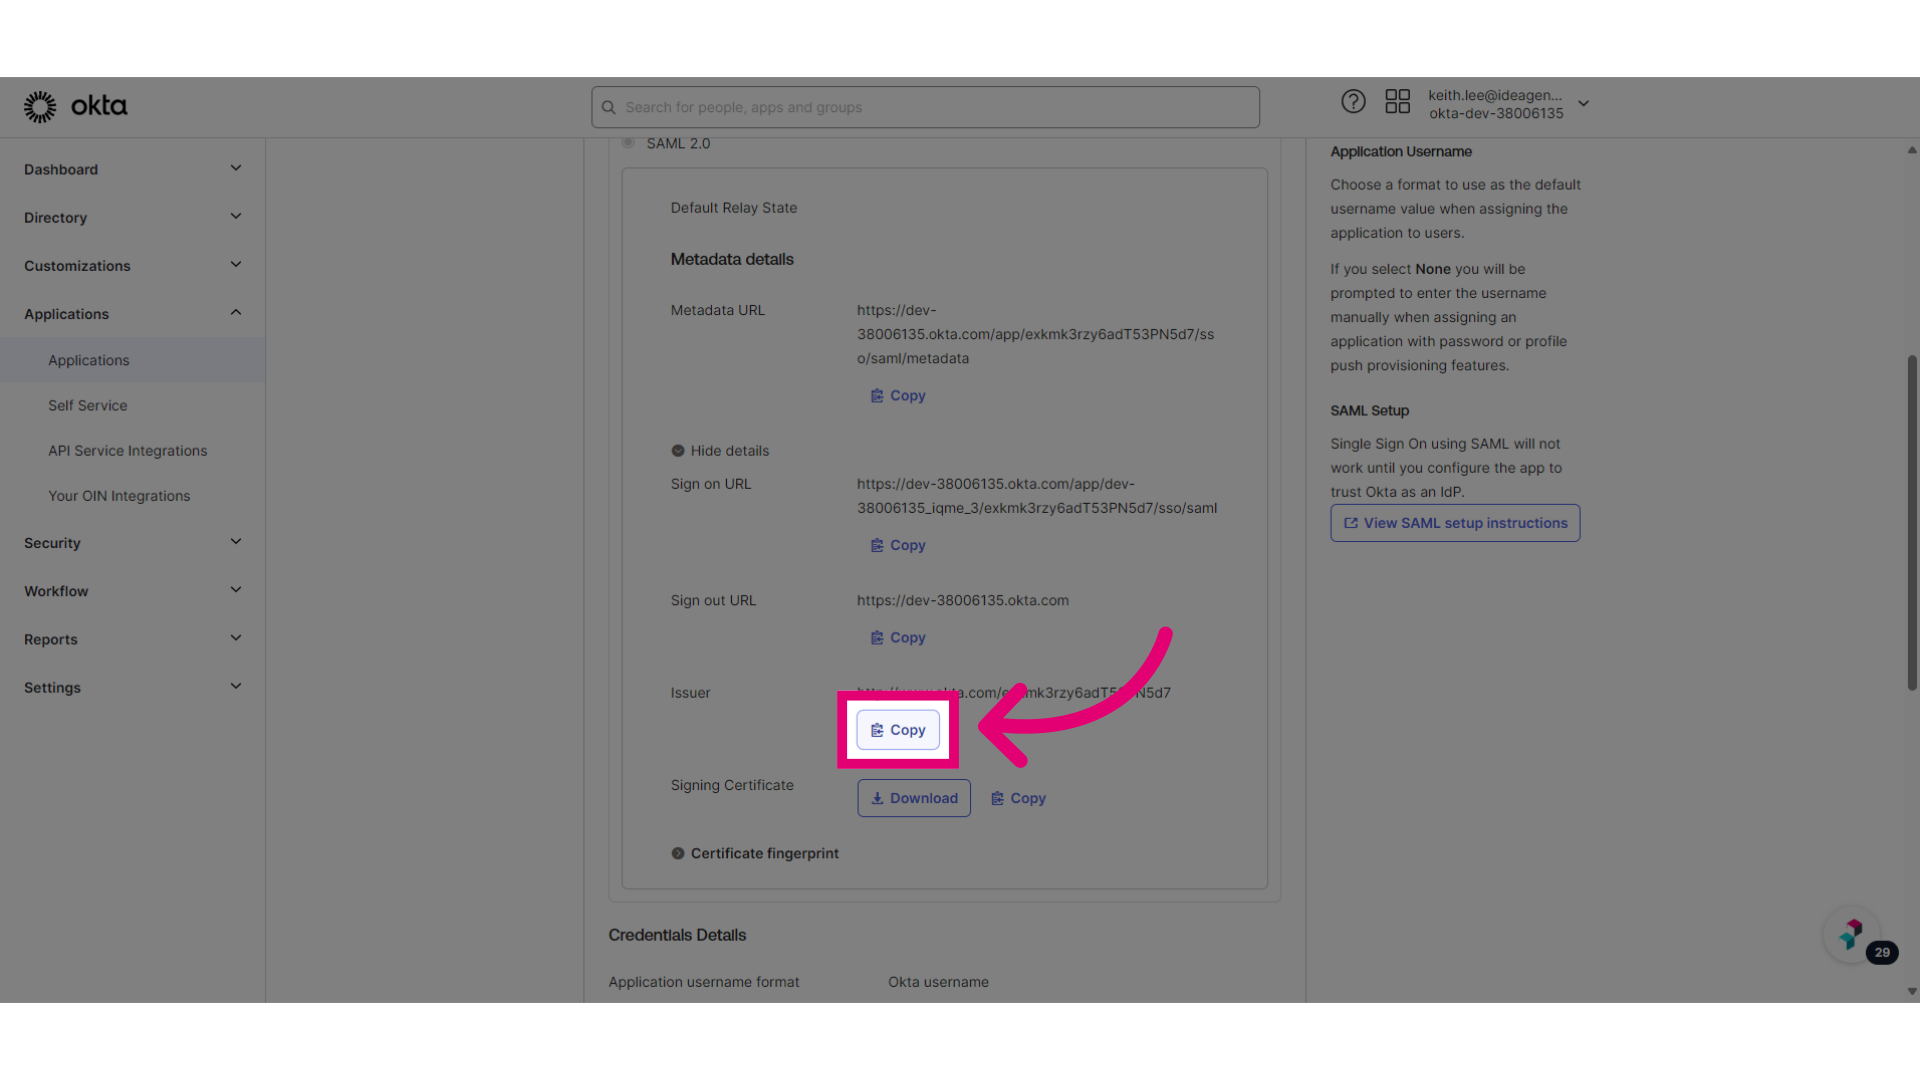
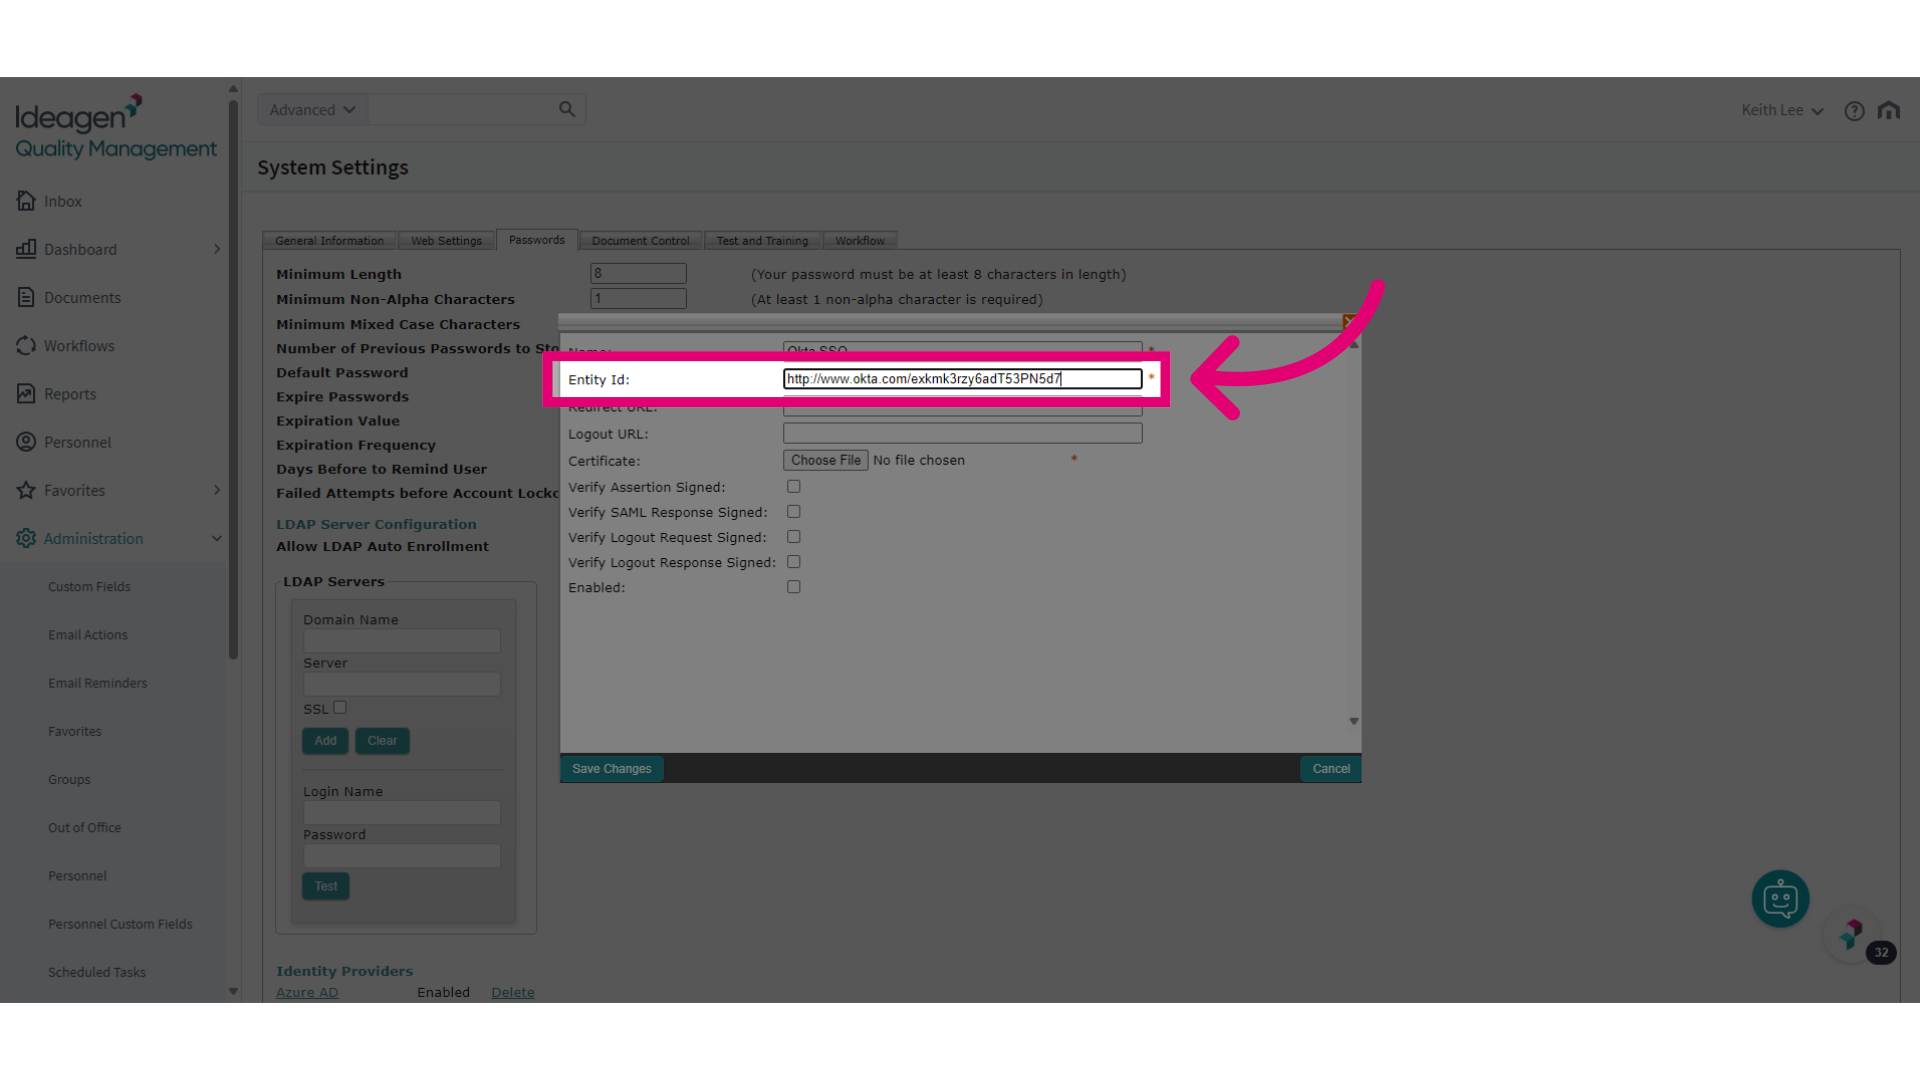
- Copy the Issuer URL.
- Switch to your Quality Management (Essentials) site.
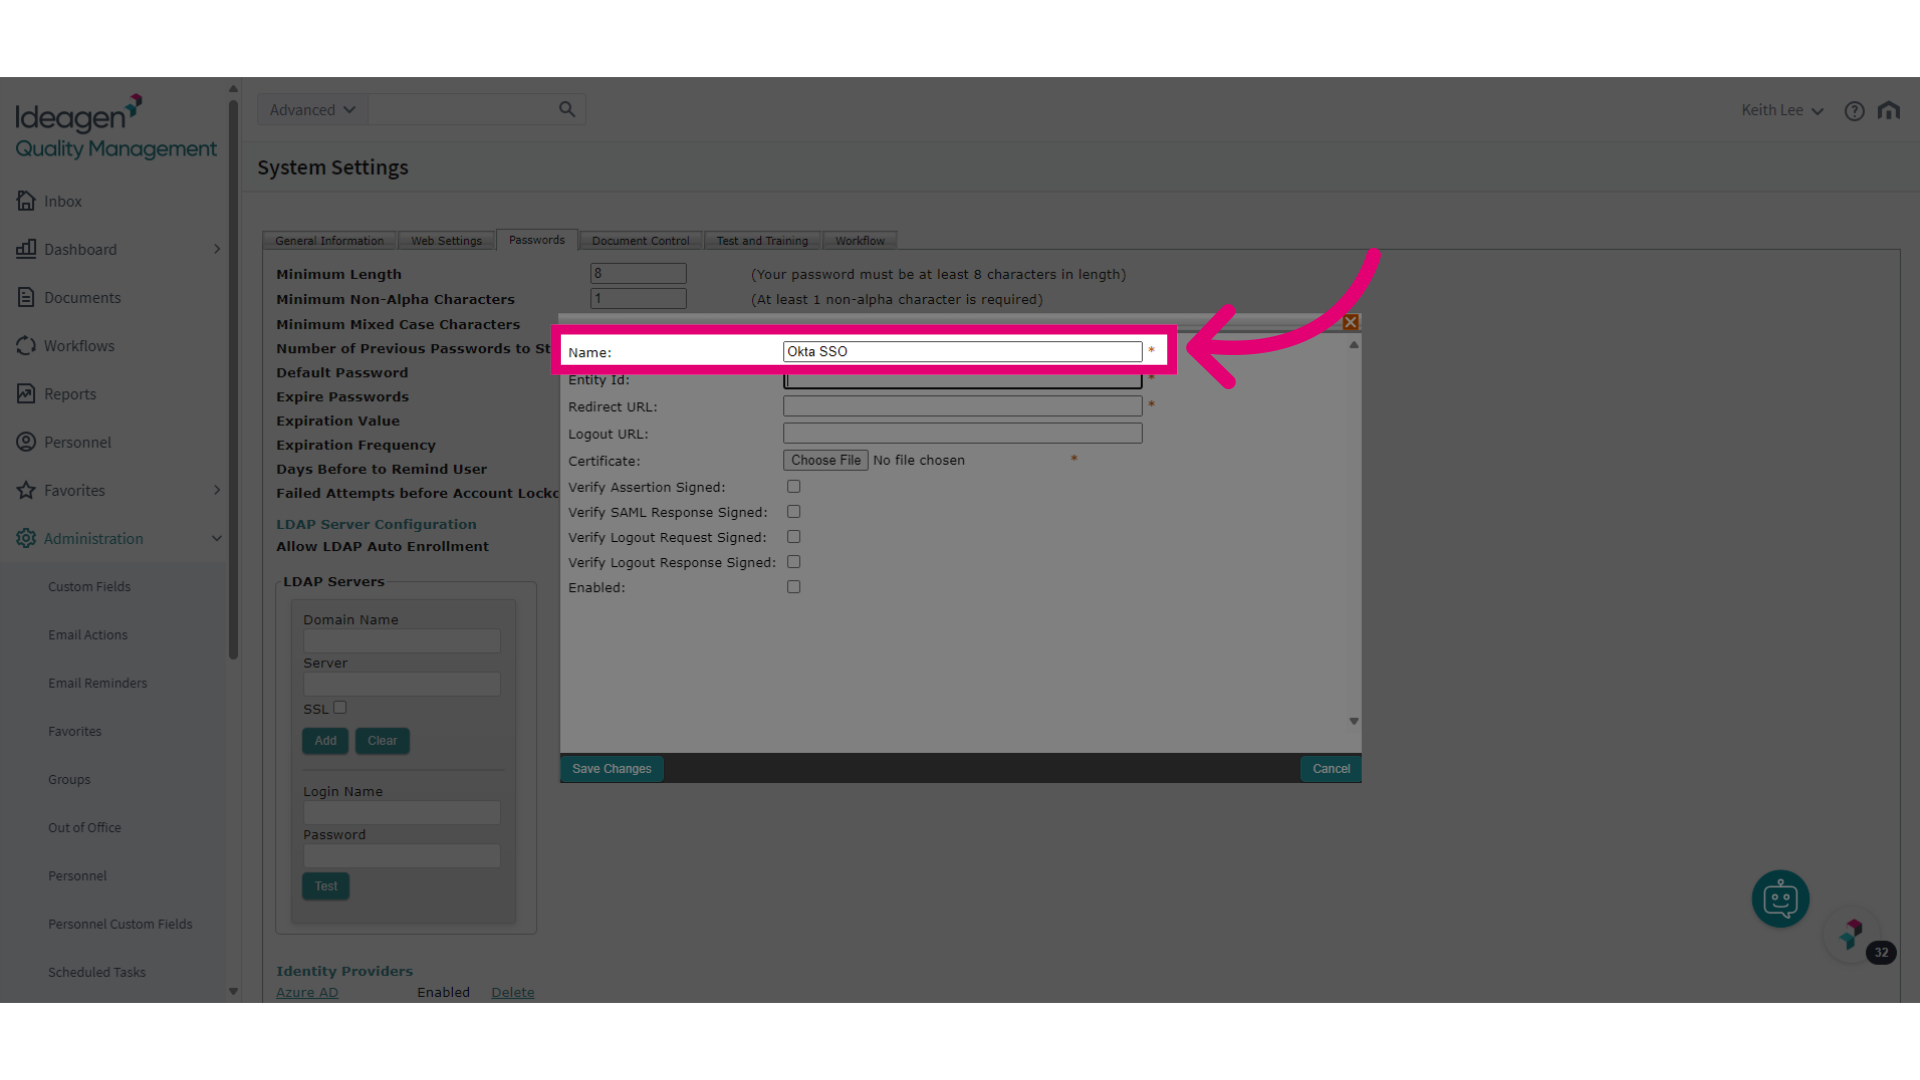
- Enter Okta SSO in the Name field.
- Paste in the copied Issuer URL in the Entity Id field.
- Go back to Okta.
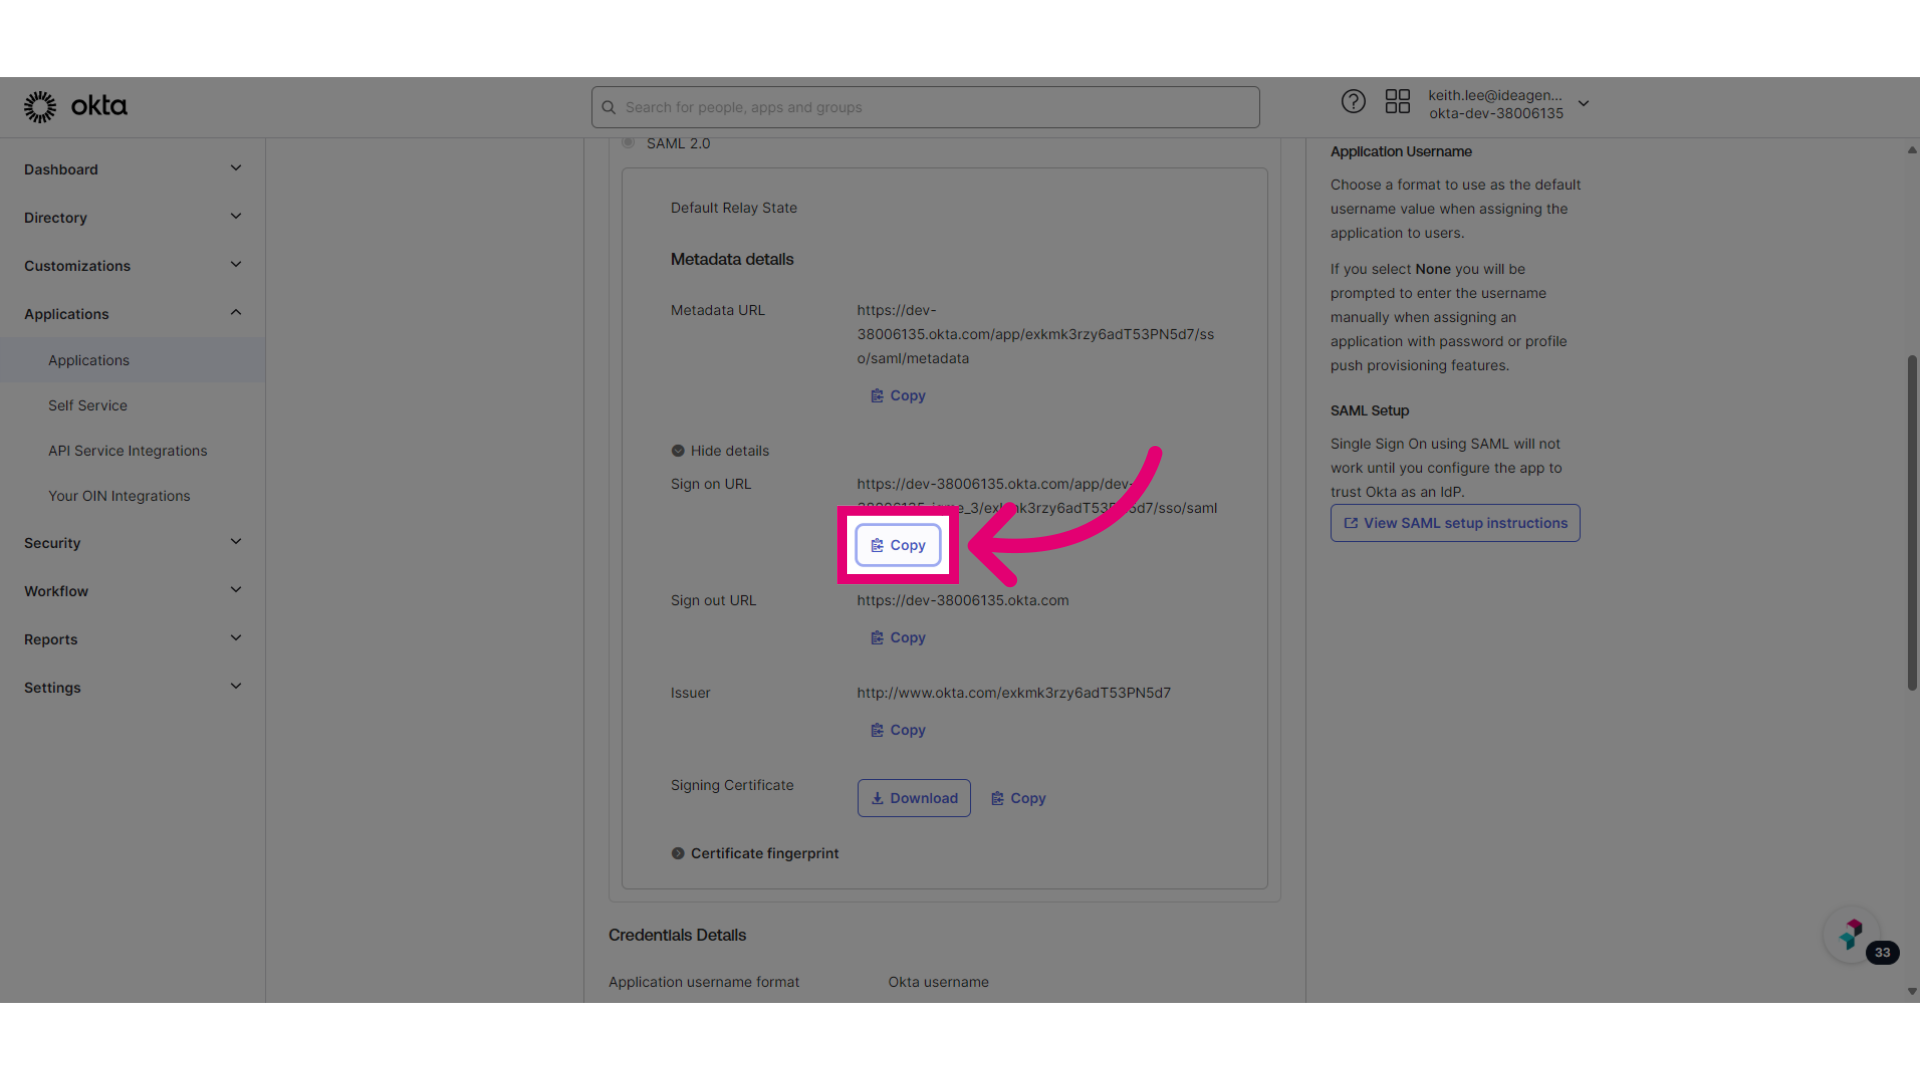
- Copy the Sign on URL.
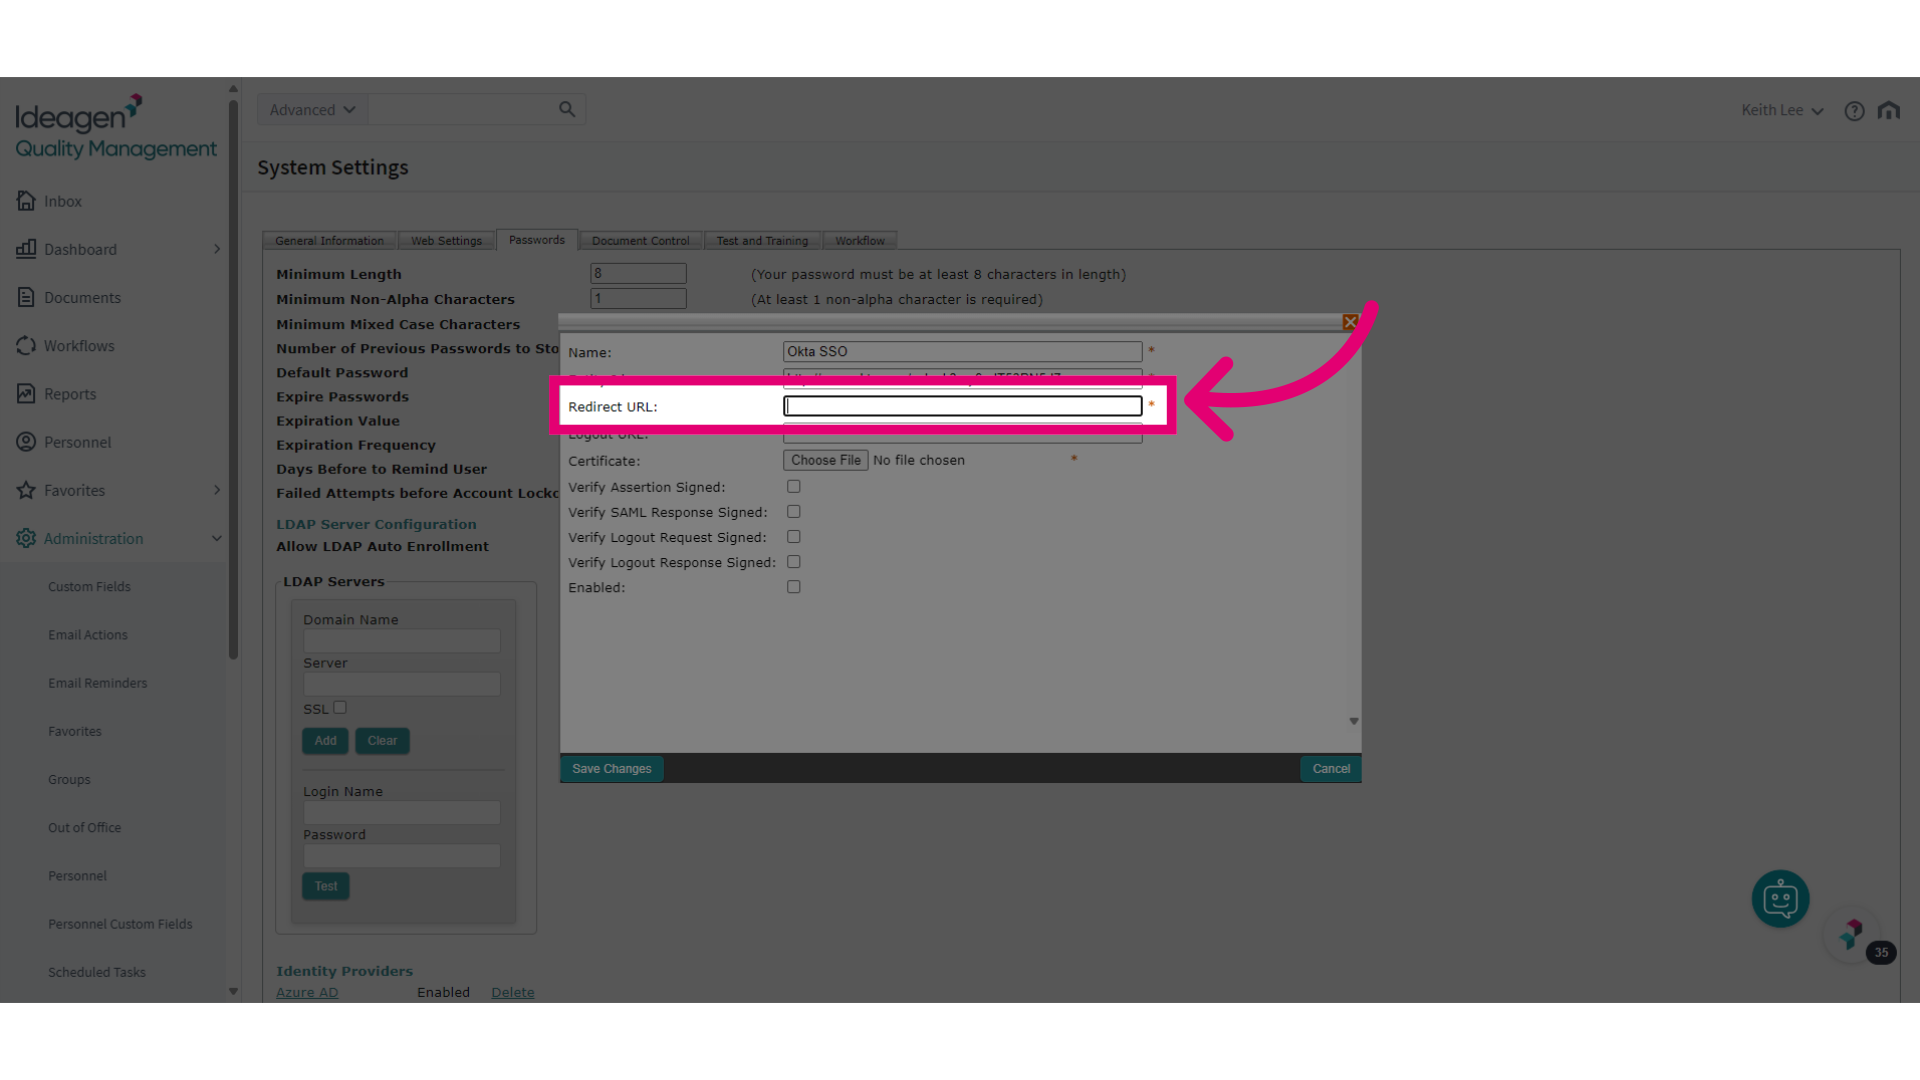
- Paste it into the Redirect URL field.
- Copy the Sign out URL.
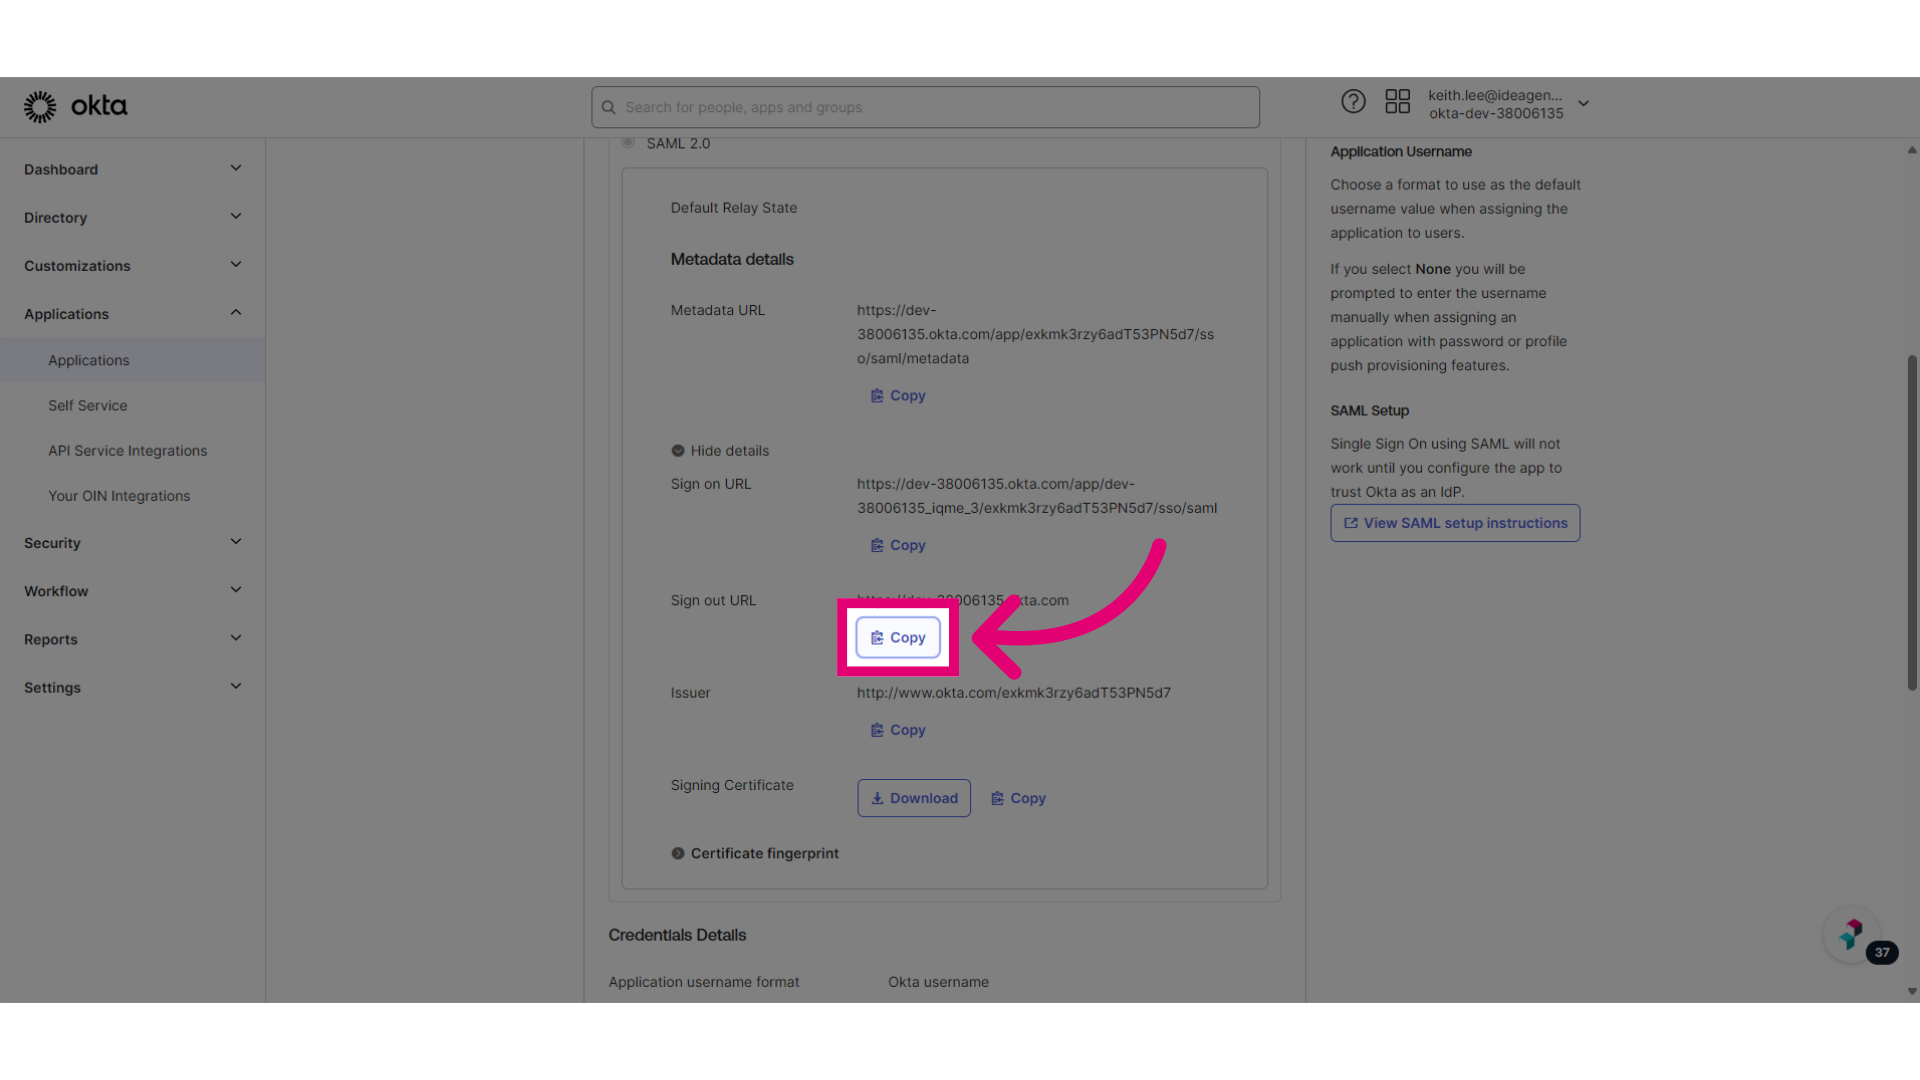
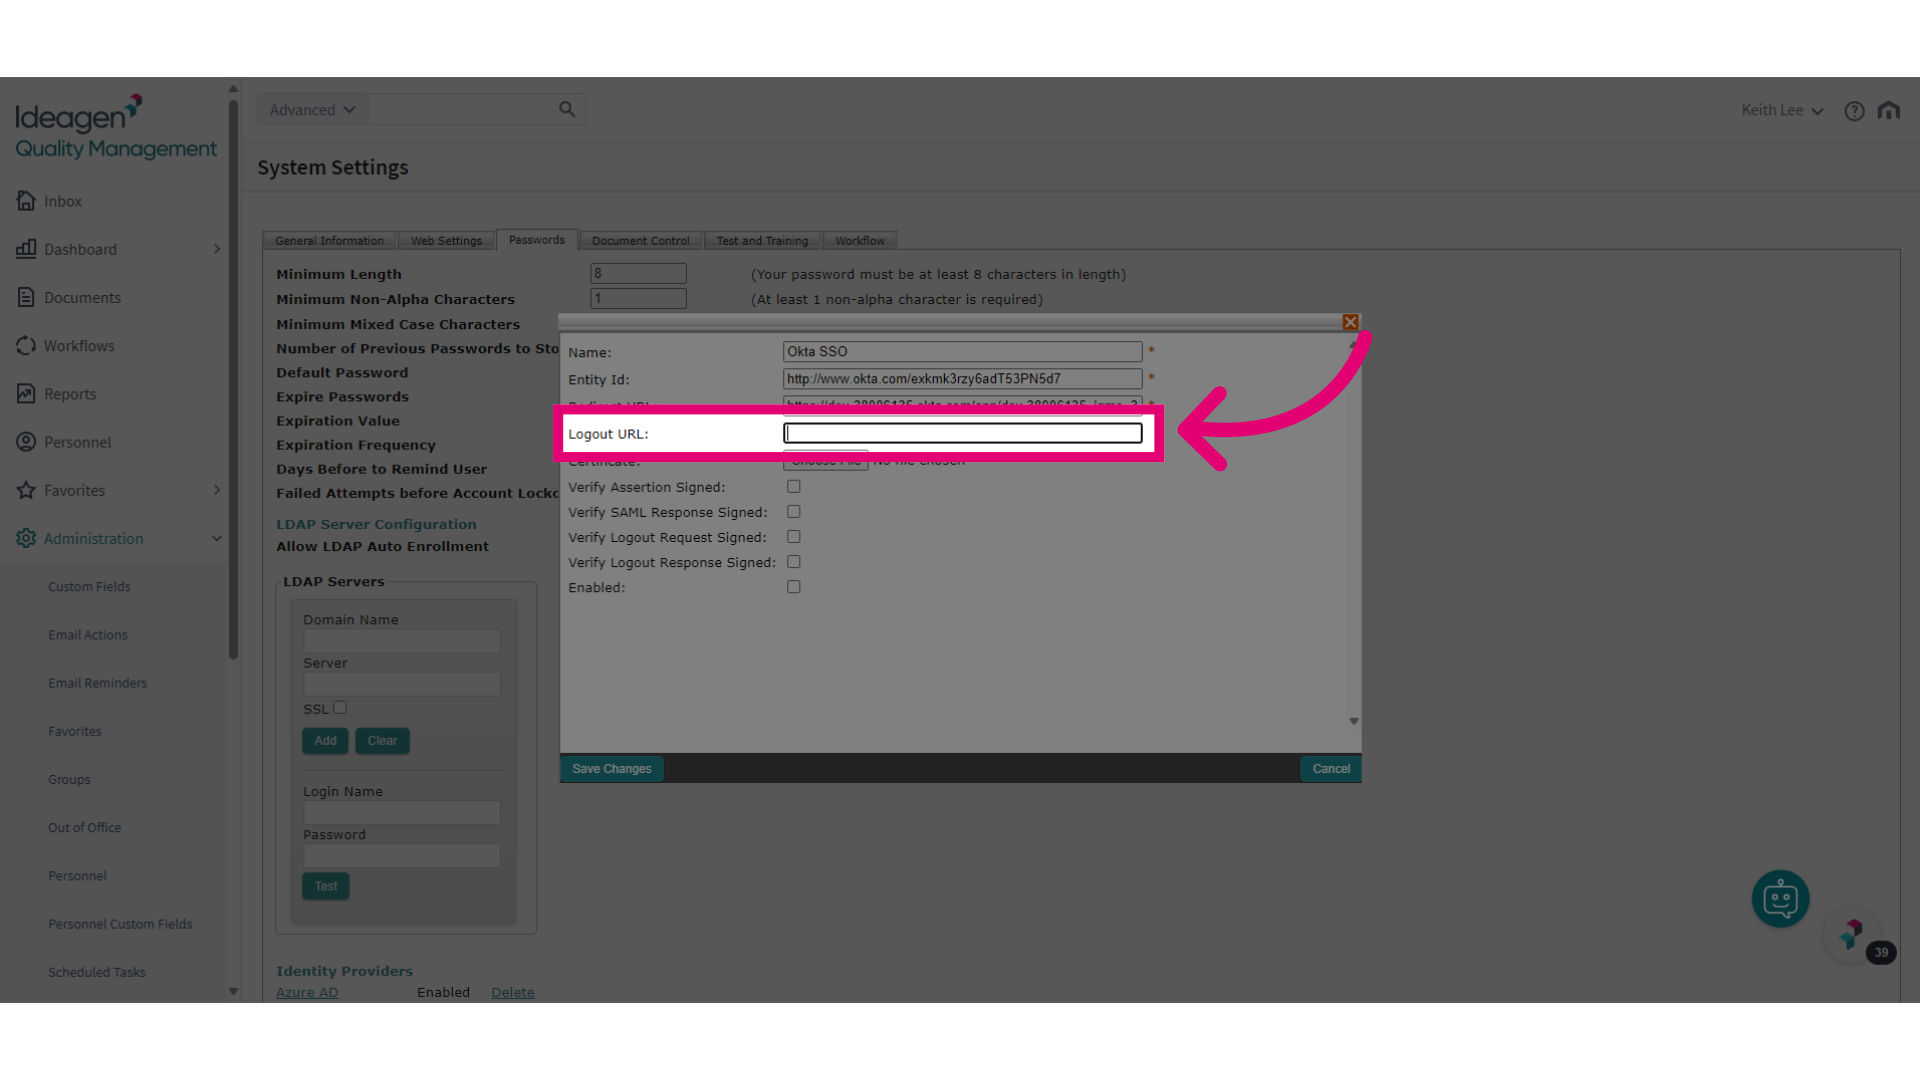
- Paste it into the Logout URL field.
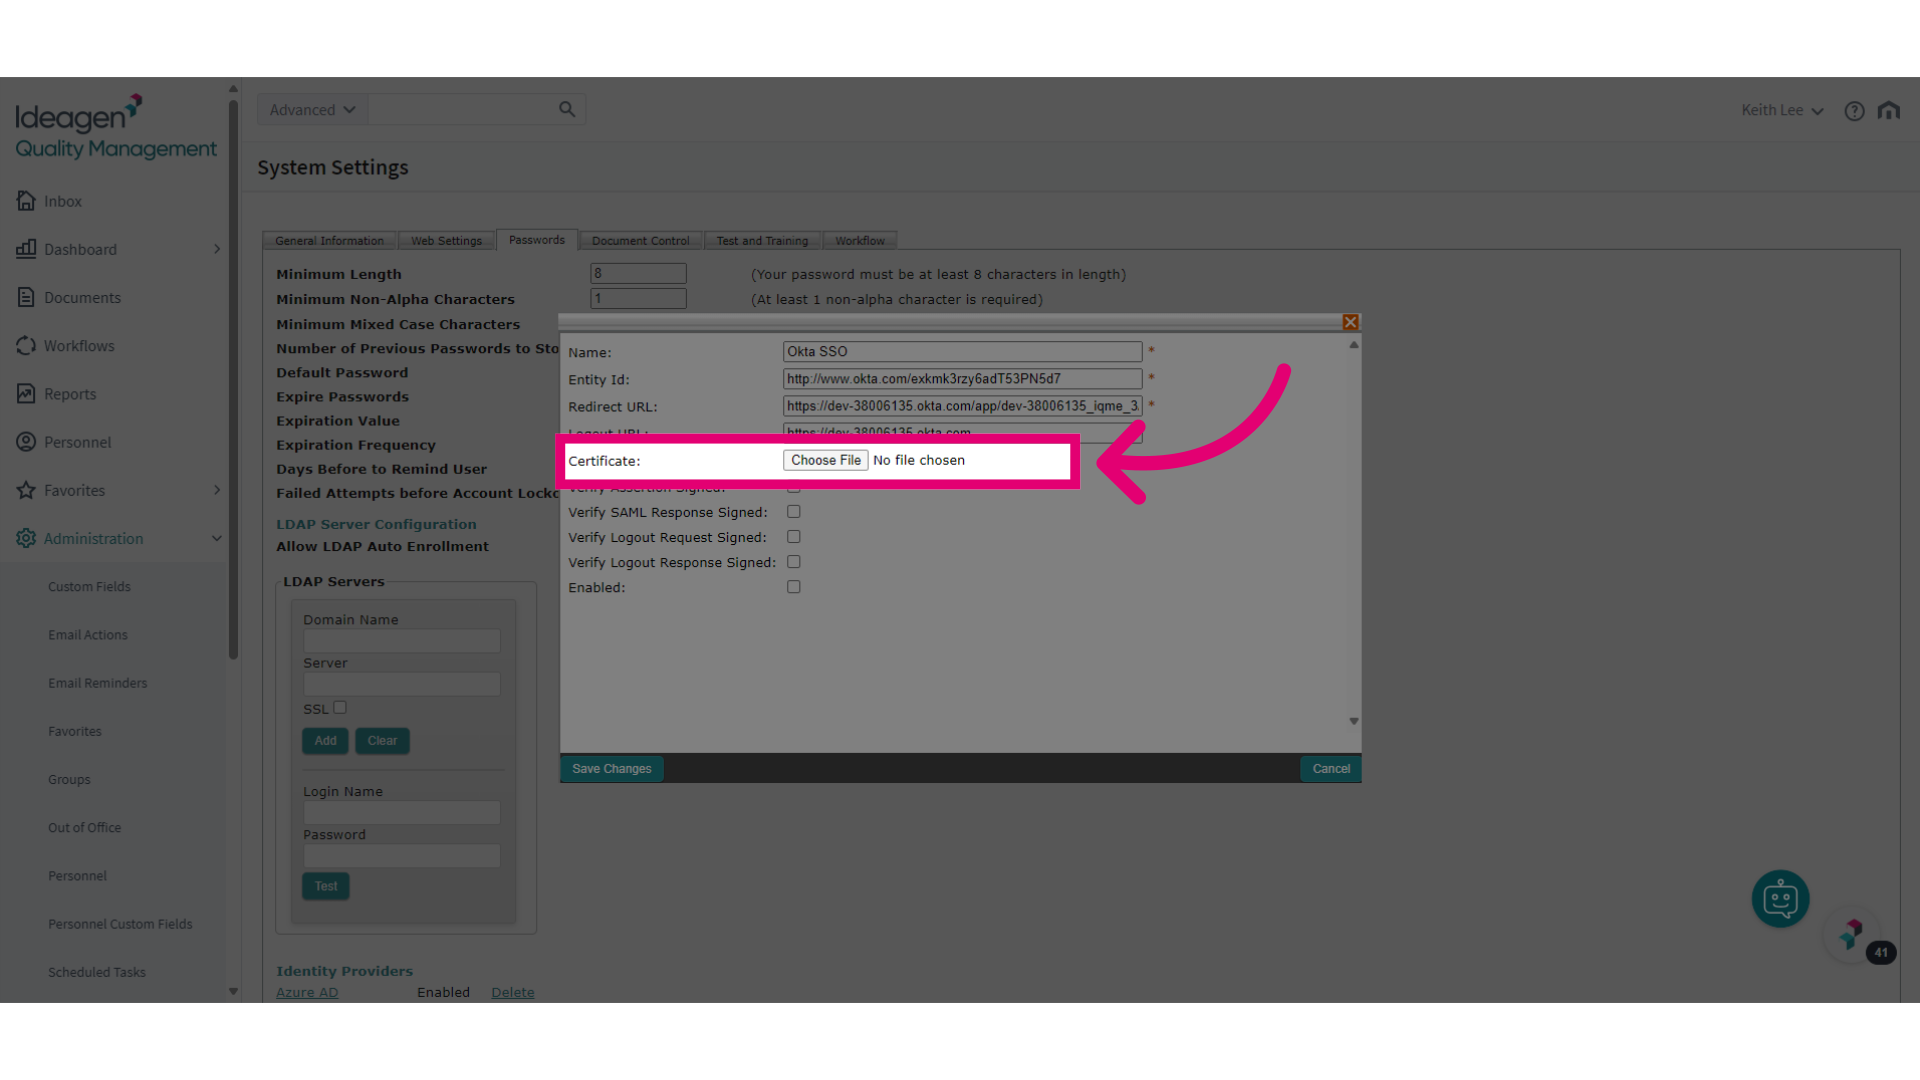
- Upload the downloaded certificate file.
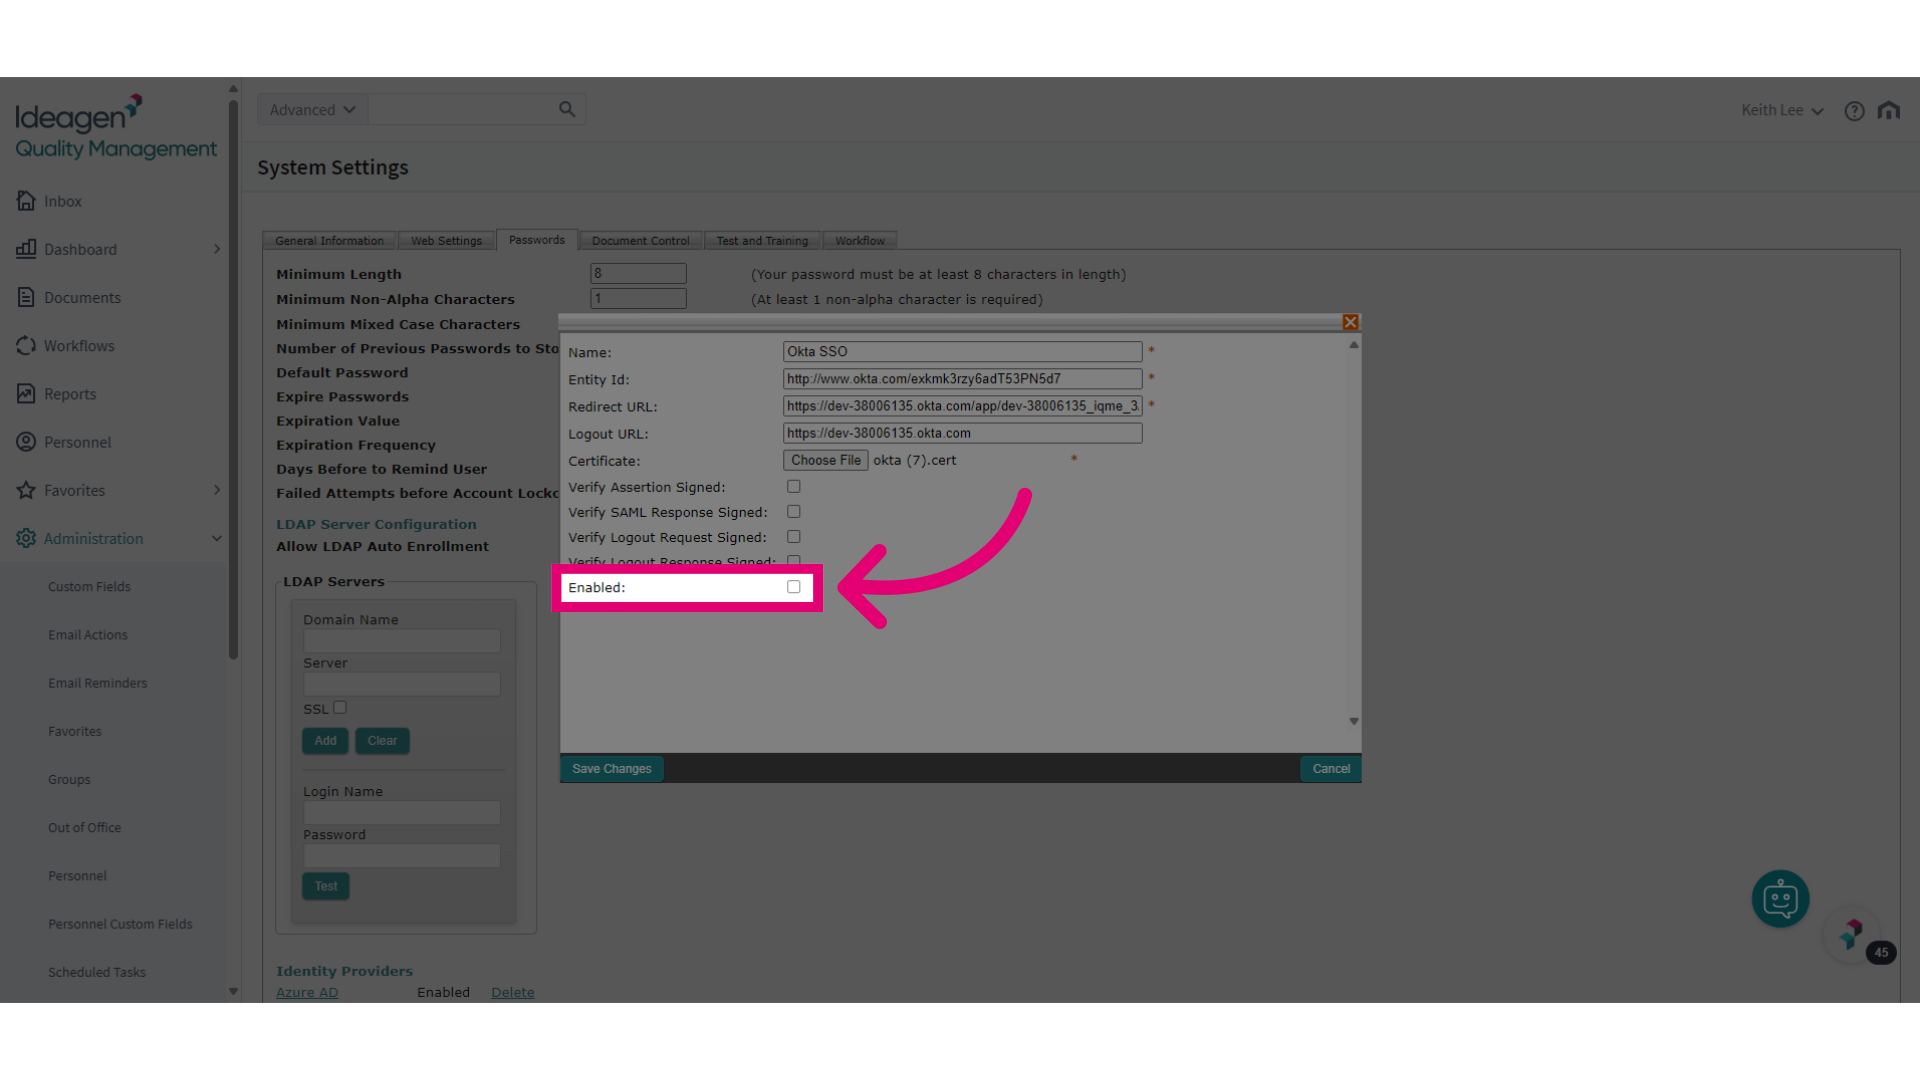
- Tick Enabled to activate the provider.
- Click Save Changes.
1. Configuring OneLogin
OneLogin is an access management solution offered by One Identity.
To configure OneLogin:
- Access the OneLogin portal.
- Open the Applications tab.
- Click Applications.
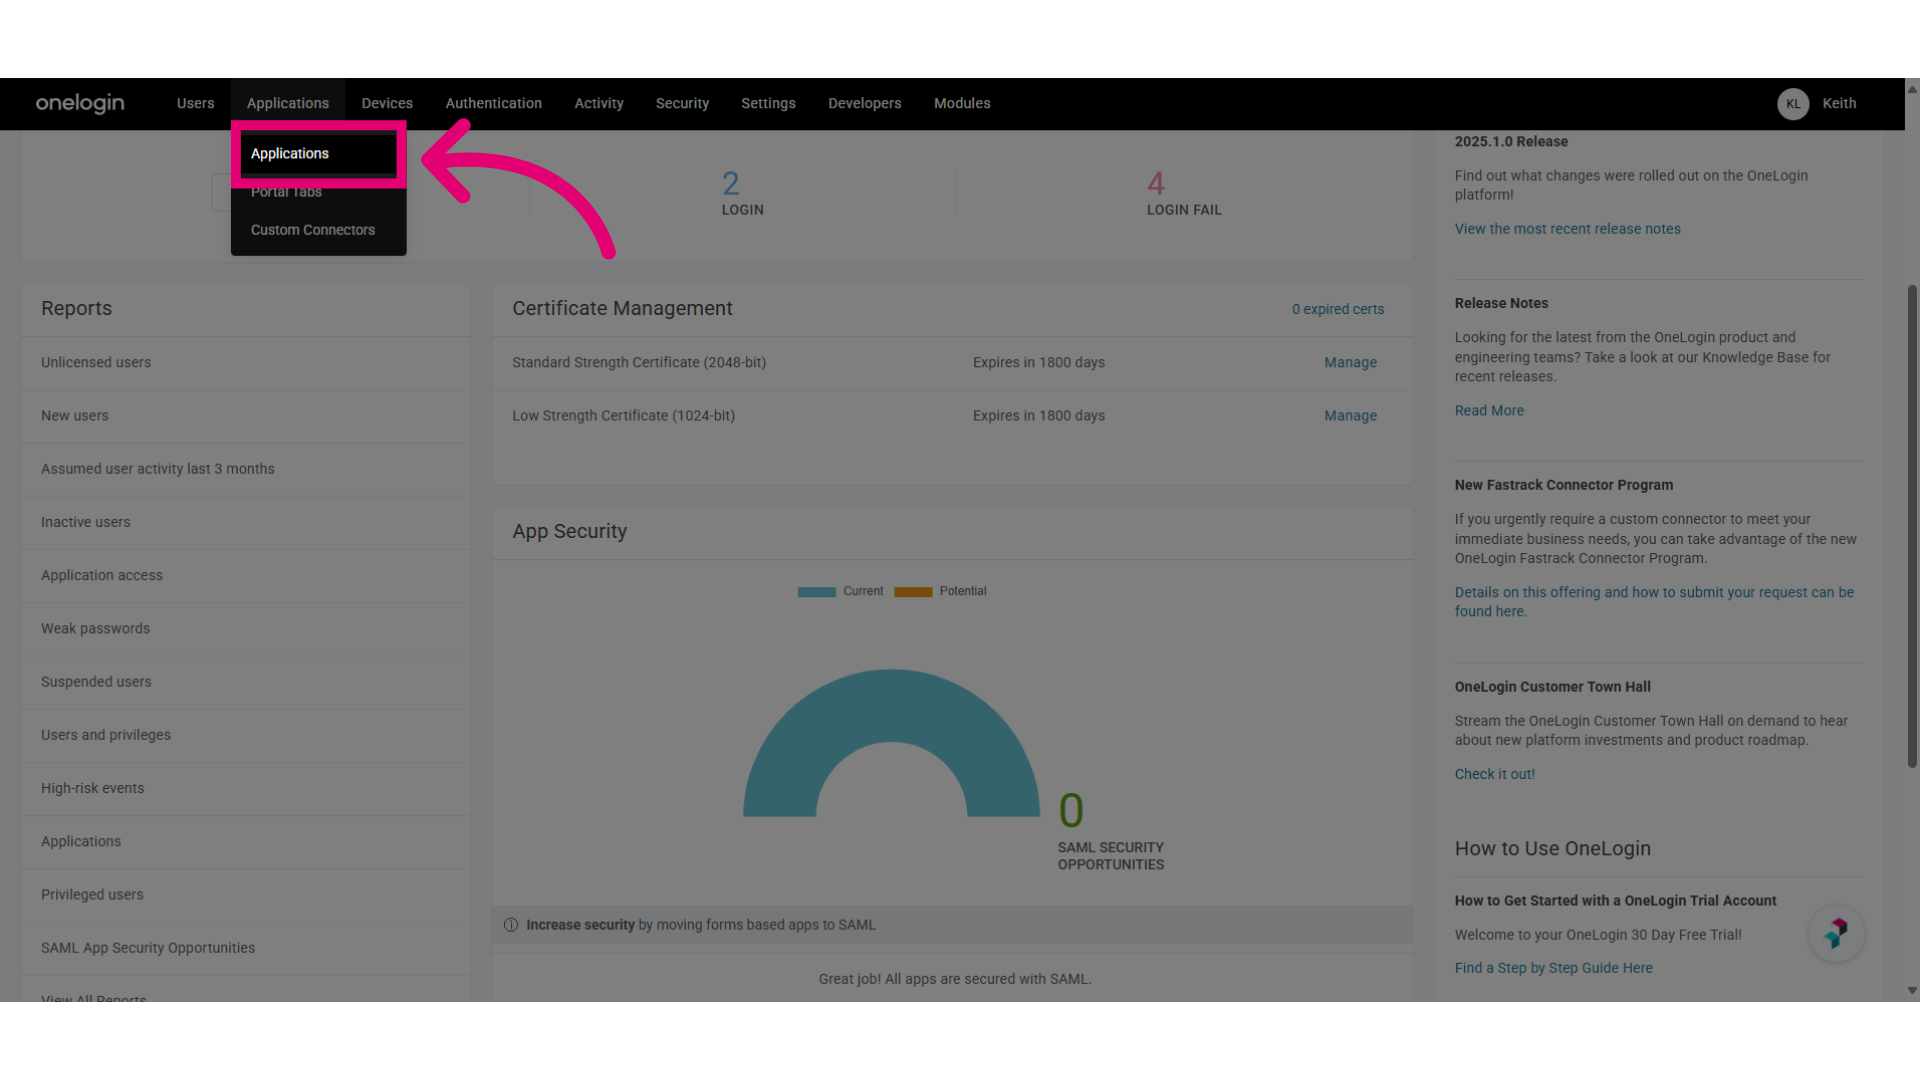
- Click Add App.
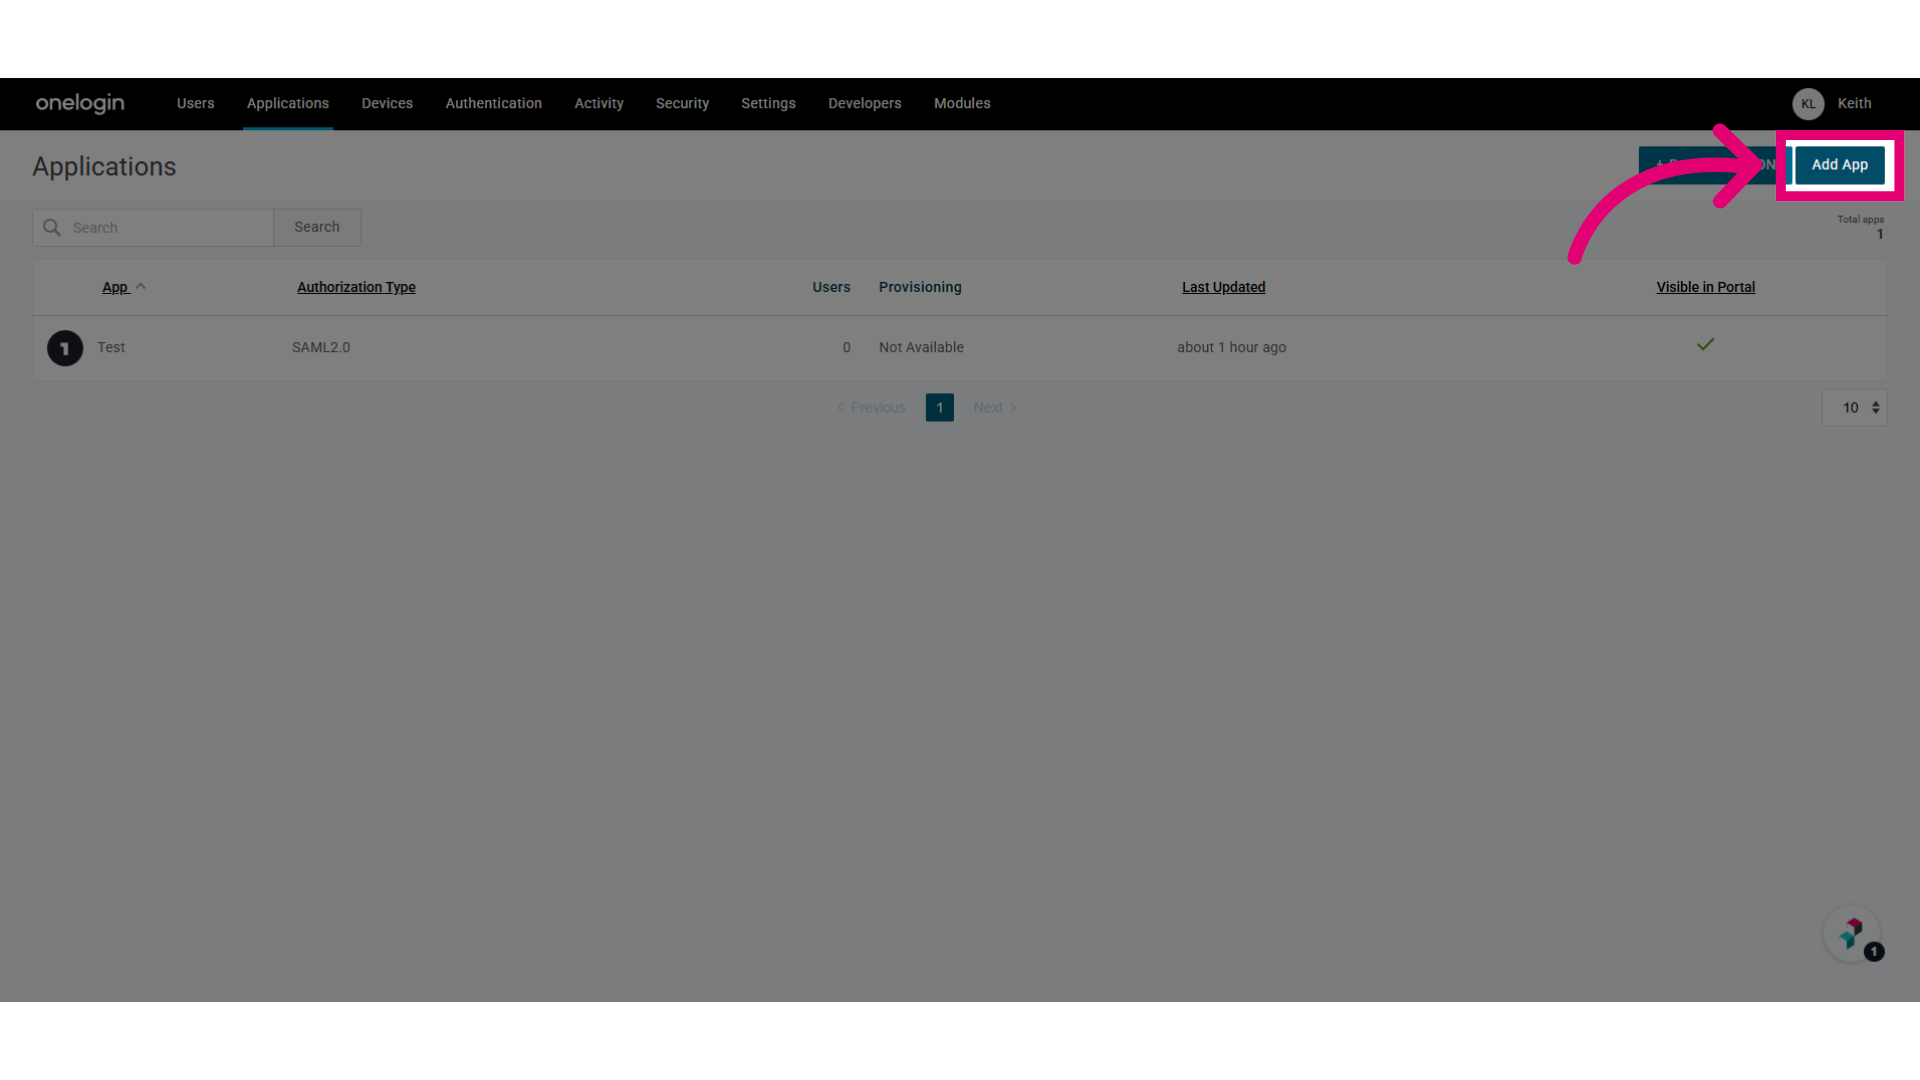
- Search for saml test.
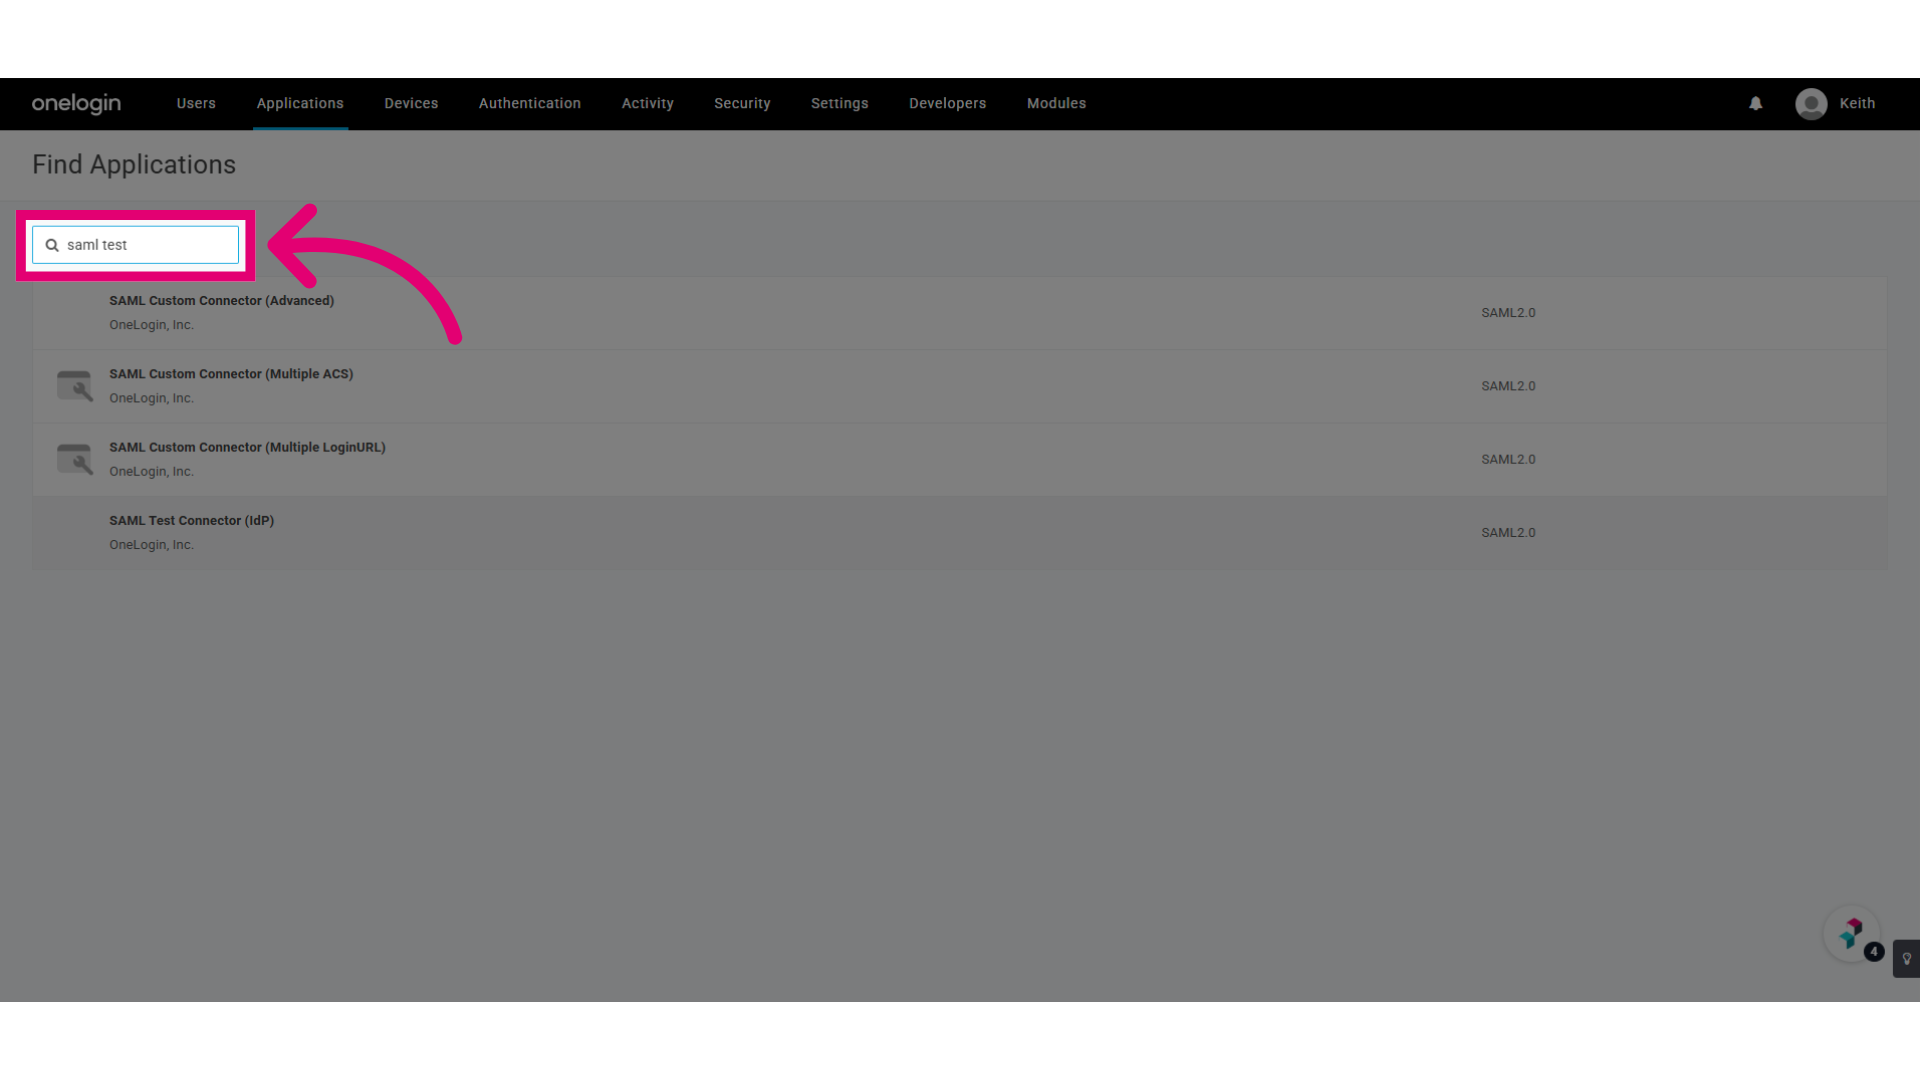
- Select SAML Test Connector (IdP) from the results.
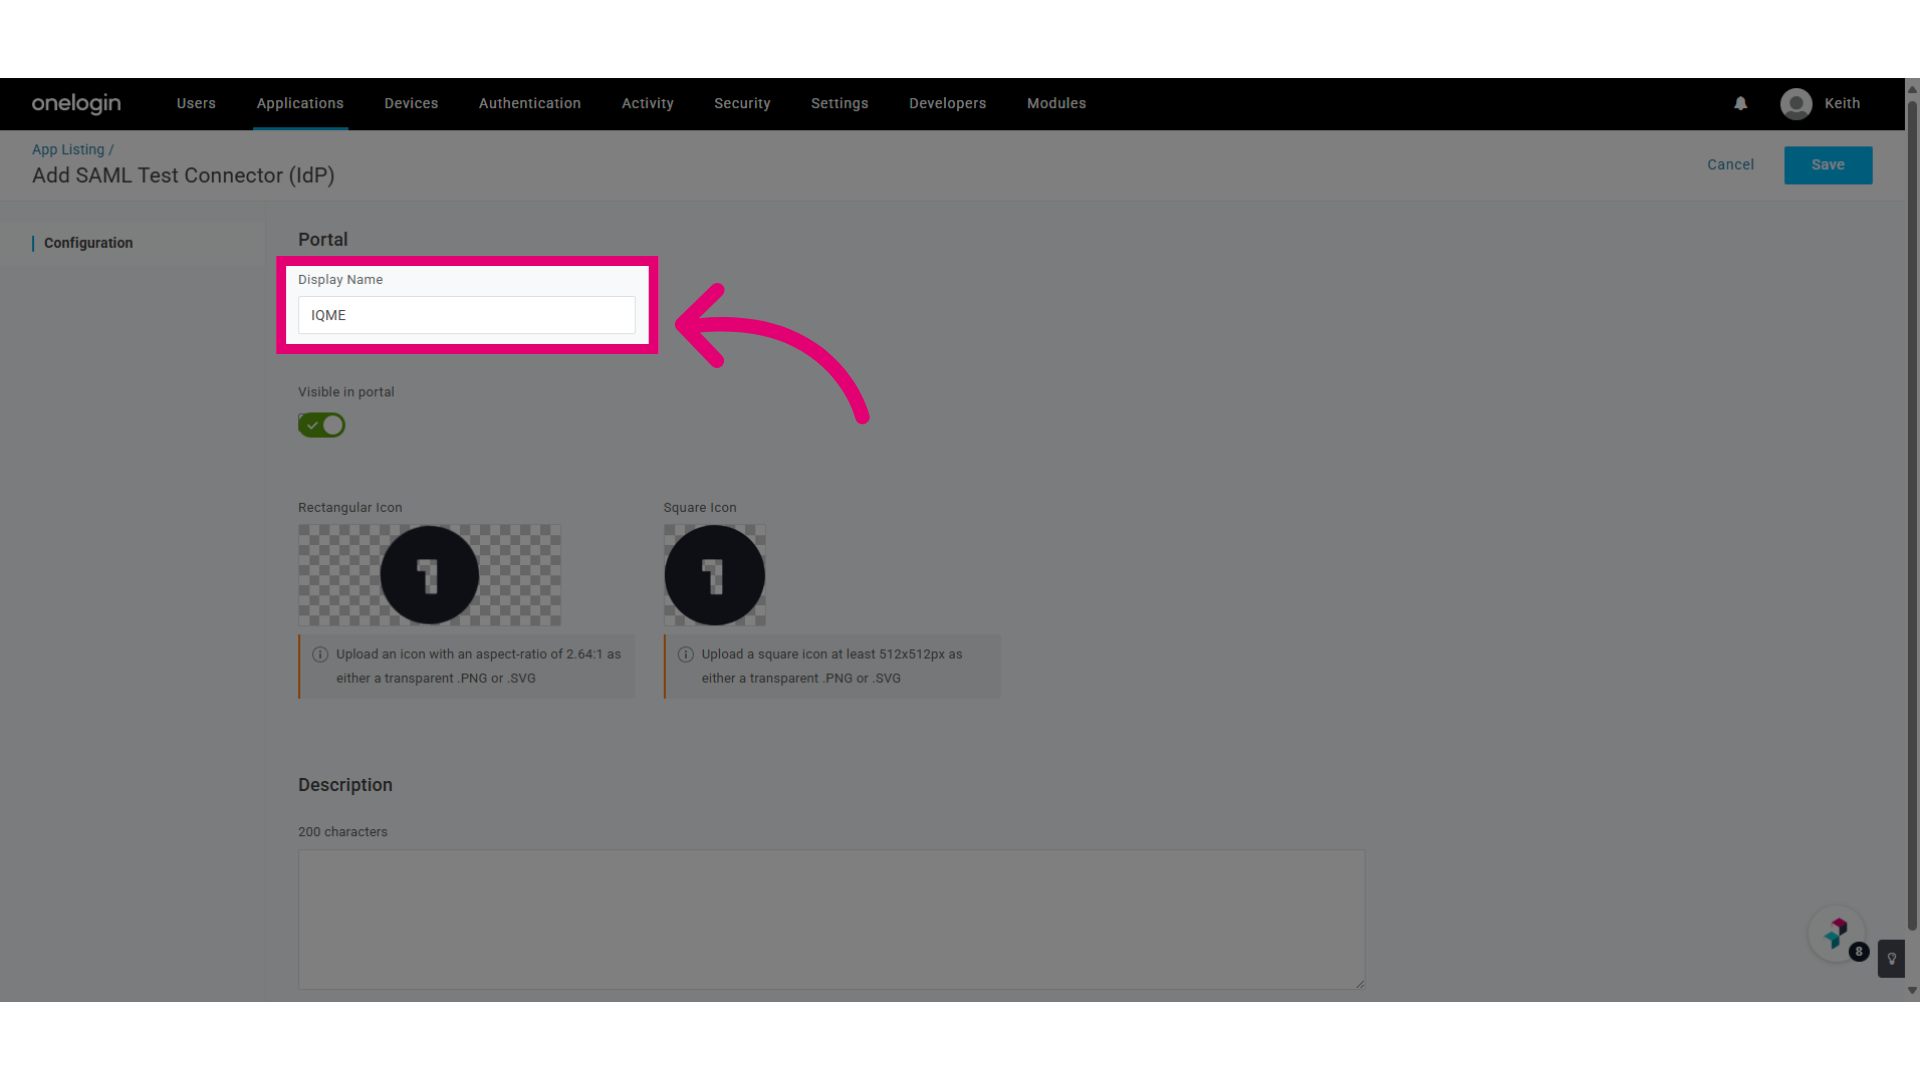
- Enter Ideagen Quality Management (Core) in the Display Name field.
- Click Save.
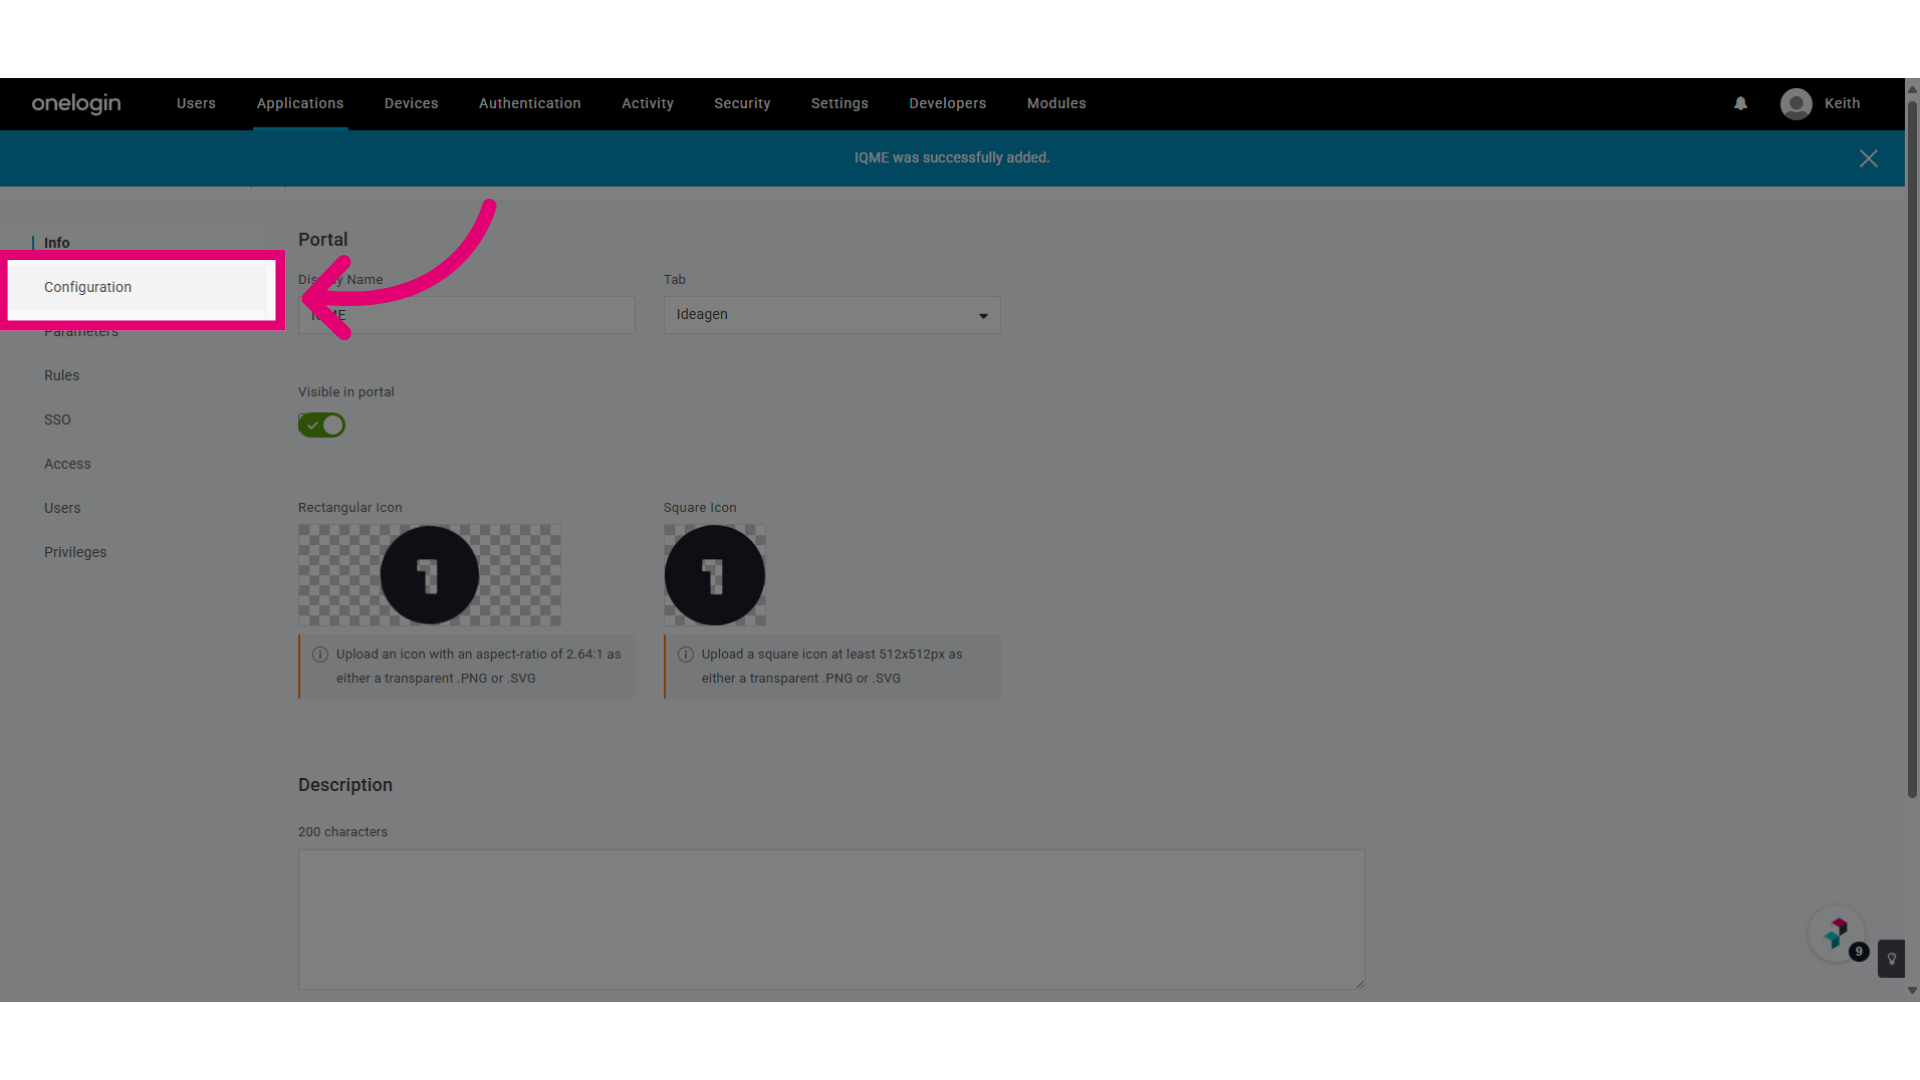
- Navigate to Configuration settings.
- Open Quality Management in a separate tab.
- Access the Administration module.
- Select System Settings.
- Switch to the Passwords tab.
- Copy the Identifier field.
![From the Identity [Entity Id] textbox, copy the URL.](https://static.guidde.com/v0/qg%2FRqCuv5HxT8dJ76p3VoXtxICxHQK2%2Fnqj419A5X6zvsrn7JC4wdz%2F6GKLbbd4vT6v7qpvGTMgAh_doc.png?alt=media&token=1c9870db-db3b-4c82-8145-8b2847314764)
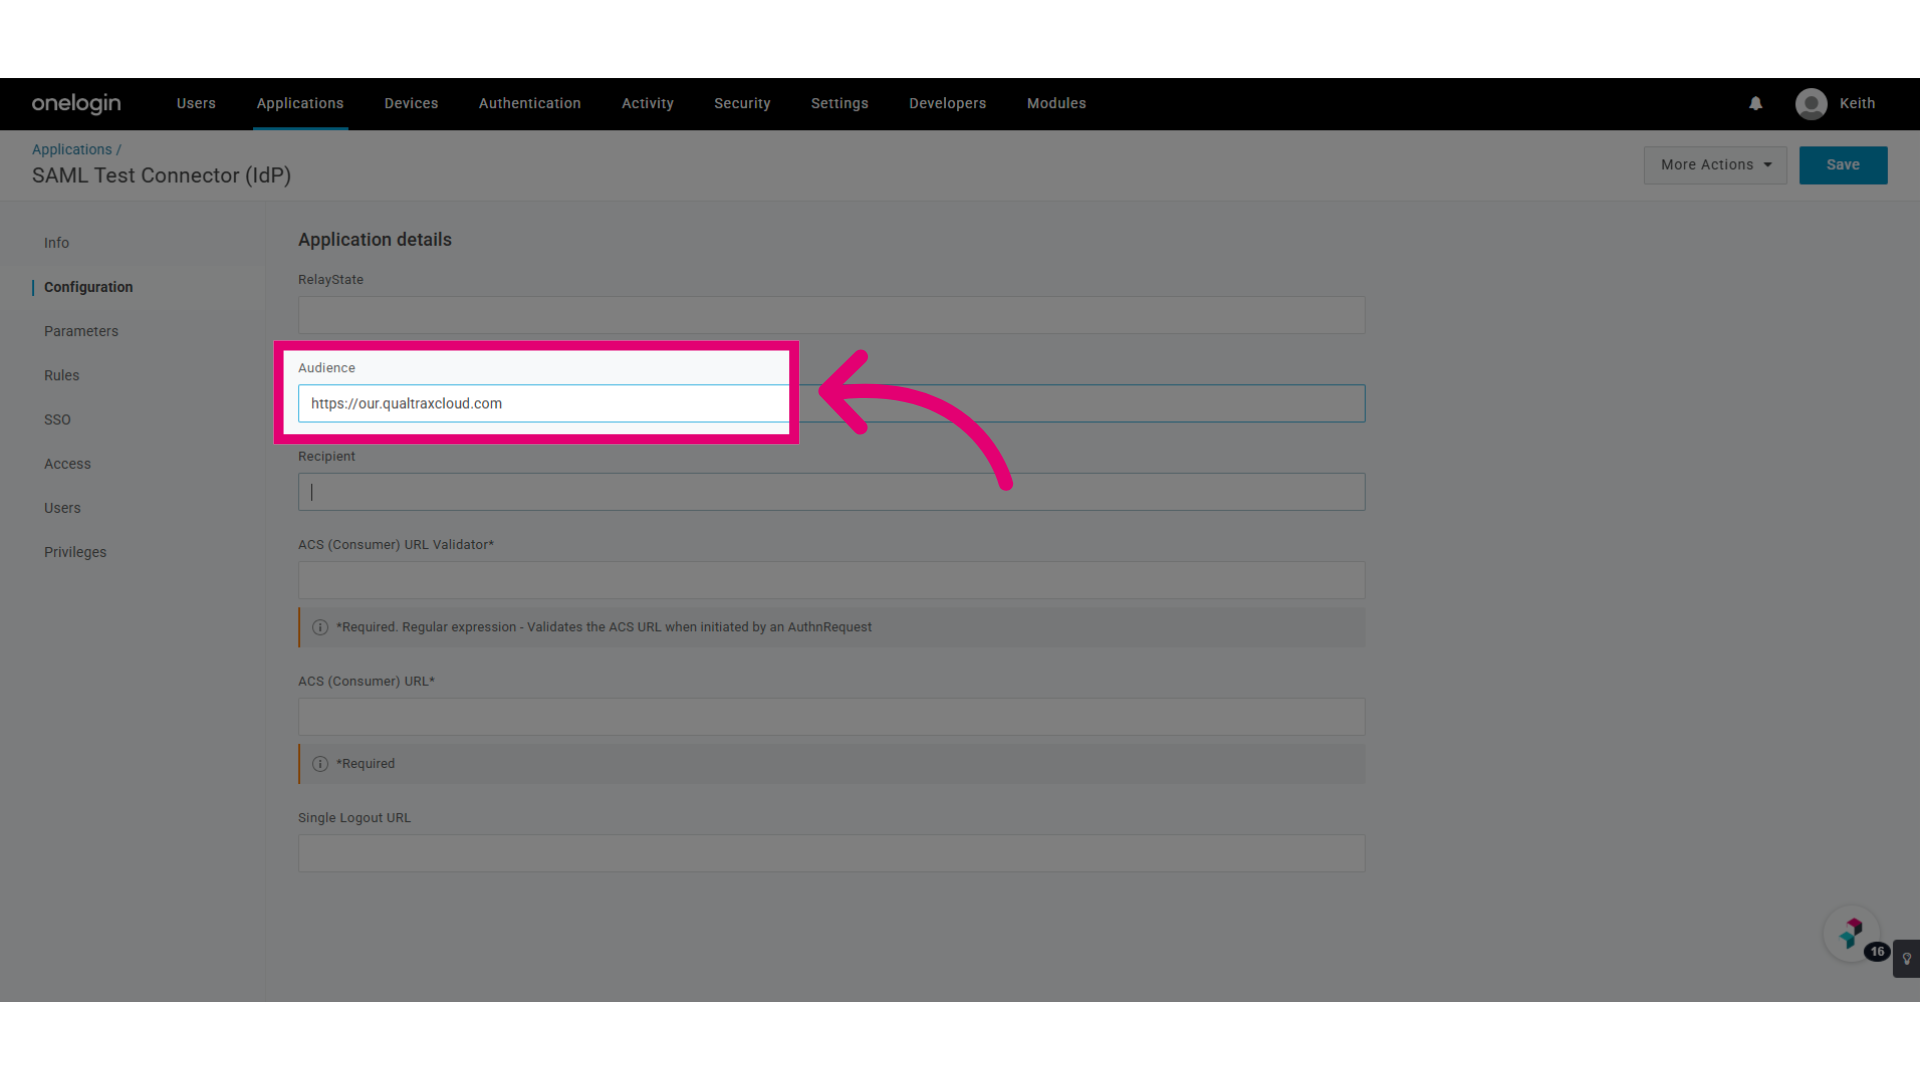
- Paste the copied value into the Audience field.
- Copy the Reply URL,
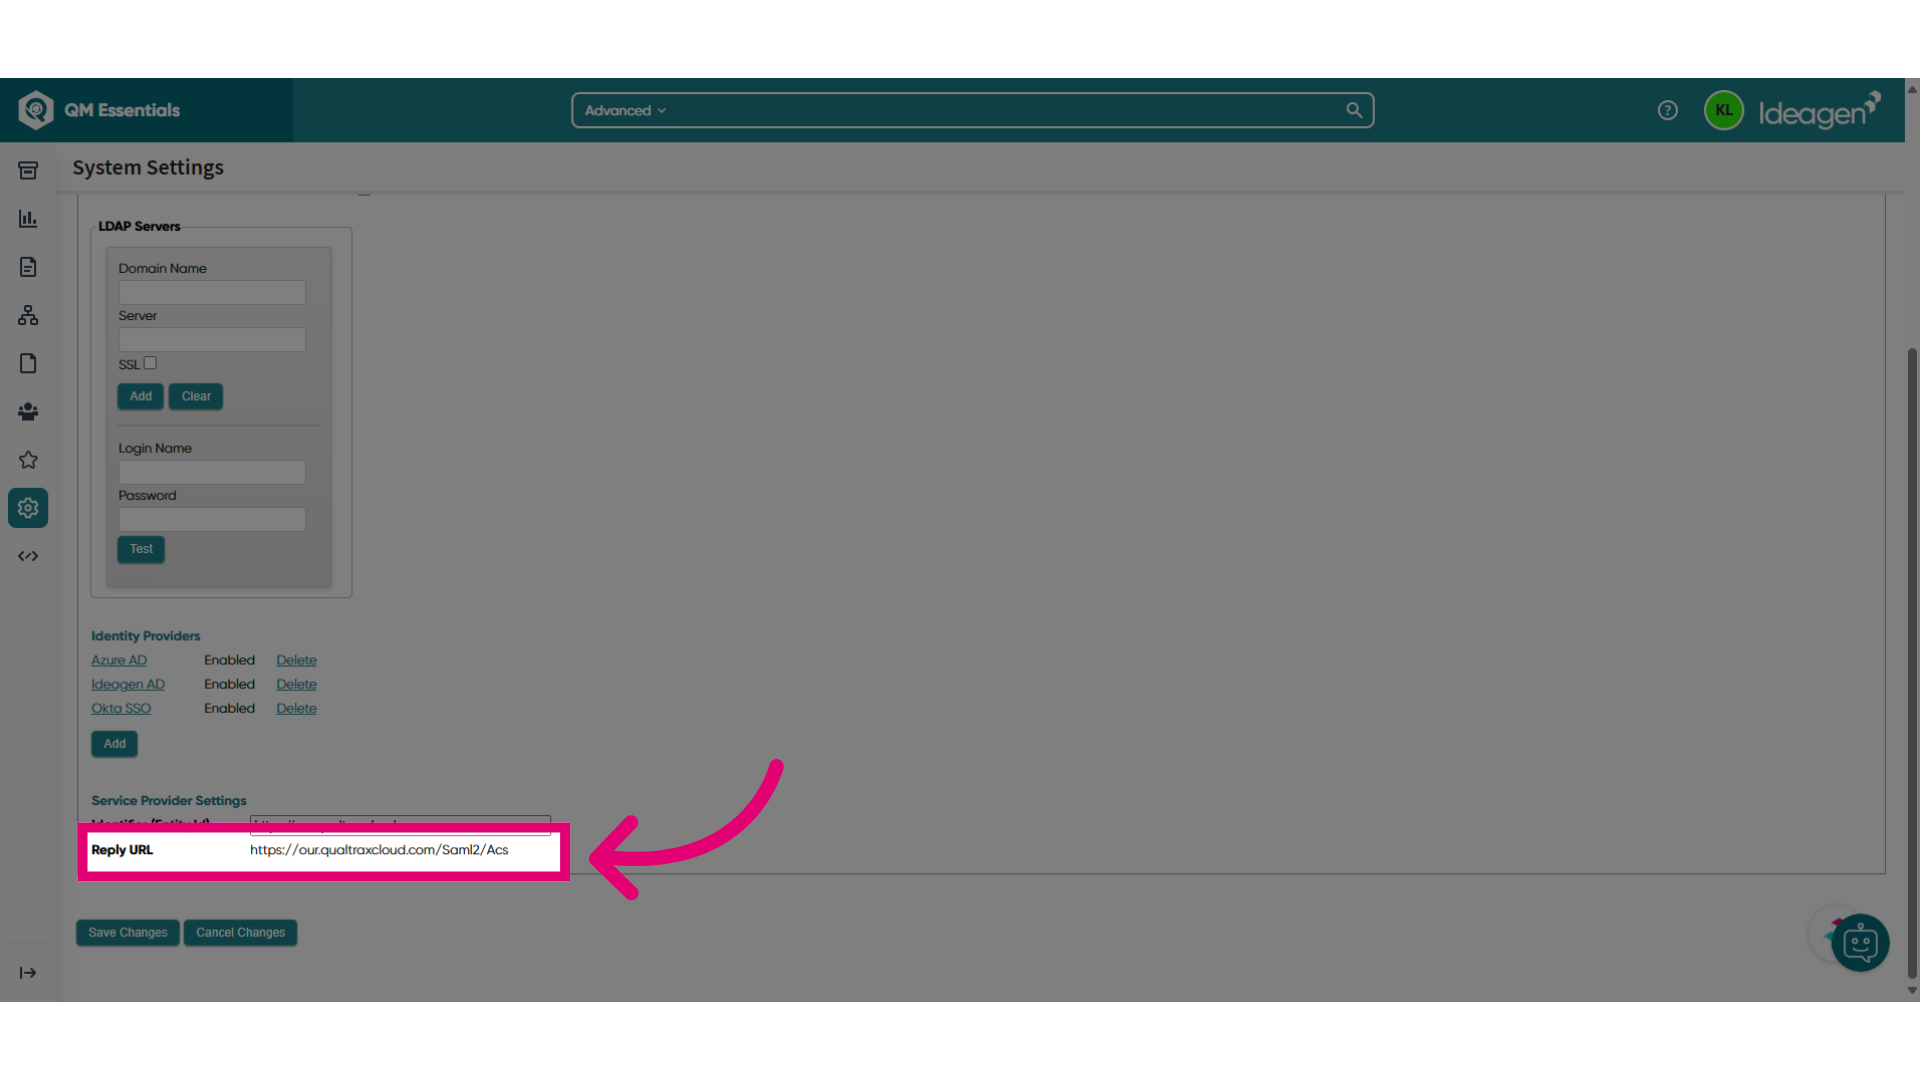
- Paste the copied value into Recipient, ACS (Consumer) URL Validator, and ACS (Consumer) URL fields.
- Click Save.
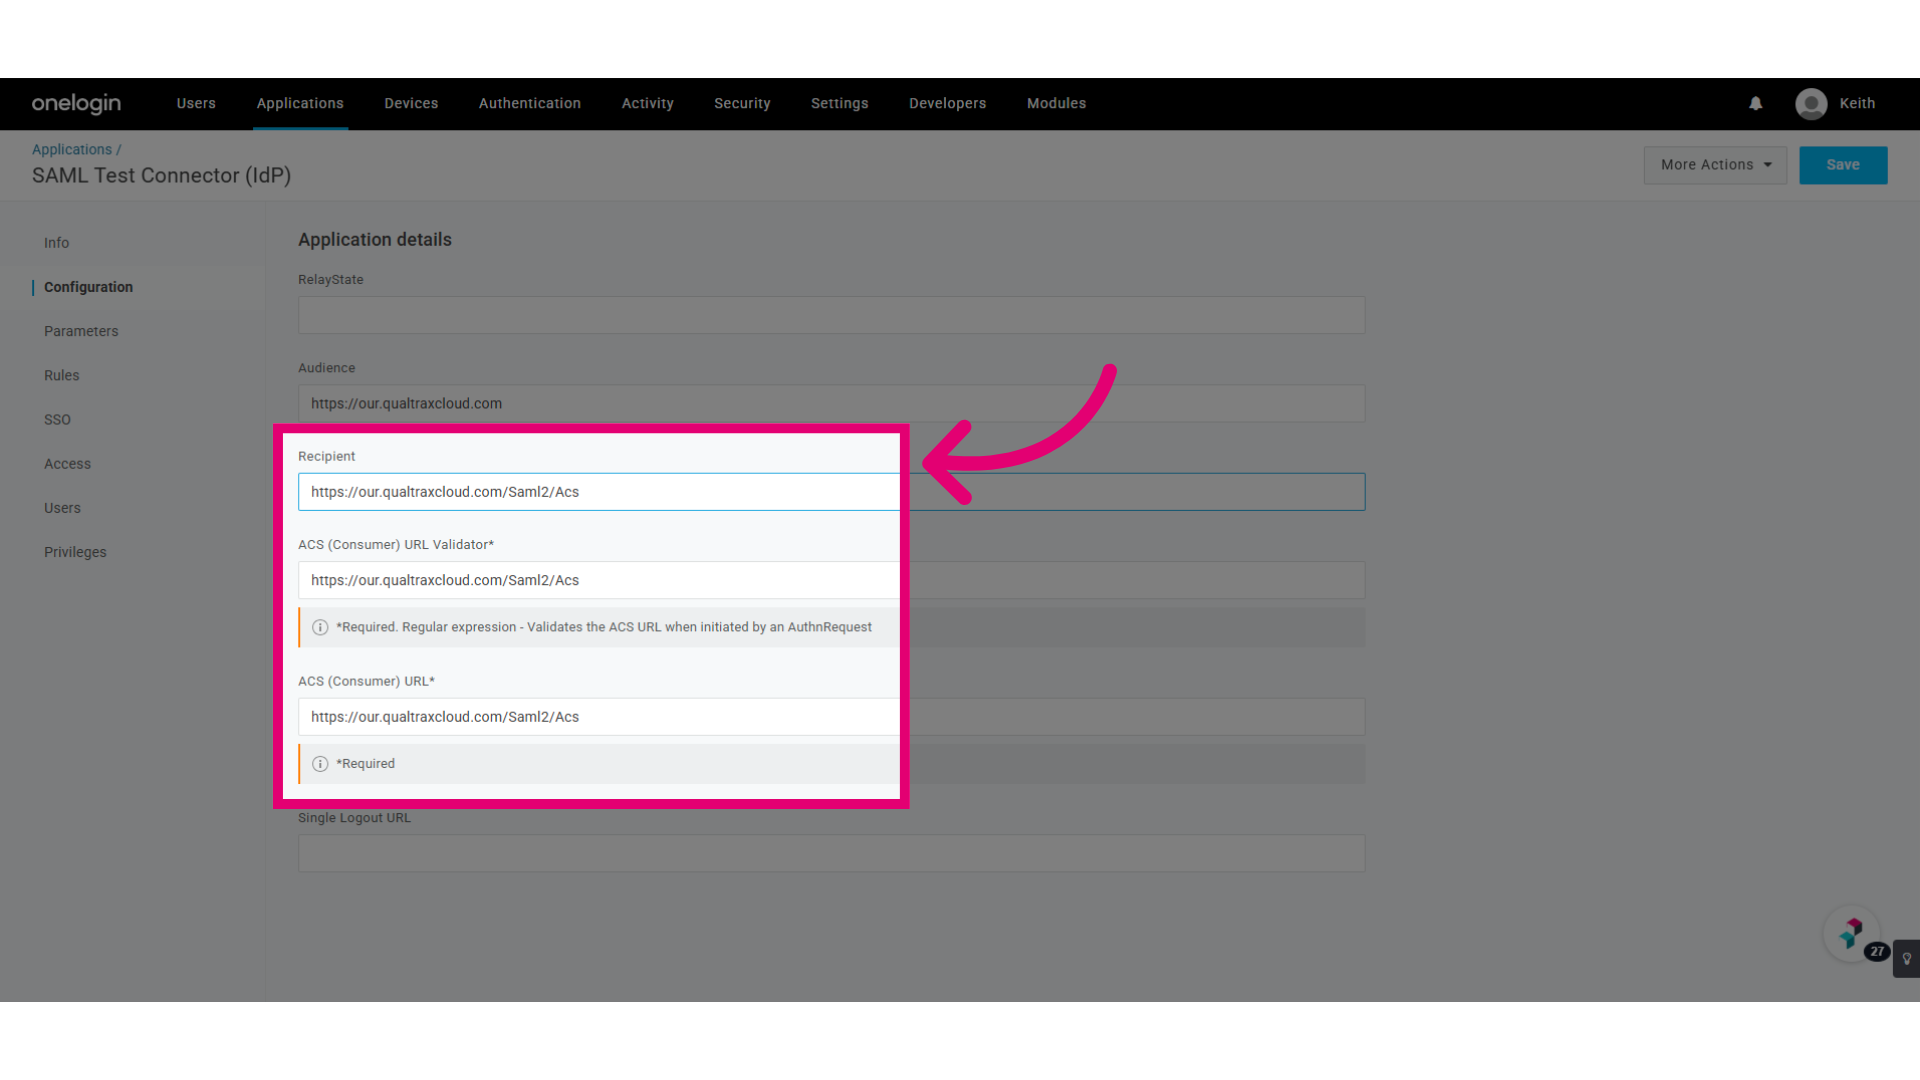
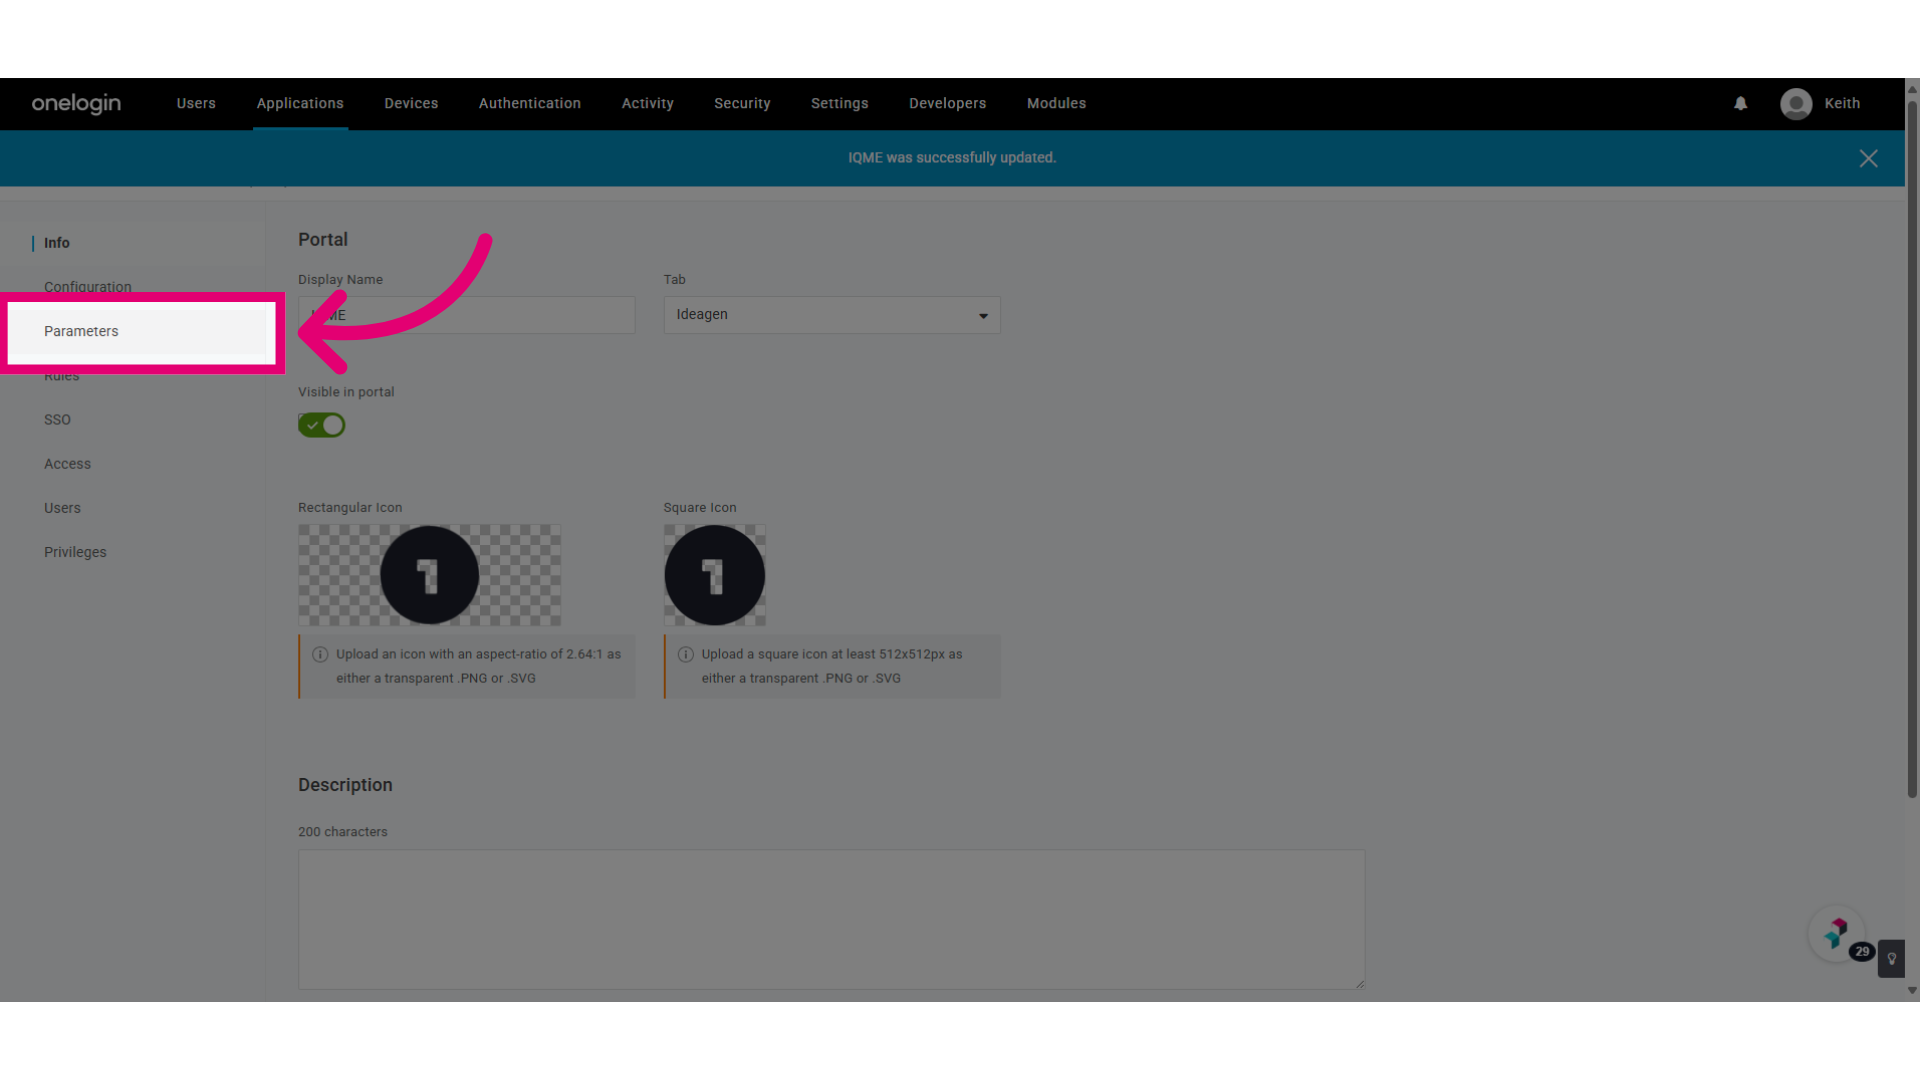
- Access the Parameters section.
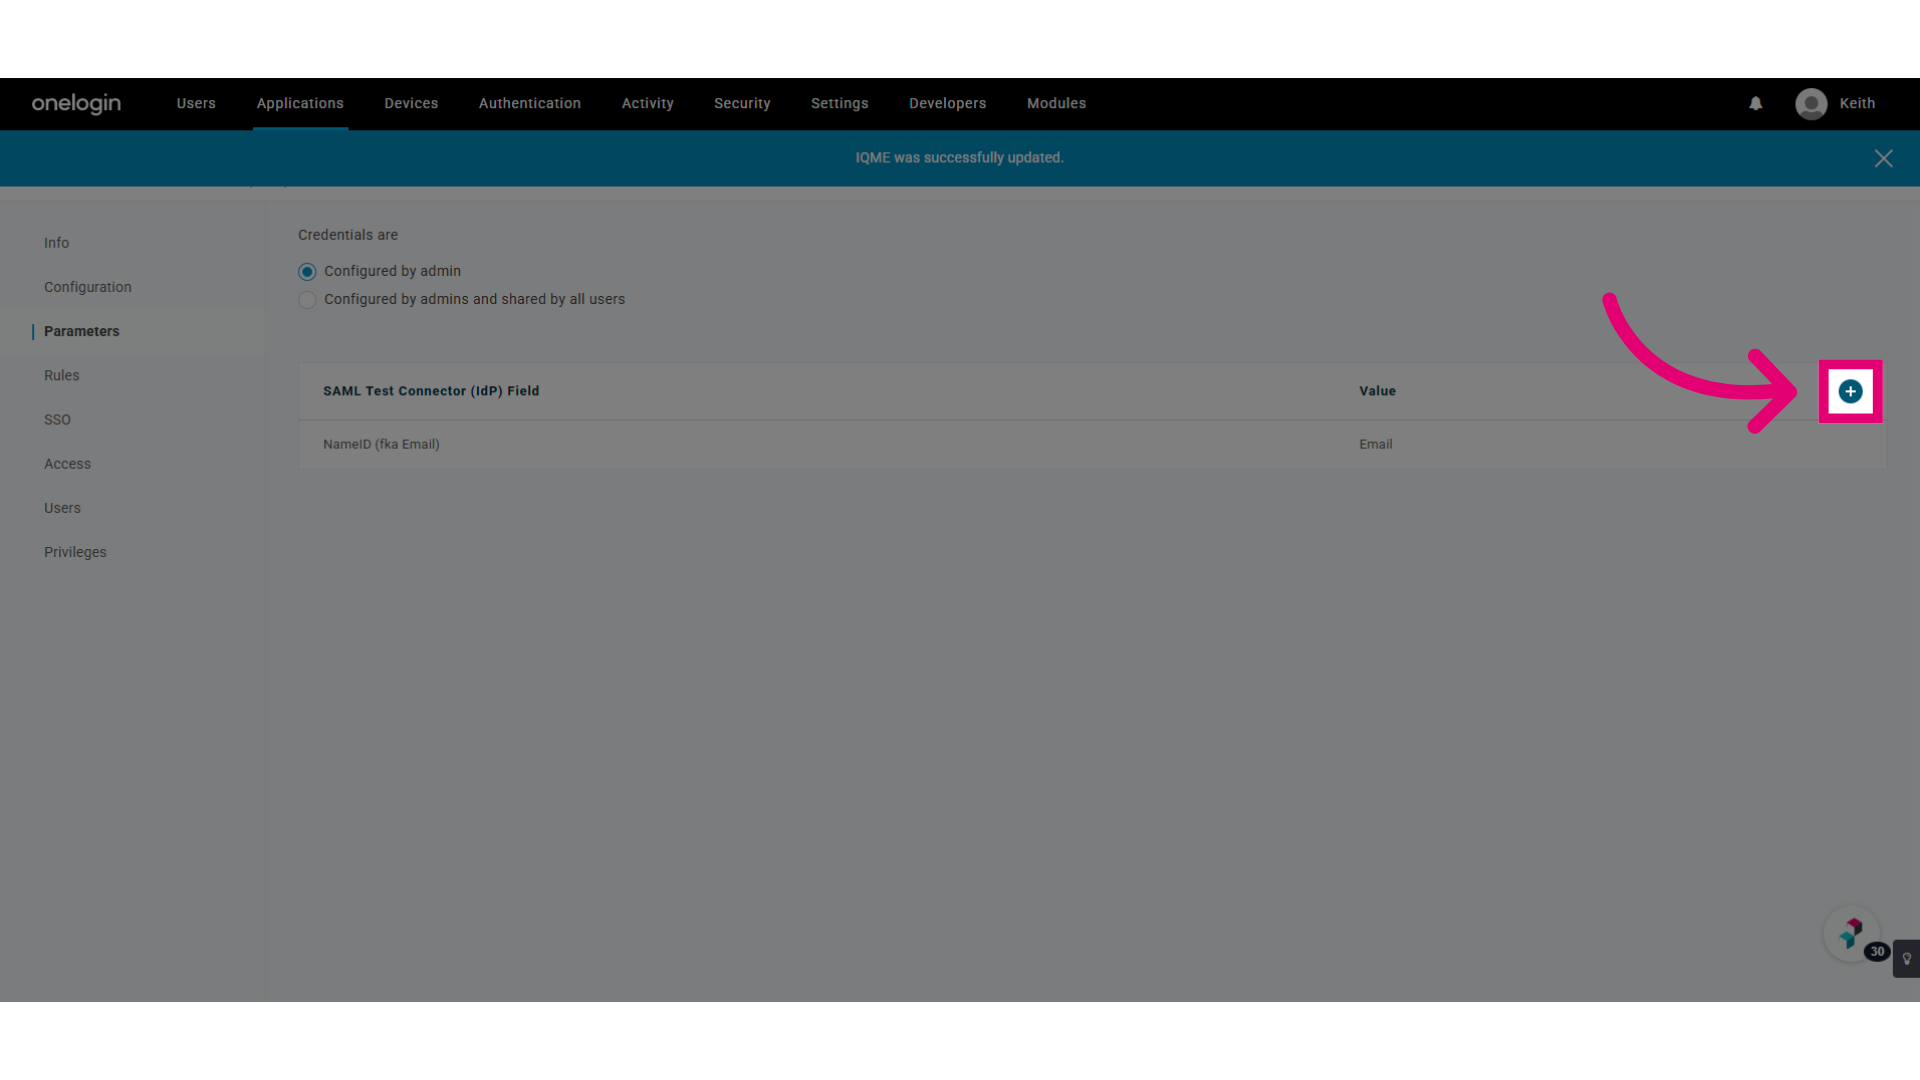
- Click the Add button.
- Enter the email schema into the Field name.
http://schemas.xmlsoap.org/ws/2005/05/identity/claims/emailaddress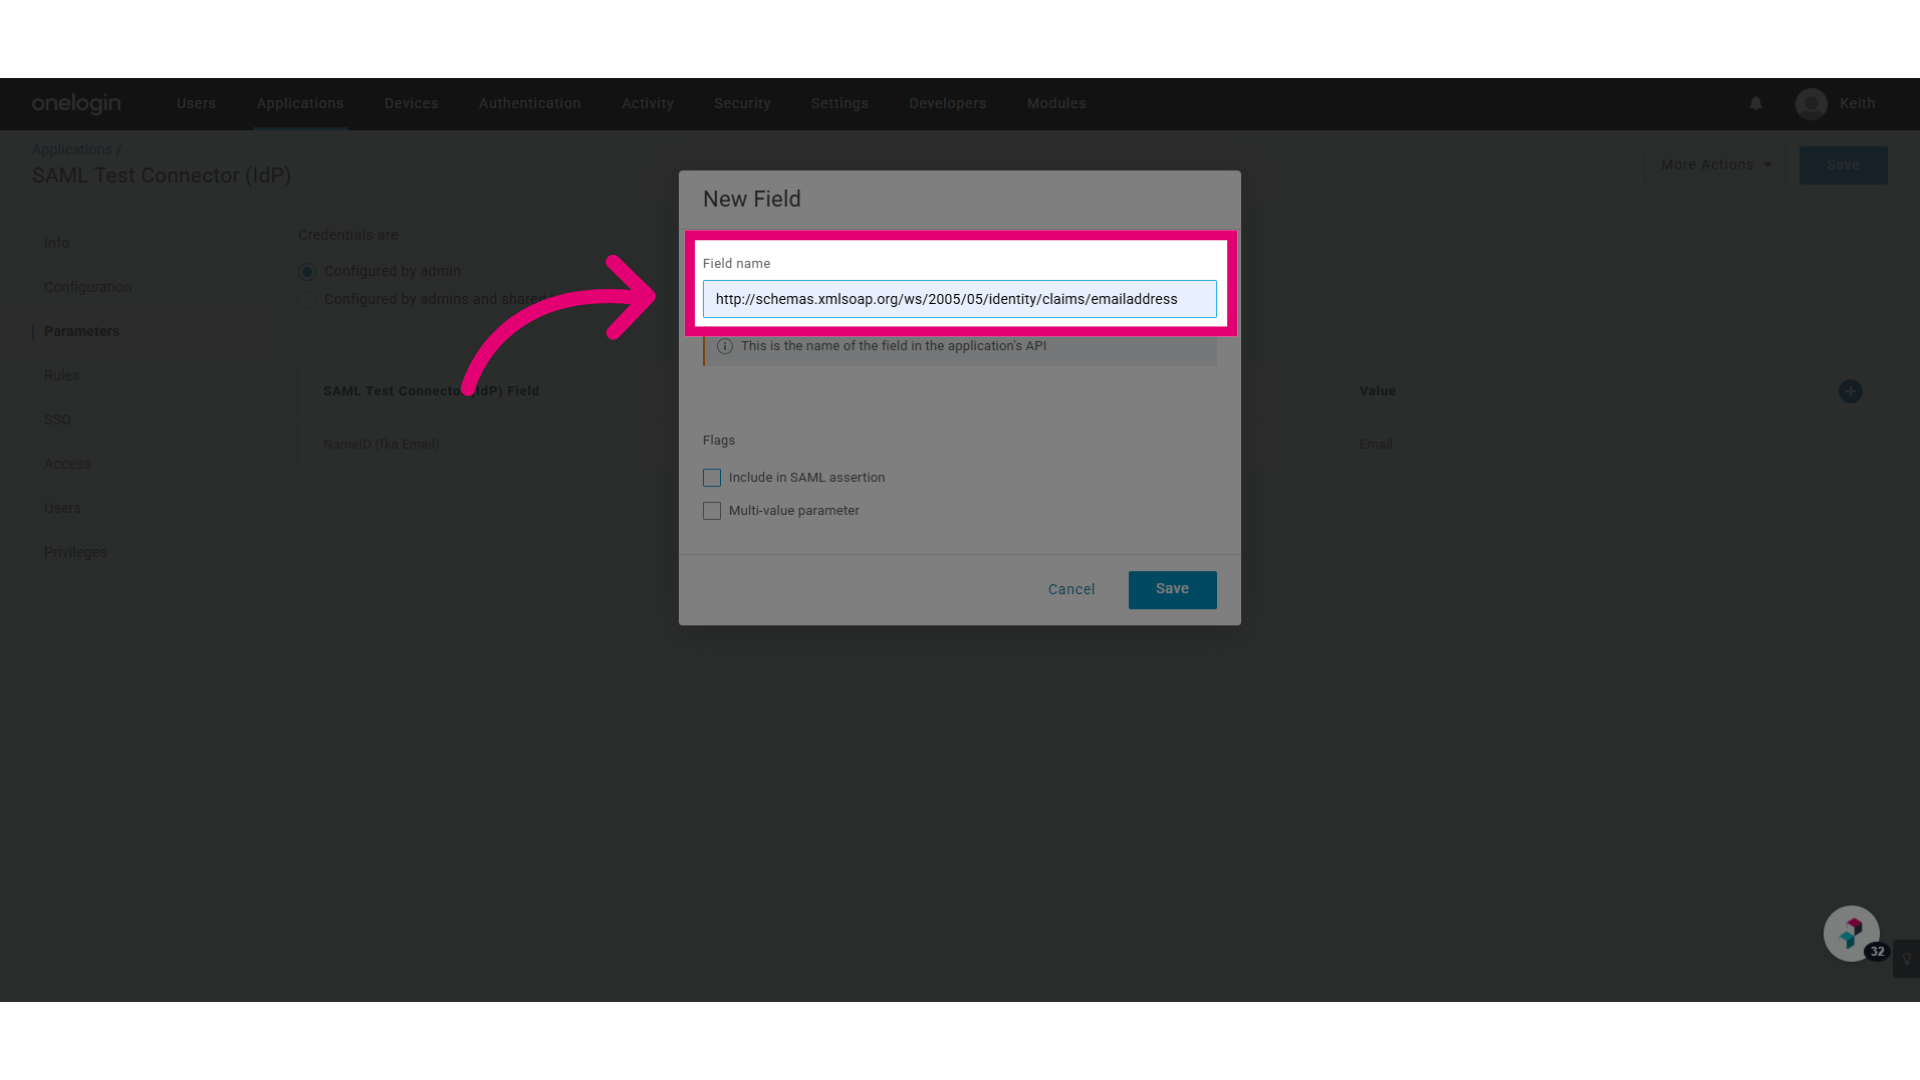
- Tick the Include in SAML assertion flag.
- Click Save.
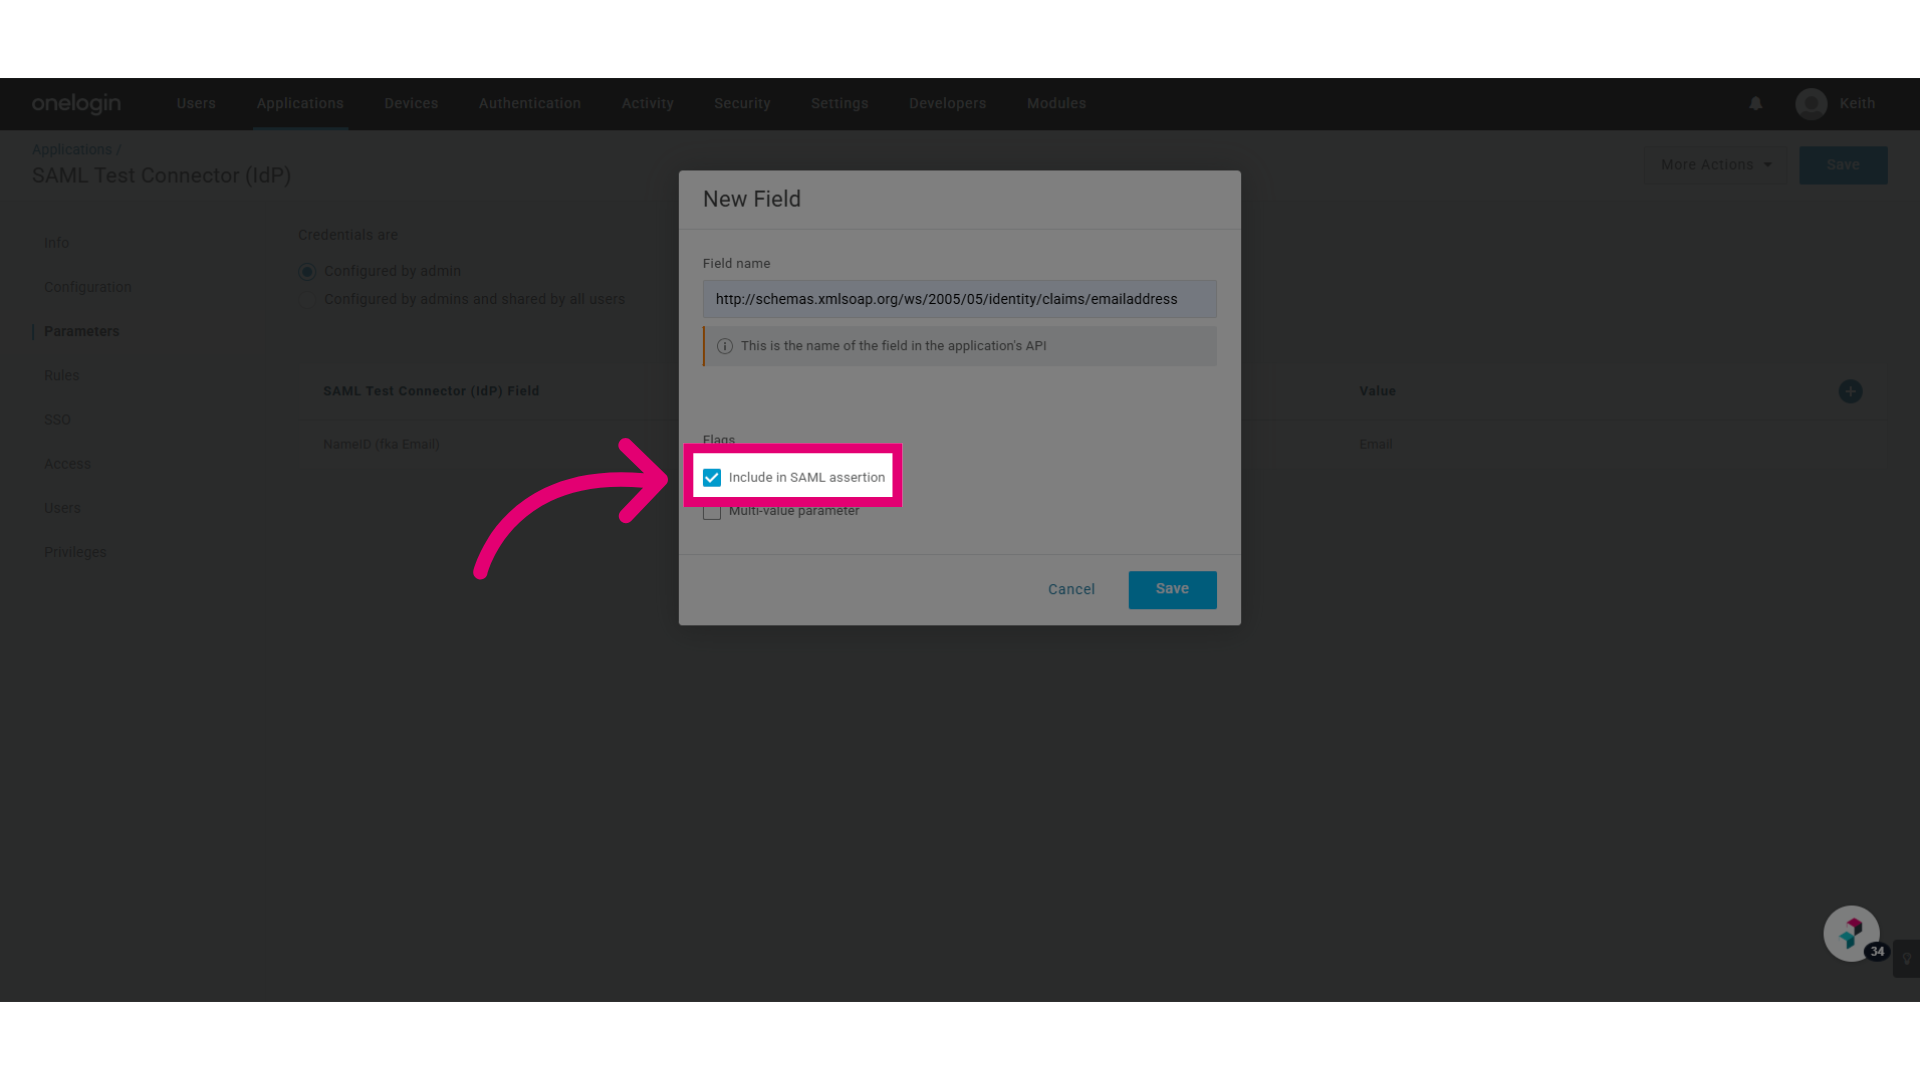
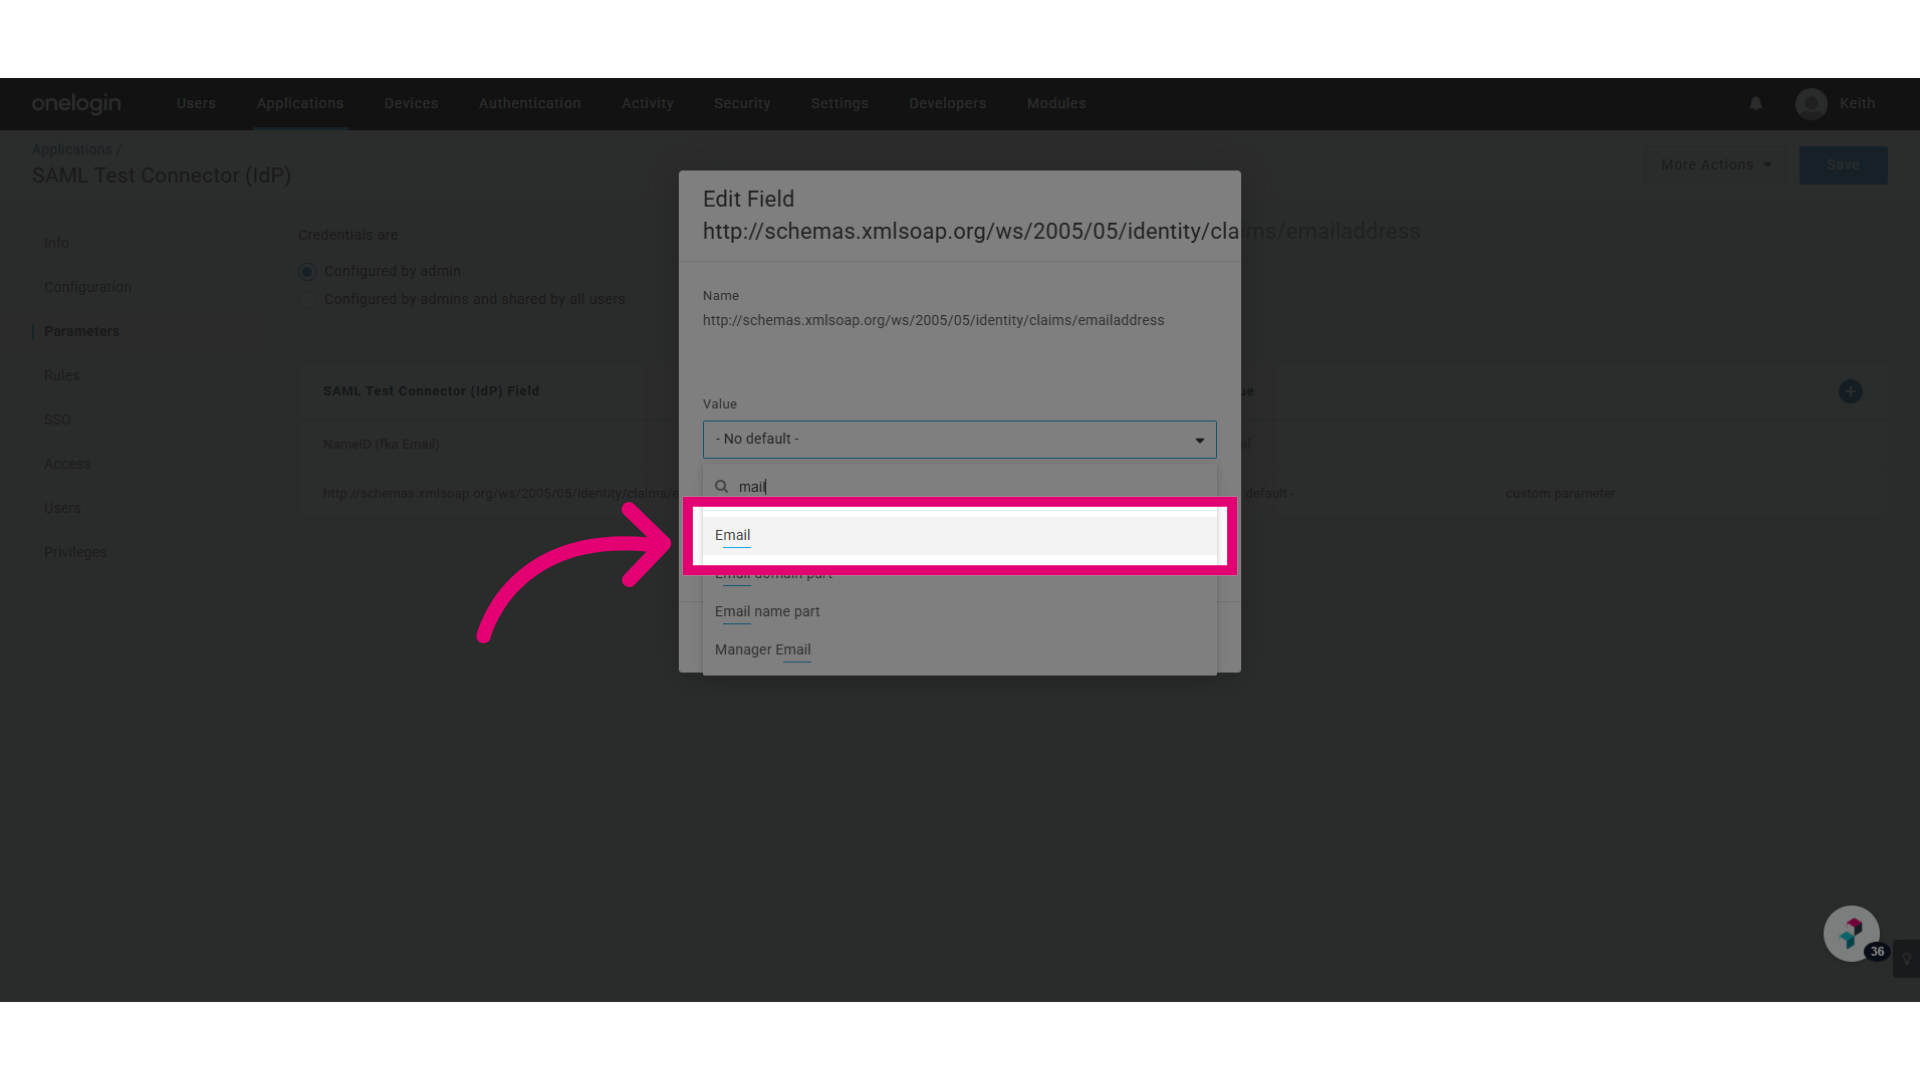
- Select Email from the Value dropdown.
- Click Save.
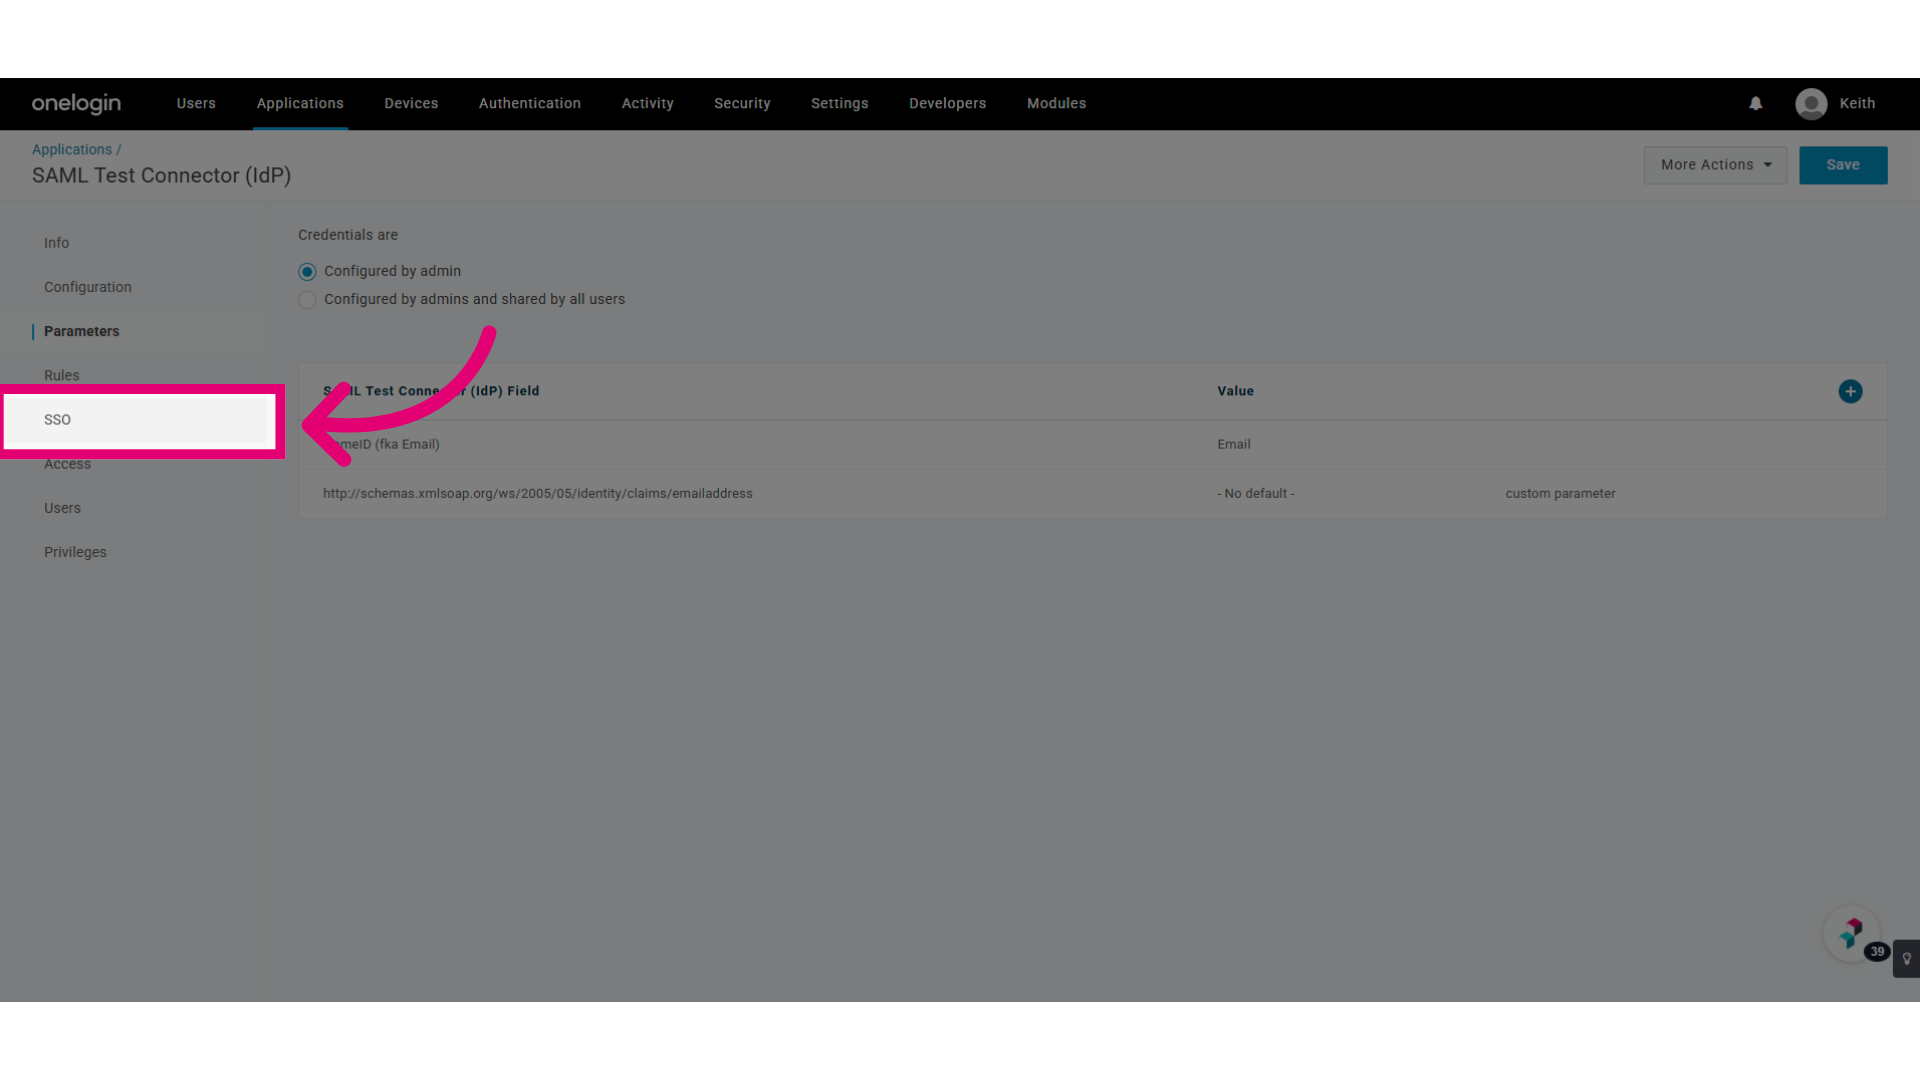
- Go to the SSO section.
- Click View Details under the certificate.
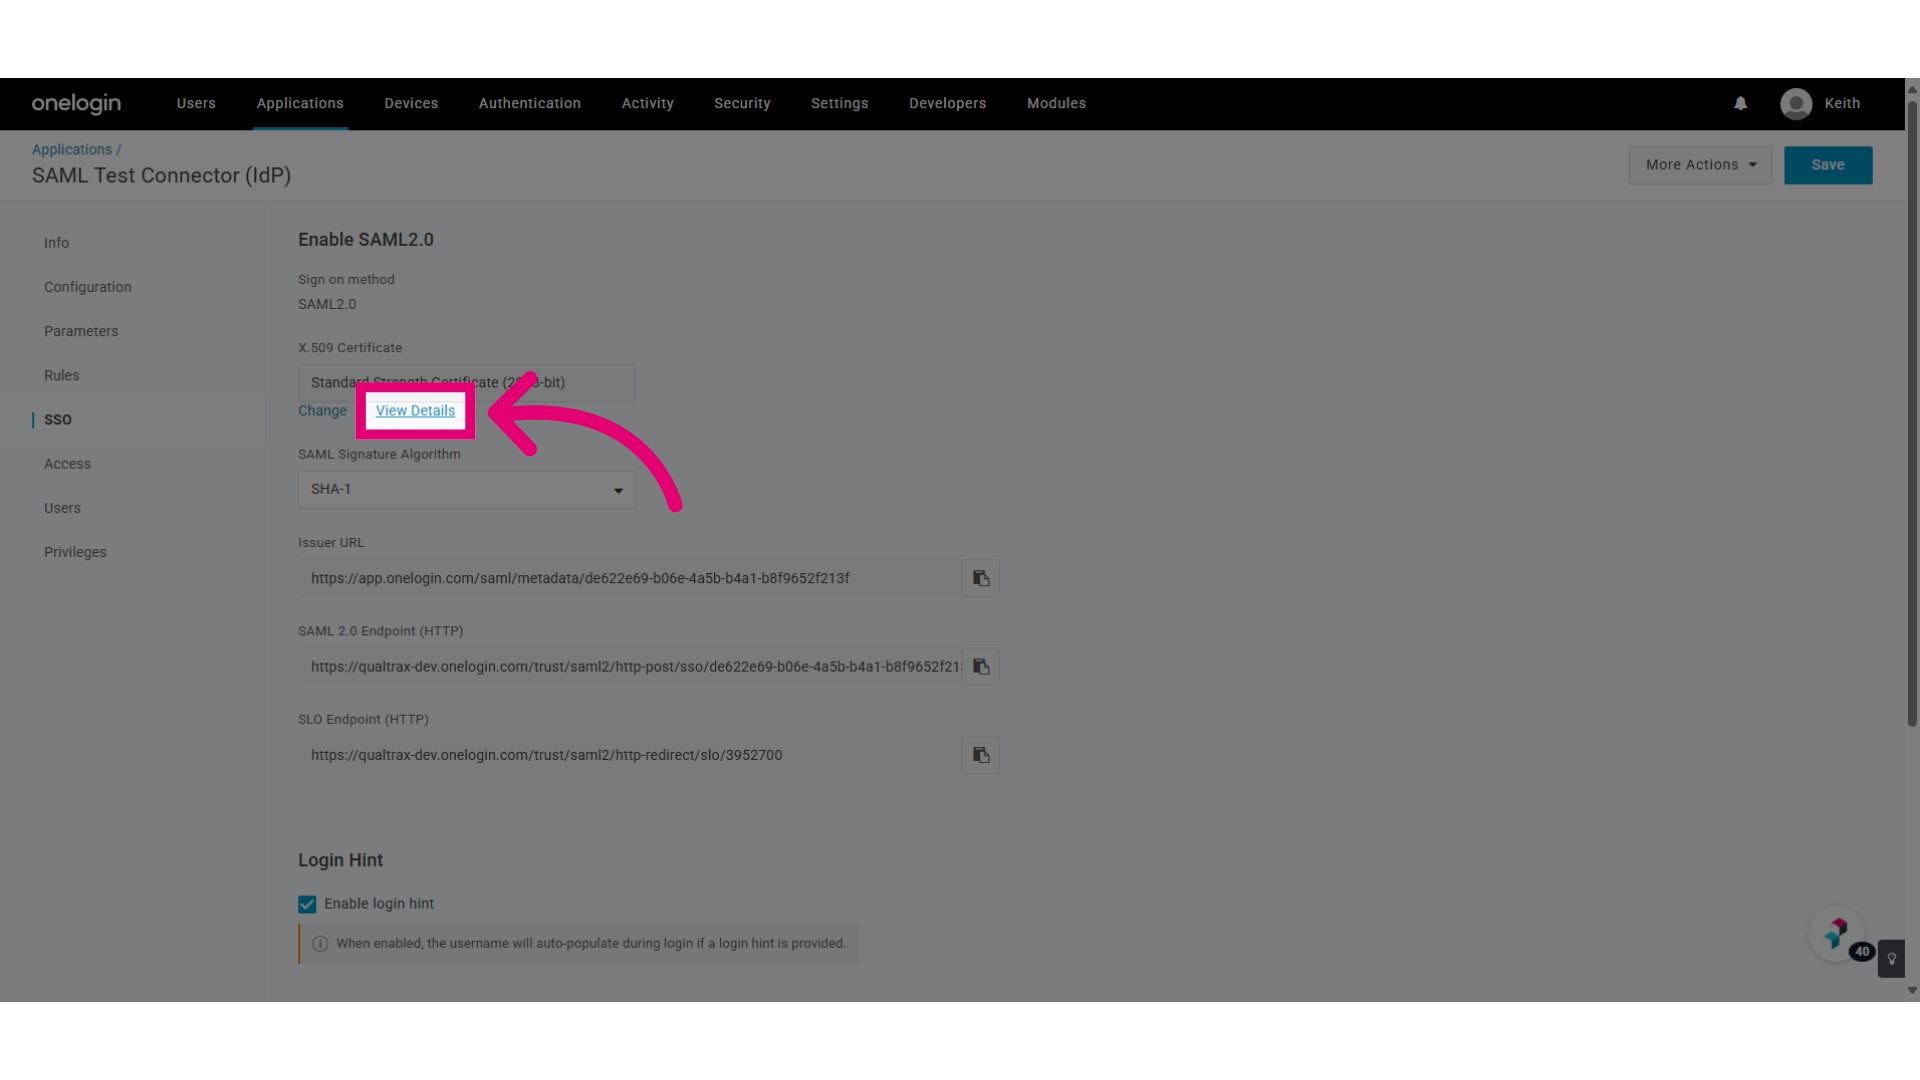
- Click Download.
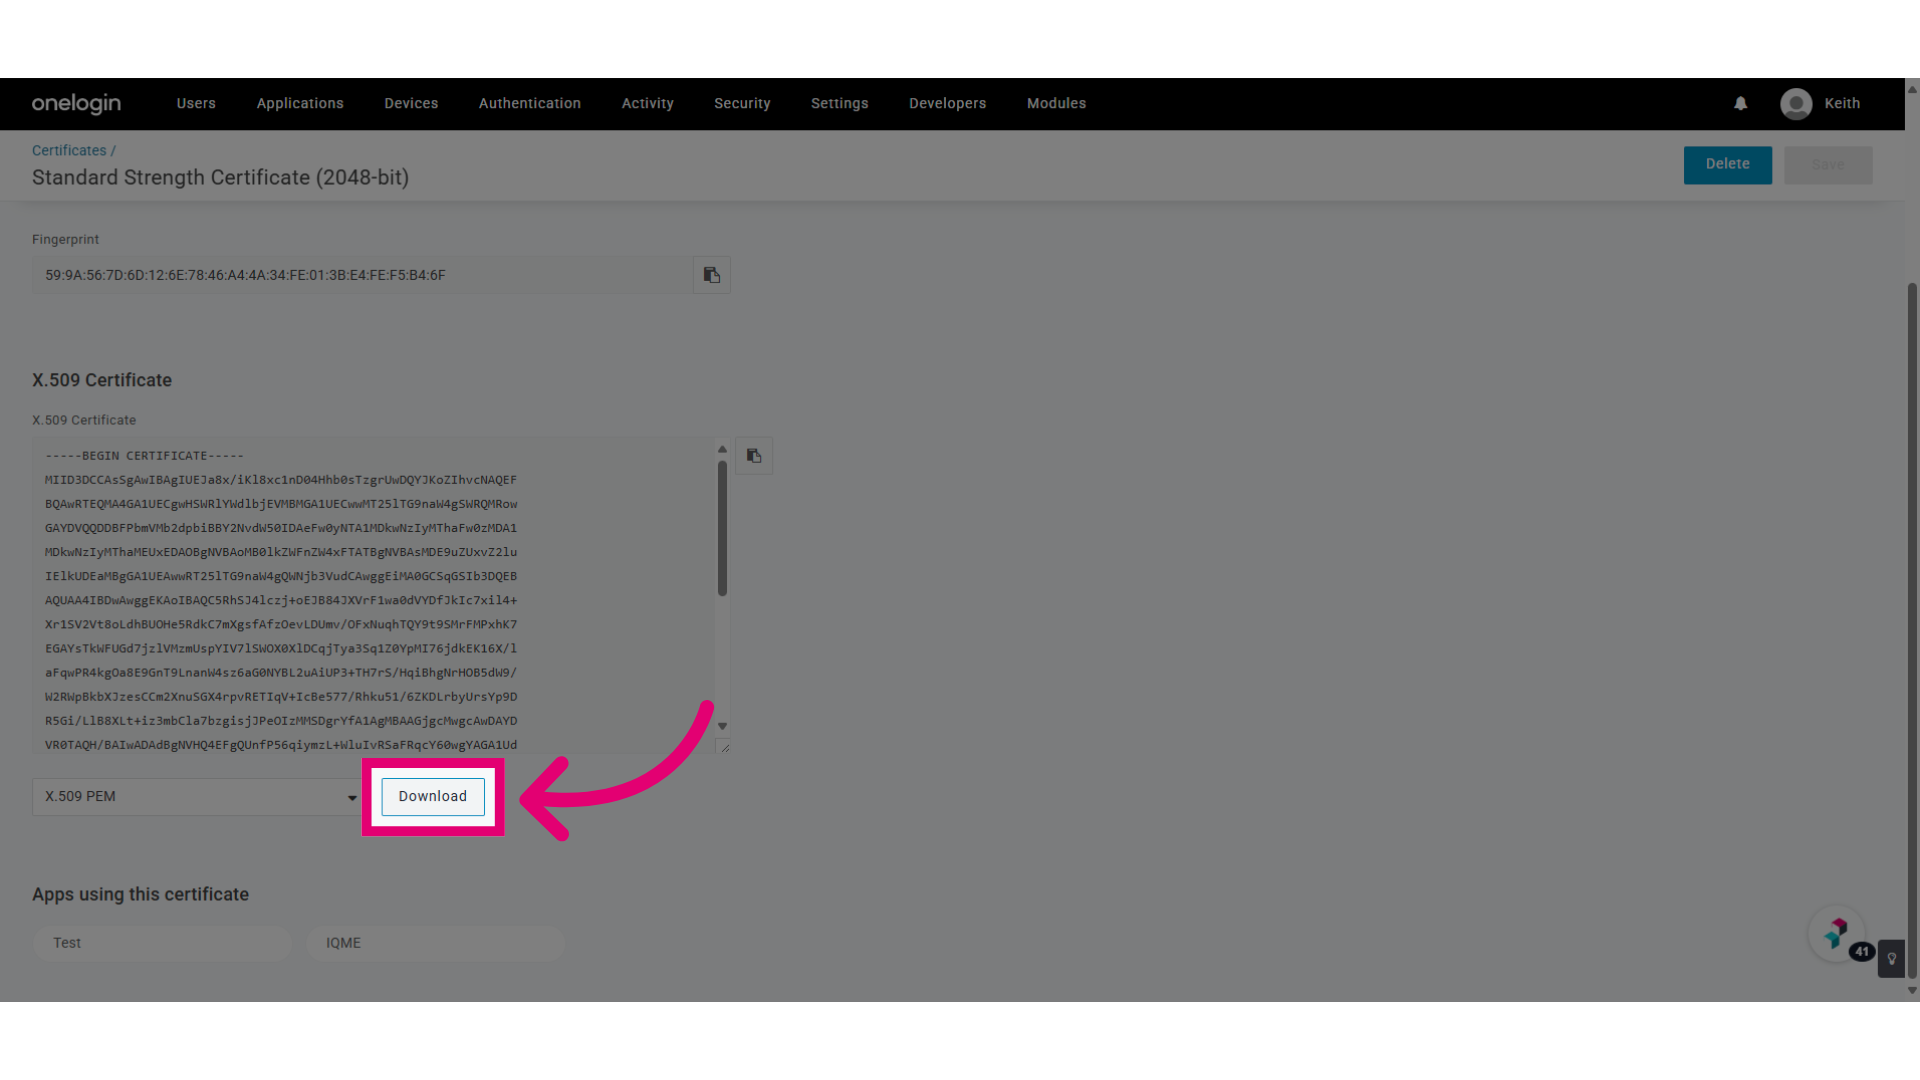
- Go back to Quality Management.
- Click Add (under Identity Provider).
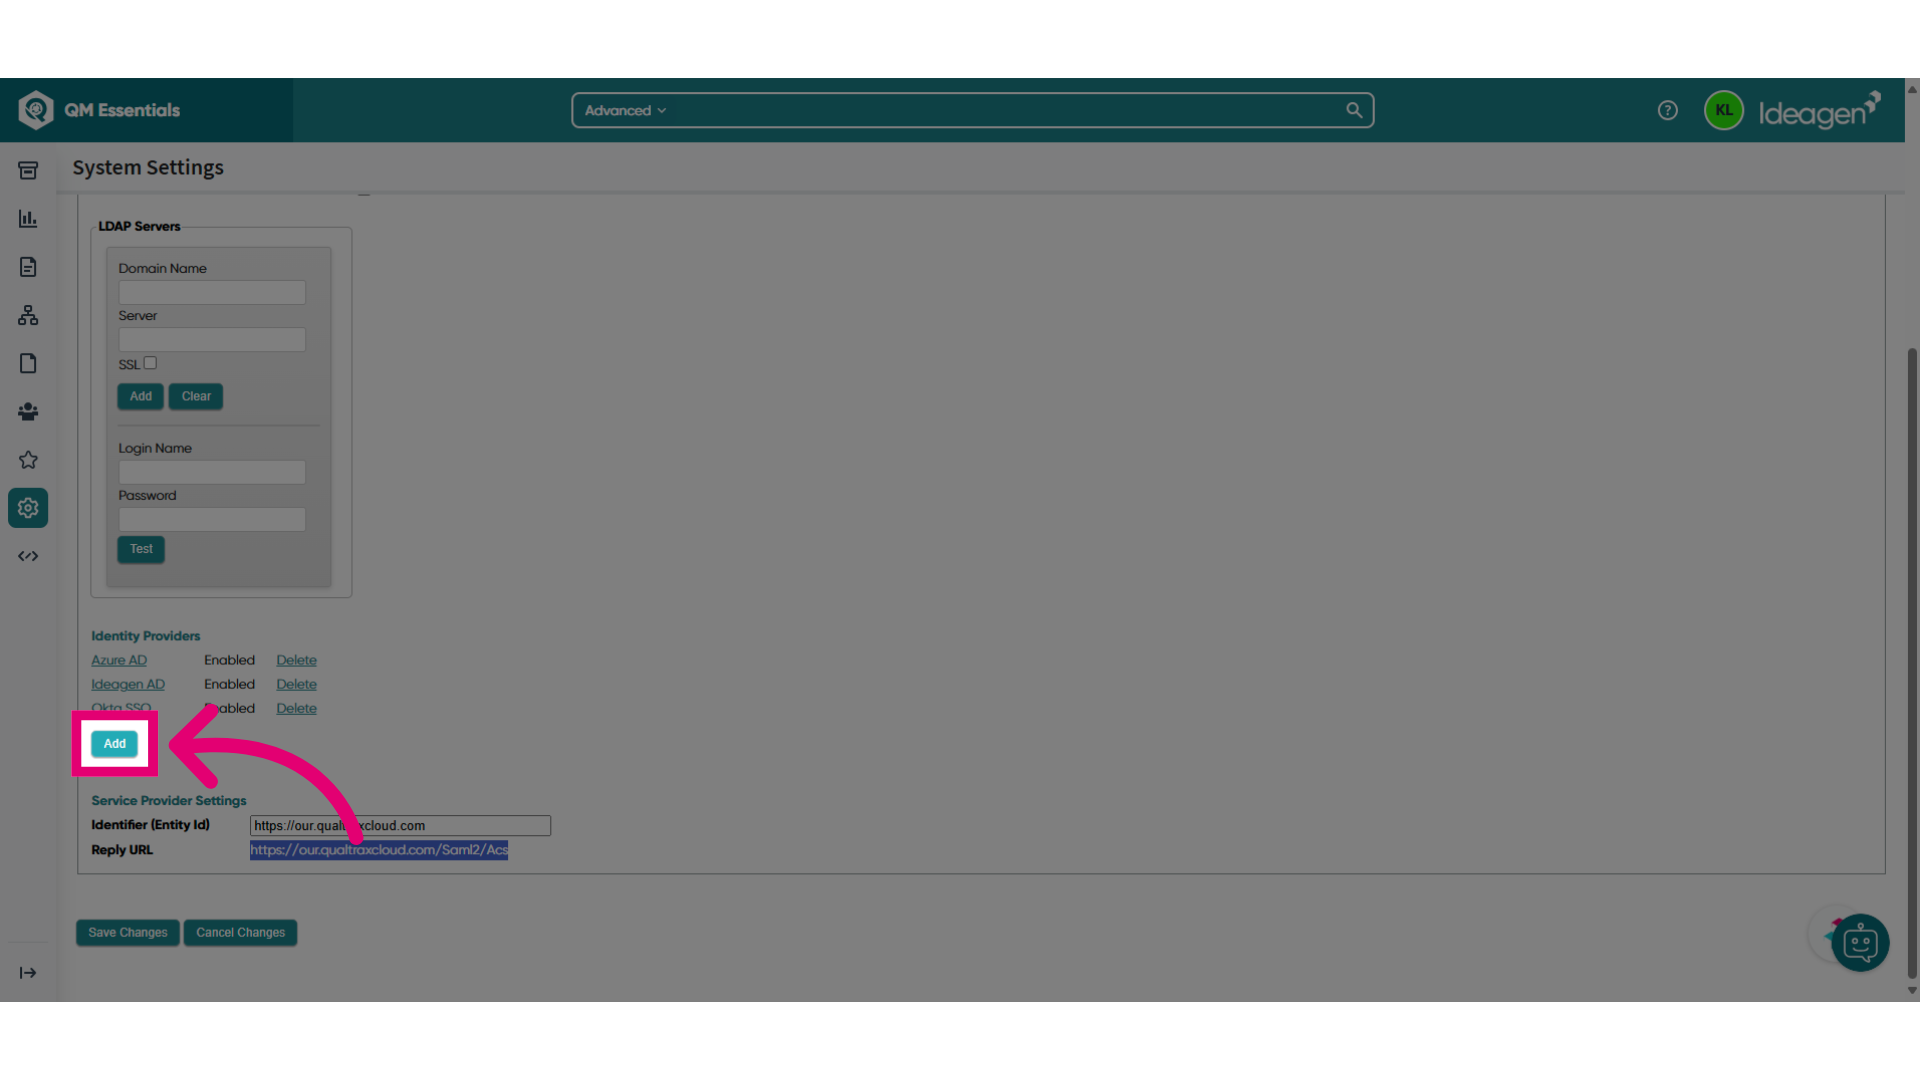
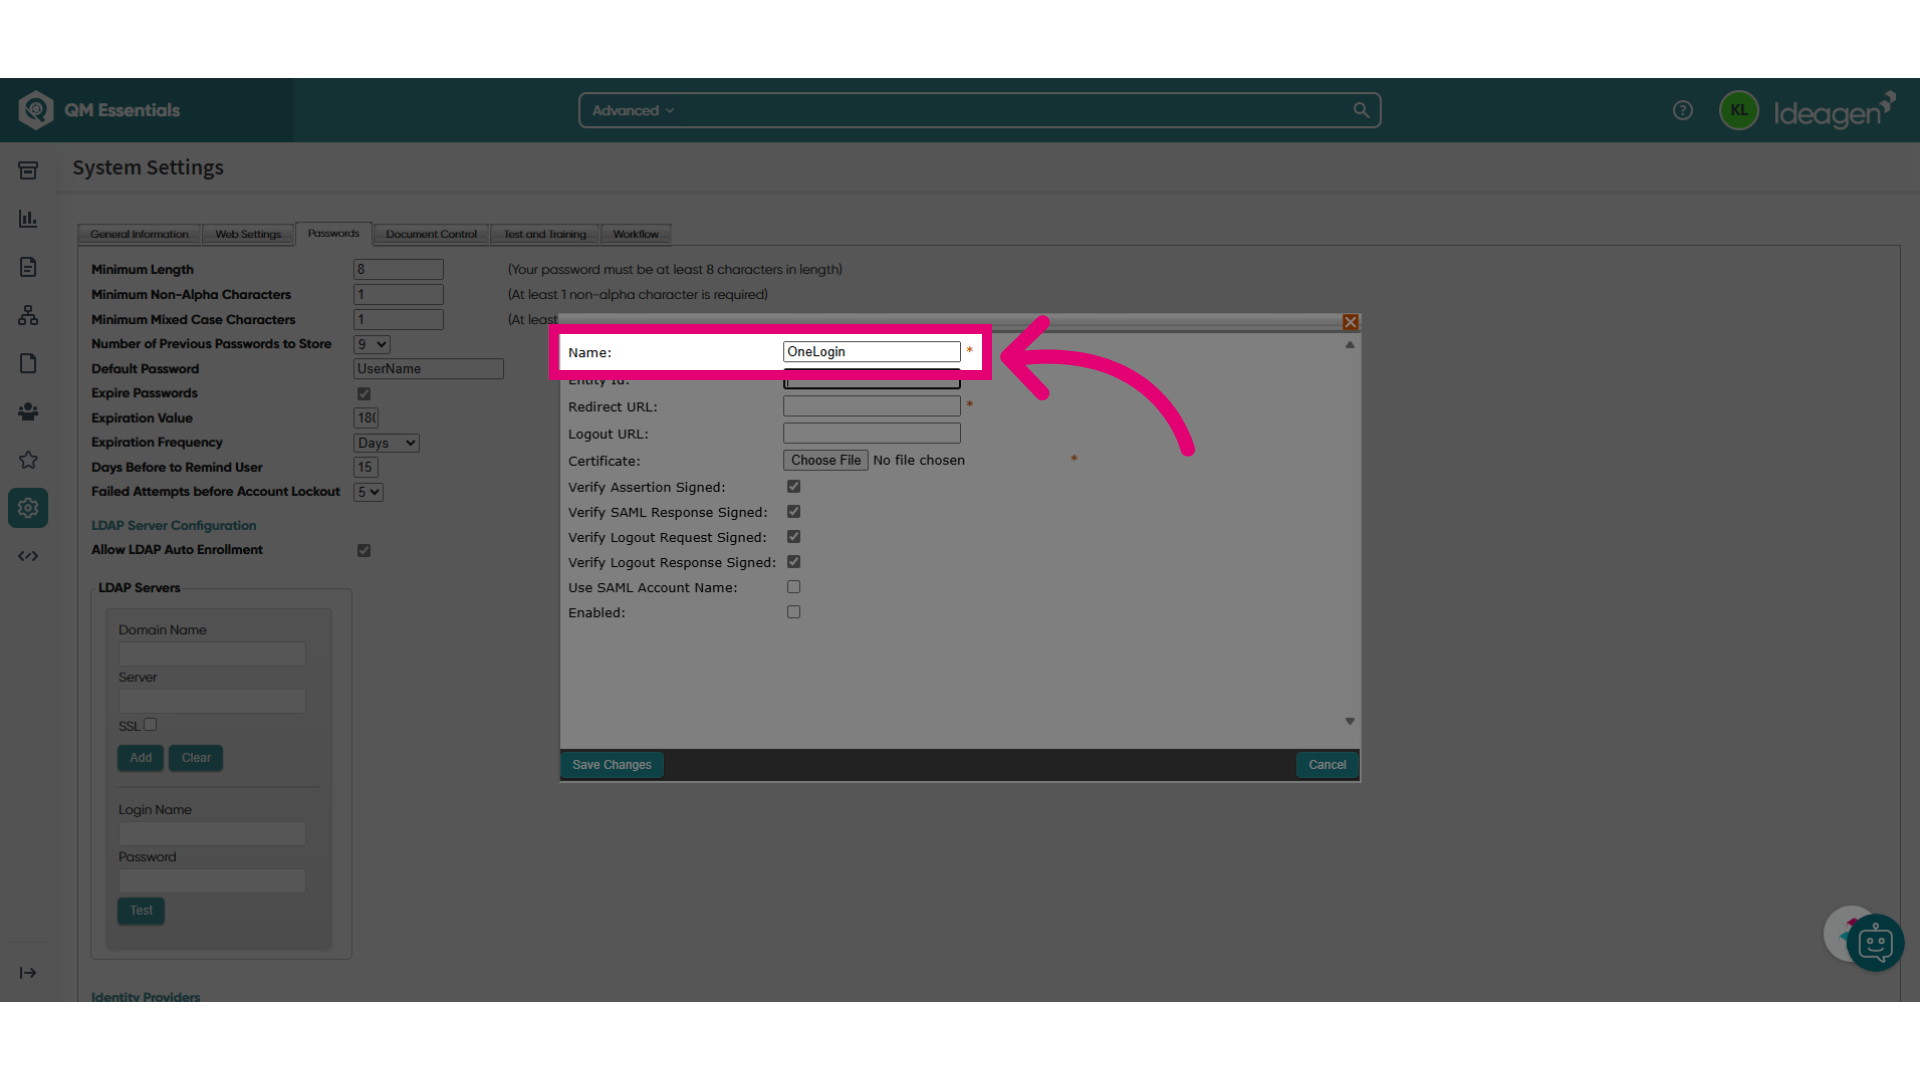
- Enter OneLogin in the Name field.
- Go back to the OneLogin portal and copy the Issuer URL.
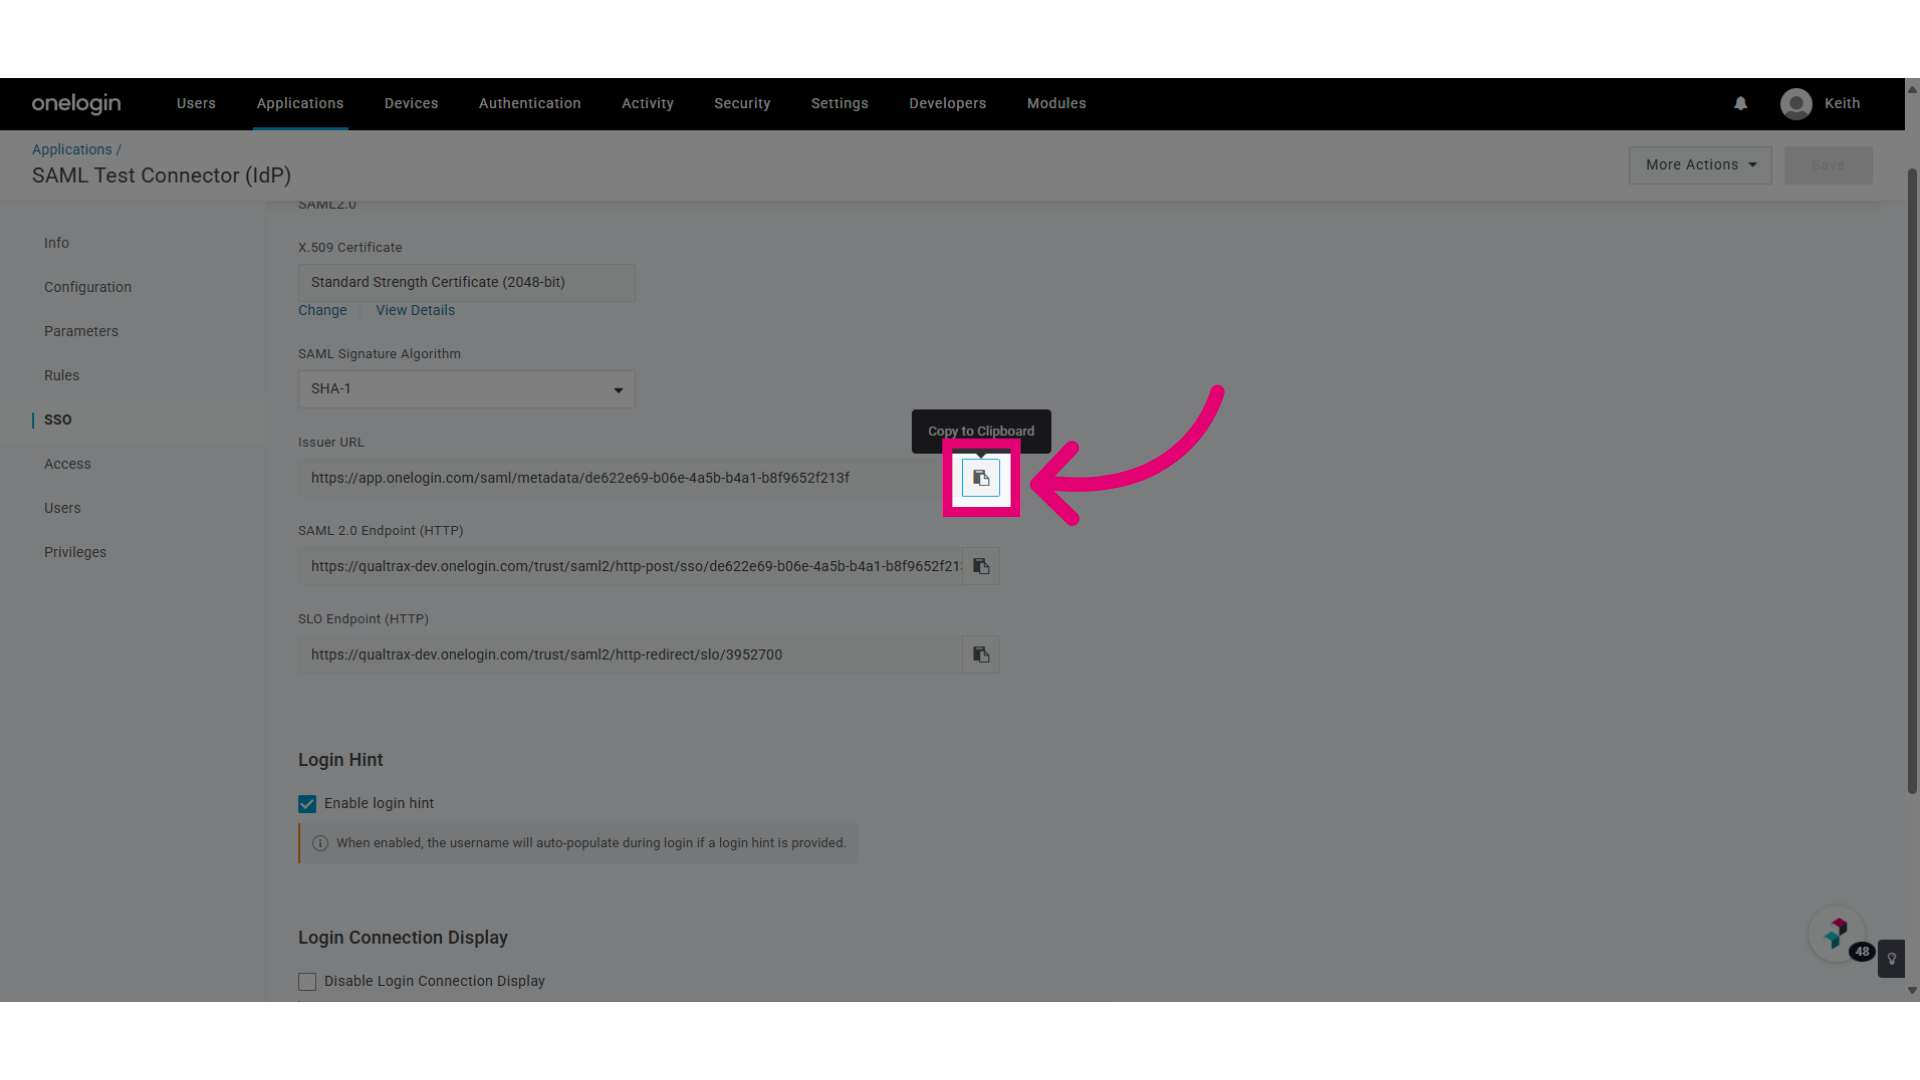
- Switch to your Quality Management page and paste it into the Entity ID field.
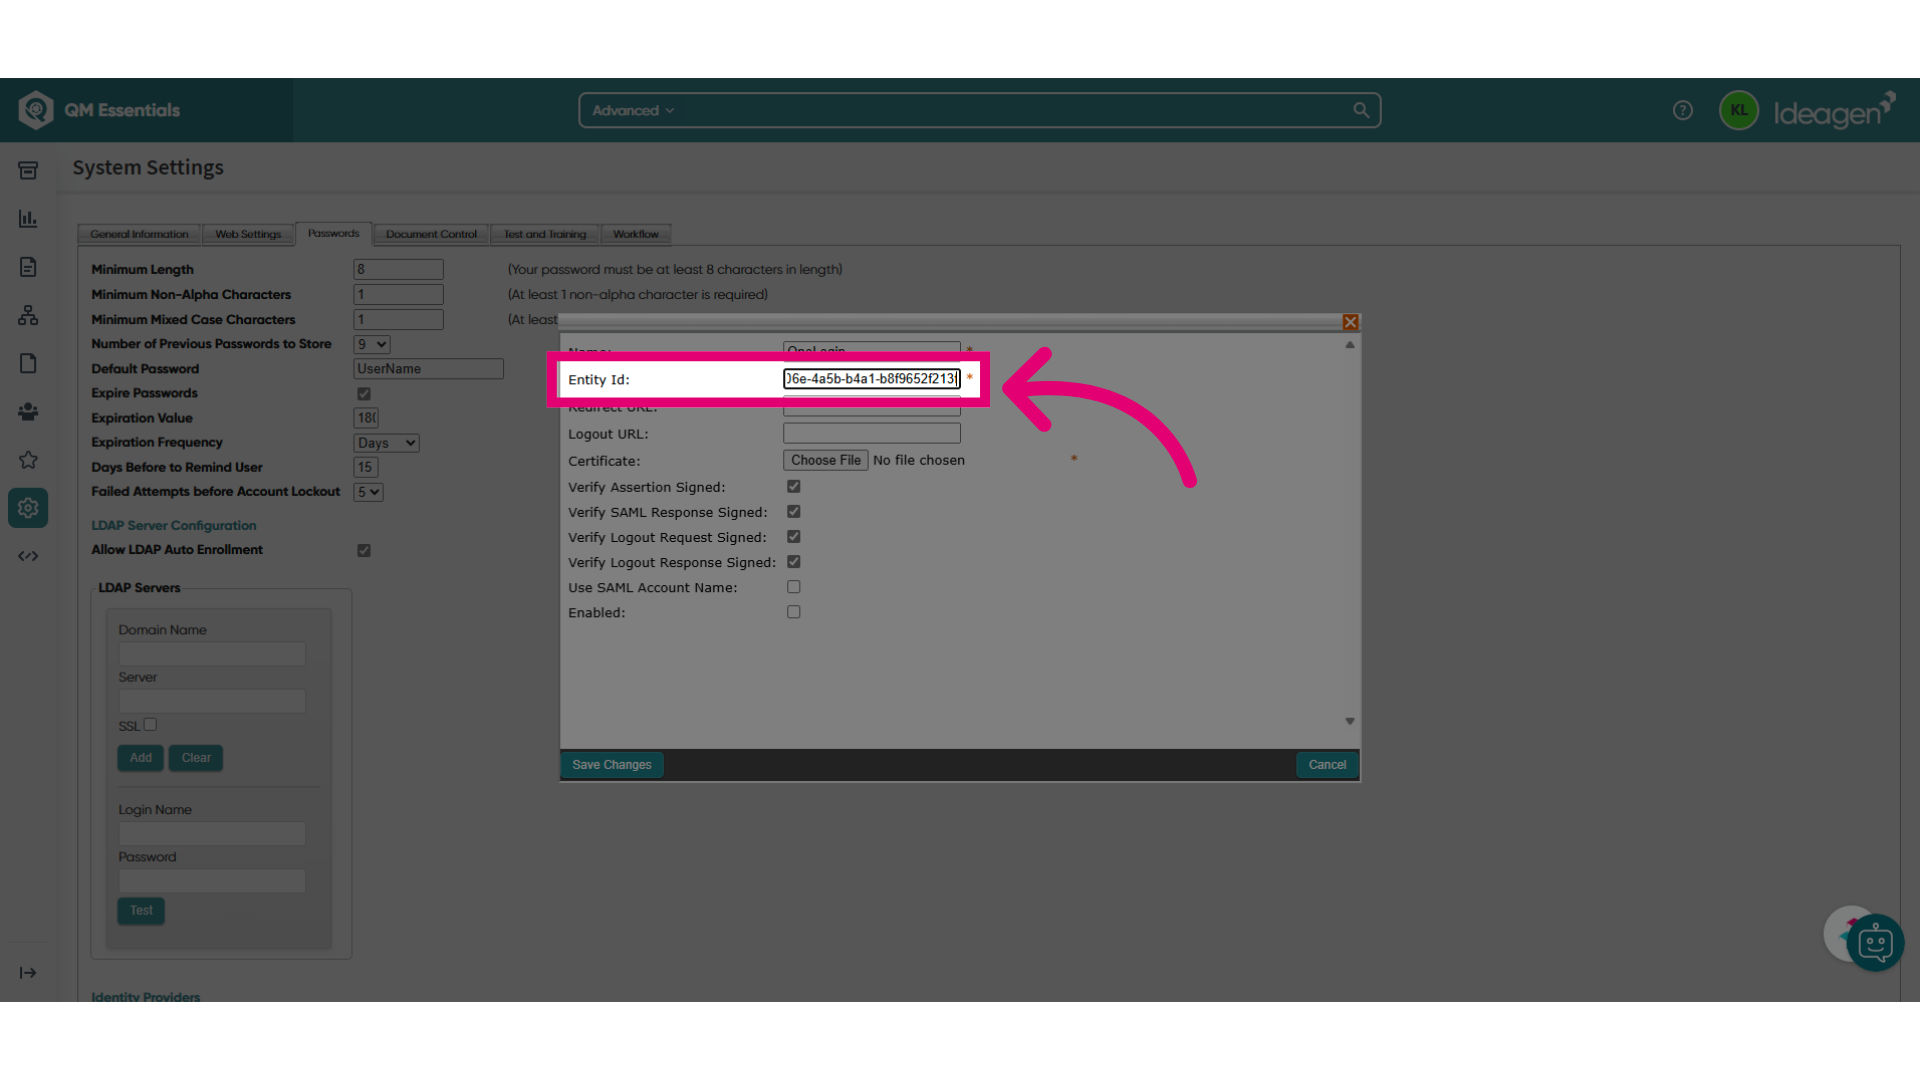
- Copy the SAML 2.0 Endpoint (HTTP) URL from the OneLogin portal.
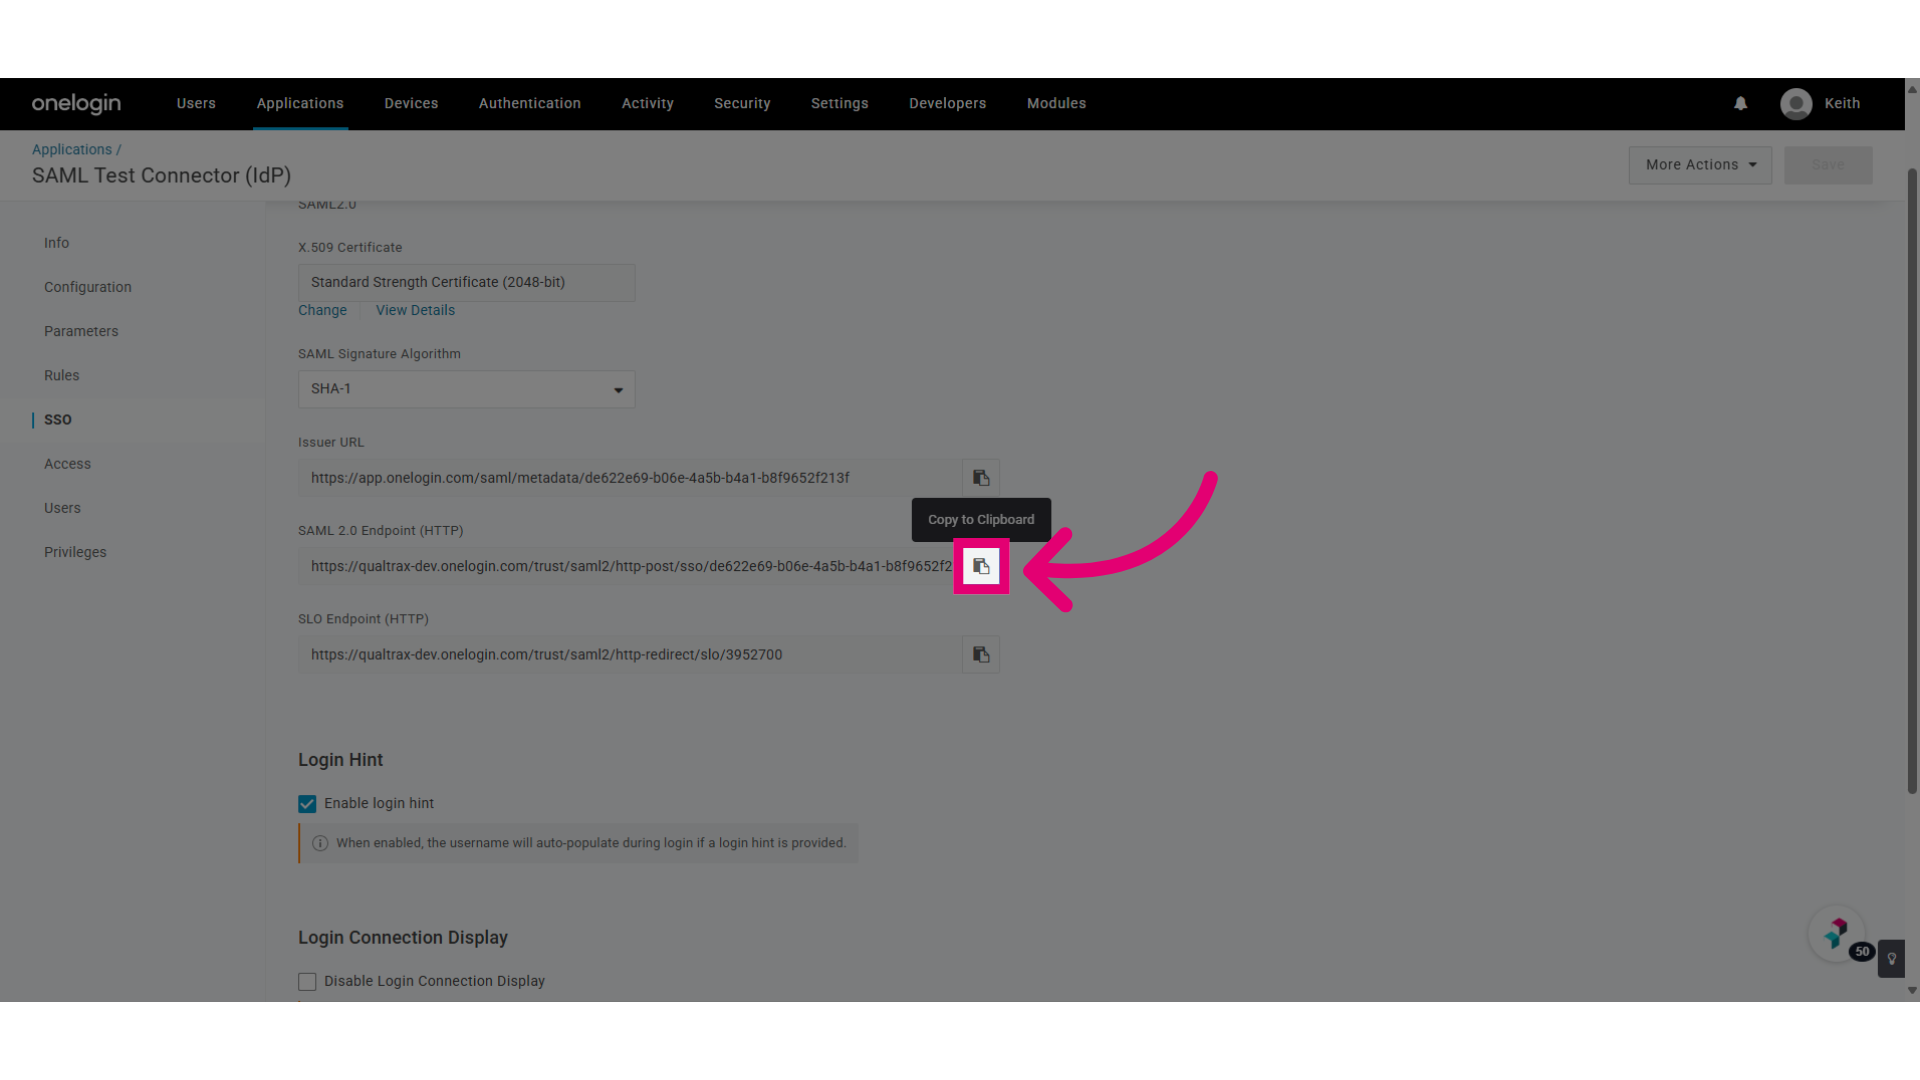
- Paste the copied URL into Redirect URL field in Quality Management.
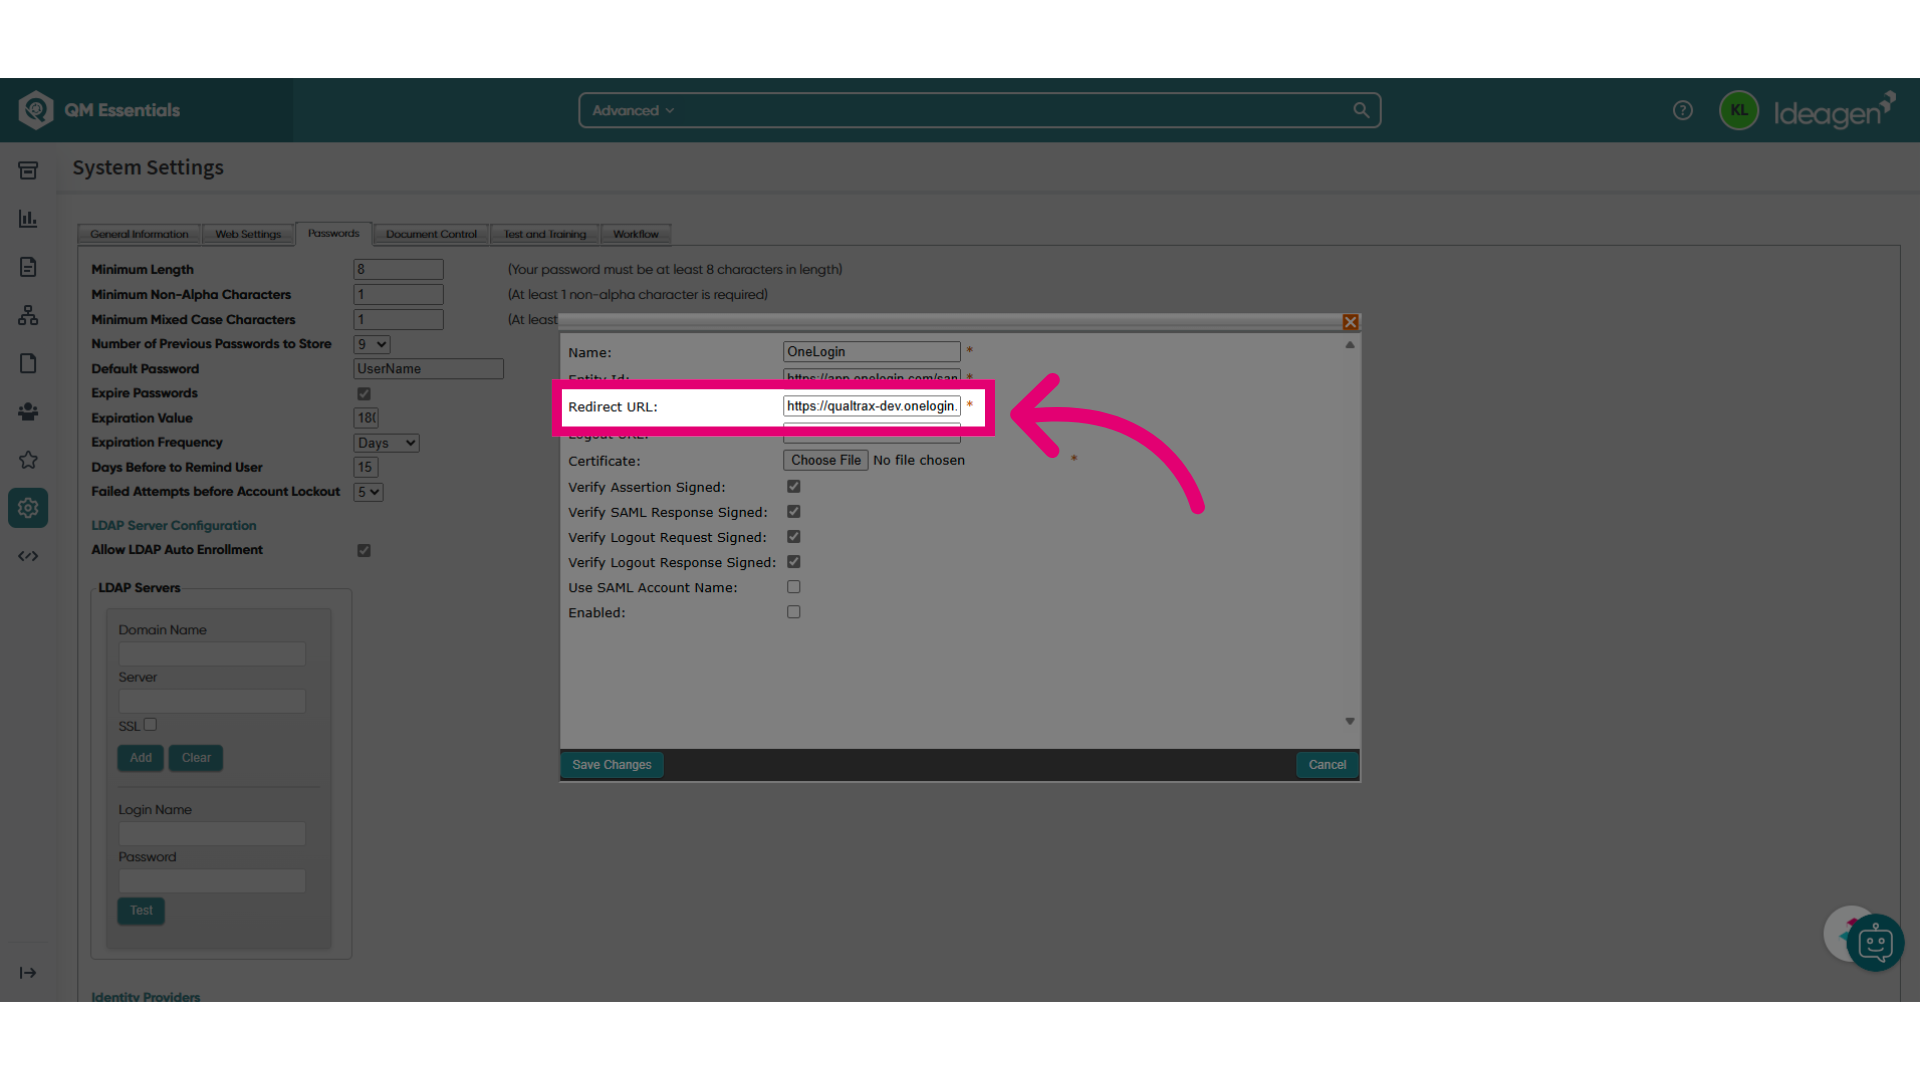
- Click Choose file.
- Select the certificate you previously downloaded.
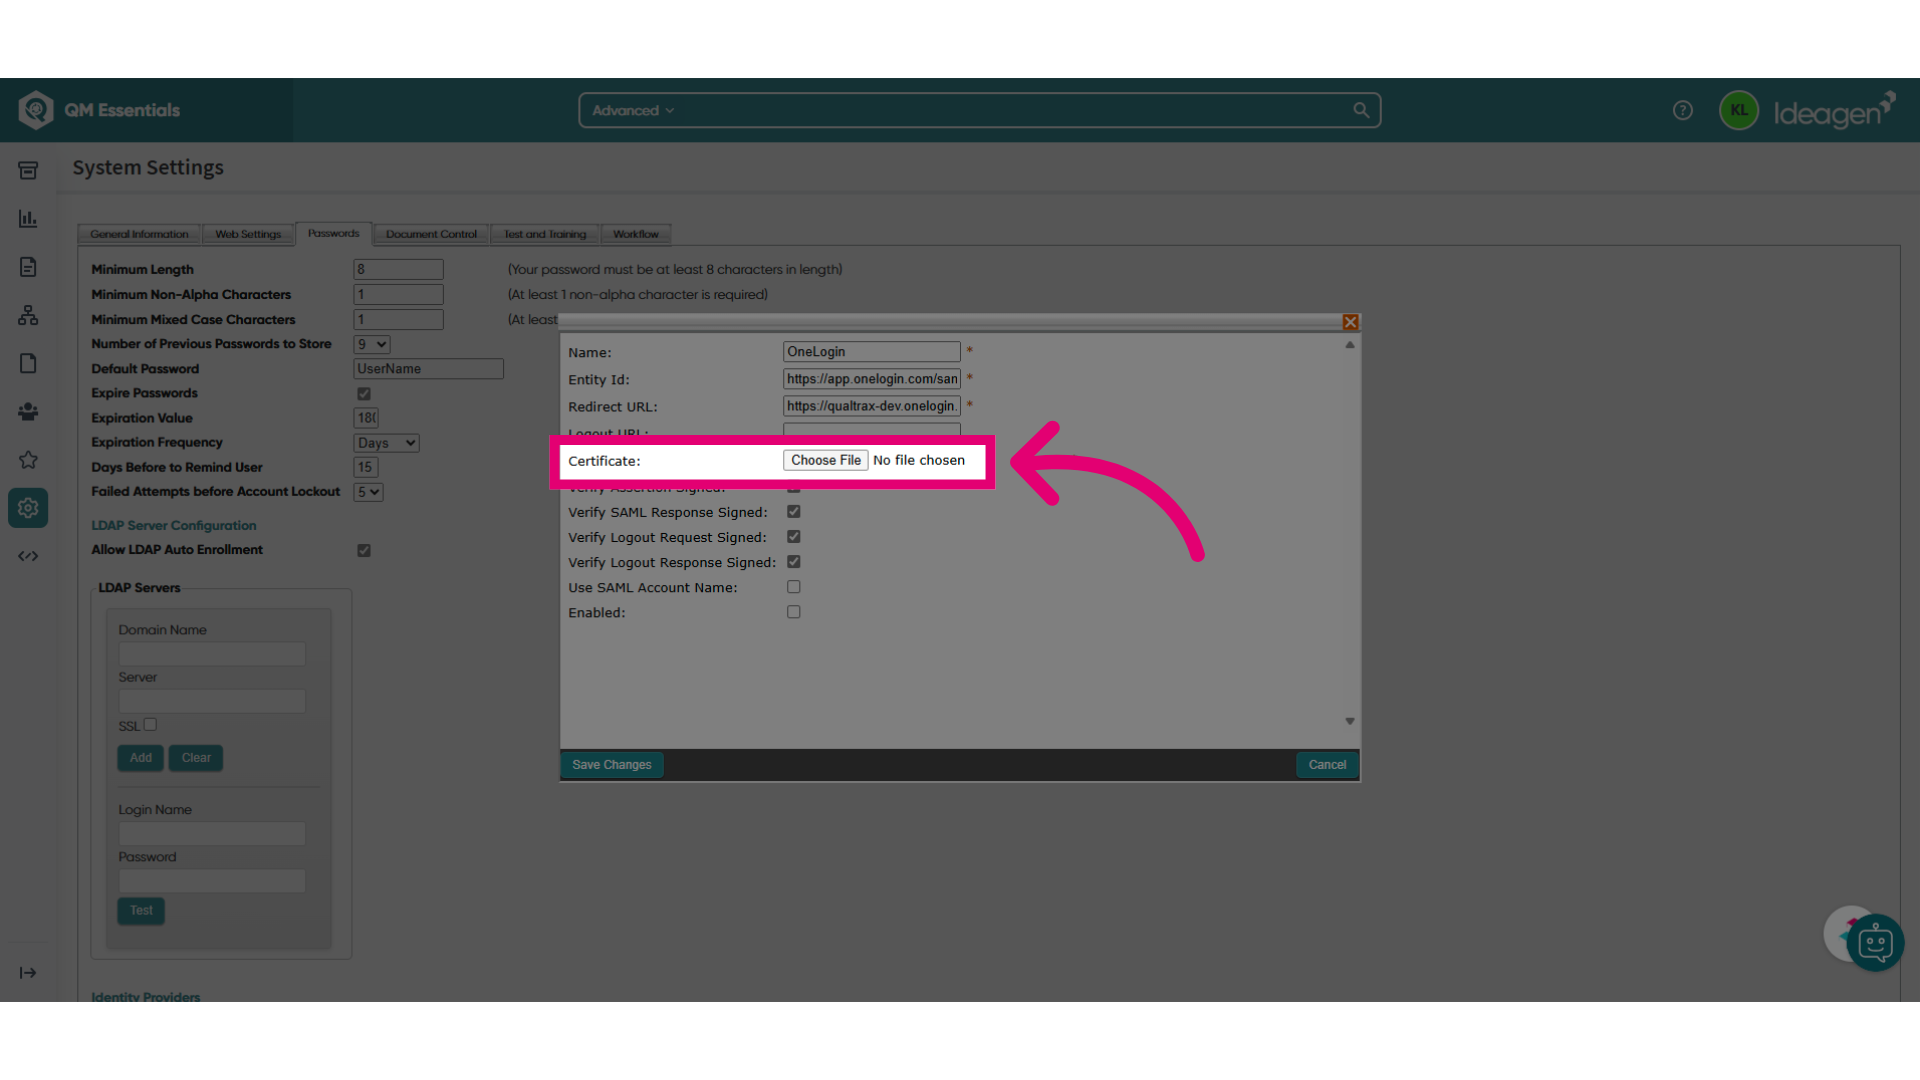
- Tick Enabled.
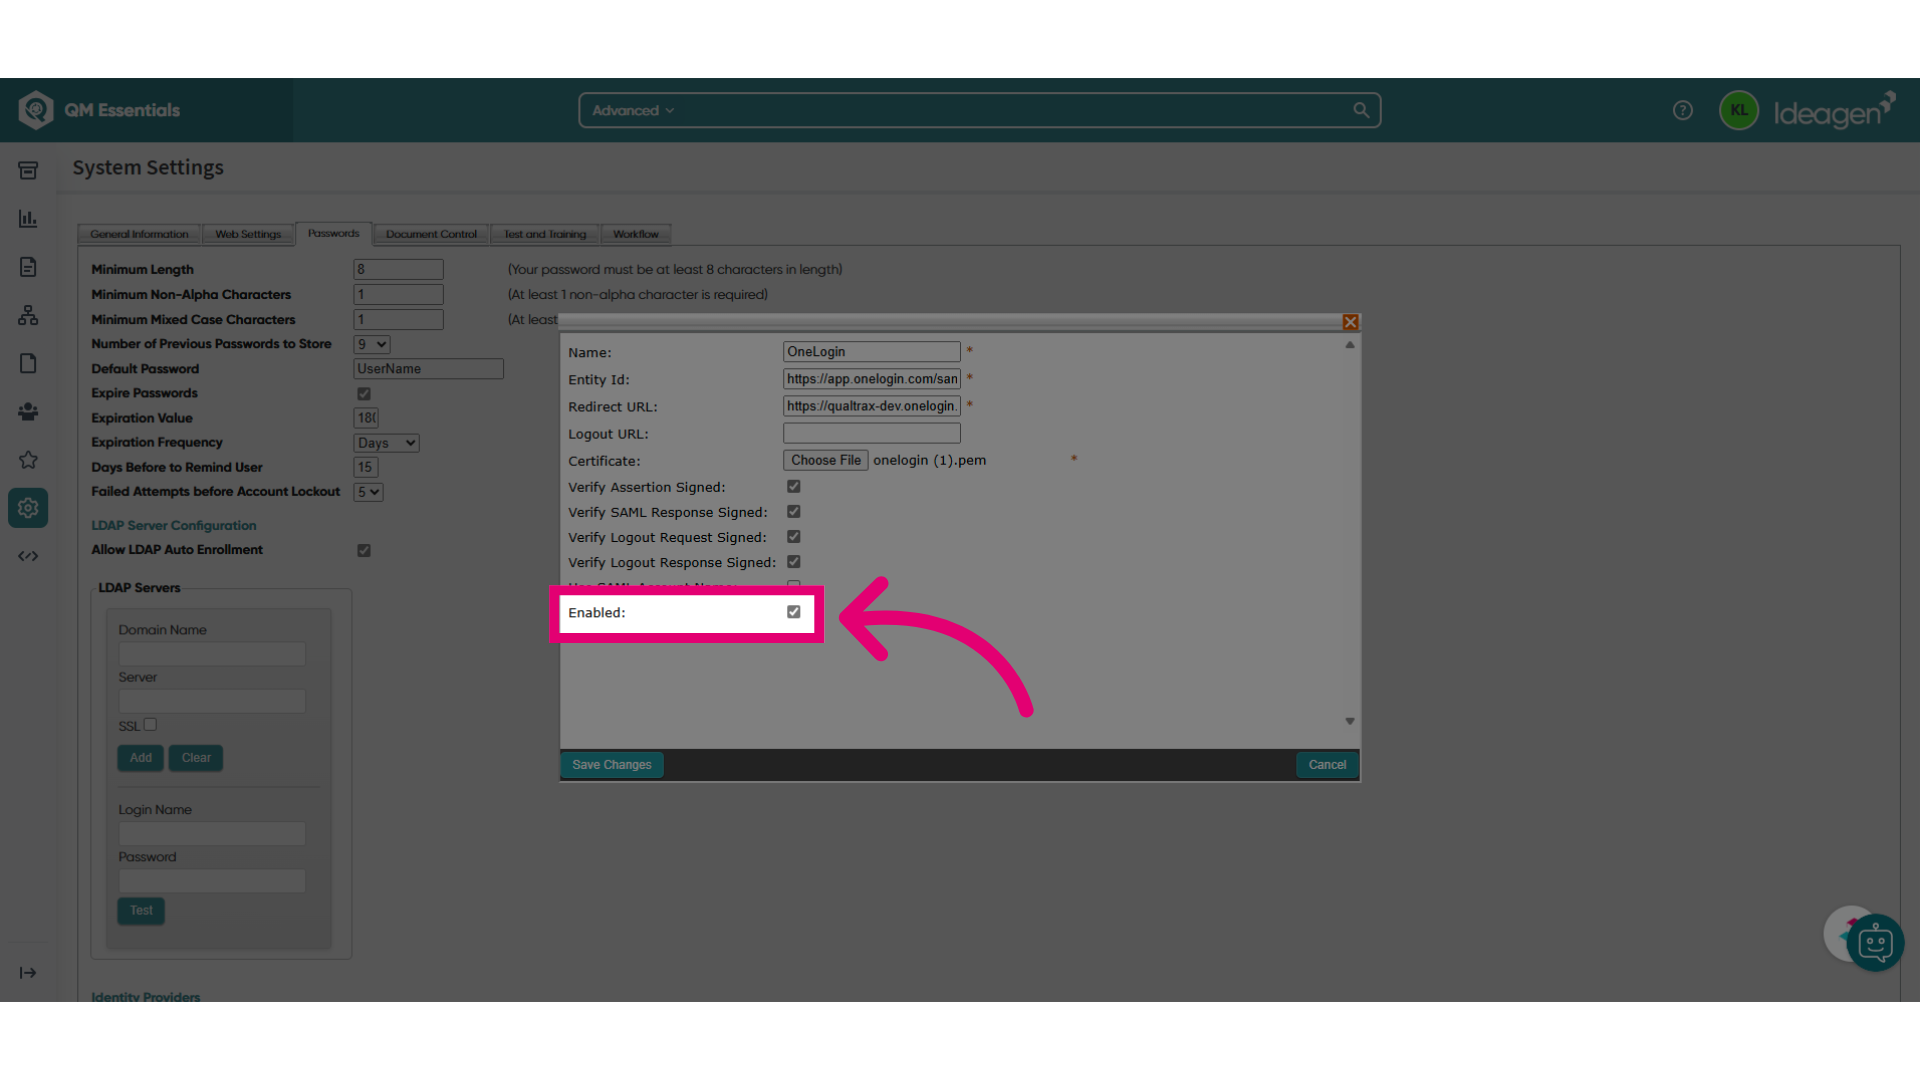
- Click Save Changes.
- Go back to the OneLogin portal.
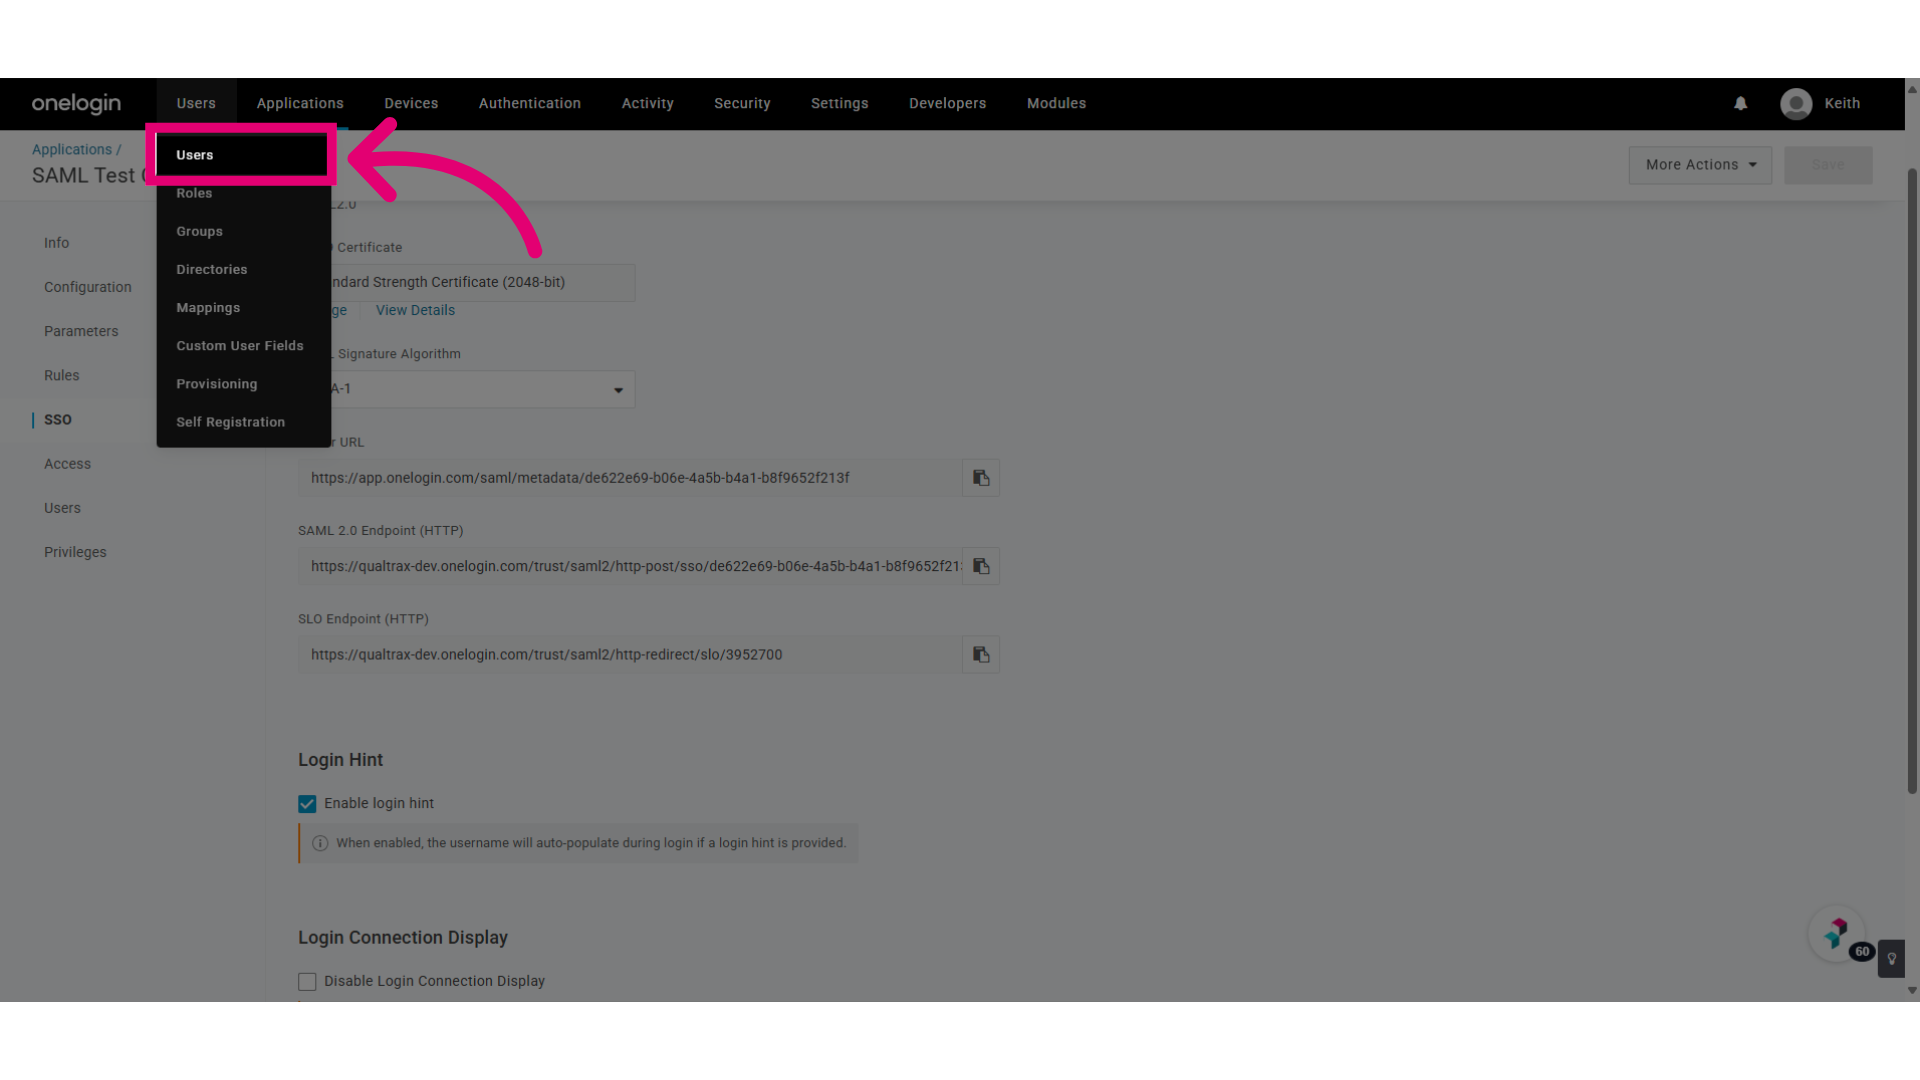
- Open the Users tab.
- Select Users.
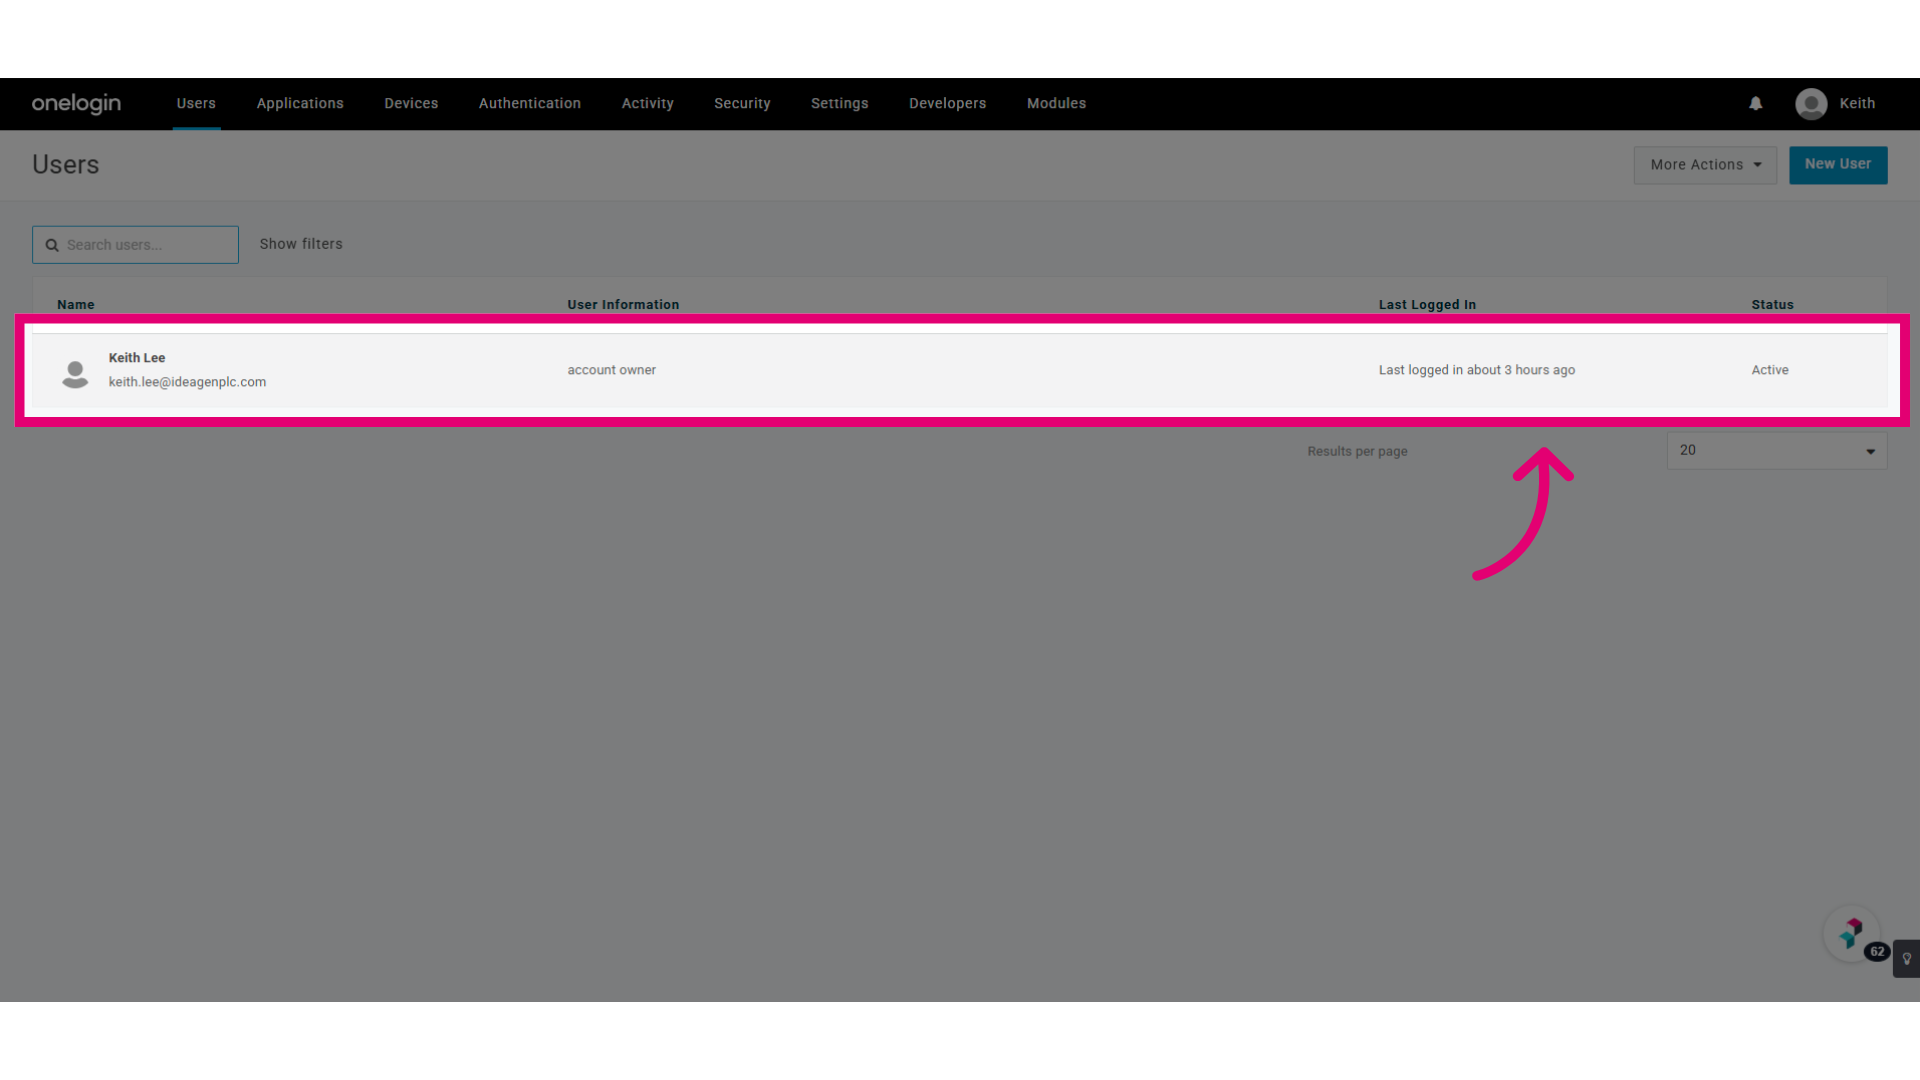
- Open your user account.
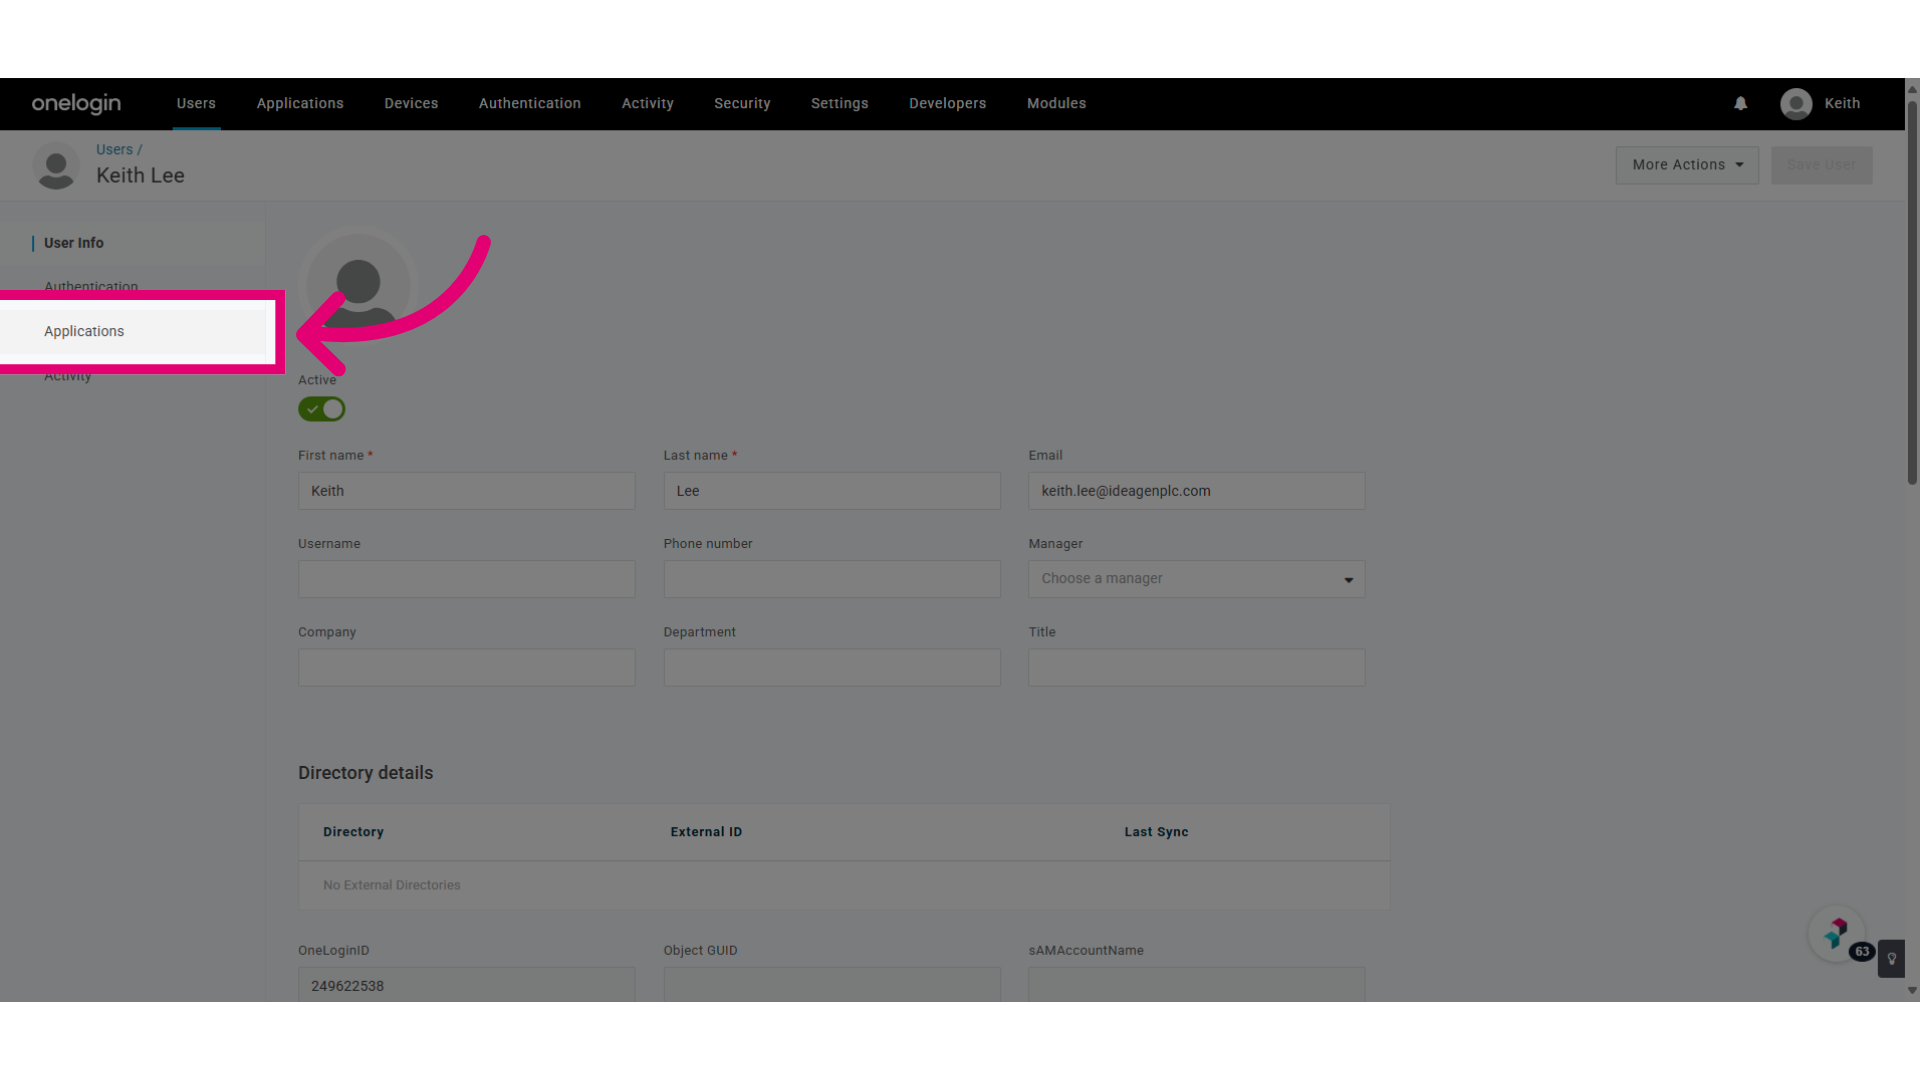
- Open the Applications section.
- Click the Add button.
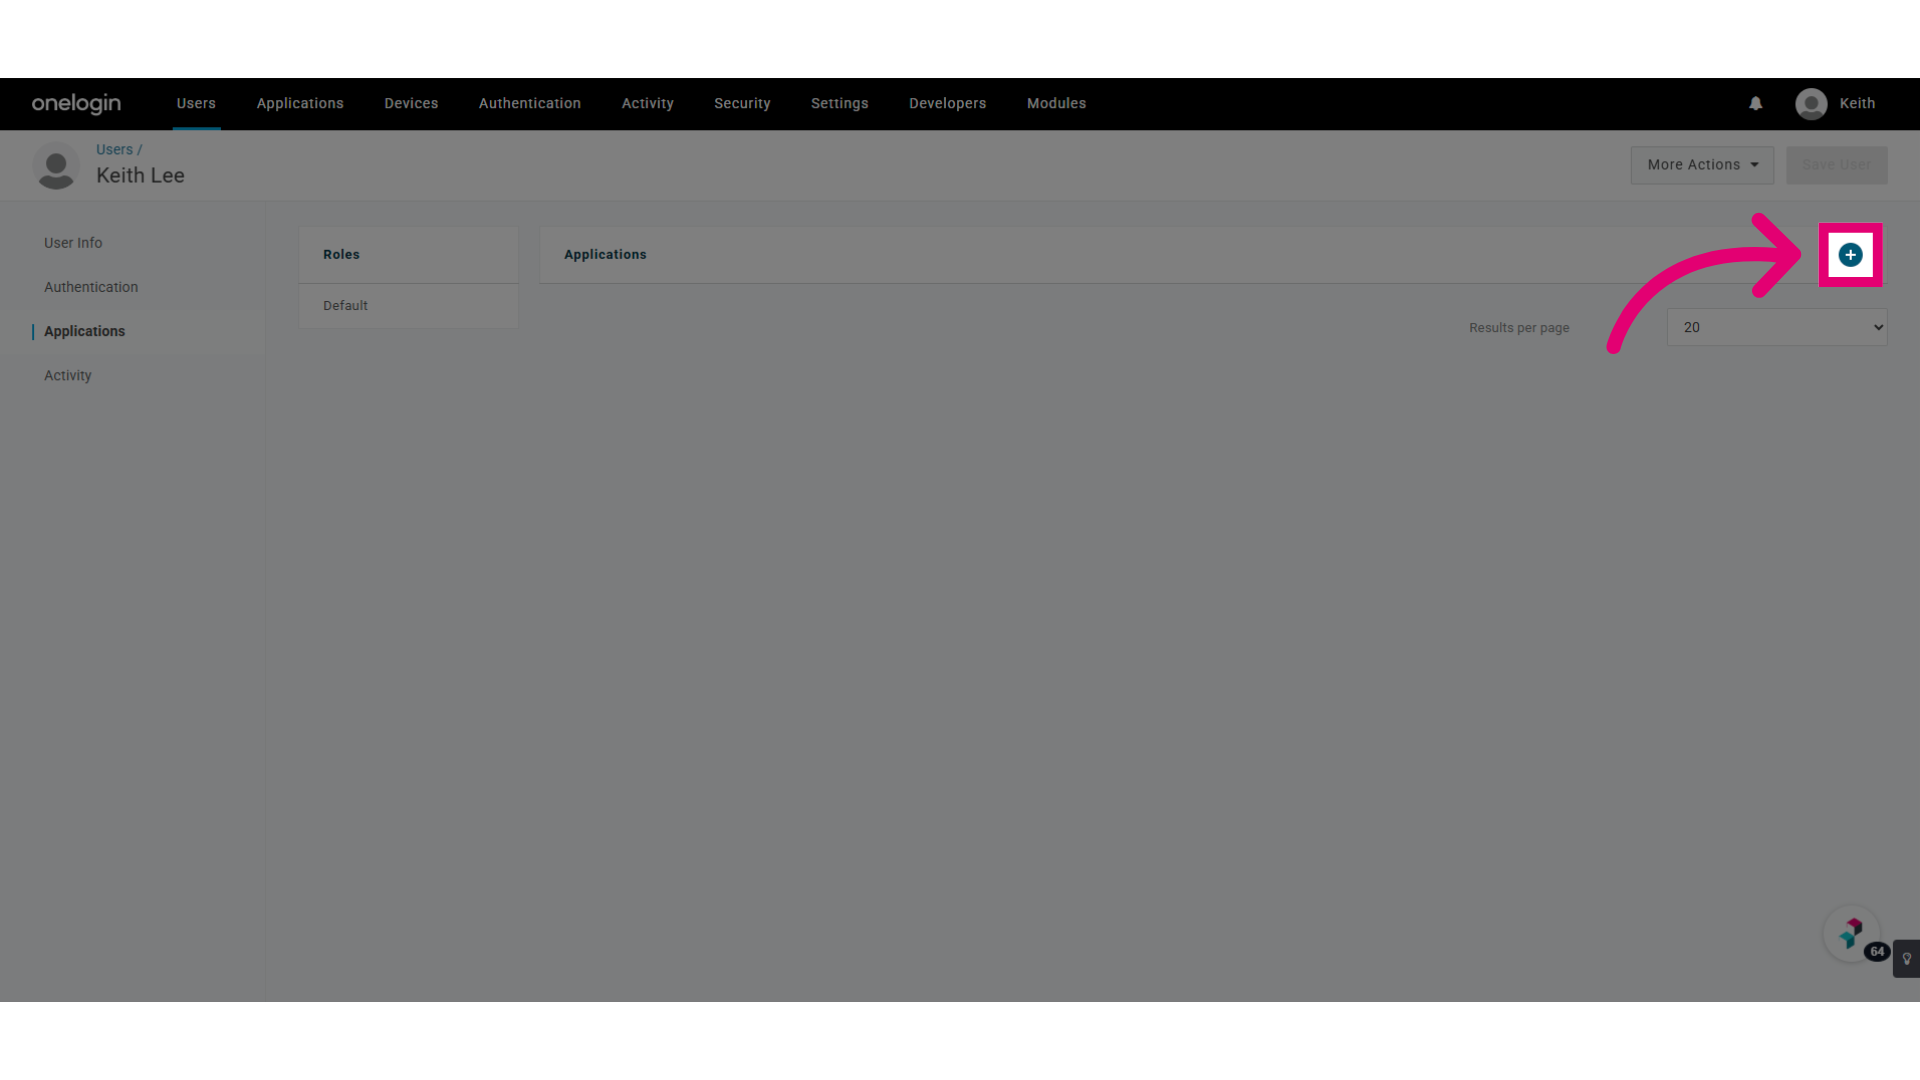
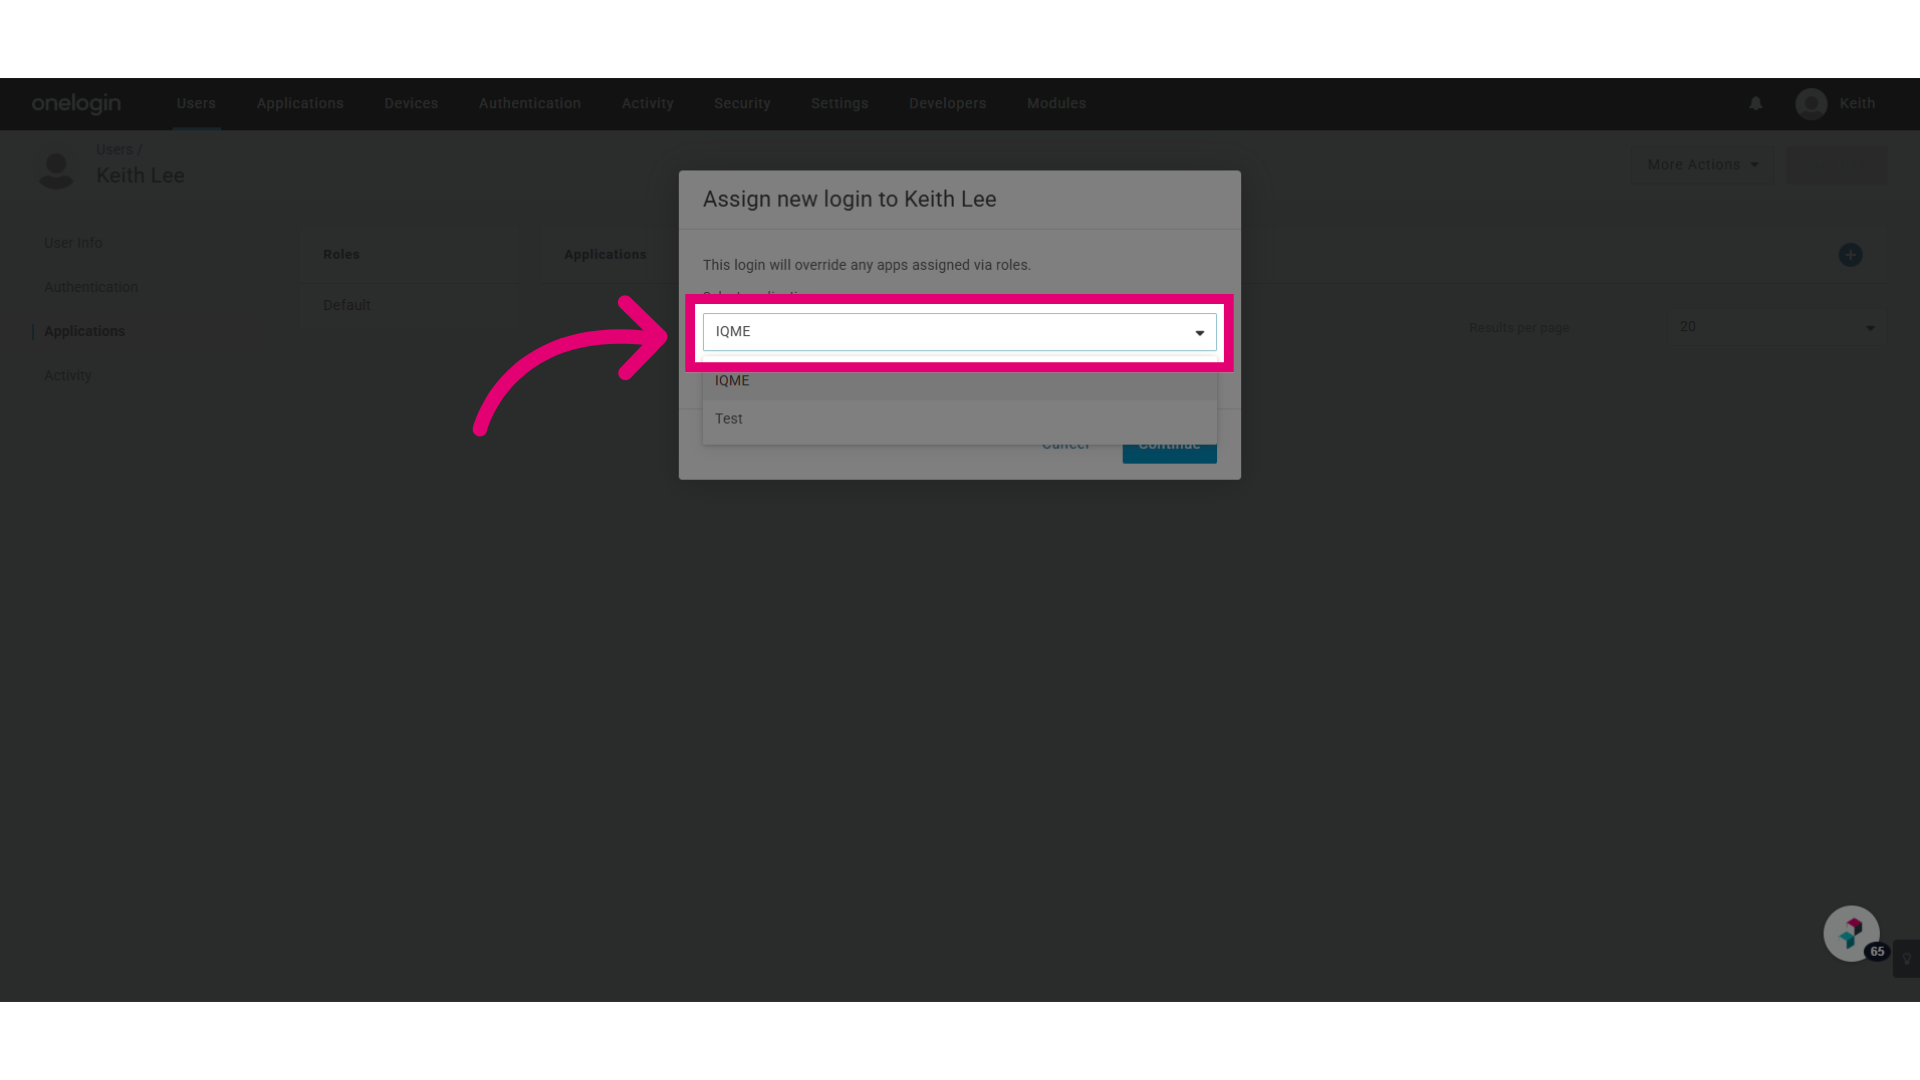
- Select the method you previously created.
- Click Continue.